• Friends, our 2nd Amendment rights are always under attack and the NRA has been a constant for decades in helping fight that fight.

    We have partnered with the NRA to offer you a discount on membership and Muzzleloading Forum gets a small percentage too of each membership, so you are supporting both the NRA and us.

    Use this link to sign up please; https://membership.nra.org/recruiters/join/XR045103

Making a Buck County entry pipoe

Muzzleloading Forum

Help Support Muzzleloading Forum:

This site may earn a commission from merchant affiliate links, including eBay, Amazon, and others.

Vaino

Cannon
Joined
Jan 21, 2006
Messages
8,266
Reaction score
460
To be HC, a Bucks County LR should have a correctly styled entry pipe and I think many are hesitant to tackle one of these slim, beautiful LRs because the entry pipe has to be made...not available from any suppliers. Here's my way of making a 2 piece BC entry pipe. By the way, I'm presently making this entry pipe for my last LR....Fred

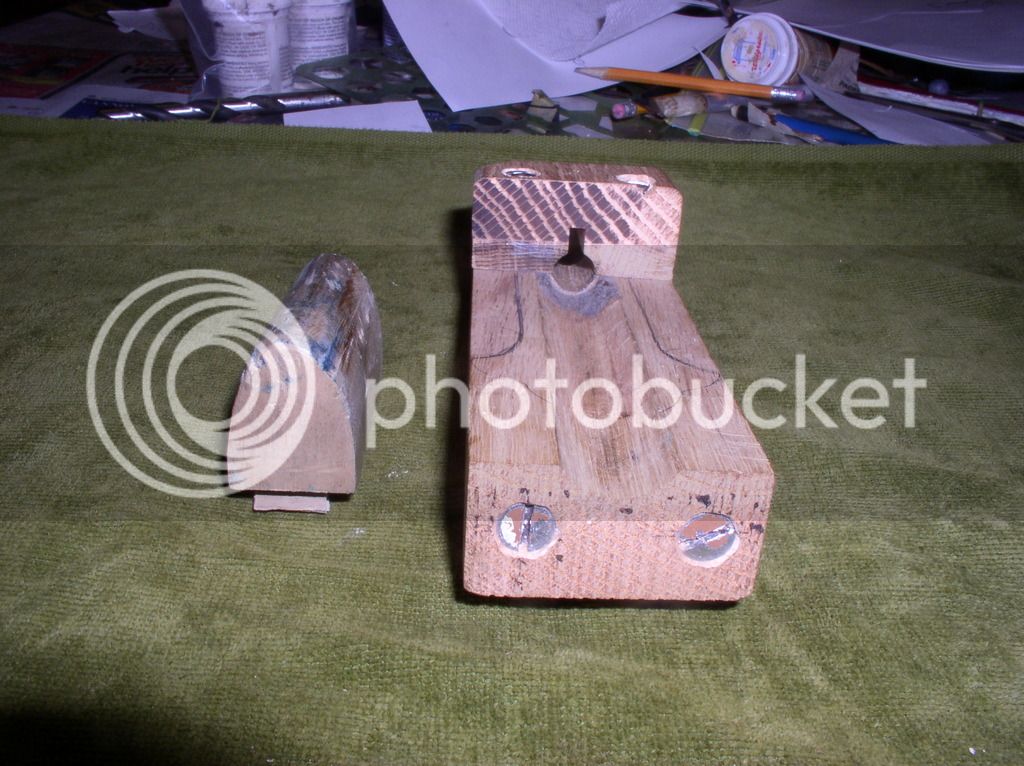
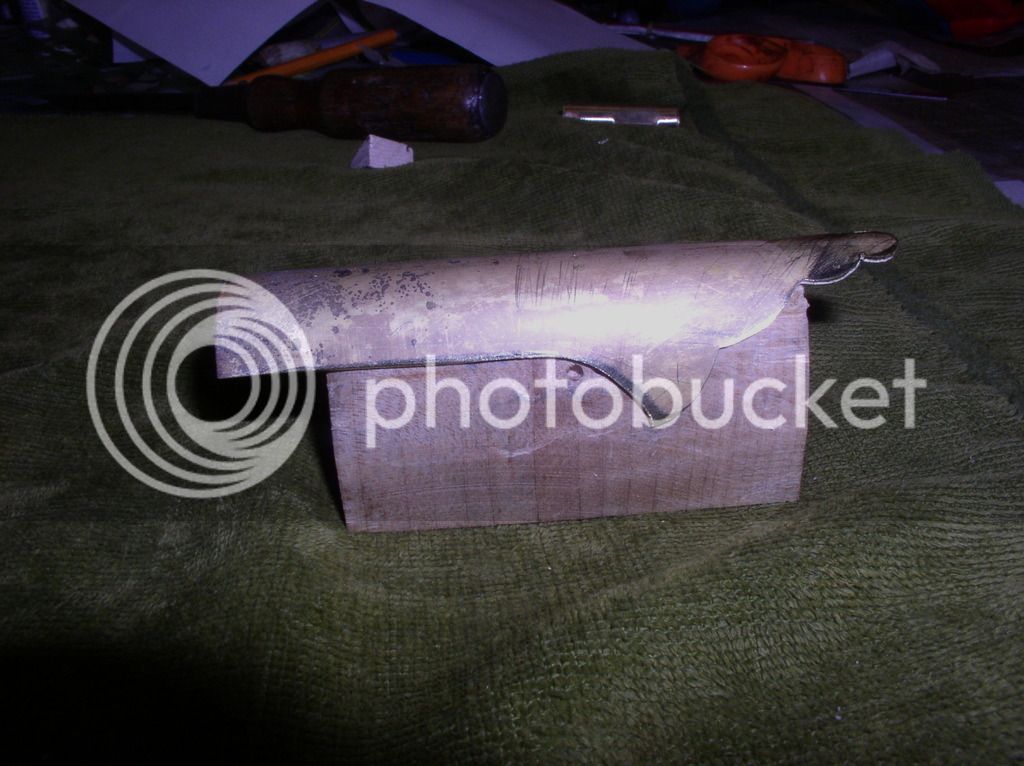
First shown are the male and female forming blocks made from oak. The male block simulates the forestock cross section and the female block is the same cross section plus the .040 brass thickness. As shown, these blocks will make a one or two piece BC entry pipe. The two piece is shown and I think it's the easier of the two to make.

This pic shows the formed finial...the layout is on the inside surface of the pipe.
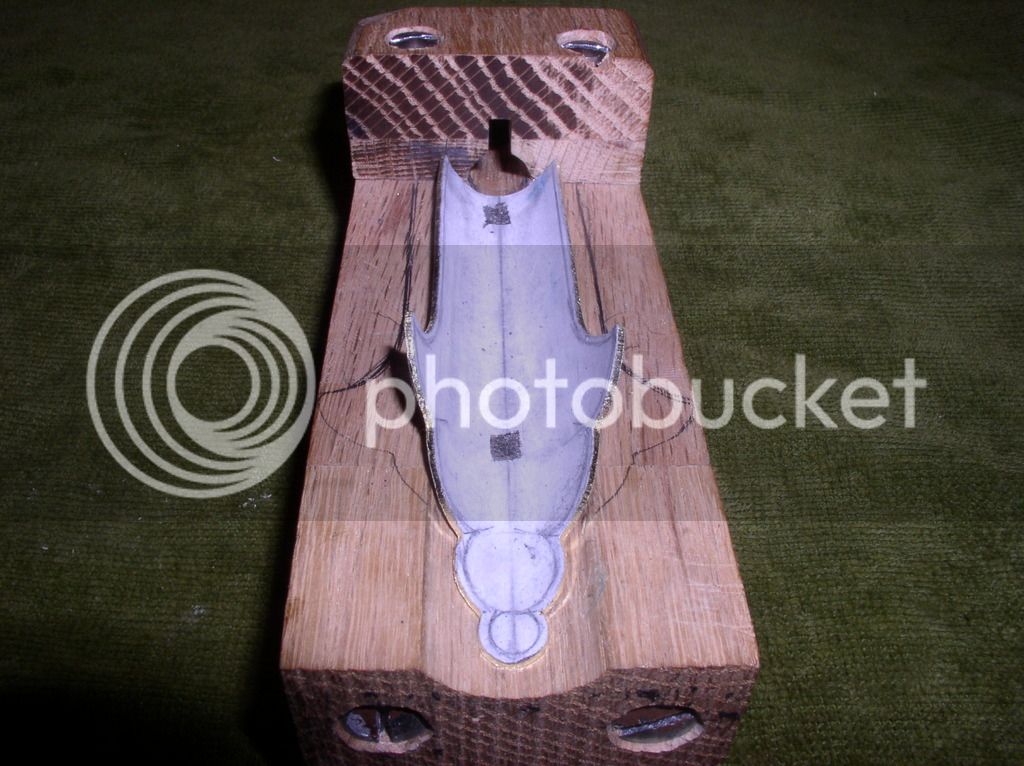

The male block w/ the finial.

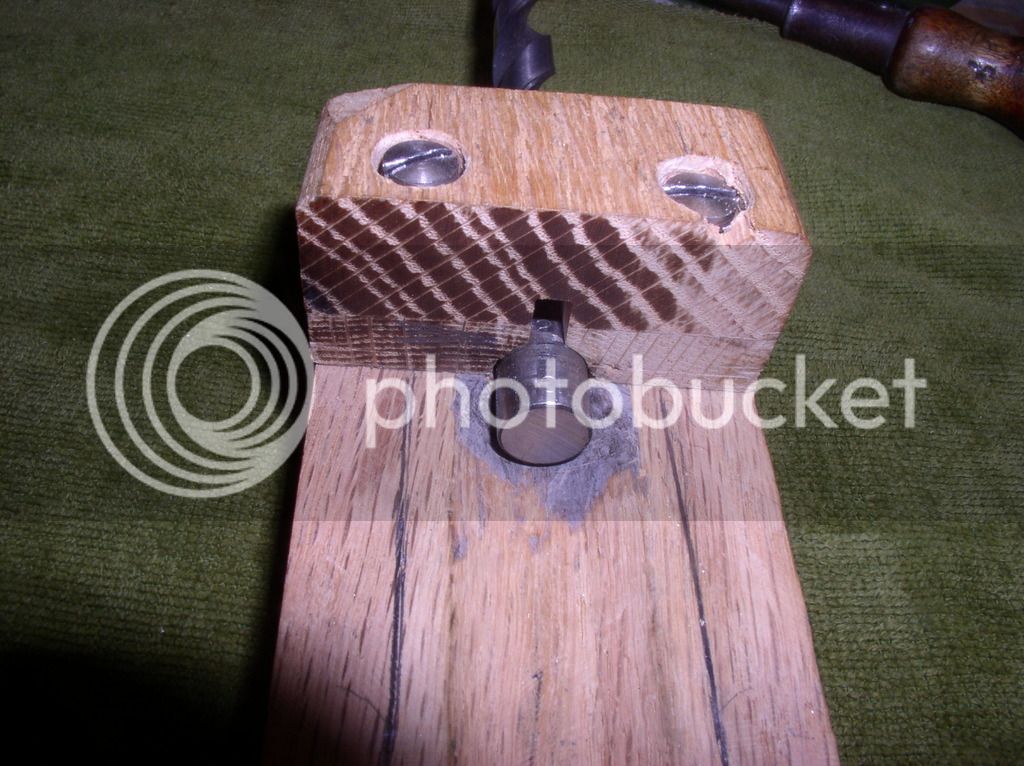
A drill the same size as the RR pipe is used to peen the radius and dia that goes around the RR pipe.

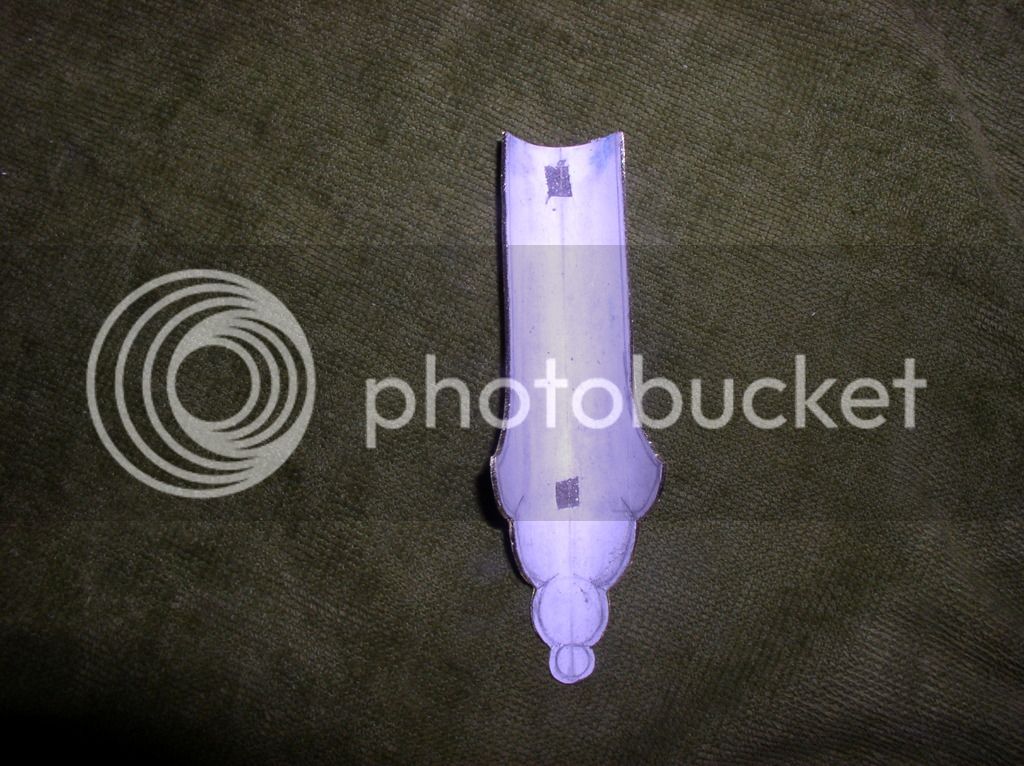
This is just the finial....the cutouts are used to align the paper layout w/ the centerline on the brass sheet.

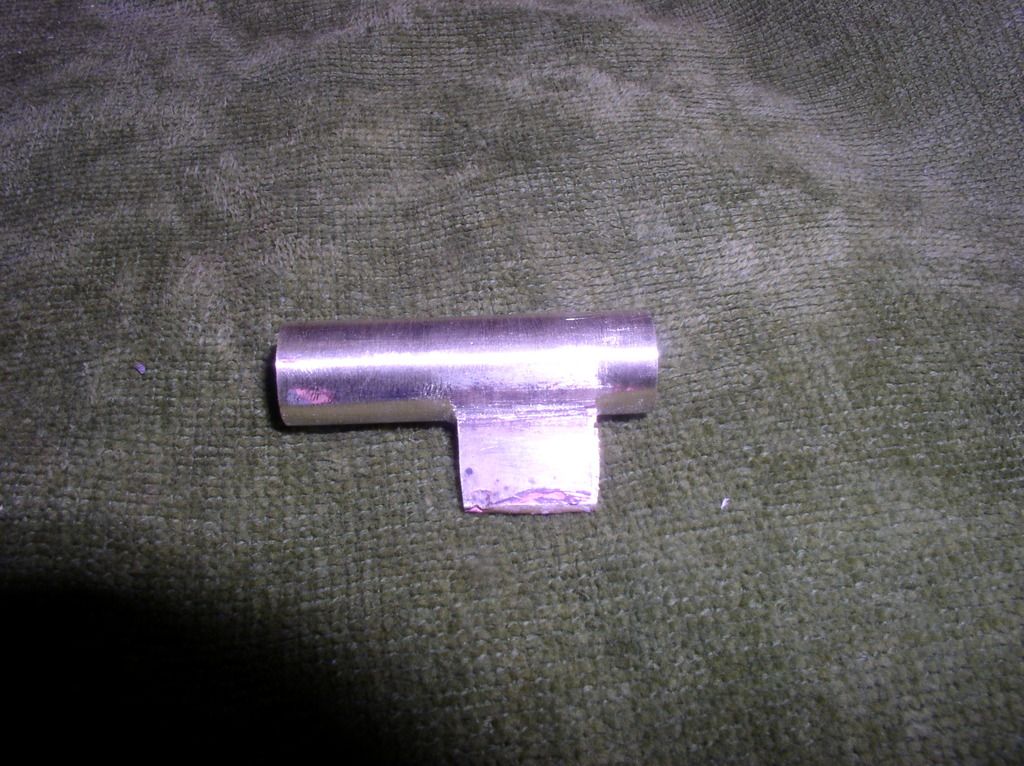
This is the RR pipe and the tab for pinning favors the finial and one pin is used.


The layout is on the paper and after the finial is filed to it, it is removed and the finial end towards the RR pipe holder is peened into a spherical shape and the dia that fits around the RR pipe is also peened. A couple of anneals w/ a torch is necessary to prevent tearing of the brass.

Pictured below is a top view of a 2 piece BC entry pipe showing the radiused transition to the RR pipe itself....the two pieces are joined w/ silver solder....Fred
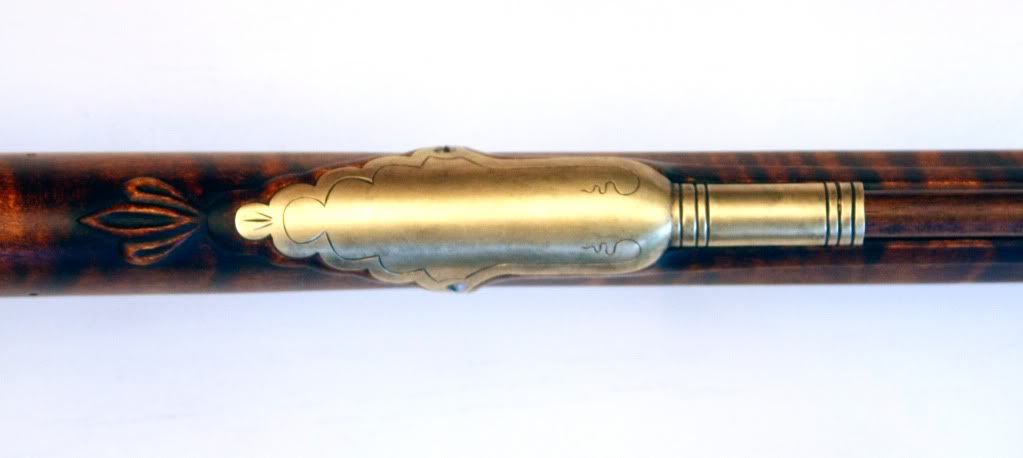
 
Here's side view of another BC entry pipe that shows the mat'l thickness drop {.040} from the finial top surface to the RR pipe dia. BC LRs are slim and some would say....very petite. This has to be heeded in every facet of making one of these LRs.....Fred
 
Thank You Fred that was very nice of you to show us how you made those,I have to put that in my file save.Im going to try this for sure.
 
Good tutorial Fred. Are you using high temp silver solder or low temp?
Not that it matters.
 
Have used Swif 95 and also a hi temp silver solder which melts above 1200 degrees. The actual RR pipe is made w/ the hi temp solder and if the finial and RR pipe are joined w/ the hi temp solder, a heat sink has to be inserted into the pipe so it doesn't melt.

The last assembly was done w/ Swif 95 but it's a little fragile because there's not much surface area due to the shapes. So...the hi temp solder is now used......Fred
 
flehto said:
a heat sink has to be inserted into the pipe so it doesn't melt.

what kind of metal/material is best used for a heat sink? if you where soldering a flat piece, could you lay that piece on that heat sink material and it would also act as a heat sink? thank you
 
I use a 3/8 dia steel rod as a heat sink when hi temp soldering the 2 pieces together. Copper would be better but I don't have it.

Laying metal that's intended to be soldered on metal requires more heat and isn't the way to solder. I'm probably not understanding you.....Fred
 
flehto said:
I use a 3/8 dia steel rod as a heat sink when hi temp soldering the 2 pieces together. Copper would be better but I don't have it.

Laying metal that's intended to be soldered on metal requires more heat and isn't the way to solder. I'm probably not understanding you.....Fred

sorry. If I understand what you did correctly: you inserted a rod of metal to allow the extra heat from your torch to transfer to so that you did not melt the pipe? If I had a larger piece, such as a brass buttplate that I wanted soldered, could I lay the parts on a similar material to also act as a heat sink? Thank you.
 
A heat sink draws or absorbs the heat from soldering, so to do a Bplate, you wouldn't want that.

The actual RR pipe is made from sheet stock and is closed w/ hi temp solder, so when attaching the finial to the pipe, I don't want the solder on the pipe to melt...and the heat sink prevents this. A heat sink doesn't increase the heat.....only eliminates the melting of areas that are already soldered....Fred
 
Have had macular degeneration in both eyes for the last 20 yrs and because it's worsening, it's quite difficult to do gun building. Straight lines look liked curved ones and areas of view are missing. So at 83 yrs I guess it's time to quit building.....Fred
 
Maybe its time to start writing and putting your knowledge, experience and examples on paper for present and future builders. you make beautiful rifles, and hope my second build when i start it comes halfway to the pieces you craft.
 
There are many gunmakers who are much more skilled than I. When I started building MLers in 1976, it was for the sole purpose of obtaining some reliable, trouble free hunting guns. The offerings back then were just the opposite.

Many of the flintlocks on the market back then were "lousy", so my first 4 were made from Siler flintlock kits.

A lot of sweat and tears went into the first few builds, but then it got a lot easier and after 2 gunracks were filled, realized that most weren't being shot and decided to sell all except my 3 hunting guns. Thought it might be a difficult decision to carry out, but after a few were sold, found out it wasn't that difficult.

Sold several through TOW's consignment sales because I now realized that building was more important than owning and the "advertising" due to TOW's widespread internet exposure garnered some customer builds. TOW's 33% cut seems high but the exposure was worth it. Anyways to me.

Then decided to "sell on my own" and also decided to build only "spec" MLers....customers sometimes are difficult to deal w/. Then decided to build only 2 styles of LRs...Bucks County and Lancasters.

Certainly enjoyed the building......Fred
 
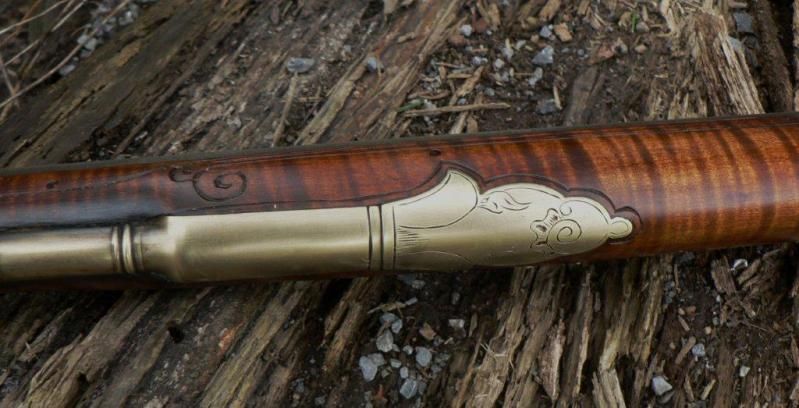
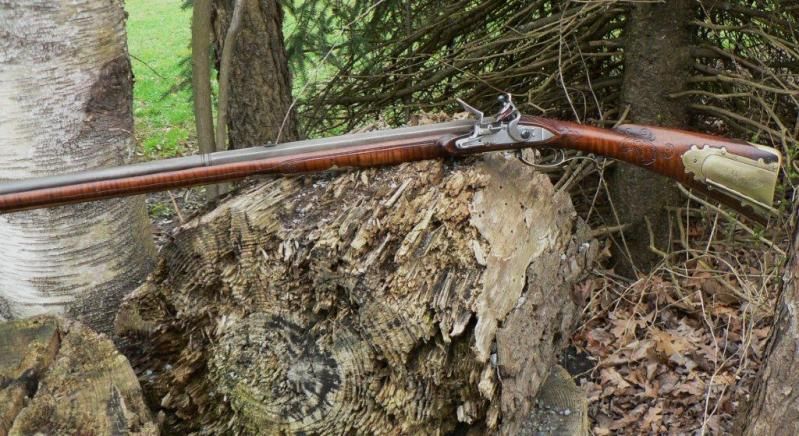
Fred: Here's an even simpler way to make a two-piece entry pipe, if you don't mind cheating a little. The pipe shown was a purchased entry pipe that was inlet per standard practice. The extension was formed as a separate part, and simply butted up to the stock pipe. One of those horizontal lines is where the two parts meet. I honestly can't remember which one. It does not have as much width as your pipe and, as shown in the bottom photo, doesn't show on the side view as well as yours.

110706.jpg

110602.jpg
 
Thanks for the tip....it saves soldering the 2 pcs together. Were there any originals made as yours is? Who built that beautiful BC?

MSW.....thanks for the compliment, but it is time to quit......Fred
 
Fred: I started that gun about 10 years ago. I made the brass parts except, of course the buttplate and triggerguard, did the inletting and shaped the stock. I kept making small mistakes and put it away for a couple of years, thinking I'd start over. Ron Luckenbill (of Revenant fame) told me to give it to him and I got it back a month or so later finished, engraved and carved as you see it. It's a .50 smoothbore and I won a turkey last Fall with it (second time).

I'm not sure about original entry pipes being made that way. Most of the ones I remember studying were one piece but, of course, the pipe couldn't be removed to see if there was a solder joint or separate part. The old guys were pretty clever and were in business. They would have chosen the method that was easiest for them.
 
Eric...don't know if I ever thanked you for your guidance on building HC Bucks County LRs...both through the pix you sent me, the advice given to my questions and the article that was so enlightening. Your generosity was an enabling "windfall" of information for my efforts to correctly build these LRs.

Building these BC LRs was an evolution of guesses due to never having viewed any BCs and after you came along, the guessing ceased.....Fred
 
Back
Top