- Joined
- Nov 26, 2005
- Messages
- 5,258
- Reaction score
- 11,078
Hi,
I am making an 18th century British sporting rifle modelled somewhat on a pair of rifles made by John Twigg shown in Neal's book "Great British Gunmakers 1740-1790". I am not copying them just using the style as inspiration. This rifle will have double set triggers, something rarely if ever seen on British flintlock rifles. It is what the owner wants. I am using the Davis Twigg flintlock. I have issues with this lock, specifically, the tumbler and cock really should be positioned 1/16-3/32" closer to the pan. However, I can make it work well and it has the exact look I want for the gun. The mainspring that came with the lock is anemic. So to bring the lock up to the standard I require, I made a new stronger spring. I've posted threads about making springs in the past but this one involves making and fitting a claw to hook a stirrup attached to the tumbler. That has some unique challenges, which I think worth discussing. So here is the cast spring and my 1075 steel blank cut and ready to go. The steel is 1/8" thick and provided by Bob Roller.
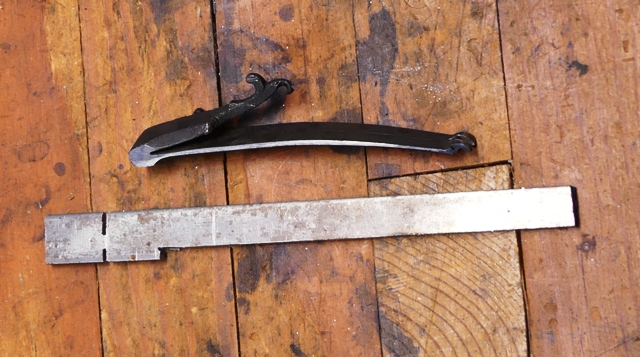
Now let me be clear. I do not have a milling machine, metal cutting bandsaw, or metal lathe. So those of you who want to post comments that this can be done easily on some machine please don't bother. This is for folks who don't have those machine tools and you can make great springs without them. The great British lock makers during the 18th and early 19th centuries who made the best flintlocks of all time did not have those machines either. The blank shows the appropriate shape and cuts you need to form the spring. After cutting out the blank the next step is rotating the tab to form the lug. Heat the neck red hot and turn 90 degrees with pliers.
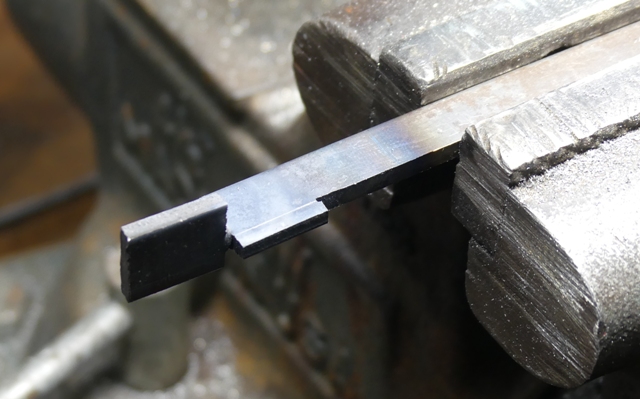
Then I file away the excess metal on the inside of the top leaf to form the pin, which inserts into the hole in the lock plate. I make sure the spring fits in place as it should. Next I file the end of the spring to provide for the raised claw. I use a triangular file to cut the border of the raised section and to thin the spring at that point.
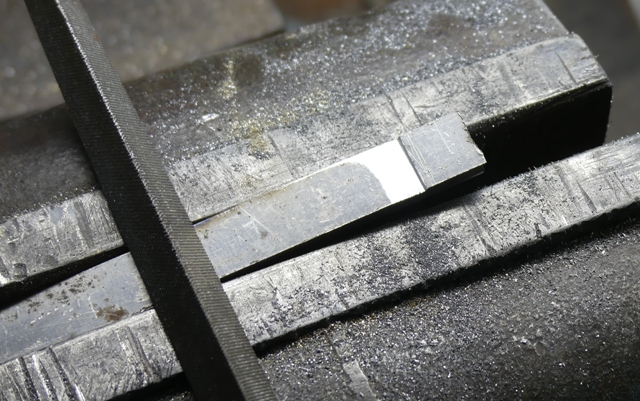
Then I use files to taper the top of the lower leaf of the spring toward the claw.
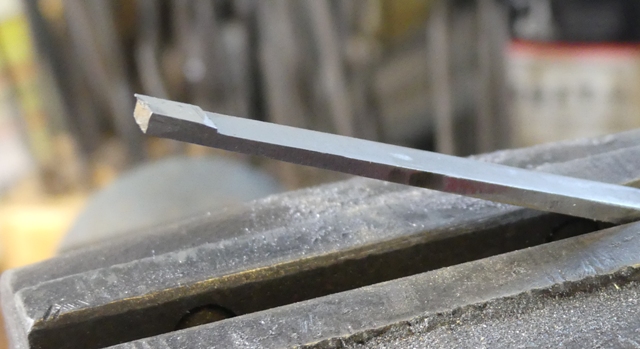
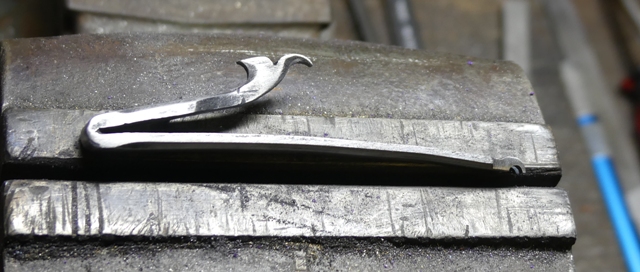
Using a MAPP gas torch, I make the main bend first bending with pliers and then hammering the bend closed with a ball peen and anvil. It ends up looking like a little nuclear submarine don't you think?
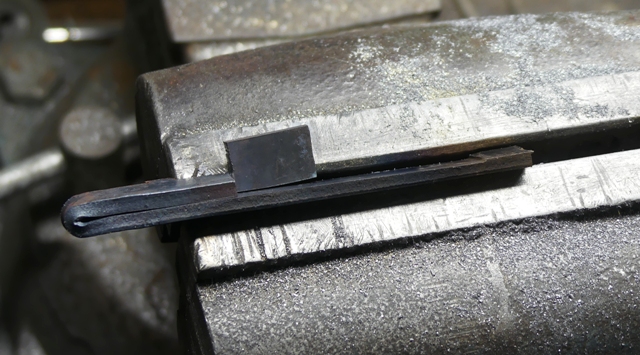
I shape the lug with files. I want it tall enough so the spring clears a large barrel. However, it also has to be the right height to make sure the spring has proper geometry at half and full cock. I want the lower leaf to be close to straight when the lock is at full cock.
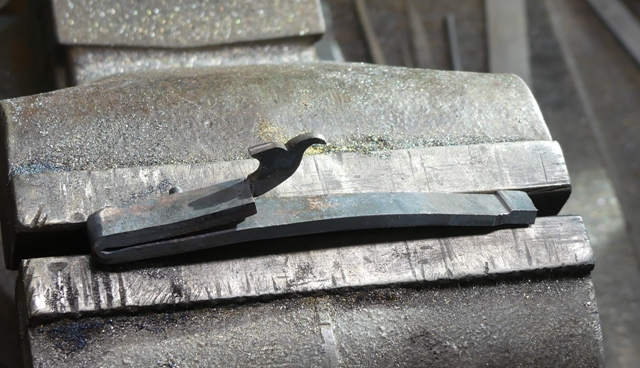
Next is shaping the claw. This is not trivial. First, the slot has to be positioned exactly right so it does not induce any sideways pressure on the stirrup, which could break it. The groove for the pin on the claw has to be positioned correctly so the stirrup arm can rotate freely and it has to have a recess at the base of the slot to allow the pivot arm on the tumbler to clear the spring.
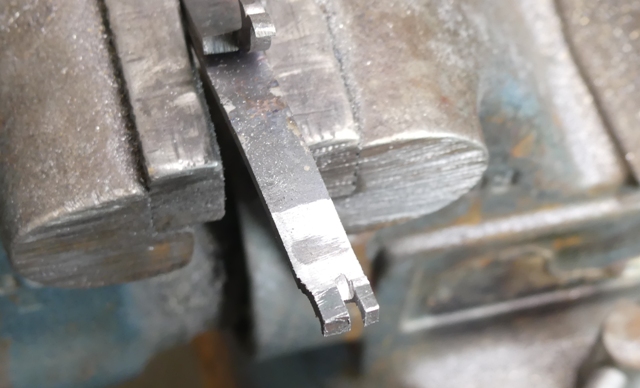
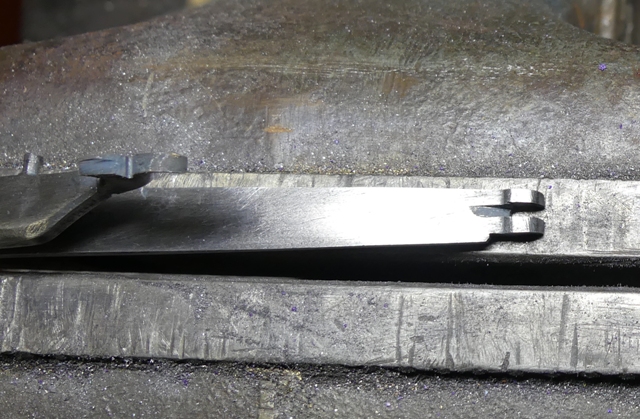
I opened the main bend a little and straightened the lower leaf to fit properly in the lock. Then I filed bevels on the edges of both leaves, filed decorative details into the lug, and polished up the spring. I then heated it bright orangey red hot with 2 MAPP gas torches and quenched it in brine. Next, I rinsed it in clean water, dried it and then tempered it at 750 degrees F for 1 hour. It came out very well and is much stronger than the cast spring that came with the lock.
dave
I am making an 18th century British sporting rifle modelled somewhat on a pair of rifles made by John Twigg shown in Neal's book "Great British Gunmakers 1740-1790". I am not copying them just using the style as inspiration. This rifle will have double set triggers, something rarely if ever seen on British flintlock rifles. It is what the owner wants. I am using the Davis Twigg flintlock. I have issues with this lock, specifically, the tumbler and cock really should be positioned 1/16-3/32" closer to the pan. However, I can make it work well and it has the exact look I want for the gun. The mainspring that came with the lock is anemic. So to bring the lock up to the standard I require, I made a new stronger spring. I've posted threads about making springs in the past but this one involves making and fitting a claw to hook a stirrup attached to the tumbler. That has some unique challenges, which I think worth discussing. So here is the cast spring and my 1075 steel blank cut and ready to go. The steel is 1/8" thick and provided by Bob Roller.

Now let me be clear. I do not have a milling machine, metal cutting bandsaw, or metal lathe. So those of you who want to post comments that this can be done easily on some machine please don't bother. This is for folks who don't have those machine tools and you can make great springs without them. The great British lock makers during the 18th and early 19th centuries who made the best flintlocks of all time did not have those machines either. The blank shows the appropriate shape and cuts you need to form the spring. After cutting out the blank the next step is rotating the tab to form the lug. Heat the neck red hot and turn 90 degrees with pliers.

Then I file away the excess metal on the inside of the top leaf to form the pin, which inserts into the hole in the lock plate. I make sure the spring fits in place as it should. Next I file the end of the spring to provide for the raised claw. I use a triangular file to cut the border of the raised section and to thin the spring at that point.

Then I use files to taper the top of the lower leaf of the spring toward the claw.

Using a MAPP gas torch, I make the main bend first bending with pliers and then hammering the bend closed with a ball peen and anvil. It ends up looking like a little nuclear submarine don't you think?

I shape the lug with files. I want it tall enough so the spring clears a large barrel. However, it also has to be the right height to make sure the spring has proper geometry at half and full cock. I want the lower leaf to be close to straight when the lock is at full cock.

Next is shaping the claw. This is not trivial. First, the slot has to be positioned exactly right so it does not induce any sideways pressure on the stirrup, which could break it. The groove for the pin on the claw has to be positioned correctly so the stirrup arm can rotate freely and it has to have a recess at the base of the slot to allow the pivot arm on the tumbler to clear the spring.


I opened the main bend a little and straightened the lower leaf to fit properly in the lock. Then I filed bevels on the edges of both leaves, filed decorative details into the lug, and polished up the spring. I then heated it bright orangey red hot with 2 MAPP gas torches and quenched it in brine. Next, I rinsed it in clean water, dried it and then tempered it at 750 degrees F for 1 hour. It came out very well and is much stronger than the cast spring that came with the lock.

dave


