MINIMUM tool requirement

Muzzleloading Forum

Help Support Muzzleloading Forum:

This site may earn a commission from merchant affiliate links, including eBay, Amazon, and others.
Joined
Feb 9, 2012
Messages
1,842
Reaction score
154
Location
Mesa AZ
OK, Ive wanted to build a kit for a while; but I have minimal tools and my last real woodworking skill was in high school, (1987). I have some skill in various technical and mechanical fields, but to be honest I call upon my high school, early adult days for any real skill.

That said; what is the MINIMUM tools I need to properly build a basic kit. We are not talking a custom kit, we are talking a kit with a typical "90%" stock done. Eventually (when I can finally retire and buy the tools I really want) I will rekindle my true interest, spend the time and money on practice blanks, and get GOOD. Till then I want to know the absolute minimum required to build a kit rifle or pistol
 
The following is taken from Lyman's user guide:

Instructions for Lyman Assembly Kits

TOOLS REQUIRED
We recommend that you obtain a copy of Brownells Gunsmith Tool Catalog.
You will find this book to be a handy tool reference and a good source for the
material you cannot find locally.
Brownells Inc., 200 South Front Street, Montezuma, Iowa 50171
Carving Tools”“The wood work required to complete this kit could be done
with ordinary hobby knives, but a set of wood carving tools will simplify any
carving required.
Rasps”“You will need a straight rasp for rough shaping the exterior of the
stock to final dimensions. The "Surform" tools produced by Stanley will do a
satisfactory job.
Sand Paper”“Grades 80 through 320.
Files”“ (1) 10 or 12 inch mill file
(2) 1/4 inch wide pillar file
(3) 1/4 inch three square file
Electric Drill and Bits”“
(1) 3/32 inch
(2) 1/16 inch
(3) 1/8 inch
 
You'll be lots happier with the work and with the results if you assemble your tool kit on the bench top right next to a good vise with padded jaws.
 
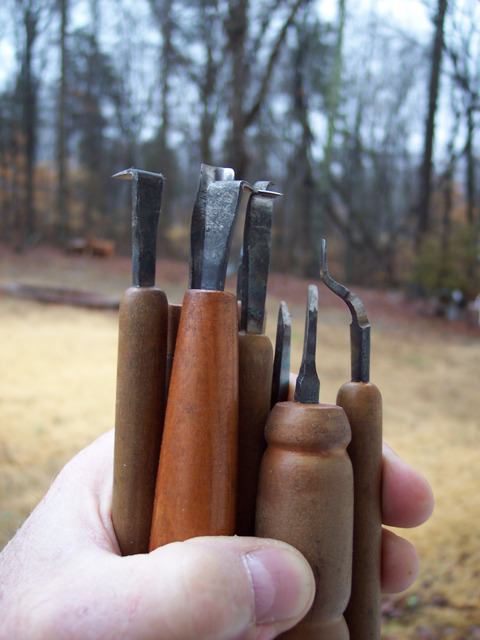
I pick up old chisels at flea markets, grind and shape them to what ever I may need. I bought a complete set of Flex Tool chisels early on but use what I made much more often.

I use concrete nails, heat and shape them on the anvil part of my vise and quench them in oil. I don't temper them, they sharpen to razor sharp easily.

Most of all, they are really fun to make and a worthy project to fill rainy days.

Here are 8 tools I made, scrapers, a gouge or two and a very handy little skew chisel.

Hba4M9g.jpg


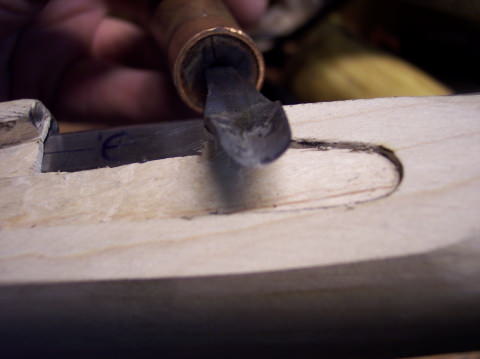
Here is my favorite homemade gouge; I have trouble cutting the nose of a lock molding evenly so I made a gouge that cuts a perfect inlet for this area every time, in this case for a Late Ketland lock.

8LFerVs.jpg


I plan to make a few stabbing tools today as my small part inletting is not up to par and I plan to delve into carving on my next rifle.

I am a beginner as well, my homemade stuff looks crude but works flawlessly.
 
I use concrete nails, heat and shape them

Eric, I'm certainly not one to be giving rifle building advice. But, I have crudely cobbled a couple together over the years. I have made scrapers from old screwdrivers heated with a propane torch then pounded over and quenched and sharpened. What do you use to heat the concrete nails? More than propane? Seems like a much more better idea than the screwdriver thing. Plus, having to make handles would give me an excuse to use my lathe. :grin:
 
I have used propane but currently use mapp gas, it get hotter quicker. I have one of those neat torches with a push button lighter on it, a bottle of gas goes a long way because you only burn it when you need it and and shuts down when you turn loose of the trigger.
 
I'd avoid the Stanley surform tools like the plague if doing a 90% kit. They remove wood very fast and leave a surface needing much work to finish. I do use these tools, especially the spoon type, but only for roughing out shapes, and never for finishing. A spoon shaped surform tool and a four in hand rasp have done a ton of work for me but neither are suitable for doing the final shaping of a 90% kit, and final shaping, just refinement, is all you'll be doing on such a kit.

As for rasps, the more expensive the better. Nicholson numbers 49 and 50 are at the lower end of the price range. You should have both for any kind of fine woodworking, although common hardware store rasps can get you buy but only for rougher work. They aren't finishing tools.

Scrapers are important. Maybe more important than chisels for a 90% kit. You should have a good selection, perhaps to include a special barrel channel scraper of a size to match your barrel. I have quite a few steel scrapers but there are times when a piece of broken glass suits me better as it may have a shape closer to the shape I'm working on.

As for chisels, small chisels can work big, but big chisels can't work small, and for a 90% kit you will only need small chisels anyway. I use palm chisels a lot on my woodworking projects. For me chisels of number 9 and 5 curves are the workhorses. A #3 is useful. You can flatten or smooth out a surface with A #3 as easily as you can with a straight chisel without having corners to dig in. A skew flat chisel is good for working convex curved surfaces. Only if you are needing to cut a barrel channel or rough shape a stock should you need much of anything larger than 3/8ths wide.

I also wind up using the European wooden handled whittling knives and sheepsfoot chip carving knives frequently.

Sandpaper is good to have, but what you back it with is more important. I very often use items from a set of rubber sandpaper backing tools. They work flat, convex and concave surfaces and also come in vee shapes. They can be had from the various woodworking supply outfits.
 
90% done??

Yep, They leave the last 10% to you. The hard part. :hmm:

90 percent covers a lot of ground. For instance the Dixie Pedersoli kits are pretty much complete in the white while a Lyman GPR and Traditions could be done on the kitchen table with minimal tools and sandpaper.

Now the Kiblers, Track, Chambers and others are parts sets that really require the list below.....

1. Eductation. The books (been listed many times) plus hands on instruction if you can get it.
2. The place. A good place all your own with a sturdy table or bench.
3. A good bench vise with wooden, leather or aluminum padding. The metal padding is a must for breech work. Mount the vise solid and make sure the bench is bolted to the floor/wall or is heavy enough for heavy work.
4. A good 1/4 inch bench chisel of good quality.
5. Sharpening stones for said chisel. It could be a Jap wet stone, Arkansas Stones or a diamond set.
6. A gouge slightly less then the radius of your lock nose.If you plan on inletting the lock.
7. A selection of files including round, half round and flat.
8. A depth gauge for locating pins, screws, depth of mortises ext. ext.... Could be as simple as a piece of wood with a screw.
9. Measuring tools, tape line, tailor tape, simple caliper, hole size plate and especially a Combo Square.
10. Electric Drill and selection of drills.
11. Marking tools. Mechanical pencil, pencils and sharpener, fine sharpie and a scribe. A scribe should be on the combo square.
12. Blackening. A candle or the various marking concoctions.
13. String.
14. Tape
15. Torch head, flux and solder with mapp or propane.
16. A dovetail file or safe side triangle file.
17. A cold chisel.
18. A dead blow hammer or non marring hammer.
19. A small hammer.
20. A Big hammer either ball or cross peen. A frame or common claw hammer can be used but is not ideal. A cross peen is best.
21. Good snips if you plan to cut inlays.
22. A hack saw, an absolute must.
23. A coping saw.
24. Fingernail files or Emory Boards.
25. Selection of sand paper.
26. A good wood glue.
27. Eraser
28. A good fine rasp.
29. Good lighting.
30. A tap and die set with various sizes.....Make sure you have the tap and clearance drills.
31. Good gun type screw drivers. A cheap set of hollow ground bit drivers is good for most work.
32. Oh, a mallet to drive your chisel. It could be as simple as a hickory hammer handle.

Optional.... a drill press with drill pin or a stand alone gunstock drill jig from Brownells or David Rase.
 
A couple more optional ones;

Jeweler's saw, (for cutting out inlays)
Spare blades for saw (they break a lot)
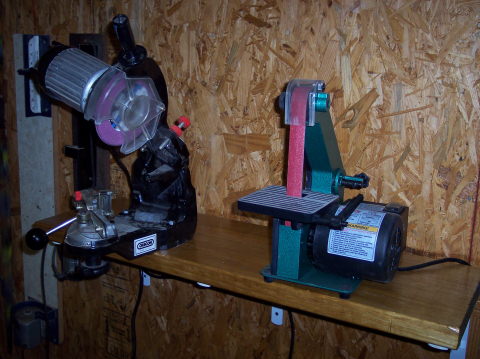
Bench grinder (numerous uses)
gravers (for engraving)
sharpening jigs
rubber gloves (for finishing chemicals)
steel wool
calipers (for measuring thicknesses)
magnifying hood or loupes (for close-in fine work like engraving or carving)
leather stop (for honing edges)
spring clamps (for holding glued-in inlays in place during curing)
C-clamps (slightly different uses than above)
heat gun (for blushing Aqua Fortis)
 
Back
Top