My first "build" GPR flint

Muzzleloading Forum

Help Support Muzzleloading Forum:

This site may earn a commission from merchant affiliate links, including eBay, Amazon, and others.

jtmattison

70 Cal.
Joined
Mar 17, 2004
Messages
4,686
Reaction score
9
Hey y'all,
I'm about to embark on my first building adventure, a GPR flint.
I want to brown the barrel and hardware. I just thought I'd prod all the experts out there for tips on browning, stock finishing, and inlays. I want it to look as authentic as possible and I want it to look rustic and unique.
Thanks for any tips. I will keep y'all posted during the build process once it starts.

Thanks,

HD :hatsoff:
 
The browning parts easy, if you use Laural Mtn Forge, and follow the directions. The only hitch will be the amount of humidity you have down there. You'll either need a sweat box, or use your bathroom shower as one. If you do half as good as those antler measures, and stuff you made me it will be a thing of beauty. By the way thanks again, I especially love that touchhole pick.

Bill
 
Thanks Swamp Rat.
And thank you Bill. I had fun making those antler tools. Maybe someday before I hit 90 years old I'll kill a big enough buck myself and make stuff with his antlers.

HD
 
Huntin Dawg said:
Thanks Swamp Rat.
And thank you Bill. I had fun making those antler tools. Maybe someday before I hit 90 years old I'll kill a big enough buck myself and make stuff with his antlers.

HD

Wa'll just make sure he's down fer tha count good n proper ... elswise it could git plumb interestin in your neck of the woods fer ah short while! :shocked2: :hatsoff:
violent018.gif


Davy
 
Dawg,
What I'd do if I were you is to take a rasp and work that massive GPR cheekpiece down a bit. This would bring it more in line with a Hawken, if that is the look you are after. Here's a link to some rifles that gave me inspiration for my GPR.

Poke Here

These are some beautiful rifles. The pics on this web site show the cheek piece, and also has some inlays to give you ideas. Do keep us posted on your progress, good luck and have fun!
Scott
 
Hi Dawg,
Been working on the same kit in .54 and is also my first kit. Since it is my first kit, I've been taking it very slow. Slower now since the wife took over my bench for Christmas decorations. Alot of wood to sand. I too, am going to brown it. I bought Laural Mountain Forge from Track of the Wolf. Sounds pretty easy to use. Good luck on your venture.
 
I'm building a GPR also. The stock finish I can't help with much. I still suck at wood finishing. You'd think after a dozen musical instruments, various pieces of furniture and a dozen or so gun stocks, I'd be good at it by now!

As for browning. Laurel Mountain Forge browning solution is the easiest and best I've used. You need a way to control humidity but I found a simple solution.

I had a small 150/300 watt foot heater laying around. It's a small thing that goes under your desk and you rest your feet on it and it gently blows warm air over them. I use a spare closet as a rusting box. I put in the foot heater and a cheapie "cold" humidifier. The kind that makes a gentle mist. You can control the amount of humidity by blocking off part of the mist port if you need to. You're looking for a light, even coat of rust in about 3 hours or so, using the LMF solution. You can adjust heat and humidity to give you the results you want.

I use C clamps and coat hangers to make hooks for the larger parts, and a small wire basket for the smaller ones. These are hung over the closet rod.

Follow the directions on the bottle of LMF and it'll come out fine. If you notice any copper color on the metal, steel wool it off and keep going. If you wipe it on carefully and don't rub, you shouldn't get any copper though.

If you want truly rustic, you might want a little pitting. The instructions explain that too. Just leave it longer during your first applications until you get the level of roughness you want. It's very easy to control. I generally go for just enough minor pitting to remove the polished look from the metal, but you can go for more, or less, or none at all.
 
Here are some of my notes on browning ...

There are generally two ways to brown a barrel. The hot brown method and the cold brown method. Most prefer the cold brown though it takes longer. Each method can be performed a couple ways. Color is controlled by the amount of carding, the method of carding, temp and humidity, and number of applications. Browning solutions can be ordered through Track of the Wolf or Brownells.

Barrel preparation is the same no matter which way you intend to brown. Browning does not work well on highly polished surfaces. Draw filing to remove the milling marks and square up the corners is a must and is all that is really required. This will give a more textured finish. For a smoother brown polish to 320 grit with the paper backed with a hard object to maintain the sharp corners. A finer polish results in a longer browning process and may result in areas not taking the browning. Polish no finer than 320 for browning. Now you need to degrease the barrel. You can use Formula 409 spray cleaner followed by Rubbing Alcohol. Some browning solutions are also degreasers. Just follow the label instructions. Once degreased, handle only with gloves. I use rubber exam gloves but any rubber glove will work. The key is not to transfer oils from your skin back onto the degreased barrel that will result in a spotty finish. All previous rust or bluing should be removed prior to browning.

12 hour cycle Cold Browning: I have had good success using Danglers Brown, Wakegan Bay Brown, and Laurel Mountain Forge Browning solutions. All three must be put on so the barrel is just damp. Any heavier and you will impart a copper color to the barrel due to the copper in the solution. The only fix is to remove the finish and start over. With the barrel prepped and all holes plugged with wooden dowels apply a light coat of solution to the barrel using a clean cotton cloth. You need only dampen the metal. When it comes to applying browning solution “Less is Better”. Now set the barrel aside for 12 hours to rust. Depending on the temperature and relative humidity this first cycle may only result in a dull greenish color. If so, do not card the metal. Simply apply a second light coat of solution and set aside for another 12 hours. Once a light coating of orangish rust appears rub/buff/card it off using 0000 steel wool that has been run through the dishwasher or washed in acetone to remove the oils. Wipe with a cotton cloth and repeat the cycles for three to five days until desired texture and color is achieved. The heavier you card the smoother the texture but the longer the process takes. In the early rusting stages heavy carding will remove all the “finish”, so card lightly at first. As the finish gets darker and heavier you can card more aggressively. A darker color can be achieved earlier by carding with a piece of denim during the first rusting cycles until the rusting gets more aggressive when you will want to switch to steel wool. The 12 hour cycle is convenient because you can do this over the course of a week before and after work/school. The 12 hour cycle is more aggressive since the solution has had more time to work between carding cycles. If you know you will miss a carding cycle do not apply the solution prior. Enough solution will remain after the last carding to allow a slower less aggressive cycle for when you get back to it. Do not let it go more than 24 hours without carding and do not skip a carding cycle often as it will result in a very rough surface. It will not hurt anything to go as much as 14 or 15 hours between a carding cycle should something arise. But again try to limit the frequency of these occurrences. Cold browning is very forgiving.

3 hour cycle Cold Browning: Everything is the same as the 12 hour cycle except you card every three hours. This can give you a nice brown in a day as opposed to 3 to five days. Desired color is often achieved after about 6 to 8 cycles. Again try not to skip carding cycles. Since the solution has less time to work between carding cycles the resultant surface texture will be much smoother. A Humidity/Damp/rusting Box may be required when using this procedure if you are trying to brown during low humidity time of the year. This is typically not a problem in the summer.

Alternately you can use Dixels scratch wheel (order from Brownell’s) attached to a drill to mechanically card. You must have a light touch to use this. Best used after rusting has progressed beyond the initial stage.

Hot browning: Normally used with Birchwood Casey’s Plumb Brown solution. Prep the barrel as before. The directions say to heat a portion of the barrel until water sizzles but does not evaporate. Then apply solution let cool and card. Move to a new area and repeat. You will need to go over the entire barrel several times for this to produce an even color. And then you still may not achieve this. I have found it best to heat the entire barrel at once in a large oven testing on the underside and applying the solution to the entire barrel once hot enough. Card and repeat until desired color is achieved. If the barrel is too hot the solution will burn off leaving a very patchy and spotted finish. This solution does fume when applied. The fumes are toxic so apply in a well ventilated area.

After rusting the barrel you must neutralize the rusting solution or your barrel will continue to rust. I use a strong baking soda and water solution to first rinse off and the wipe down the barrel and other metal parts. Warm to hot water will preserve the color. Boiling water will darken the color considerably. This color change is permanent. Apply oil while the metal is warm. Reapply every day for a week or until rusting stops. Some after rust is normal but if it rusting is heavy or continues longer than a couple days degrease the metal and wash with baking soda and water again and then reapply oil. Bee’s wax can also be applied with the barrel warm to seal the pores of the metal. Carding and oiling following neutralization of the browning solution is very important. Up to know you have been controlling the rusting process. You must continue to do so until the reaction is completely stopped. Laurel Mountain Forge Solution is quite strong and typically requires 2-3 baking soda baths to adequately neutralize the solution.
 
Here is how I made my humidity box ...

The Rusting Box / Damp Box / Humidity Box

Depending on the time of the year or the humidity in your area it may be advantageous to build a rusting or humidity box to aid in browning barrels. In its simplest for m it is nothing more than a box with a lamp installed. It can be made very complex with thermostats to control temp as well as devices to precisely control humidity also. Fortunate for our purposes we can get by quite nicely with the simple box.

This box requires a couple 1X2 boards, a sheet if paneling or 1/8inch plywood, a dowel rod, lamp kit, and screws. The dimensions are 12 inches wide by 12 inches high by 48 inches long. With this box you can brown all but the longest of custom barrels. Use the 1X2’s to form the framework and screw the bottom and sides to the frame. Some only scrap or even plastic sheeting can be used for the ends (the whole box can also be enclosed with black plastic and simply set in the sun). The last piece forms a lid that can be made to set into the frame with the aide of 1X2’s set to the inside of the frame or you can use a hinge. Install the lamp kit in the left-right center of the box through a side-wall but below the up-down center. You want to be able to get the bulb in and not have it touch the bottom of the box but you also do not want it too close to the barrel. Use a 25-watt light bulb. Install two dowels over and to side of the light. Attach some aluminum foil across the dowels to diffuse the heat from the bulb to allow more even heating in the box. Aluminum cake pans with water or wet rags can be placed in the bottom of the box to either side of the bulb to provide moisture to raise the humidity. To more dowels should be hung just below the lid to support the barrel. Small 2X4 scrap can be affixed to the box or placed on the bottom to hold small parts. Adding either heat or moisture will speed up the rusting process and make the solution more aggressive. Applying both makes it even more so. By controlling which you add you can very the color and texture of the finish. It is also a good way to kick start the process.
 
Alternatively, I have noticed that LMF browning solution is quite forgiving. If you are doing the three hour cycle and will not get back to the barrel for 6 hours simply card and do not apply solution and place in the humidity box. Recard and apply solution when you get back. Or you can card and apply solution and leave it outside the humidty box and card upon return.

I seem to get my best results by starting in the box with a 12 hour cycle and then progressing with either method following that. But I polish my barrel to 330 or 320 grit so the 12 hour initial wait is required to get a good etch.
 
Another thought. Do not scrub the solution onto the metal. This will leave copper deposites which you can not rust through. Also you only want to dampen the metal. Do not slosh it on or soak the metal with the solution. Again you will get copper deposites. If you get copper deposites you will need to steel wool it back off and redo that area.

LMF solution can be stubborn to neutralize. A couple hot baths with baking soda generally work. You can also wash it with ammonia. Make sure you apply oil every day for at least a week as well.

Slow rusting is really fairly easy just remember that "less is more".

Have fun and good luck
 
54JNoll,
Thanks for all of the information. This project is going to be fun. I just ordered the LMF browning solution, Tru Oil, eagle inlay, and sights from TOTW. Now I just need the rifle to get here. It's expected tomorrow.

HD
 
54JNoll,
That is some of the best instruction on browing ithat I have seen. Thanks much!
Scott
 
Color is controlled by the amount of carding, the method of carding, temp and humidity, and number of applications. Browning solutions can be ordered through Track of the Wolf or Brownells.

Can you elaborate a bit on the various colors, darknesses, and how to achieve them? Thanks.

Also, Brownells makes a very soft steel bristled carding brush that is superb. It removes the rust without effecting the finish at all. I've used it for rust browning and bluing both with far better results than I ever got with steel wool. I also use it for cleaning files. In fact, that might have been it's original purpose. I don't remember offhand.
 
I have not tried the Dixel Scratch wheel sold by Brownell's yet. I have hear good things about it though. Most report fine grain texture and a shinier finish than I get with steeel wool, denim, or canvas.

I guess I should also add that the type of steel used has a say in color too. Different steels take the solution different.

I have played around a little with this and have gotten different colors. By this I mean from light milk chocolate to dark choloclate. I also got the dreaded copper color once too. Getting a specific color is not an exact science, it is more a feel.

Texture comes into play as well and does affect color.

You get a rougher texture by using the humidity box with the light bulb on. Essentially the added temperature and humidity makes the solution act more aggressive. This also tends to provide a darker color quicker.

Use the humidity box with the light bulb off gives more agressive rusting than in my basement alone but not as aggressive as with the light on. Doing that I got a finer texture and a medium brown color.

Just setting the barrel in my basement gives the finest texture and lightest color.

The more cycles you do the more the color evens out. With enough applications you can get darker colors with less texture.

The "cycle" you use has an effect on texture as well. The 12 hour cycle gives a rougher or more matt texture as it has had more time to work. The 3 hours cycle provides a finer texture. The 12 hour cycle gets complete coverage in fewer applications.

You can also darken things by pouring hot water over the metal between applications or after the last application. If you want to go for a rust blue you actually boil the barrel in denatured water before carding at each cycle. Pouring boiling water does not affect the color near as much as boiling for 10-20 minutes does. Either way the color change is perminent.

When the rust is very fragile, first one or two cycles in the 3 hour cycle, I may card with cloth as it is less aggressive than steel wool. Steel wool will work it just takes more application and you want to be real light with it at first. It seams to allow the solution to etch in faster but does provide more of a textured finish than using steel wool the entire time.

I do not have a good picture of the very dark Chocolate almost black color I got by useing the hunidty box and stel wool through the entire process on a 12 hour cycle for 7 days and finifhing with 5-10 galons of very hot water. That gun was for my brother who wanted a very dark barrel. Basically I sat the barrel in the bottom of the bathtub once complete and poured hot water over it and let it set in there until I could pull it out. Nearly rust blued that sucker.

Here is a picture of one where I let is rust just in my basement and only used steel wool near the end. Hope you can see the color okay. It is a ligther milk chocolate color. Wshed in warm water only.

kieth-profile.jpg


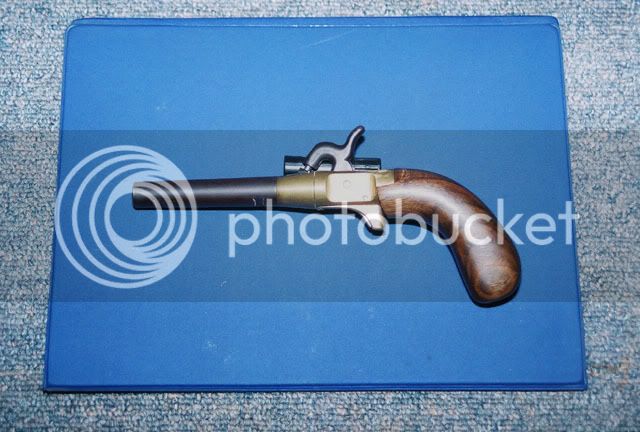
This is a pistol I redid for my brother using a 3 hour cycle inside my humidity box with light on and steel wool after the first two cardings. Washed in hot water. Acheived a finer texture than I did on his rifle. Color not quite as dark.

Briansfinishedpistol.jpg


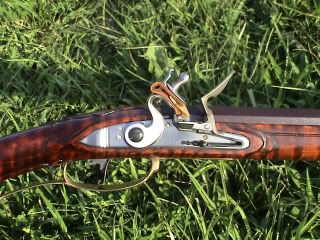
This is a rifle I did for me using my humidity box with light on for the first 1/2 to 3/4 of the cycles. After that I left the light off and later kept the lid off just to gradually slow things a bit. Canvas was used on the first cycle and steel wool following that. Washed in hot water. Rougher testure than pistol but still finer than the rifle for my brother and color somewhere between.

Lockcloseup.jpg


BarrelTransitioncloseupcopy.jpg


Essentially I can go light, dark, or somewhere in between. That is about the extent of my control. If the process is not going fast enough to my liking I add heat or humidity. If I want to slow it down I take one or both of those away. No two barrels have undergone quite the same process. I kind of do it by feel now.

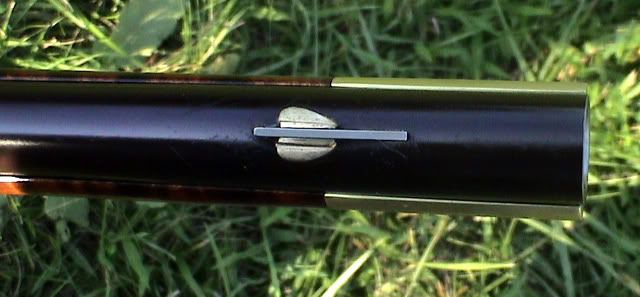
This barrel need a repair. I took a spot back to bare metal and rebrown that area. I was not able to duplicate the exact original process. So by "feel" tried to match to color and texture based on how things were or seemed to be progressing. I think I did okay.

Frontsitecloseup.jpg


To be honest the above directions where cobled together following conversations with Jim Chambers, Homer Dangler, and Tip Curtis. Mr. Dangler was the one that told me you could achieve various "colors" and textures by varying the process and just play around with it until I sort of developed a feel for what I wanted to achieve. He told me that no two pieces every come out the exact same color but by feel you can get close.
 
Dawg, I'm another LMF fan. I used it on my GPR and it was easy. Just don't scrub it in; just one long smooth wipe, and let it work. It'll look lousy at first, just card it (I used denim) and keep going.

Post pics of your progress, we're real nosey here!

-SHOOEY!!
 

Latest posts

Back
Top