Nice job cleaning up the lock. You probably already know this but others may not. have found the best backing for holding the flint is to hammer a round ball thin, then once it's wrapped around the flint trim the edges with a knife. Works better than leather, my grandfather taught me that.
You are using an out of date browser. It may not display this or other websites correctly.
You should upgrade or use an alternative browser.
You should upgrade or use an alternative browser.
Next project rifle
- Thread starter Phil Coffins
- Start date

Help Support Muzzleloading Forum:
This site may earn a commission from merchant affiliate
links, including eBay, Amazon, and others.
That lock looks terrific! Masterfully done.It’s a bit late in the game to learn how to engrave to the quality that an English rifle would have gotten.
But the lock has been cleaned up and fresh lubricant applied. I also added small teeth to the jaws to hold the flint.
IMG_0490 by Oliver Sudden, on Flickr
Notchy Bob
Phil Coffins
69 Cal.
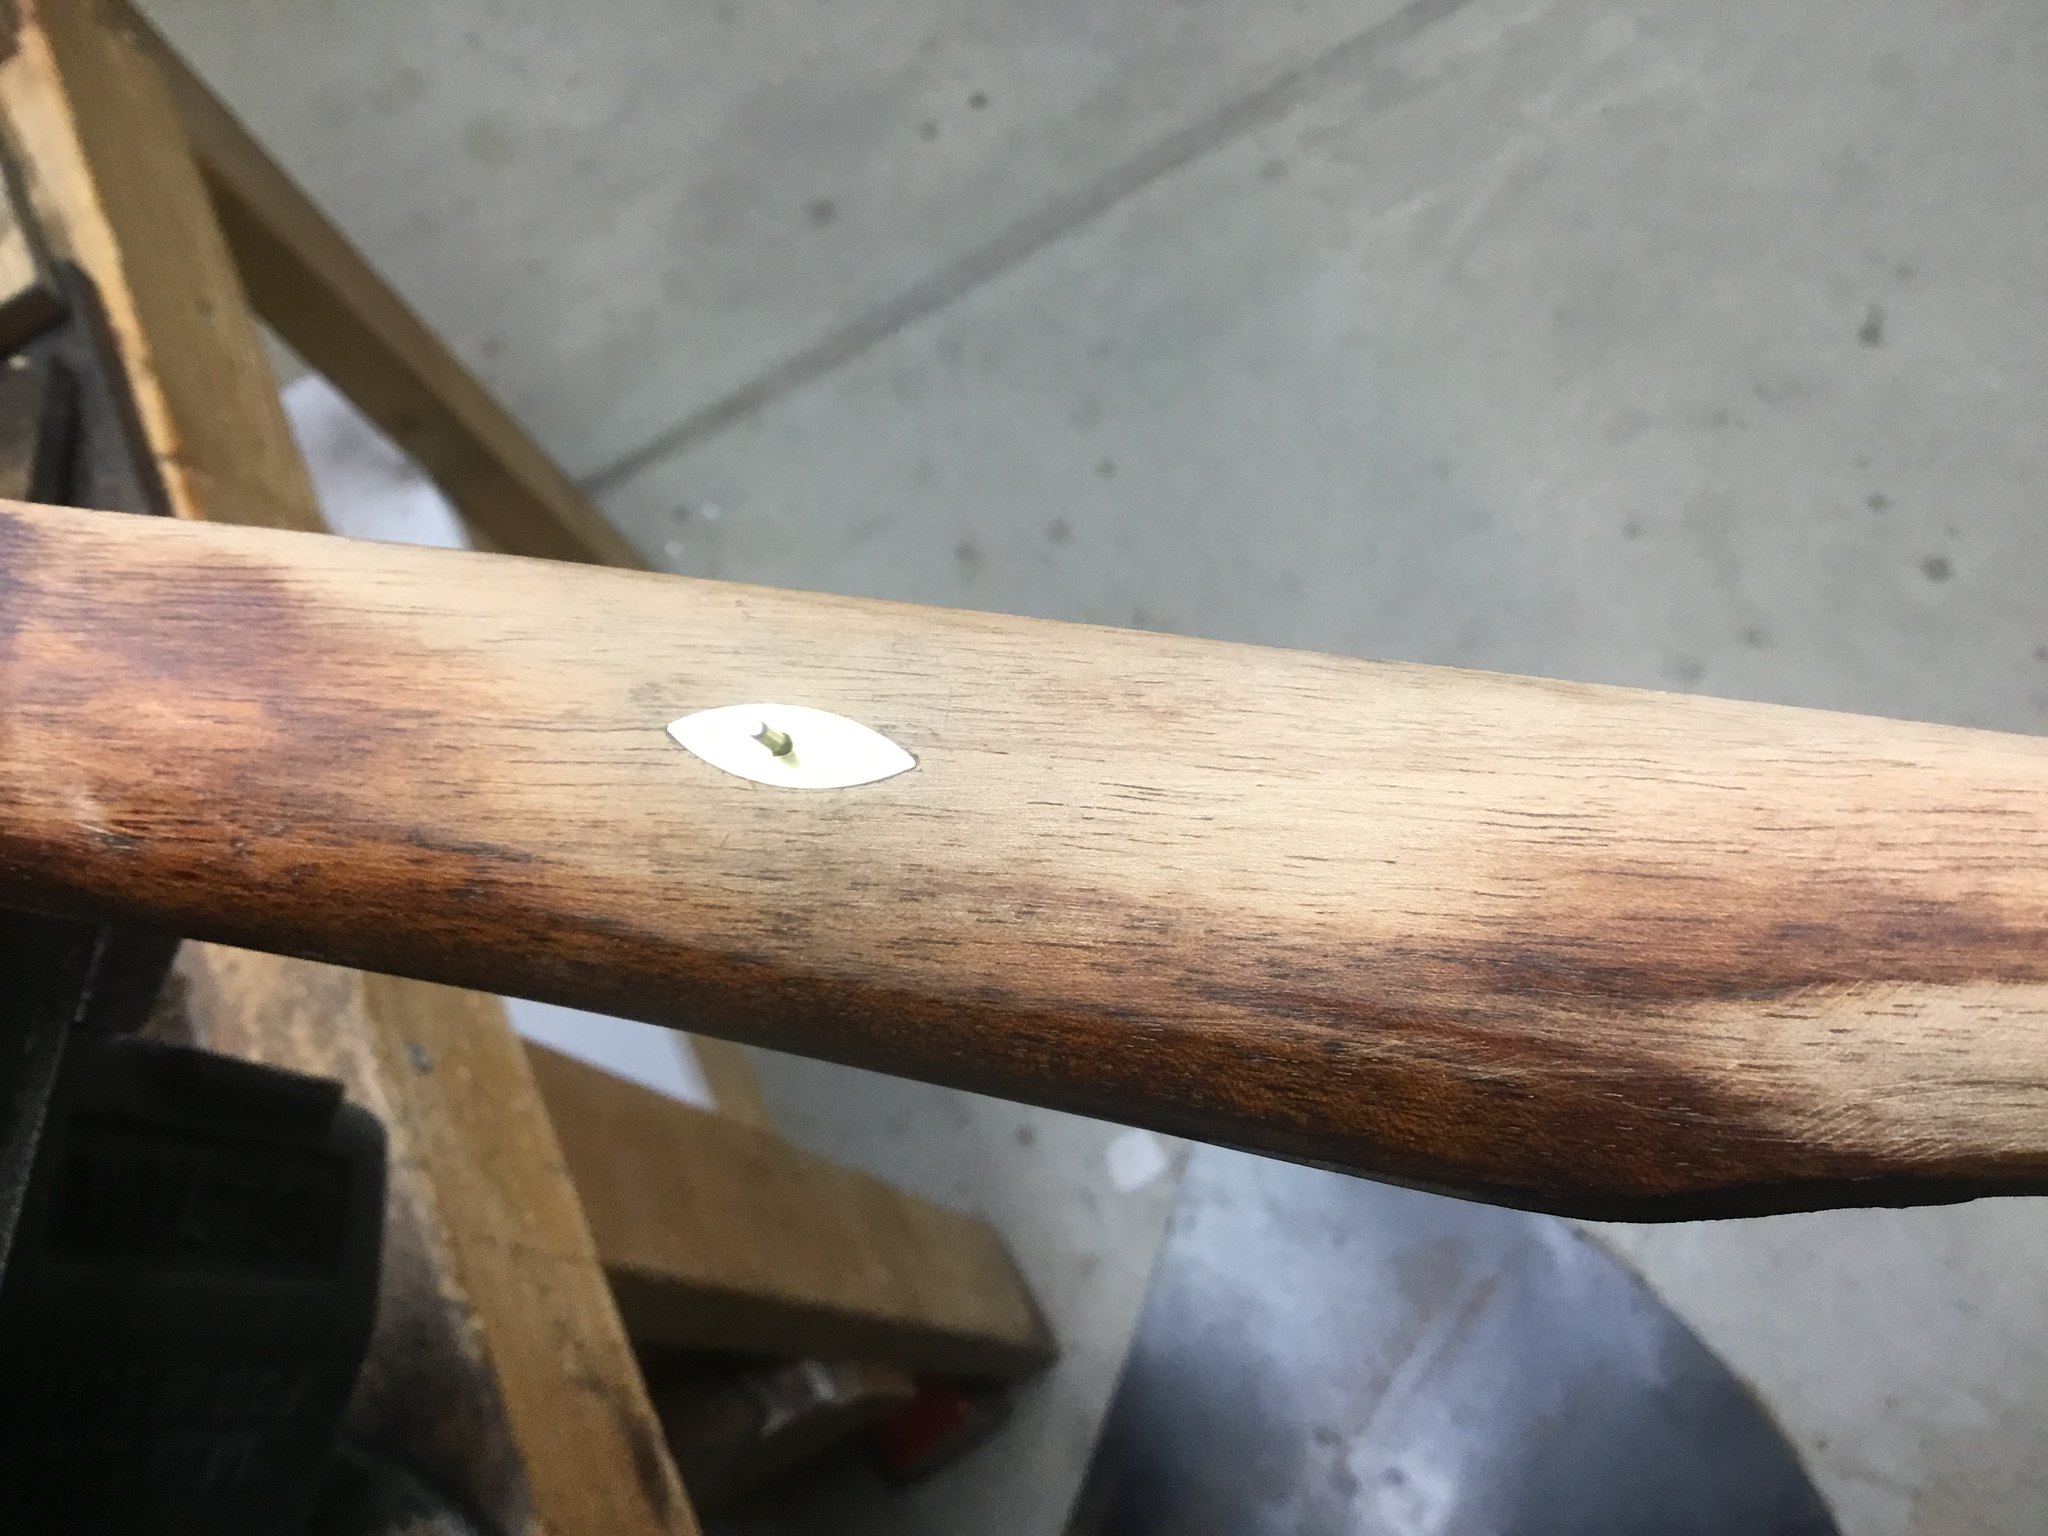
After re-inletting the thimble so it holds the ramrod close in the channel the extra wood has been removed from the forearm. Six small escutcheons will be added to the pin holes that hold the barrel down. The sides of them are first filed smooth then each is bent to match the curve of the stock. They will be pinned in to hold them no glue is needed. The first one went OK only five more to go!
 IMG_0491 by Oliver Sudden, on Flickr
 IMG_0491 by Oliver Sudden, on Flickr
hanshi
Cannon
That is a very handsome rifle and I like the simple lines and architecture. Finished photos when completed, please.
Phil Coffins
69 Cal.
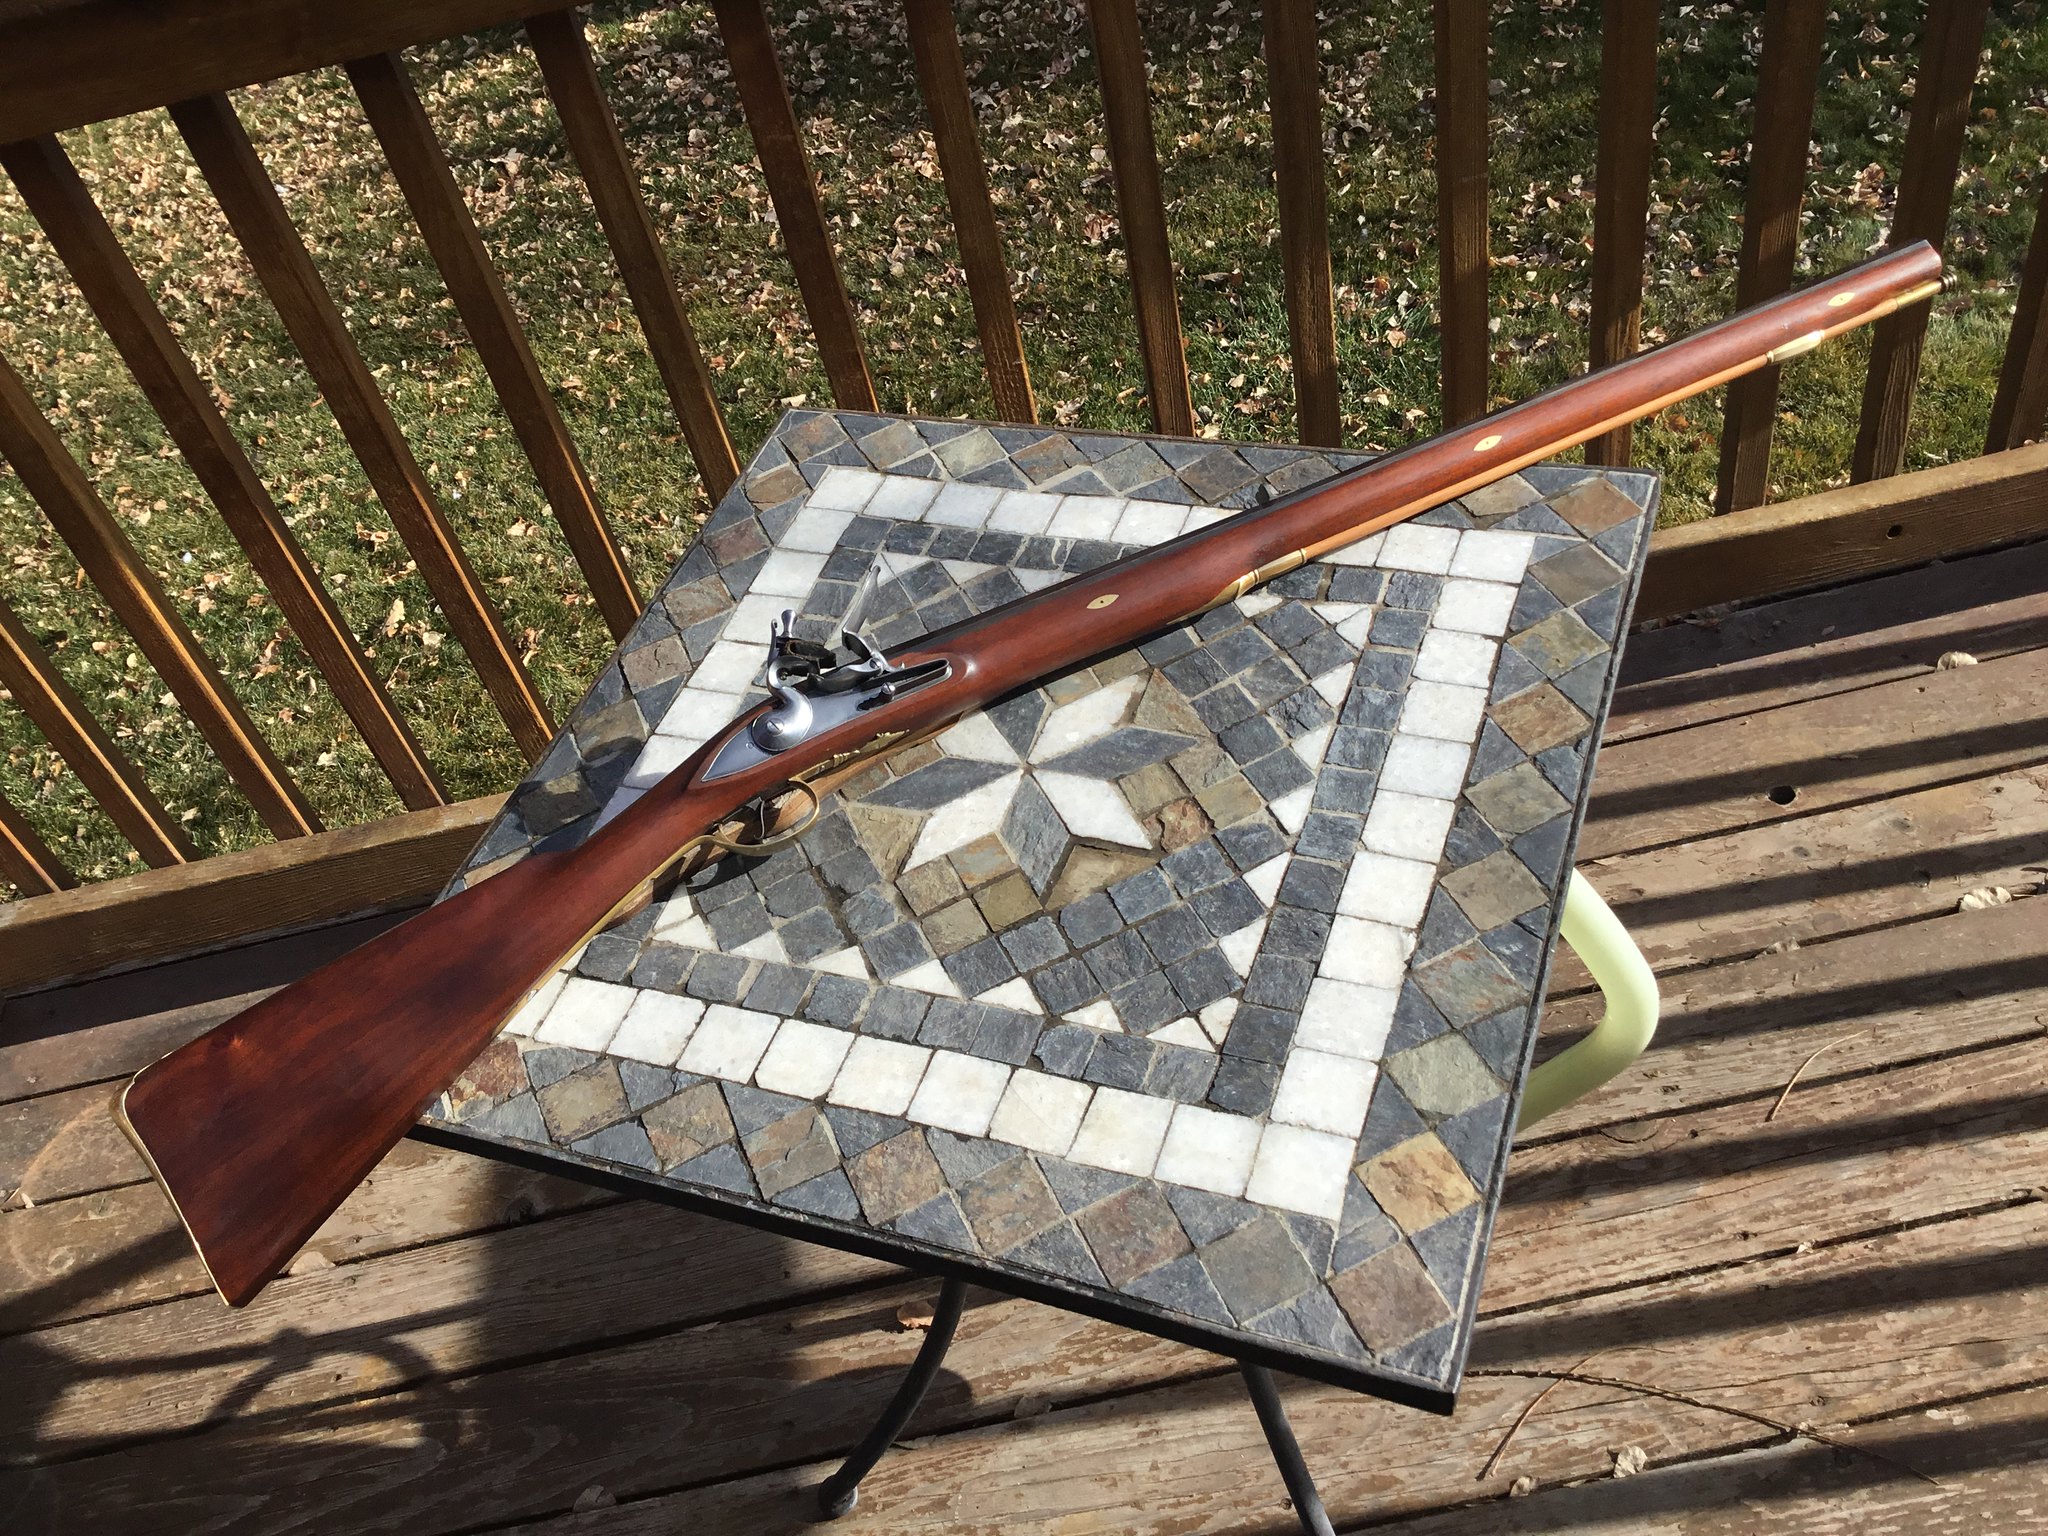
Almost finished, until I took the front sight out to replace the blade. Let’s not go into details but I and my wife spent hours searching the shop, I’ll make a new one that will be better and easier. The escutcheons helped and re-inletting the trigger guard. Trimming the forearm down and removing the filler/stain/ finish then a water based stain and oil finish shows off the wood a bit better.
 IMG_0503 by Oliver Sudden, on Flickr
 IMG_0503 by Oliver Sudden, on Flickr
MUCH better! Neat little rifle.
How do you keep such a clean workbench?
He must have had plenty of time to clean it off while saving up for a new toy to work on...
Great job, Jim. It looks beautiful!
Notchy Bob
Notchy Bob
Very nice Rifle. Its tempting me.
Dave
Dave
Phil Coffins
69 Cal.
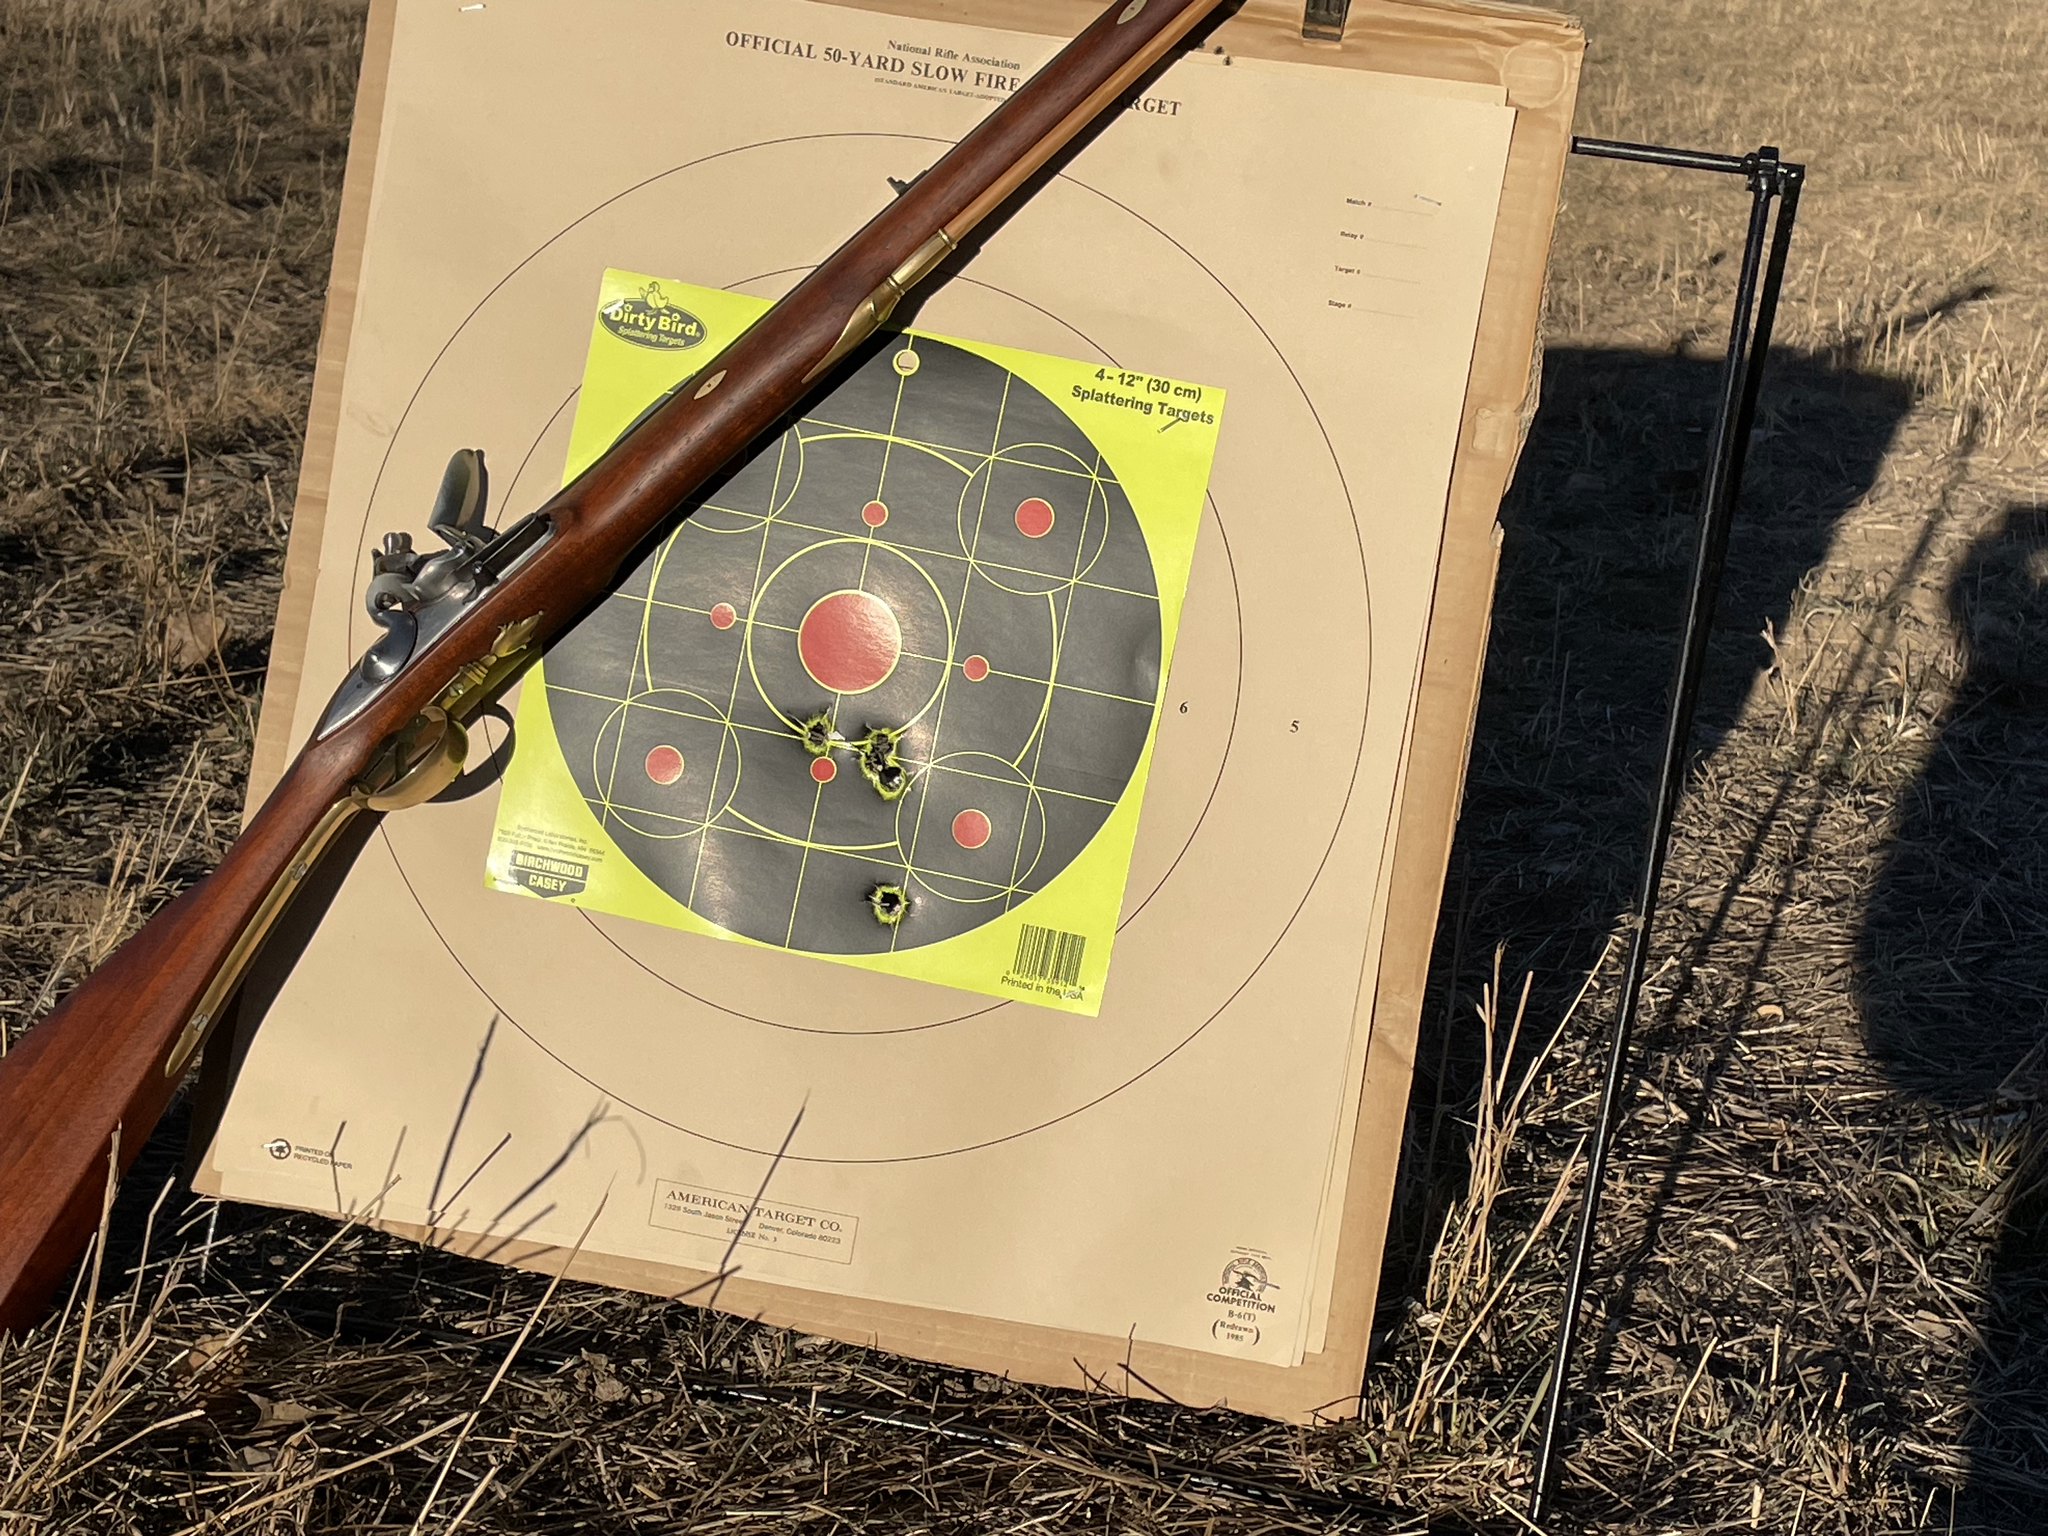
Did all I intend to on this rifle and shot it today. The front sight I made for it is brass base with a silver blade placed in my best guess for center. After five plinking shots with patches that came with the rifle I loaded with some patch that although slightly thicker were thinner than my usual. All but one of the ten were blown and burnt. Still the rifle worked perfectly and shows that fine groups could be made with little effort. Fifty seven grains of 2fg and a .530 ball target at fifty yards. Just leaning over he hood of the Jeep. I’ll take it to next weeks shooting match if weather is decent to see if I can find a buyer.
 IMG_0063 by Oliver Sudden, on Flickr
 IMG_0063 by Oliver Sudden, on Flickr
Nice going, Phill. Ya did good.It’s a bit late in the game to learn how to engrave to the quality that an English rifle would have gotten.
But the lock has been cleaned up and fresh lubricant applied. I also added small teeth to the jaws to hold the flint.
IMG_0490 by Oliver Sudden, on Flickr
- Joined
- Oct 19, 2021
- Messages
- 2,659
- Reaction score
- 4,934
- Location
- Far Away Downs Queensland Australia.
I always thought neatness was some sort of mental def
I’m not bright enough to work in a mess, I have to put things away to be able to find them again.
This one is fifty four and the forearm is a bit fat and the sights are to big for my taste. The swamped barrel makes for a nice handling rifle and lighter then it looks.
You and I both sir.
- Joined
- Oct 19, 2021
- Messages
- 2,659
- Reaction score
- 4,934
- Location
- Far Away Downs Queensland Australia.
I really like that style rifle.
Ditto, I've already made an equiry to Jim Chambers for a kit, although I'm a Leftie, right hand kits are acceptable as long as theres no off-side cheek piece included.
- Joined
- Oct 19, 2021
- Messages
- 2,659
- Reaction score
- 4,934
- Location
- Far Away Downs Queensland Australia.
This one only has two piercings. It would’ve been easier for him to Inlet it if he had cleaned up the edges of the casting before starting.
IMG_0486 by Oliver Sudden, on Flickr
Did the ornate side plate come pre-inletted as a kit ?
- Joined
- Oct 19, 2021
- Messages
- 2,659
- Reaction score
- 4,934
- Location
- Far Away Downs Queensland Australia.
The lock was installed with out any of the parting lines or casting surfaces being finished. Upon disassembly care was required to remove the rust that would impede a good finish. I’ll start by filing then stoning everything then decide what finish if any will be done. After that some parts will be re-inlet then the extra wood will come off.
IMG_0487 by Oliver Sudden, on Flickr
IMG_0488 by Oliver Sudden, on Flickr
An elegant flintlock, I'm totally addicted to Flintlocks as a practical mechanism blended into artistry, that Chambers lock melts me.
Phil Coffins
69 Cal.
There was no cheek piece on this one but anyone with a rasp can make that happen. The fancy side plate was already poorly done on this one so I think it wasn’t inlet from the factory.
- Joined
- Oct 19, 2021
- Messages
- 2,659
- Reaction score
- 4,934
- Location
- Far Away Downs Queensland Australia.
There was no cheek piece on this one but anyone with a rasp can make that happen. The fancy side plate was already poorly done on this one so I think it wasn’t inlet from the factory.
Thanks phil, Im surprised that the upper jaw of the cock didnt have "teeth", what did you use to do the job ?
Phil Coffins
69 Cal.
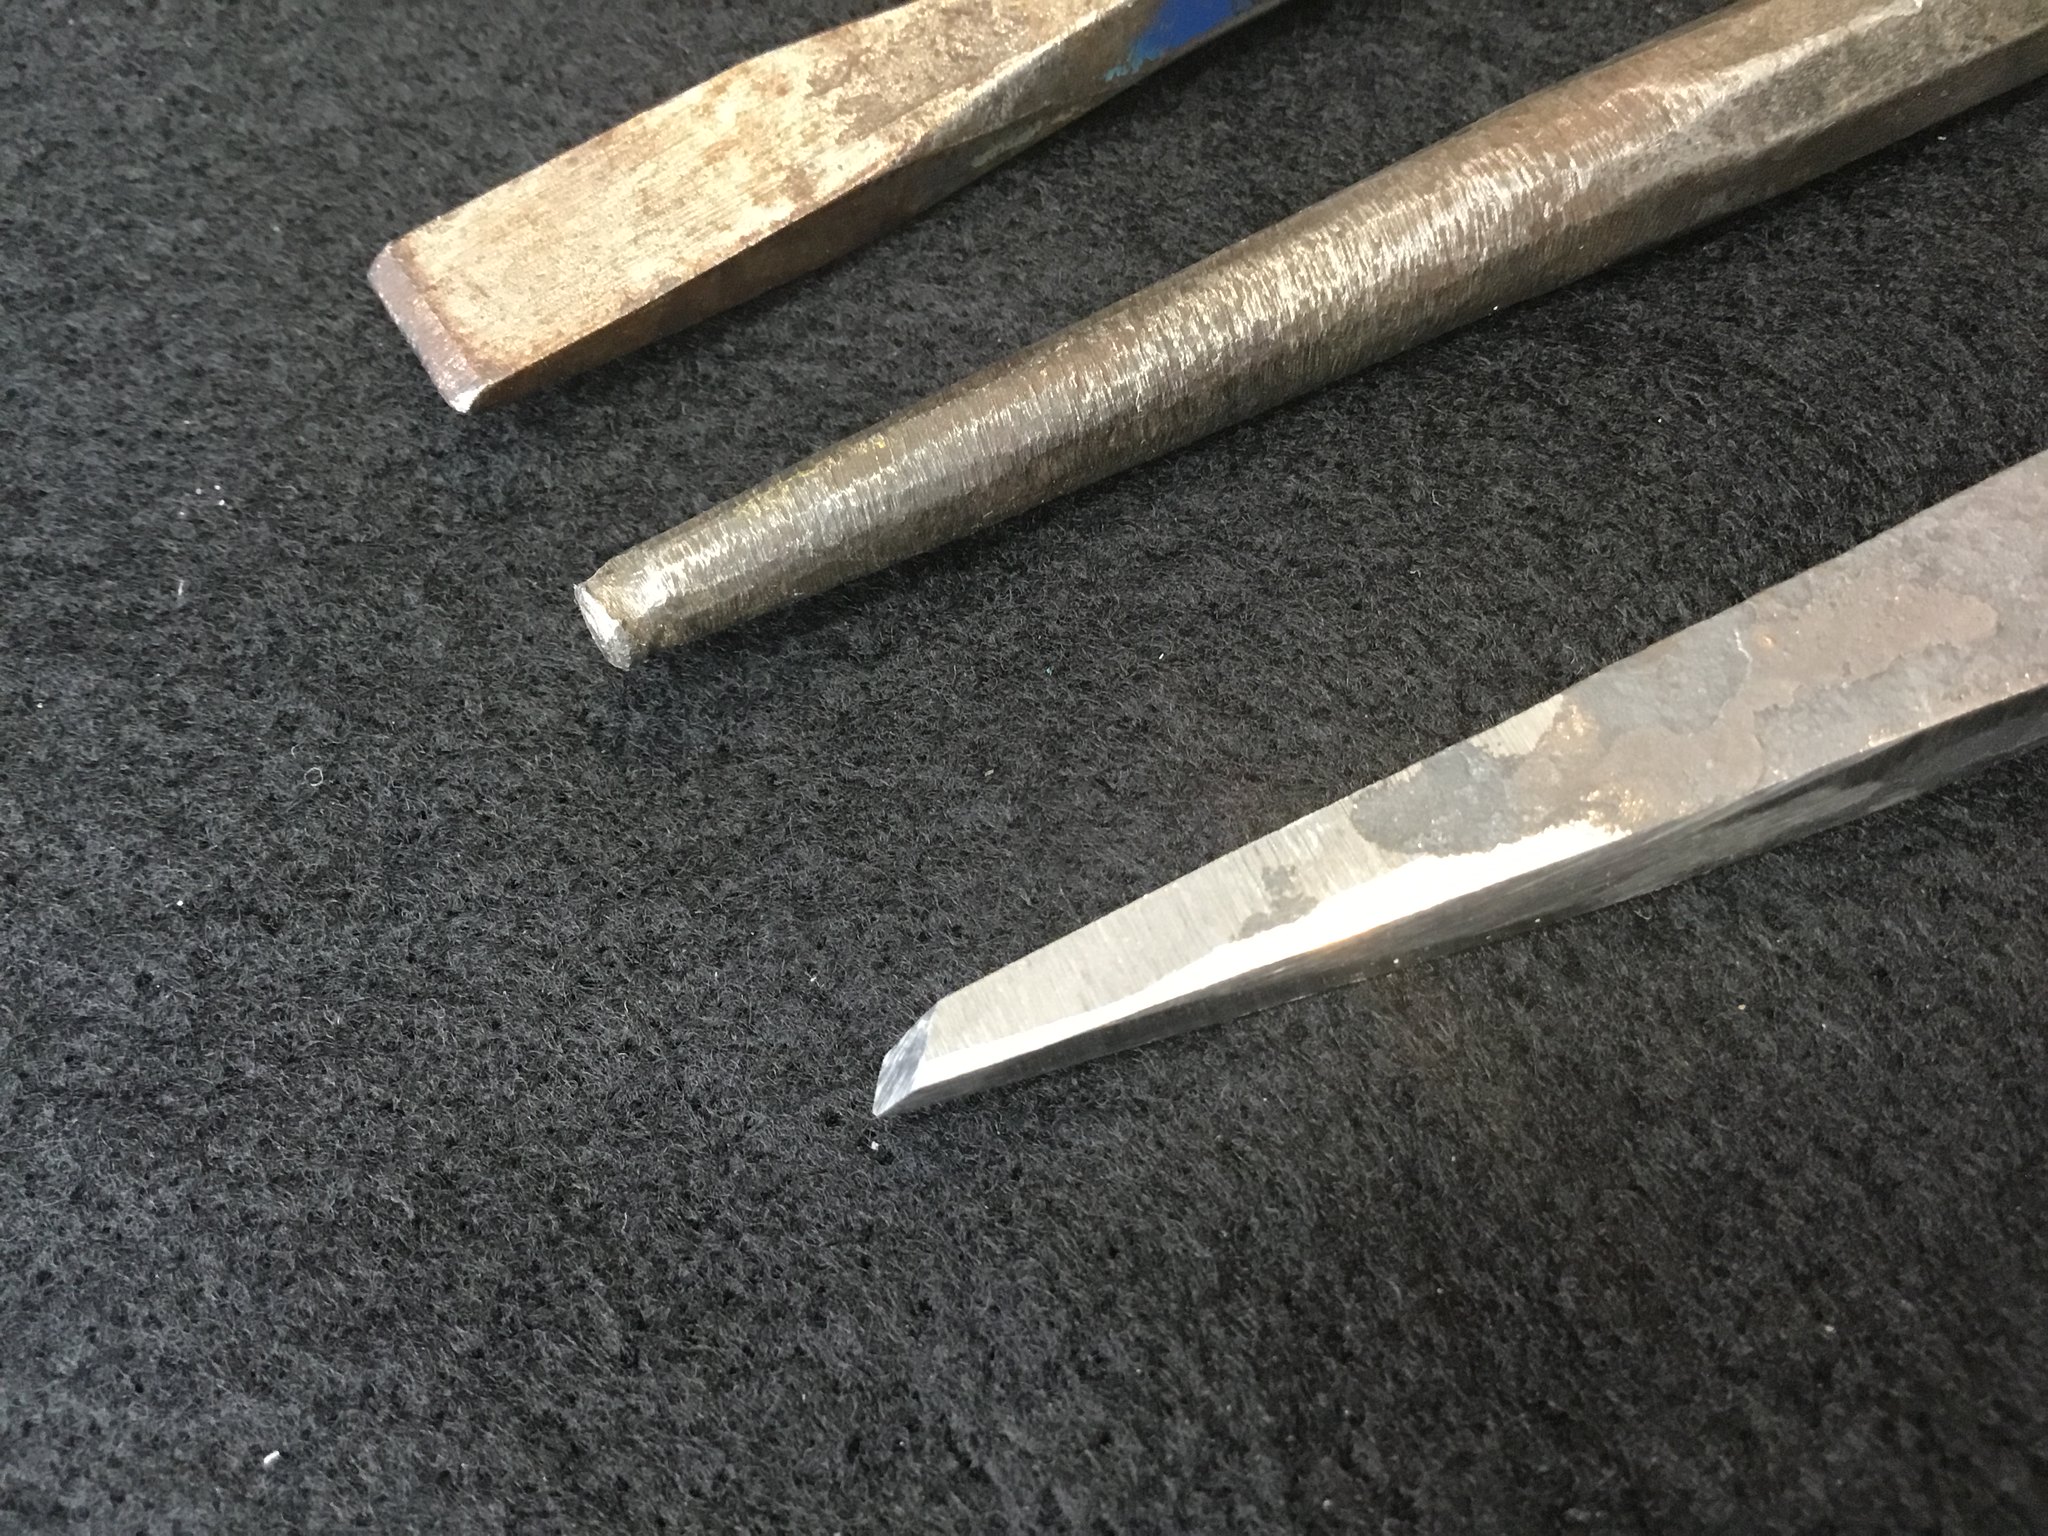
I used an old chisel to form a type of graving tool that can be used for simple engraving or making teeth on a cock as well as forming teeth on a homemade rasp.
 IMG_0454 by Oliver Sudden, on Flickr
 IMG_0454 by Oliver Sudden, on Flickr
- Joined
- Oct 19, 2021
- Messages
- 2,659
- Reaction score
- 4,934
- Location
- Far Away Downs Queensland Australia.
I used an old chisel to form a type of graving tool that can be used for simple engraving or making teeth on a cock as well as forming teeth on a homemade rasp.
IMG_0454 by Oliver Sudden, on Flickr
Thank you, I would have made an offer on that Chambers rifle if I'd known it was for sale at the time.
Similar threads
- Replies
- 3
- Views
- 740
- Locked
- Replies
- 5
- Views
- 705


