• Friends, our 2nd Amendment rights are always under attack and the NRA has been a constant for decades in helping fight that fight.

    We have partnered with the NRA to offer you a discount on membership and Muzzleloading Forum gets a small percentage too of each membership, so you are supporting both the NRA and us.

    Use this link to sign up please; https://membership.nra.org/recruiters/join/XR045103

Origin of the Banana patchbox

Muzzleloading Forum

Help Support Muzzleloading Forum:

This site may earn a commission from merchant affiliate links, including eBay, Amazon, and others.

bnail

54 Cal.
Joined
Nov 5, 2004
Messages
1,804
Reaction score
9
Does anyone know the origin of the banana patchbox stereotypical of the Tn Mt. Rifle? Is this design attributed to any particular maker?
 
I think I found the answer. I believe that Bean is connected with this design. :thumbsup:
 
der Forster said:
Which one? There weren't but 4,784 Tennessee Beans making rifles :haha: :haha:.

Ahh ... musta been a "Bean Counter" in a nother life! :rotf:

Davy
 
Micanopy said:
Got no idea, but I have one I wanta mount on my .45 CVA Kentucky.


I gots a steel one last week from TOTW & I am gonna modify it (probably shorten it) and put it on my 45 cal flinter Pedersoli Frontier "all iron" hybrid, no-count riflegun! :grin:

Davy
 
Davy, did you change out all the brass on your Frontier for iron? If so, which parts / mfr's did you use? I really want to do that to mine, but am not the most skilled of people. I need to minimize the fitting and finishing.

DC
 
echo89 said:
Davy, did you change out all the brass on your Frontier for iron? If so, which parts / mfr's did you use? I really want to do that to mine, but am not the most skilled of people. I need to minimize the fitting and finishing.

DC


Hello Echo

Yes I did replace the brass .. some I made from materials, some I bought stock from TOTW and modified and have some (Banana patch box) I am going to modify. I took some digital picts .. but they were too dark .. so if you are interested I wll post some others once I take them.

I am just a rank amateur here ... but I like to dabble with things and see how much trouble I can get into. Besides I can break it iffin I want to .. its mine! :grin:

Davy
 
Well ... heres the damage done .. a work still in need of major progress!

You will note the banana patchbox asis is much too large, it needs some work, and is just laid loose on the stock for your perusal, and also the trigger guard that I am still working on ...

I bought the trigger guard, buttplate and patchbox from TOTW ... and so far have modified all to meet my needs ... the rear site, toeplate, oval side plate, and thimbles I made myself from materials on hand.

I did do a small amount of line carving on the stock ... the stock had no line carving at all as it came, have to careful here as I wanted simple clean lines .. hope I did not mess it up too bad for a first time attempt ... any remarks good or bad would be welcome.
:hmm:

peda.jpg

pedb.jpg

pedc.jpg

pedd.jpg
 
Davy, how are you doing the inletting without stripping the stock first? I have been thinking of putting a sideplate, a toeplate, and some inlays on my flint lonrifle, but have absolutely no idea how to go about it. What tools did you use? Any info appreciated. Nice job by the way. Looking good.
 
Rebel said:
Davy, how are you doing the inletting without stripping the stock first? I have been thinking of putting a sideplate, a toeplate, and some inlays on my flint lonrifle, but have absolutely no idea how to go about it. What tools did you use? Any info appreciated. Nice job by the way. Looking good.

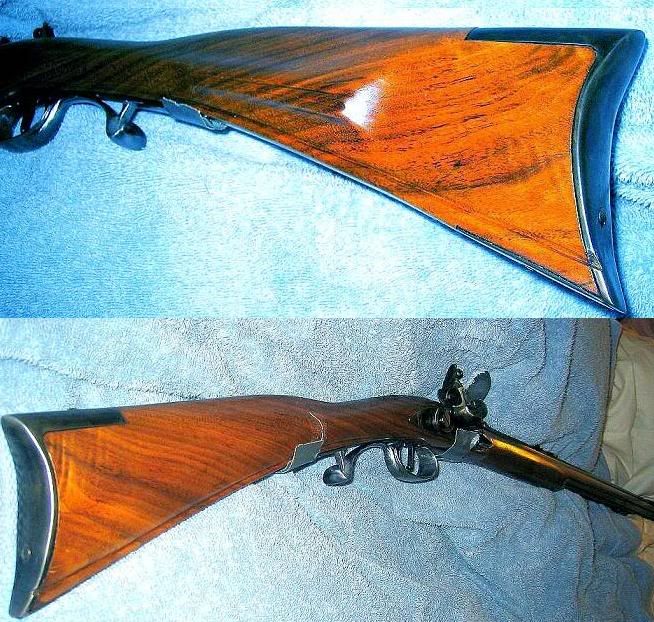
Well I did in fact strip the stock for the inletting, I just have a coat or two of Tru Oil on it currently to help protect the wood while I continue my journey, I wanted to take it out and shoot it, and so rather than put dirty paws on it and smudge it up I put a coat of Tru Oil on it.

I used a commercial stripper on it and sanded where needed ... I am not a sophisticated guy nad so simple is better for me ... it needed to be sanded and fitted for the buttplate anyway .. so it was an ongoing process.

I still want to do some more inlay and so no doubt will strip it again to inlet it properly.

pedlinea.jpg


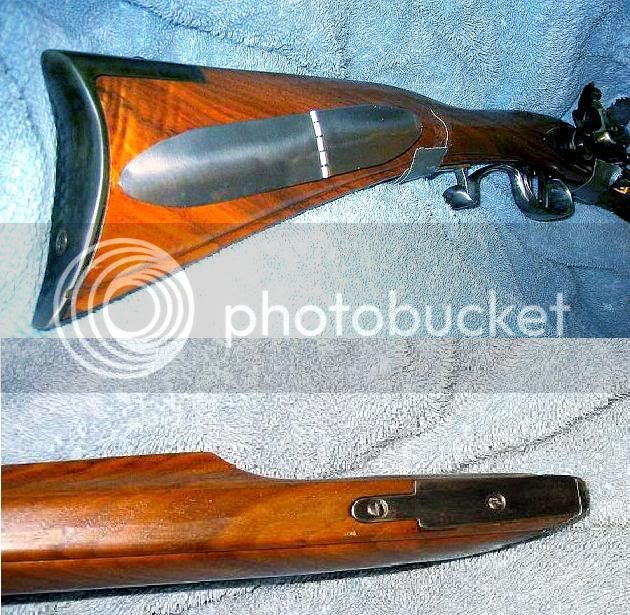
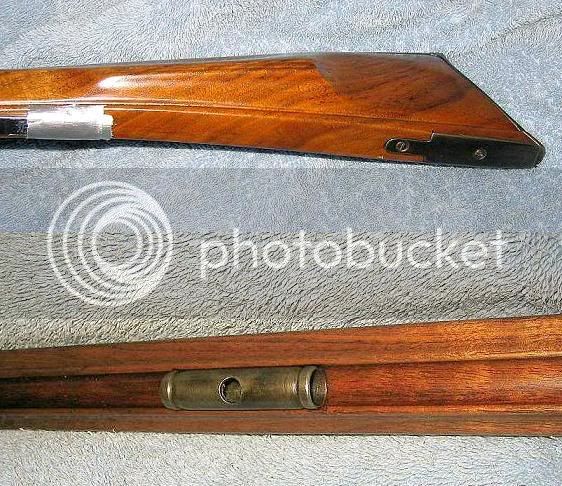
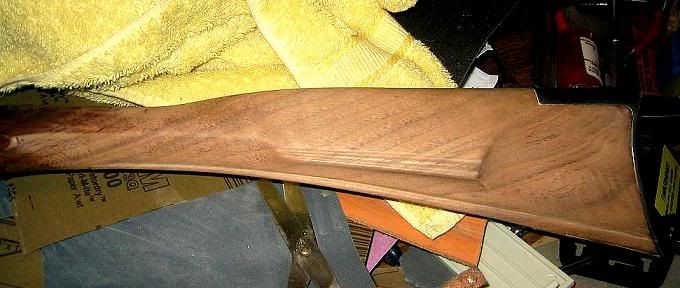
To inlet the stock lines ...

1) I first lined it out with a pencil and a straightedge .. you will note that my line follows the bottom line of the stock .. but flared as well, slightly as it reached the near end. That was strickly by eyeball and proportion.

2) I next used a sharp exact knife to scribe the line until it was deep enuff to proceed with the next tool.

3) Next using a fexible backsaw that is of the Japan design I deepened the line using the tip of the saw blade as a very thin gouge til it was of sufficient depth.

4) After that I used a small chisel to relieve the line from the side and above .. removing the wood a small amt at a time.

5) Once satisfied with the "shadow line" I had gotten, I then actually sanded it smooth after using a scraper to smooth it up, and clean up the lines.

I used somewhat the same process for the relief lines on the cheek piece.

I still want to inlet a half moon into the cheek piece, and also inlet the side plate, which currently is only bolted on.

I am sure I will heed the great advice here to do this by beveling the sideplate,and scribing and then slowly deepening the cut til I am satisfied with the depth.

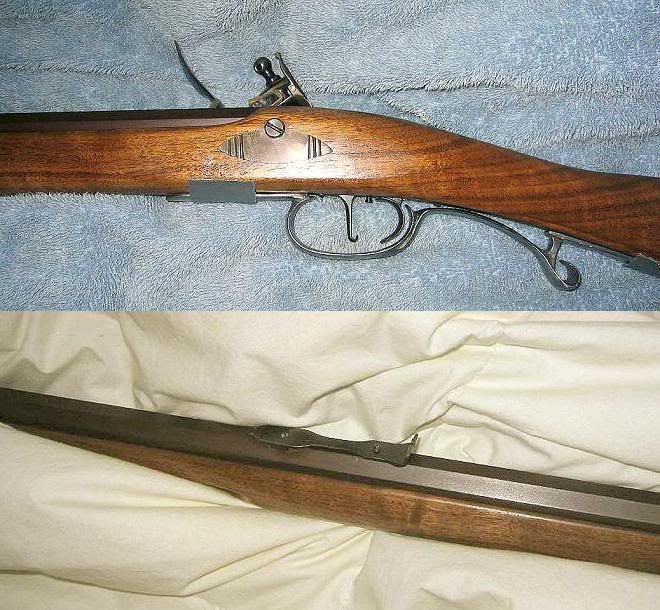
I also need to make decisions regarding the patch box ... I am currently thinking on shortening it, and thinning it slightly to be more in line with the narrow buttstock of this rifle.

I also need to drill and tap the Trigger guard and attach it properly.

Hope this info helps someone out there, I just took my time and worked thru it, not getting in a hurry.

A note on the toeplate ...

I simply outlined the toe plate on the stock, making sure the toeplate length was longer than the inlet .. (for goof factor) and scribed it in with an exacto knife after slightly beveling the plate.

Then used a chisel I had ground down to a 1/8 inch width, I SLOWLY made my cuts until it was seated to the proper depth, and used a sharp 1/4 chisel to flatten the base of the inlet.

Next I cut the excess off the end of the toeplate to match and mate up to the buttplate.

Davy
 
Rebel said:
Thanks a lot for the info Davy. You are doing a good job. I hope if i decide to go ahead with mine it turns out as well.

Thanx Reb ... I apprciate it! There are certainly mistakes made here and there, but I tried to minimize as much as possible, knowing my own severe physical limitations and mental weaknesses! :redface: I hope mymeager efforts have helped someone out there! :grin:

Davy
 
Rebel said:
Hey Davy, we might be related, i have them same mental and physical limitations. :grin:


At the very least probably neighbors .. onlyiest live 2000 mile apart! :grin:

Davy
 
Back
Top