• Friends, our 2nd Amendment rights are always under attack and the NRA has been a constant for decades in helping fight that fight.

    We have partnered with the NRA to offer you a discount on membership and Muzzleloading Forum gets a small percentage too of each membership, so you are supporting both the NRA and us.

    Use this link to sign up please; https://membership.nra.org/recruiters/join/XR045103

Pietta 1860 smashing caps and jamming

Muzzleloading Forum

Help Support Muzzleloading Forum:

This site may earn a commission from merchant affiliate links, including eBay, Amazon, and others.

Skogarmann

32 Cal.
Joined
Jan 27, 2014
Messages
8
Reaction score
0
Hello, I recently bought a new Pietta 1860 (my first cap and ball revolver). I took it out today and shot it to see how it went. I noticed two main issues with it:

1) It was smashing caps pretty badly. I've heard others having problems with caps falling off and getting into the workings, but these were generally smashed hard in place on the nipples. It usually wasn't an issue and they'd often fall off and away when I cocked the hammer. But some of them were so badly smashed up and stuck on, that their jagged, protruding edges would prevent the cylinder from turning.
Is this normal and can I fix it so that it doesn't happen? I'm using Remington No.10 caps. I'm glad that I'm not having other issues, like caps falling off; but if I could fix this issue it would be very nice.

2) The cylinder or some mechanism seems to get gummed up or something like that. After just 4 shots trough it (using Triple 7 powder because it was all that Cabelas had in stock when I bought the revolver), the cylinder would not properly turn. To finish the final 2 shots, I had to pull the hammer back as much as I could and jiggle the cylinder so that it turned. This didn't required much force and when the cylinder turned, the hammer would cock fully back and be ready to fire.
For some reason the mechanism that turns the cylinder seemed unable to turn it. I tried pulling the hammer back hard and sometimes it worked, but other times nothing happened. I'm not sure what exactly causes this and how I can fix it.
I kept firing, a total of 18 shots (didn't have much time and those 18 took me an hour and a half somehow!) and kept having these same problems. Before reloading the cylinder, I took the barrel and cylinder off and wiped the base pin and face, as well as the...um...clicky thing (I think it's the bolt according to Taylors Firearms?) on the bottom of the frame (on the top face, below the base pin).
This seemed to allow the cylinder to turn properly when I pulled the hammer back, but it still felt kind of grainy and reluctant. After the first shot or 2, it would go back to needing me to turn the cylinder with one hand while pulling the hammer back with the other.

Is this normal? How can I fix it or prevent it from happening so much? I've had a friend tell me "it's just how they are", but I'm sure that these revolvers must be able to run much more smoothly and it's just operators error.


Also, what should I put on the base pin after cleaning it? Right now I've just put some generic gun oil on it, but it seems like it needs some kind of grease. Is there anything in particular I should use or is gun oil fine?

Any answers or general tips/advice would be very much appreciated. Thanks!
 
I have found the cap problem on every cap and ball revolver I shoot. New Army, Old Army even my LeMat. The caps are literally crushed and often fall into the cocking mechanism. I've had to stop shooting because my Old Army wouldn't hold cock due to a spent cap jammed in the mechanism. And yes, I've had the entire cylinder not rotate due to a jammed cap.

I have tried Remington, CCI and the German caps. They all do it. The #11 caps won't stay on the nipples of most revolvers. Goex or Pyrodex made no difference to me on cap performance. There's some trick about flicking the gun to the side as you cock to dislodge the spent cap but I've never mastered it. Now as I cock the revolver for the next shot, I carefully remove the old cap.

All cap and ball replica's are bad about fouling the cylinder pin until the point the cylinder barely rotates. I have tried a number of lubricants without success. Most just fouled the pin faster. Now I remove the cylinder after every 6 shots and clean the pin.

Makes ya wonder how those guys did it in the heat of battle back in the day?
 
Are you greasing the balls in the cylinder throats after loading.
I can shoot mine all night long at our indoor shooting matches without having to clean them.
ROA, 58 Rem, and 60 Pietta Colt copy.
Mine are light loads for target work and the cream of wheat filler tends to scour out the bore.
I have found more fouling with heavy loads gums things up quicker but the grease should still keep them operating.
Little bit of wiping off regularly but the grease should keep them going for as long as you want to shoot if your getting it right.
I usually use Crisco but bore butter will work as well.
Get some good after market nipples and a lot of your cap issues will go away.
I still get them stuck from time to time but if all is right they will shoot a lot more reliably then your describing.
It also is helpful if you remove the cylinders and load them out of the gun as you can wipe them off each time. Mike D.
 
I saw a modification on a 1860 to keep the caps from falling off. He installed a post right behind the cap and cut a groove in the hammer. It still had enough impact to fire the cap and kept it out of the mechanism. Not positive but I think it was on Cast Boolits.
 
Caps jamming up the works is just part of the fun. Another reason the technology quickly went from percussion muzzleloading to brass cartridges. The cylinder getting sticky has to do with lubrication. The pin the cylinder rotates on should be lubricated prior to shooting. A grease that doesn't instantly melt away is best. I have heard of using water pump grease. It helps to seal the cylinder on the pin so fouling doesn't get in there. I use crisco for my over ball lube and put that on the pin also ('58 remmy) I will get maybe 4 cylinders shot. Crisco is one of those lubes that melts away quickly. It is uncommon for me to shoot more than 2 or 3 cylinders so that works for me.
 
1) Colt's are notorious for that, the trick is learning a hand movement with the revolver when cocking. There's kind of an upward flip of the hand and wrist while cocking the hammer that helps clear the spent cap, it is a large movement bringing the revolver's barrel up to 45 degrees or better.
Part of what's going on is #2 also.

2) You need to use a lot of grease/lubricant on that arbor/cylinder pin.

Hang around for awhile, I'm not a revolver pro and others will share.
Do some reading of the back pages to pick up ton's of tip's, :wink:
 
Thanks very much for all of the responses!

I haven't been putting any grease on the balls nor using any wads. I was told by a friend that the reason for using them was to prevent chainfires, but if you use a ball big enough that it shaves lead (I'm using .454s and they shave a neat ring), then it will be fine.
I didn't realise that the grease and wads helped to prevent fouling - I'll definitely use some now. Is there any reason to use both grease over the ball and wads underneath? Or do they do the same job?

I was shooting the revolver as it came from the box, so whatever grease they put on the cylinder pin is what was being used. When I took it apart prior to shooting, I can't say that it looked like there was a lot of grease on there, so that might be the issue.

It was just strange to me because it took me so little effort to manually twist the cylinder while pulling the hammer back with the other hand - but for some reason it was difficult, sometimes impossible, to do turn the cylinder solely by pulling back the hammer. That's why I thought maybe I'd got something in the workings gummed up. But maybe it was just fouling on the cylinder pin?

I'll look into getting some aftermarket nipples. I've seen people recommend Slix Shot. Would they help fix the cap shattering problem?

I have to admit, I'd be quite ok with just the caps being an issue - it's the strange binding/gumming up of the cylinder that started to frustrate me. When the caps stopped it moving, it was very obvious (I could see the cap grabbing the wall behind the cylinder and jamming it) and easily fixed, but when the cylinder would not rotate for some other reason, it was starting to confuse me. I just assumed that I'd be able to get at least a whole cylinder shot without having to wipe it all down or manually rotate the cylinder.

I'll try some of the things mentioned here and see how it goes. I really love this revolver - even though it's slower to use, it's a great feeling to load the whole thing up and take your time with it. I'm in no rush and I'm not looking to make it more reliable than a modern revolver (though hopefully I can start getting a few cylinders shot before wiping/cleaning, like some of you can). I can't wait to try it with some real black powder too, although I'm a little worried that it will jam up the cylinder even more than the Triple 7. Anyway, it's fun to experiment with it.

Thanks again for all of your advice and help - I really appreciate it :)
 
I'm not able to edit my post (left it too long), but I just wanted to ask how people that use paper cartridges get reliability out of their revolver? Paper cartridges don't generally have wads or grease (I think?), so is there something that the paper cartridge users do to ensure their revolver can fire a few cylinders without gumming up or binding? Or do they have to wipe the cylinder pin after every cylinder?
 
It sounds to me like the hand/pawl angle cut on the cylinder star is not quite cut correctly or the nose of the hand is buggered. The nose should be defined but not sharp. Any sharpness needs to be honed off.
I bought a model 62 Sheriffs model that would not turn the cylinder reliably on one chamber.
I had to use a Barret file to work two of them down so the hand would do it's work when clean let alone fouled.
The more I shoot the gun the smoother it gets.
You will need someone experienced in filing a star/ratchet or you will ruin the cylinder rather quickly. Mike D.
 
In terms of lubrication when firing paper cartridges, bullets can be dipped in melted lube, or a lubricated wad can be included inside the cartridge as long as it's not going to contaminate the powder by oozing oil. I prefer either method to topping off the chambers with grease.
 
I agree with M.D.'s suggestion to replace all the nipples, which is the first thing I do with a new Italian repro revolver. The original nipples are cheap and often for #10 caps, not #11 caps that are much more readily available in the U.S. Also, they are often over-tightened and may be difficult to remove - particularly true of the Uberti's I've bought.
 
The advice to replace the nipples is sound. Neither Pietta or Uberti seem to have uniform quality nipples installed in any of their guns. I have accumulated enough factory nipples, that I can separate them out into dmiensionally alike measured groups and make them function satisfactorily.

A better approach is to simple get a set of Treso/Ampco nipples. They are precision made, take #11 caps, and are more durable than the factory steel caps.

For target shooting in all my Colt, Remington and Ruger .44's, I use 23 gr. 3F BP or same volume of Pyrodex. Accuracy is impressive.

I'm not impressed with 777 for revolver use. It works better in rifle-length barrels.

I use either Froglube, or just plain tallow + beeswax ball lube on the cylinder arbor. I also have benchtop loaders, and removing the cylinder allows accumulated crud to be wiped off as needed.

Many folks use greased felt wads between ball and powder to better and more uniformly compress light loads. While they work fine, I prefer to use lightly greased paper wads instead. a roll of toiletpaper will last for many weeks of shooting: simply fold a square into quarters, place a tiny dab of ball lube in the center and fold the corners up and around it. lightly seat it with the ball ram, then seat a ball atop and you're ready to go.

I wonder if the 777 loads you're using are hot enough to cause blow-back of pressure thru the nipples, aggravating the crushed cap problem. Try a lighter load, and get either real BP or even Pyrodex P at your first opportunity. If that doesn't work, then consider the Ampco nipples. Jedediah-Starr has the best inventory on hand at the best price I've found yet.

Get your gun functioning smoothly and accurately first, before wasting time trying to get paper cartridges to work.
 
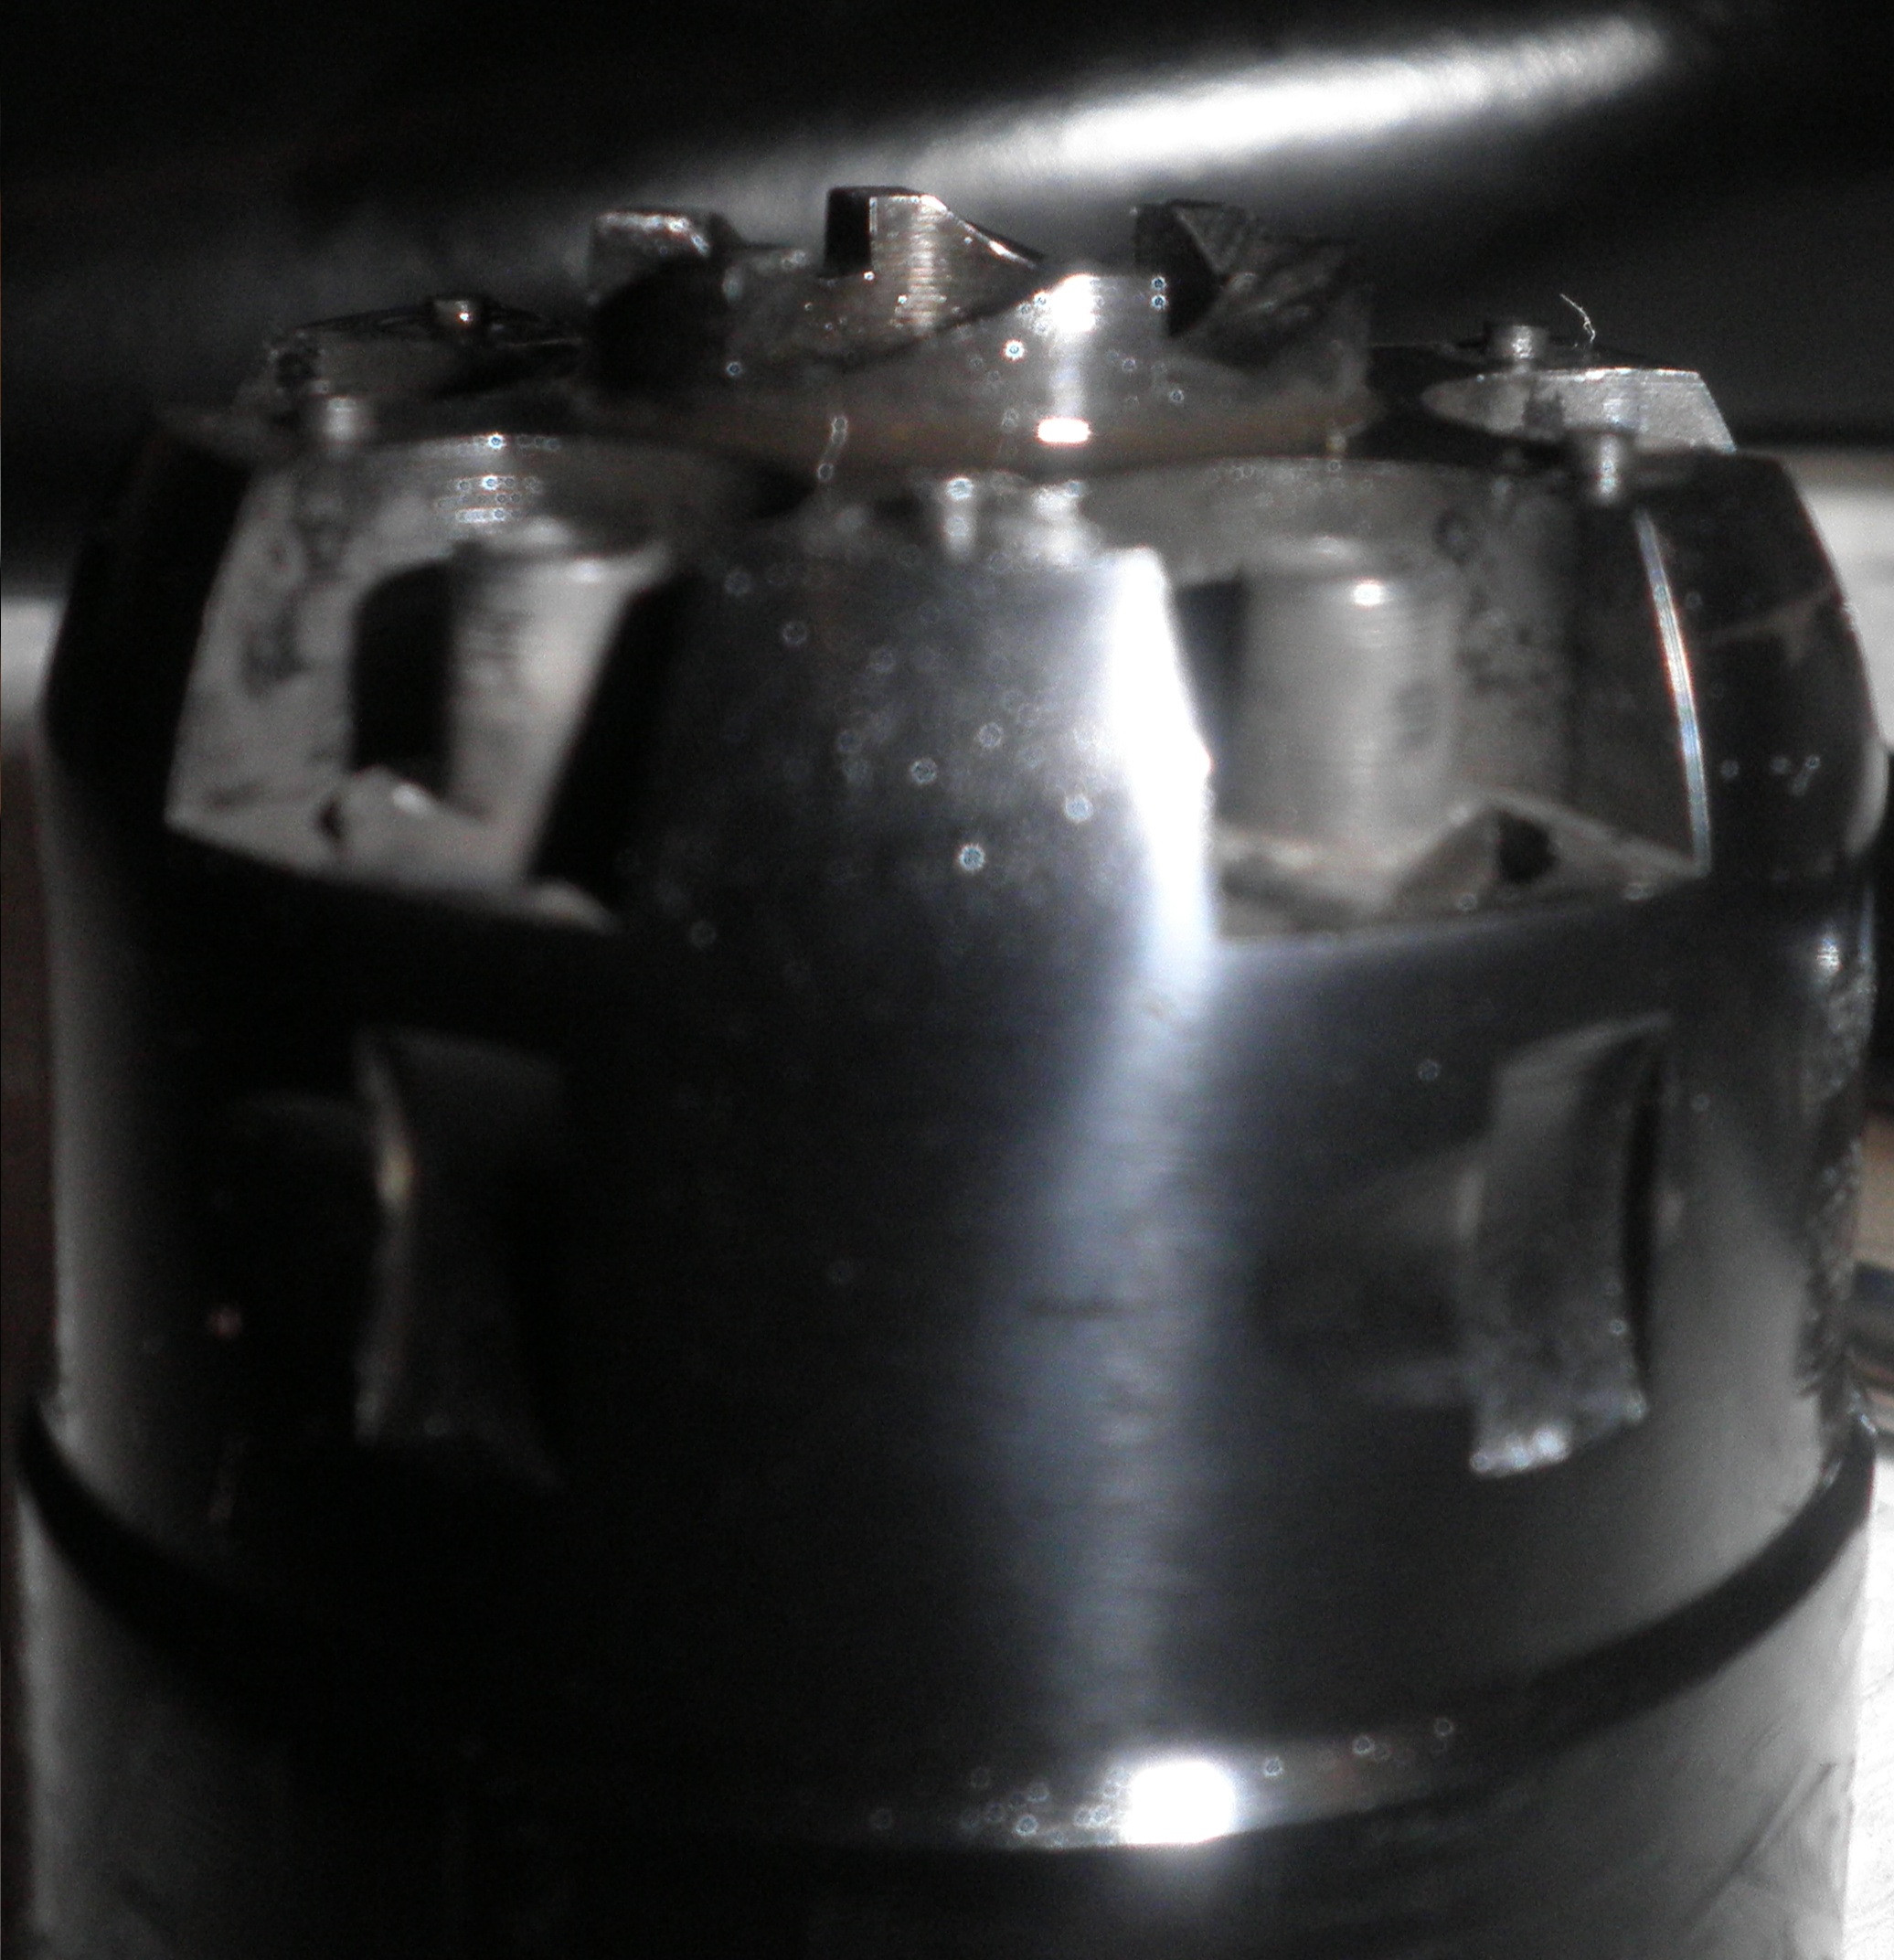
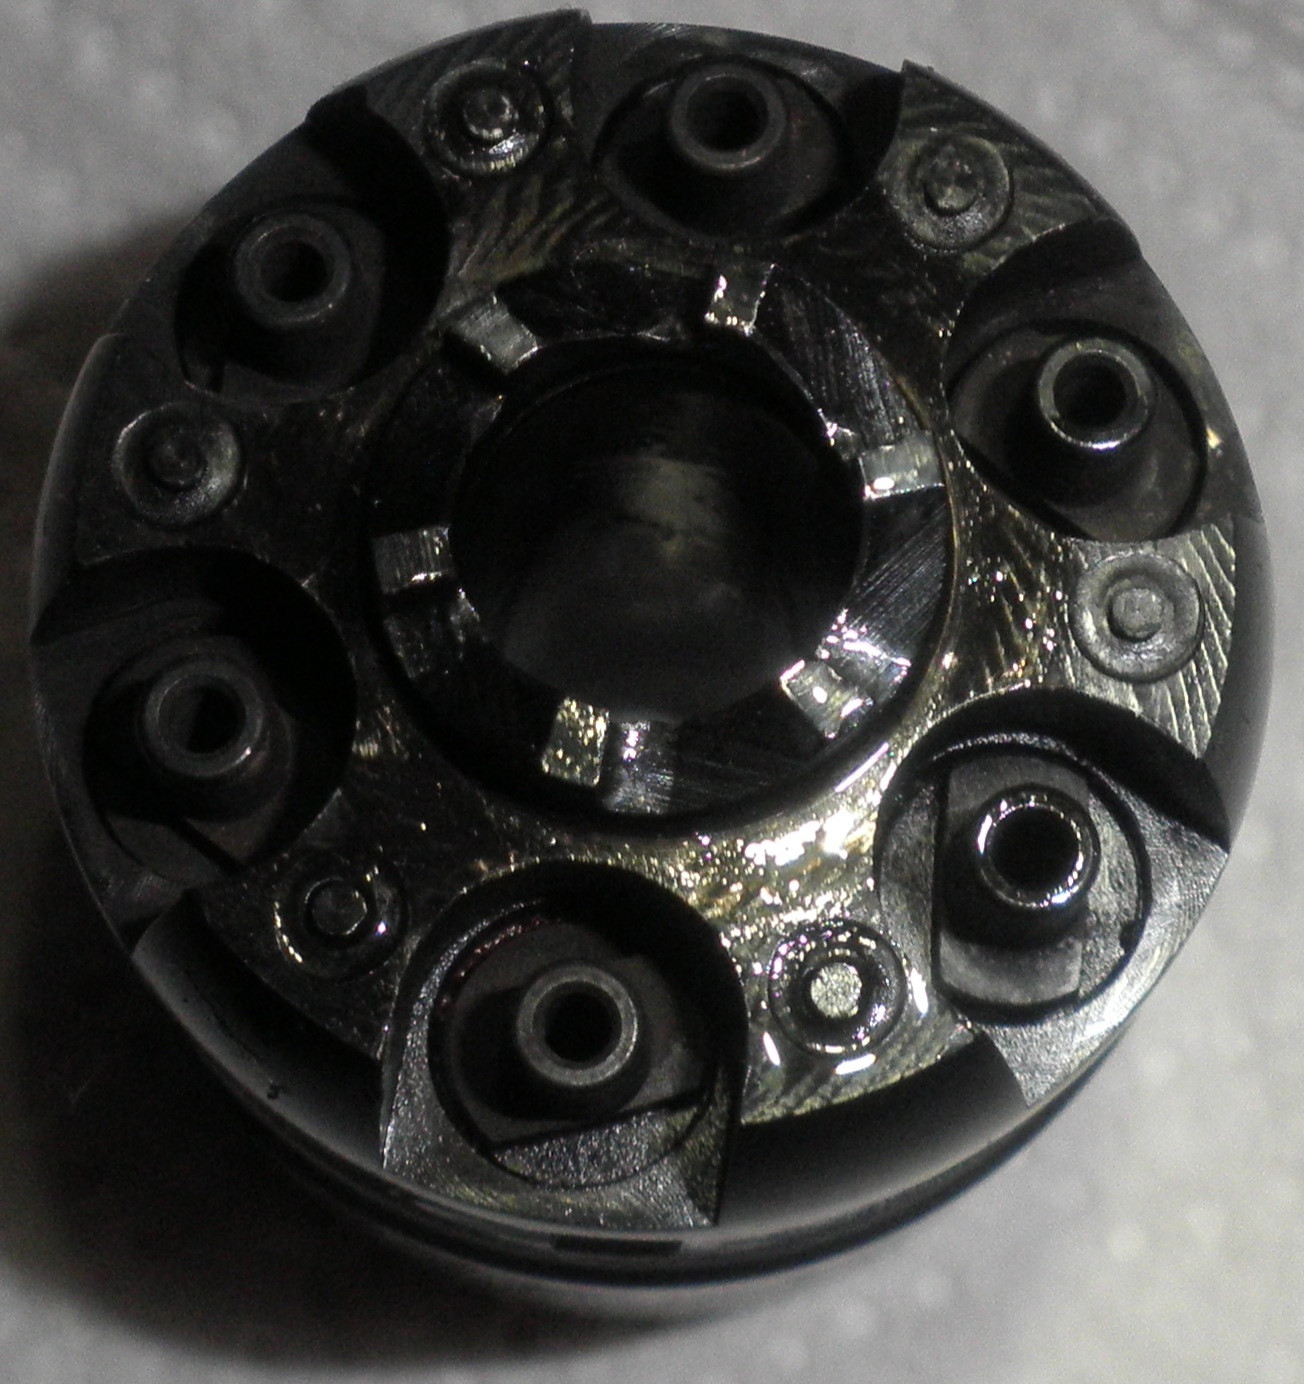
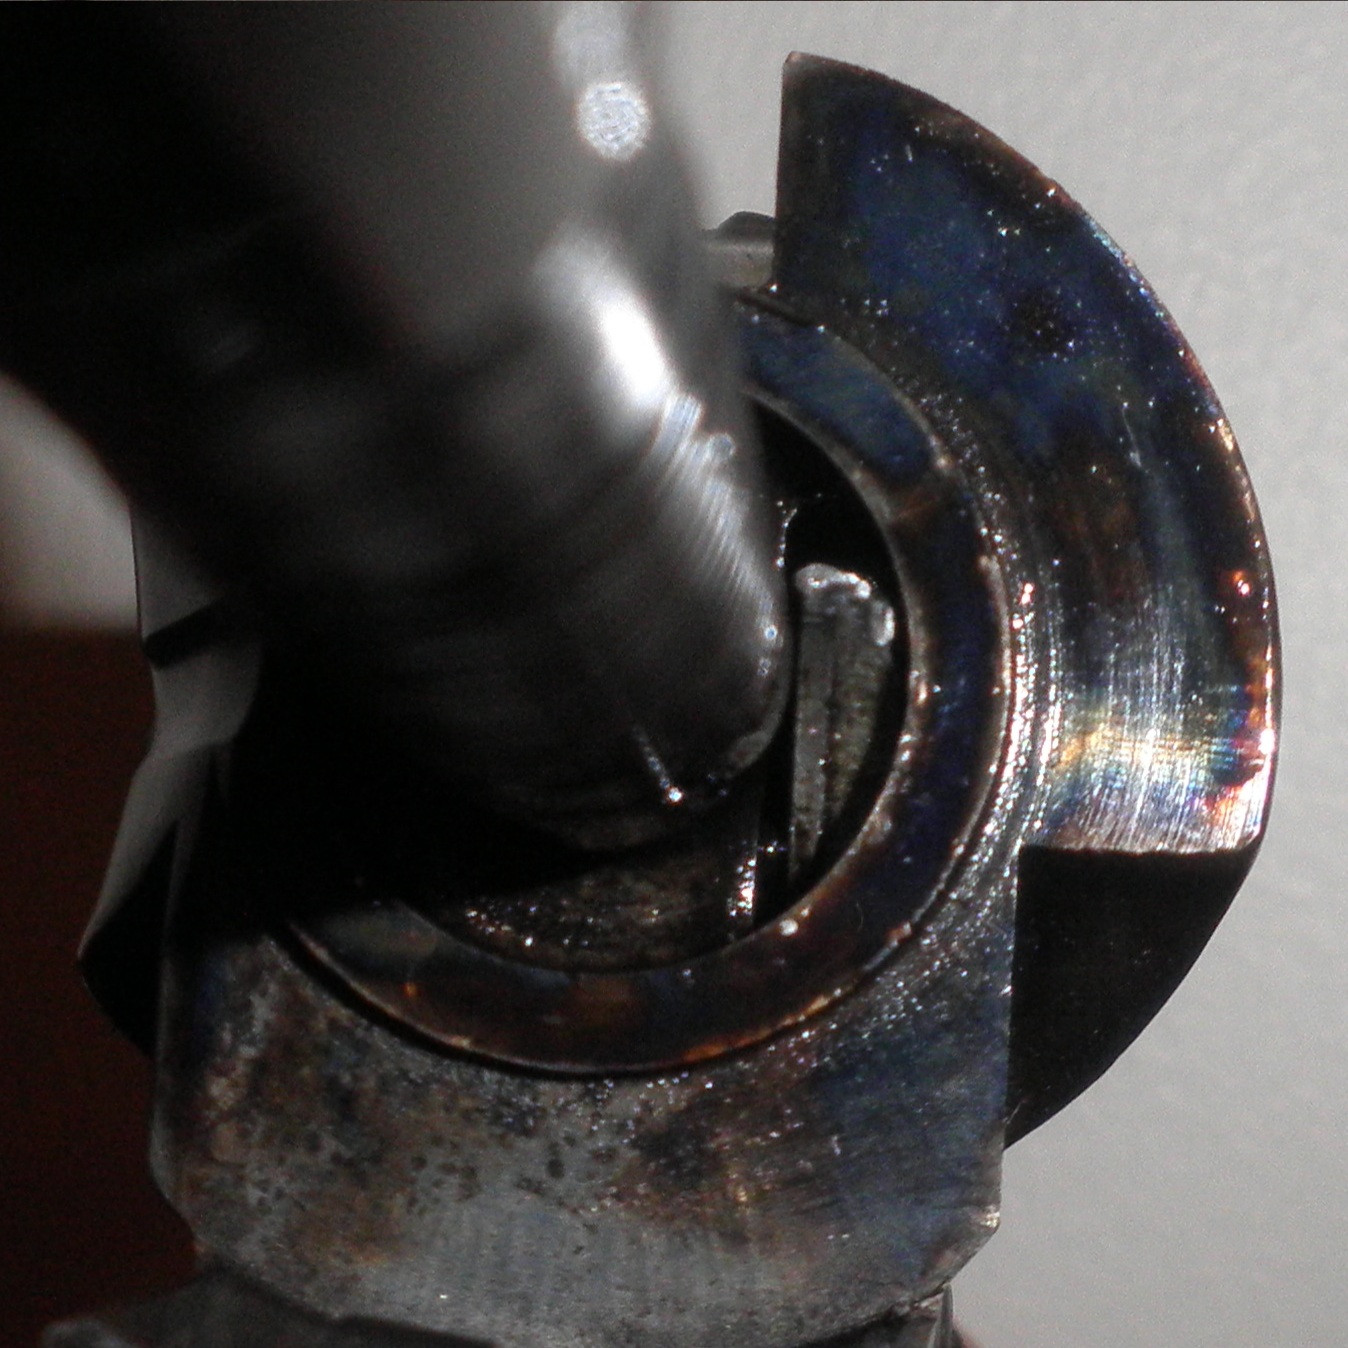
I'm not 100% sure of some of the terms used, but I think I've understood correctly. I've taken some pictures of the back of the cylinder (the cylinder star, I think) and a side picture too. I also have two pictures of the hand (I hope it's the hand!). Here they are (hopefully this works):

sEiKXsK.jpg

Cylinder from the side.

n8RboBE.jpg

Cylinder bottom/top, depending on which way you look at it.

vTVmJvB.jpg

Hand at full cock from one angle.

J8FhMGu.jpg

Hand at full cock from another angle.

Sorry for the poor photography, it's the best I could do for now.

Is there any chance you can see in these photos, whether the cylinder star or hand has any issues? I can try to take the hand out if need be - I haven't stripped the revolver down that much yet, just taken the barrel and cylinder off.
I don't have any issues with the cylinder turning before firing or even for the first round or 2. I've dry fired it (with paper towel to stop the hammer hitting the nipples) probably 100 times with no issues. I'm not sure if that means much, though, but I figure I might as well give you all the information I can think of, just in case.
Is there any other issue I should check for? I'm new to revolvers, so I'm not really sure what I'm doing, haha.

AZbpBurner, how come you don't like Triple 7? I haven't tried real blackpowder or Pyrodex P yet, so I'm not sure what the differences are, other than black powder has more smoke and less power per volume. Is Triple 7 dirtier? If so, that might explain some of the issues I've been having. I'll definitely get some black powder when I can next.

I'm not planning on using paper cartridges yet; I was just wondering how people who use them get their revolvers to work if they don't use wads or grease - but as others have commented, you can use wads and/or grease with paper cartridges, so I guess that's why!

The load I have been using is roughly 27 grains of Triple 7, with a .454 ball and No.10 caps.

Thanks again for your help everyone :)
 
In a normal NMLRA as issue pistol competition, (as issue meaning revolvers "as issued" in the Civil War) we usually shoot 50 or 60 rounds or more. As the match goes on, the cylinder gets stickier and stickier, until, as the OP reports, the hammer won't turn it. The solution is to take the cylinder out every 10 shots or so, cleaning the pin and running a patch through the pin hole in the cylinder. Then a light coating of oil (I use ballistol both for the cleaning and the oiling) before the next relay. Heavier coatings of grease will just turn to gum and make the problem worse.

As to the caps fragmenting, thats what they do. Nobody much notices on single shot guns, and if the hammer has a shroud it will capture the fragments so they do no damage. On a revolver, the hammer face is flat, so the pieces go flying, and the mechanism is exposed and vulnerable to jamming. It is so common that the rules address it: In a timed match if the gun jams you are allowed to stop the clock and then restart after the jam is cleared (often by taking the gun apart.) The solution is to remove the fragments after each shot - take the gun down, half cock, turn the cylinder to the loading gate, and flick out the cap fragments. Remember that one of the advantages of black powder is that we can (we will) go slow and enjoy the experience. If you want to go fast try that new smokeless powder in a different kind of gun although I wouldn't invest too much since I think it is a fad that will soon pass.

JMHO,
Alan
 
I can see proud metal pushed up on top the ratchet flats and the nose of the hand looks bunged up.
The proud metal on the star is an easy fix by standing it on end on top of a sheet of 320 grit sand paper on top a sheet of glass or a flat metal plate. Turn the cylinder by hand on the paper making sure it stays flat and the high/proud spots will be removed. Don't take any of the flat off just the high spots that have been pushed up by the hand nose.
The hand is screwed to the hammer and requires a compete disassemble to remove but should be taken out and the bunged up metal pushed off to the side cleaned up.
It's really hard to make an accurate diagnosis without being right there and watching the interaction between the parts but that's about all I can see from the pictures that needs some help. Mike D.
 
I'm not sure what the factory grease/oil coating is, but it's likely petroleum-based, which may well be the cause of premature powder residue build-up. It's always advantageous to completely disassemble and clean any firearm prior to the first trip to the range. In general, petro-based materials combine with powder residue to make more of a tarry mess than do veggie or animal-based lubes. The exception seems to be paraffin as used in ball lubes, or paraffin oil (mineral oil) which is the main ingredient in Ballistol and Baby Oil.

In over 45 years of burning black powder and also Pyrodex, I've never had any trouble quickly dialing in a powder charge to get the best accuracy. I can't say the same about 777. It burned pretty clean, but between 20 and 30 grain load ranges, I was not able to get groups on paper to my satisfaction.

Someday I'll burn up the rest of my 777 in one of my rifles, but since I have BP and Pyrodex loads that run flawlessly now, I see no advantage to trying to make the stuff run in a revolver.
 
I've done a closer inspection of the cylinder and hand and I can see that the top surface of the hand has a dent on the left side, where maybe a quarter of the width of the hand has been depressed or removed, at the very left edge (not sure if it's a dent or chunk has been taken out - or maybe it was always like that?).
This seems to be what is making the cylinder star get dinged up. I noticed that one of the peaks of the star (not sure what to call them) has a pretty sizeable dent in it which seems to roughly match the dent in the hand. I'm guessing that when I was trying to pull the hand back and the cylinder wouldn't budge, the hand must have been on that peak and put a decent dent in it.
I don't think I've messed it up too badly though. It still seems to cycle all cylinders fine.

To fix the big dent in the hand, I was thinking of putting some JB weld in it. Is this a good idea? Feel free to tell me it's a stupid idea if it is!

I also checked the cylinder gap and I think I might have had the barrel on too tight. I was shooting it with the wedge pretty much evenly protruding from either side of the barrel. When I did this at home, the cylinder gap seemed nearly non-existent. So I tried taking the barrel off and putting it back on, with the wedge only just sticking out of the right side of the barrel (just enough that the hook spring clicked up and over the barrel metal). The cylinder gap was then visible and enough that I could fit a piece of paper in it fairly easily.
This might have been a major part of my problem. I've read that if the cylinder gap is too small, the cylinder face gets fouled and can't turn properly, so me turning it manually with my hand might have been easy because I was unconsciously pulling it backwards slightly, too.

I checked to make sure the arbor/cylinder pin (not sure which is the correct term) was the right length and it seems to be perfect, with the barrel only very, very slightly going past the frame. So this doesn't seem to be an issue.

I think that's about it. In the end, I think I've decided that the main issues were the arbor/cylinder pin not being covered in an appropriate grease; the barrel might have been on too tight; and the nipples are just stock nipples. I've got Crisco on the arbor now, have the barrel on less tight so I can see light through the cylinder gap; and I'm going to order some new nipples if I still have issues next time.
I'm hoping to get to the range in within the next few weeks to see if these changes have solved my problems.

Oh, also, I noticed that the cylinder notches are a little scuffed. I dry fired the revolver many times and never noticed this, so I'm wondering if this might be some issue from shooting at the range. I'm hoping it was a temporary issue because of the fouling, rather than a permanent issue that I've caused by trying to shoot when the gun was too fouled.

Thanks every for all of your help - hopefully I've fixed it now and I can get a cylinder (or a few even?) shot before the revolver starts locking up.
 
To fix the big dent in the hand, I was thinking of putting some JB weld in it.

Nope, JB just won't stay when used like that, It'll snap off pretty quick. Replacement hands can be had for $3-4, if you really need another.

So I tried taking the barrel off and putting it back on, (just enough that the hook spring clicked up and over the barrel metal). The cylinder gap was then visible and enough that I could fit a piece of paper in it fairly easily.

That hook spring doesn't need to click to the off side of the barrel. It's actually there to keep from loosing the wedge when it's pulled, it's supposed to catch and stop on the screw head.
The cylinder gap should be closer to .020,,, Big!
If your sliding a piece of paper in there you should fold the paper about 10 times first. :wink:

p.s.,, just a hint,, drop the photo size a bit next time,, those huge files are taking up 3/4 of my screen,
:grin:
 
I'm not sure whether the problem is enough of an issue to bother replacing the hand? The cylinder still turns fine now that it's cleaned up. I guess if I have issues next time (or notice the cylinder star dented up), then I'll replace it.

And wow! I didn't realise the gap was supposed to be that big! I guess that shows how small the gap was before, if I think "paper thin" is big. Must have been an issue.
I'll try increasing the gap some more; though hopefully I don't need to move the wedge out too much or it might not fit too well in my holster. I'd certainly rather it fire reliably than fit in the holster, I guess!

Thanks :)

Edit: oh and I'll try to reduce the photo size next time. I didn't realise they would come out so big. Maybe next time I'll just post a link to them instead.
 
The proud metal pushed up on the ratchet flats by the pawl/hand nose is making the cylinder gap shorter as well. The gap will open by the amount you take the high spots down on the star as well as the wedge penetration of the arbor slot.
Keep in mind that when you lengthen the cylinder gap you also change the angle of hand nose engagement with the ratchet lift points.
The buggered metal on the out side of the hand nose is from forcing it against the star when it was fouled. It is forced outward against the circular collar on the recoil shield of the frame which is case hardened as it tries to push forward and upward to advance the cylinder.
I would just stone off any metal that has been pushed out proud to the side being careful not to take any of the nose length away.
Width is as important as length on a hand/pawl nose. You only want to remove any metal that has been swagged over the side that is wider than the hand nose body.
Basically you have forged the hand nose and star to fit each other and now all you need do is stone off the pushed over metal. Mike D.
 
Back
Top