• Friends, our 2nd Amendment rights are always under attack and the NRA has been a constant for decades in helping fight that fight.

    We have partnered with the NRA to offer you a discount on membership and Muzzleloading Forum gets a small percentage too of each membership, so you are supporting both the NRA and us.

    Use this link to sign up please; https://membership.nra.org/recruiters/join/XR045103

Sanding a tiger striped maple stock ??

Muzzleloading Forum

Help Support Muzzleloading Forum:

This site may earn a commission from merchant affiliate links, including eBay, Amazon, and others.

pulaskius

36 Cal.
Joined
Jul 27, 2009
Messages
89
Reaction score
0
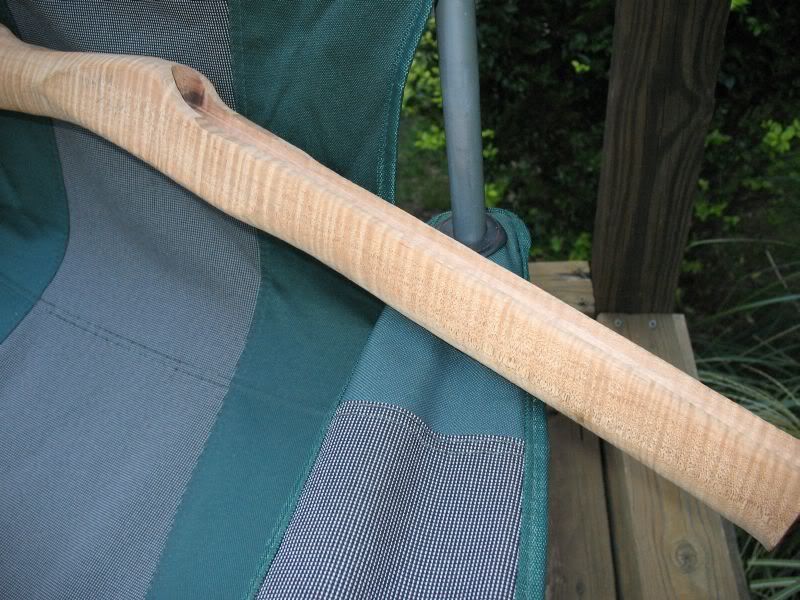
I have a real nice 95% + striped maple stock that is going to be a Kentucky Half stock Hawkens if that makes sense :grin:

I started sanding on it this evening and realize that I don't know if I should sand the stock from butt to forend ... or sand it vertically "with" the tiger stripes ?? TIA !!
maplestock005.jpg
 
Thanks John ! That seemed to be right when I got started but then I started second guessing myself.

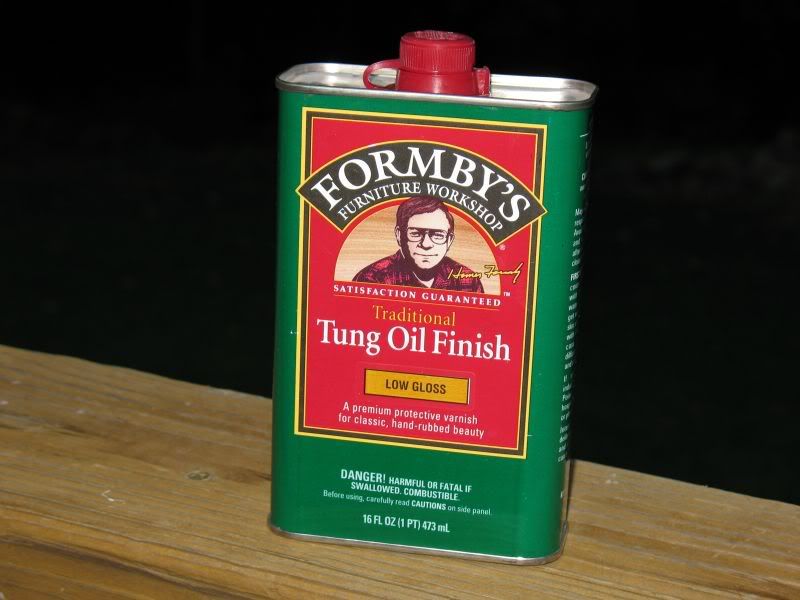
I plan to finish it with this Tung Oil product but somewhere I read that Tung Oil "Finish" as it says on this can ... might not be the correct product to use.

Do I have the right Tung Oil for a hand rubbed finish on this stock ??

maplestock009.jpg
 
JohnFH said:
Exact same stuff I used on mine.
Link

That's good to know thanks John ! Did you stain that stock before applying the tung oil finish ?? I don't want my stock to come out dark on this one ... looking for a blonde or honey appearance on this rifle.

Thanks again !! :)
 
JohnFH said:
Nope, just straight finish on a Walnut stock.

Great looking finish too congrats !

I'm going to have to re-think my choice of Tung Oil Finish for this rifle ... a transparent honey appearance would just rock on this stock me thinks :)
 
From the pic it doesn't look like most of the work has been done, eg...inletting the bbl , lock panels, forend shaping and probably many other tasks. Why do you want to sand now...that's the last thing to do before whiskering, staining and applying finish?.....Fred
 
flehto said:
From the pic it doesn't look like most of the work has been done, eg...inletting the bbl , lock panels, forend shaping and probably many other tasks. Why do you want to sand now...that's the last thing to do before whiskering, staining and applying finish?.....Fred

You're right .. I am just taking some of the thickness out of the butt stock region where it has bark still attached.

I'm a sneaking up on the hard parts :rotf:
 
flehto said:
From the pic it doesn't look like most of the work has been done, eg...inletting the bbl , lock panels, forend shaping and probably many other tasks. Why do you want to sand now...that's the last thing to do before whiskering, staining and applying finish?.....Fred

I was wondering the same thing, you neeed to build the gun before thinking about sanding it.
 
Swampy said:
flehto said:
From the pic it doesn't look like most of the work has been done, eg...inletting the bbl , lock panels, forend shaping and probably many other tasks. Why do you want to sand now...that's the last thing to do before whiskering, staining and applying finish?.....Fred

I was wondering the same thing, you neeed to build the gun before thinking about sanding it.

There is a thin layer of bark on both sides of the butt stock and it is thick enough to shape in a cheek piece on either side.

I figure that once I get some major work completed I would run into this area that is going to take quite a bit of time with the sanding and if I get it out of the way now it won't slow my progress later :)
 
No........ :shake: Build the stock first. Sand later. :wink: All that wood you are gonna take off is the Protection you need there to keep from damaging the good stuff. Leave it alone & build the stock first. You would be amazed of how may times I get one almost done & ding it & have to steam it out. If it is done before I get to the sanding part, I don't mess with it but just go on with the build.

IMHO, Fit the lock. Take the barrel to the lock. Then build the rest of it, then rasp, file, sand WITH the metal parts on it, as if not you will have rounded edges & low spots coming up to the edge of the metal. :thumbsup:
 
pulaskius said:
I figure that once I get some major work completed I would run into this area that is going to take quite a bit of time with the sanding and if I get it out of the way now it won't slow my progress later :)


Pulaskius, you need to do some study on the correct procedure for building a rifle, especial the order of the steps. Seriously, you are going to cause yourself some headaches later and rather than speeding things up, you will slow yourself down. Read Mike Brooks' tutorial at:
http://www.muzzleloadingforum.com/tutorials/brooks/Brooks1.html

Enjoy and good luck.
 
Last edited by a moderator:
Thanks Guy's I appreciate the advice and see the value of the protection of that extra wood for now :)

Moments ago the post office Lady delivered a box from TOTW and inside were numerous books to include The Gunsmith of Grenville County yippeee !

I put the sanding block away and got out my reading glasses ... time to get edjumacated :grin:
 
Just remember IF it is from a precarve & the lock inlet is already Preinlet ? Inlet the Lock First, then take the barrel to the lock for proper vent liner or drum placement. If you don't you are asking for a problem to occur very shortly in the build...... If the lock is preinlet, it goes where they inlet it. But you can move the barrel up, down, or back....

We have been down this road several times this year alone with guys having vent liner location issues by putting the barrel in first on a precarve......

Not the same thing when the lock is not inlet or building from a blank..... THEN you can do the barrel first, put the lock were it aligns properly, etc...

:thumbsup:
 
Birddog6 said:
Just remember IF it is from a precarve & the lock inlet is already Preinlet ? Inlet the Lock First, then take the barrel to the lock for proper vent liner or drum placement. If you don't you are asking for a problem to occur very shortly in the build...... If the lock is preinlet, it goes where they inlet it. But you can move the barrel up, down, or back....

We have been down this road several times this year alone with guys having vent liner location issues by putting the barrel in first on a precarve......

Not the same thing when the lock is not inlet or building from a blank..... THEN you can do the barrel first, put the lock were it aligns properly, etc...

:thumbsup:

Great stuff Bird much appreciated ! The barrel channel is there but that is all ... the lock is not pre-inletted I wanted to do that so I specified barrel channel only ... now I have a table router so no barrel channel next time either :)

I like the idea of inletting the lock first and then taking the barrel too it ... will see how it all looks when the lock, triggers, and barrel gets here. Tanky tanky :grin:
 
Pulaskius,

If the lock isn't preinlet, then you should fit the barrel in the inlet first. It's easier to put the lock in the proper orientation after the barrel is fixed than to move the barrel to match the position of the lock.

If you inlet the lock first and get it too far forward, then you have a major problem on your hands as you'll have to move the barrel forward, leaving a gap at the breech.
 
Oh, and if you are going to use a hooked breech, then the easiest way to inlet it is to solder or epoxy the breech to the tang and inlet it as one piece. Otherwise, it's almost impossible to get everything to line up properly. After it is inlet, you can apply heat to remove the solder or epoxy.
 
pulaskius said:
Thanks John ! That seemed to be right when I got started but then I started second guessing myself.

I plan to finish it with this Tung Oil product but somewhere I read that Tung Oil "Finish" as it says on this can ... might not be the correct product to use.

Do I have the right Tung Oil for a hand rubbed finish on this stock ??

maplestock009.jpg

I've seen a lot of comments about this finish that were critical of it. However, I've found it to work great. I used this finish on some walnut knife scales that I put on some steak knives, and they have been washed in the sink many, many times and the finish is still holding up great. I mix it 50:50 with boiled linseed oil though. It dries in a reasonable time, fills the pores in the grain, and doesn't build up to a high-gloss finish like Tru-oil or some other finishes. Probably isn't PC, but once it's dry you can't tell what it is anyway.
 
I like the idea of inletting the lock first and then taking the barrel too it ... will see how it all looks when the lock, triggers, and barrel gets here. Tanky tanky :grin:

Go back & read what I said. No lock inlet ? BARREL goes in first......... :wink:

There is a proceedure for building these things ya know. And basically the first step is get all the parts so you KNOW you can build it & have them avail. Know all of the parts are correct & will work ON the rifle. :confused:
The second part would be buy a builders book & read it, then start on the rifle. Or you can swap 1 & 2, but they are important steps.

I never start a rifle without ALL of the parts there. I did that one time years ago & waited 6 mo for a barrel & lock from TOW that never did show up, ended up having to rush around & find that & some other parts for the build I had promised.

Never again.... Get all the parts in front of you & insure they are Correct, good condition & etc. Then you start the rifle......... :wink: :hmm:

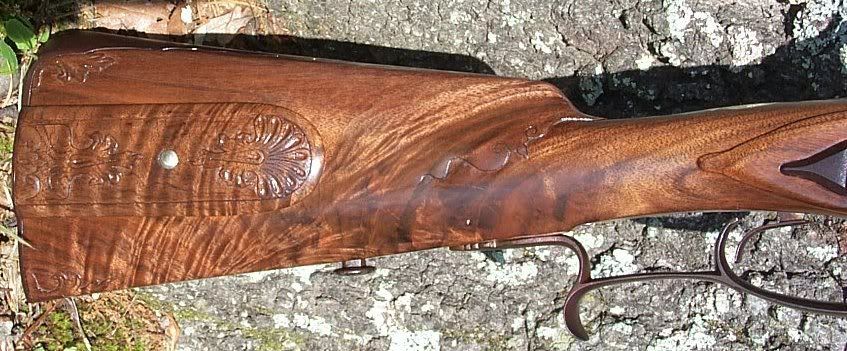
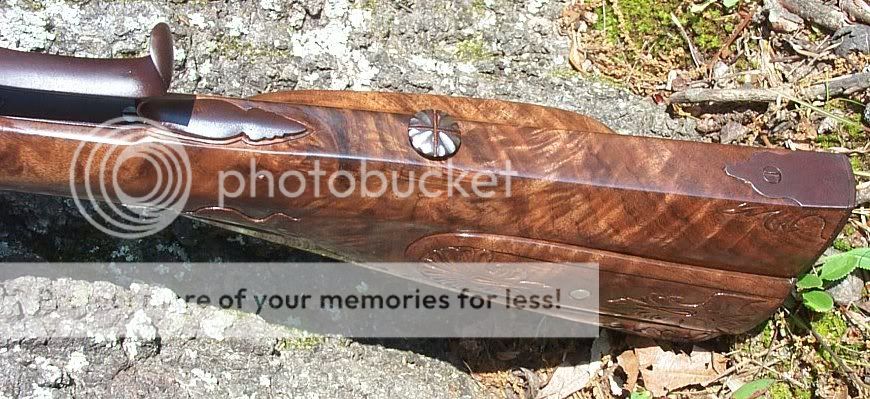
As for the Formby's Tung Oil Finish. Have used it may times with wonderful results. Sometimes add a drop or 2 of Japan Drier to a teaspoon of tung oil when using. I like it very well however it is not a waterprrof finish. I would put Permalyn or Tru-oil on first to seal the stock, then the Formby's if that is what you like. You can get the same results with Tru-Oil if applied & worked correctly. Here is a Jaeger rifle with Formby's Tung Oil Finish on it & it turned out halfway decent. IMHO.

Right1.jpg


StockRight.jpg


Toeplate2.jpg
 

Latest posts

Back
Top