• Friends, our 2nd Amendment rights are always under attack and the NRA has been a constant for decades in helping fight that fight.

    We have partnered with the NRA to offer you a discount on membership and Muzzleloading Forum gets a small percentage too of each membership, so you are supporting both the NRA and us.

    Use this link to sign up please; https://membership.nra.org/recruiters/join/XR045103

What is your procedure for installing brass inlays?

Muzzleloading Forum

Help Support Muzzleloading Forum:

This site may earn a commission from merchant affiliate links, including eBay, Amazon, and others.
Joined
Aug 27, 2004
Messages
3,201
Reaction score
7,110
There is usually more than one way to accomplish most tasks. I had always thought until recently that after a brass inlay/escutcheon was installed and polished (no engraving) it was to be removed for stain & oil, then replaced after. A friend last week who has built hundreds of pistols and rifles over 50 years changed my thinking. He said once it is in, it stays forever! So, my question: Is my original thought your method, or my friends procedure? I really see pros and cons for both procedures.
Thanks in advance.
Flintlocklar 🇺🇸
 
I'm with your friend on this. Install now, inlay stays in, then sand with the stock, stain, oil, and polish.

Watch the video " Colonial Gunsmith of Williamsburg". Wallace Gusler installed all inlays before finishing and did not remove them.
 
The answer is Both ways are correct. If inlays are to be engraved the inlay is first inlaid and the stock made ready for the finish. Then the inlay is removed and engraved, Then reinstalled in the stock. Then the stock is finished. The inlays can be cleaned up with lacquer thinner and a erasure.
 

Attachments

  • ffl-rs-butt1a.jpg
    ffl-rs-butt1a.jpg
    124.3 KB
There is usually more than one way to accomplish most tasks. I had always thought until recently that after a brass inlay/escutcheon was installed and polished (no engraving) it was to be removed for stain & oil, then replaced after. A friend last week who has built hundreds of pistols and rifles over 50 years changed my thinking. He said once it is in, it stays forever! So, my question: Is my original thought your method, or my friends procedure? I really see pros and cons for both procedures.
Thanks in advance.
Flintlocklar 🇺🇸
I use your friends method. Once the inlay is in, it stays in.
After saying that, I need to mention that when I finish the stock I do not use aqua-fortis or a acid method of darkening the wood. I use lye water, nutrialized with vinegar to improve the contrast of the stripes and then use alcohol based stains to create the color.

Lye water does not attack steel, brass or German Silver so leaving the inlays installed isn't a problem.
 
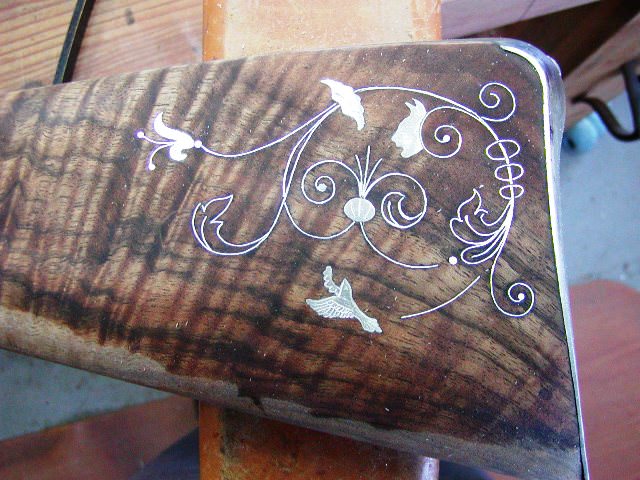
"Avitar?" Not familiar with that in this context. I would like to see your examples. Thanks
The avitar is the little image connected with my profile info. Here's the pic in an easier to see format, along with other inlays.
Eaglestars.jpg
Buttright.jpg

Each star is held in with a countersunk brass brad, filed and sanded flush. The eagle has 5 brads holding it.
 
Unless they are to be engraved I would just leave them in. That is why I said both ways are correct.
 
Hi Larry,
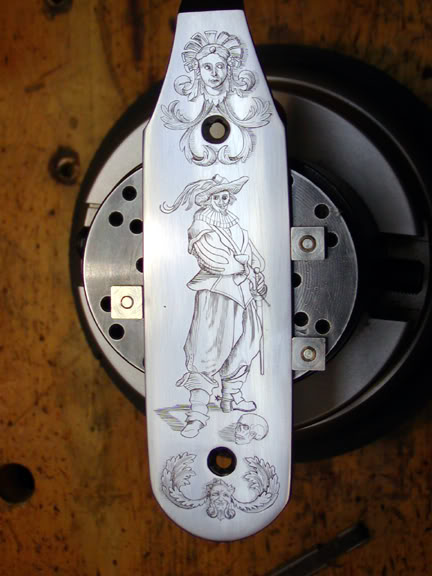
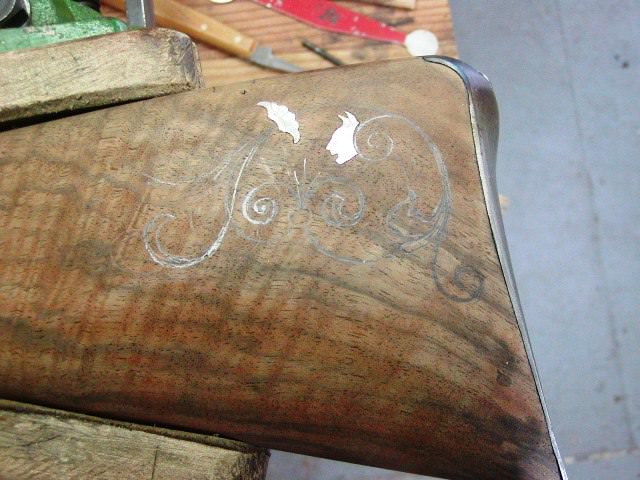
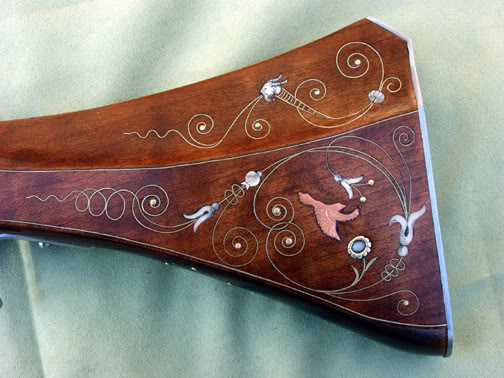
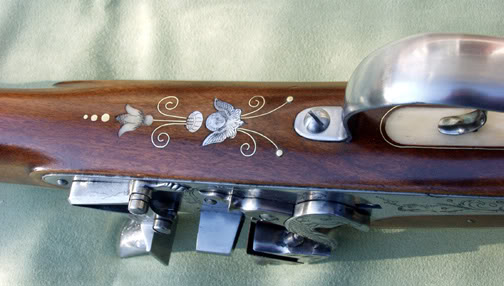
I agree 100% with Jerry's comments. I think the decision to remove an inlay or leave it in place during finishing is mostly about how large the inlay is and the extent of engraving. It is a huge advantage to be able to spin a metal part in a rotating vise to do smooth engraving. With the exception of side plates on some long rifles, I rarely use metal inlays without engraving. Therefore, my decision to permanently attach them before finish is based on how practical it is to remove them and reinstall after finishing. Small intricate inlays can be a problem to remove so I often leave them in place accepting the fact that engraving them in place will be more troublesome compared to removing them for engraving. In the photo below is a gun with intricate inlays of metal and bone. Many are small and difficult to remove once in place so they were engraved on the gun. The mother-of-pearl and bone inlays were particularly delicate and brittle so they stayed in place.
yipekOT.jpg

HNOJusU.jpg

However, the butt plate, easily removed, was engraved in my ball vise.
fo4BUvw.jpg

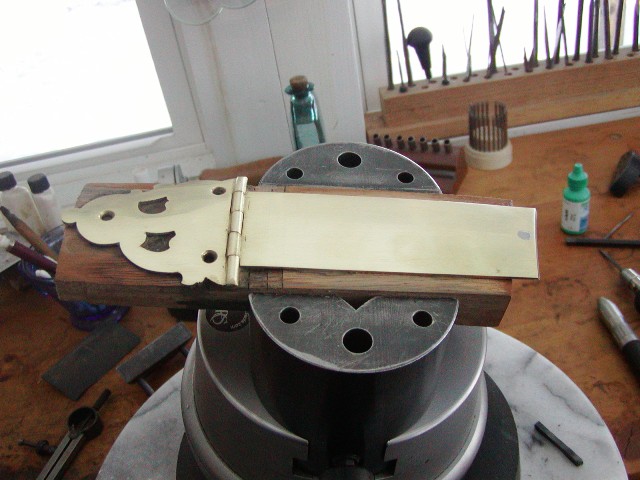
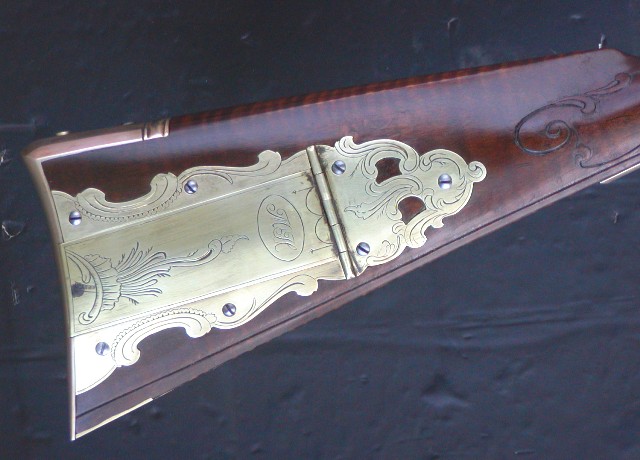
There is usually no reason an inlay like a patch box cannot be removed for engraving and attached after finishing.
5eaj4BC.jpg

lW8E4sU.jpg

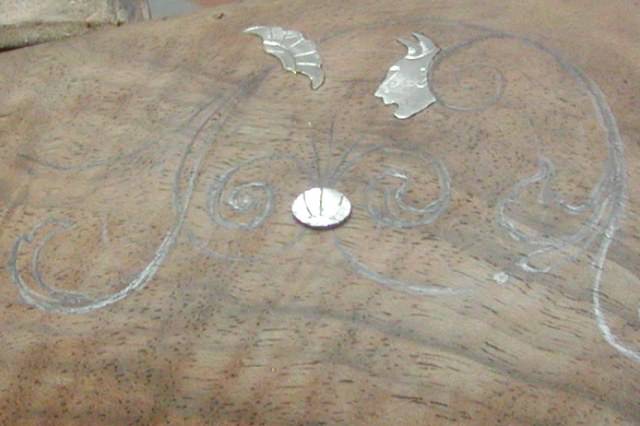
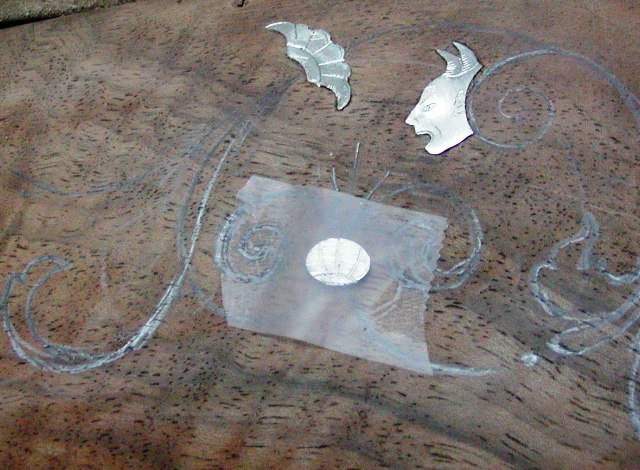
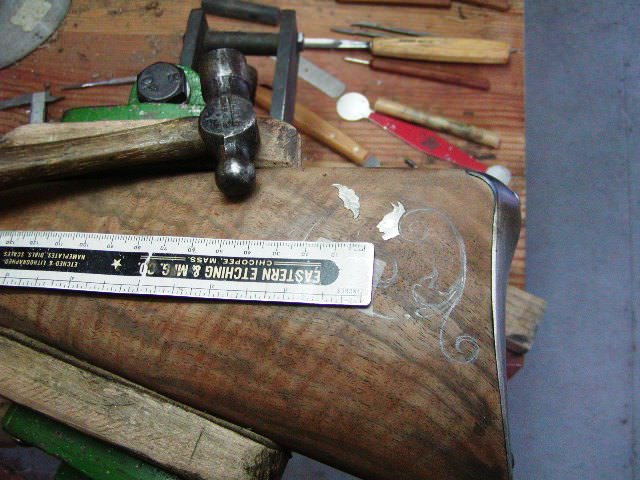
By the way, let me share a little trick I learned from Dave Price about inletting small metal inlays. They can be hard to hold in place and trace around on the wood. Instead, I tape them in place, then hold a flexible metal ruler on top and smack it with a hammer. That marks the outline on the wood making cutting the tiny mortice pretty easy.
4fpRT6j.jpg

xB5Xn4j.jpg

vbYeKu6.jpg

bPXVj6Z.jpg

oRrnJlr.jpg

f6YFSGs.jpg

WeRvf7D.jpg

z4vIZoL.jpg

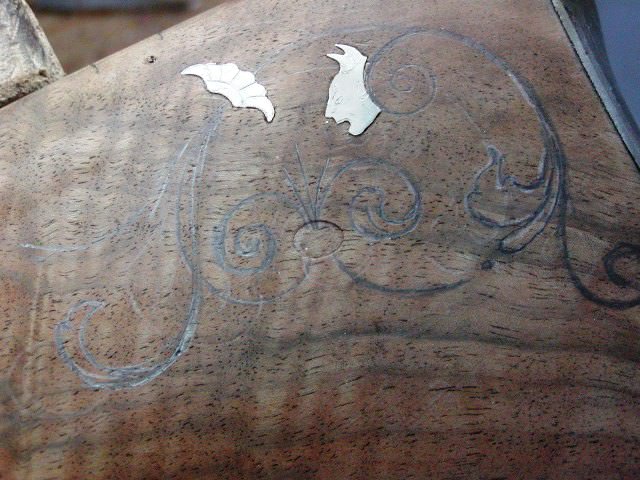
Note Larry, that I engraved the inlays out of the wood. I engraved them first and then inlet them. Then they were permanently attached before finish was applied. One feature in doing it this way was the inlays sit a tiny bit proud of the wood surface. That is intentional and allows me to polish them periodically without rubbing off finish on the surrounding wood. It also prevented finish from building up on top of the inlays.

dave
 
Hi Larry,
I agree 100% with Jerry's comments. I think the decision to remove an inlay or leave it in place during finishing is mostly about how large the inlay is and the extent of engraving. It is a huge advantage to be able to spin a metal part in a rotating vise to do smooth engraving. With the exception of side plates on some long rifles, I rarely use metal inlays without engraving. Therefore, my decision to permanently attach them before finish is based on how practical it is to remove them and reinstall after finishing. Small intricate inlays can be a problem to remove so I often leave them in place accepting the fact that engraving them in place will be more troublesome compared to removing them for engraving. In the photo below is a gun with intricate inlays of metal and bone. Many are small and difficult to remove once in place so they were engraved on the gun. The mother-of-pearl and bone inlays were particularly delicate and brittle so they stayed in place.
yipekOT.jpg

HNOJusU.jpg

However, the butt plate, easily removed, was engraved in my ball vise.
fo4BUvw.jpg

There is usually no reason an inlay like a patch box cannot be removed for engraving and attached after finishing.
5eaj4BC.jpg

lW8E4sU.jpg

By the way, let me share a little trick I learned from Dave Price about inletting small metal inlays. They can be hard to hold in place and trace around on the wood. Instead, I tape them in place, then hold a flexible metal ruler on top and smack it with a hammer. That marks the outline on the wood making cutting the tiny mortice pretty easy.
4fpRT6j.jpg

xB5Xn4j.jpg

vbYeKu6.jpg

bPXVj6Z.jpg

oRrnJlr.jpg

f6YFSGs.jpg

WeRvf7D.jpg

z4vIZoL.jpg

Note Larry, that I engraved the inlays out of the wood. I engraved them first and then inlet them. Then they were permanently attached before finish was applied. One feature in doing it this way was the inlays sit a tiny bit proud of the wood surface. That is intentional and allows me to polish them periodically without rubbing off finish on the surrounding wood. It also prevented finish from building up on top of the inlays.

dave
I'm going to keep that trick for small inlays in mind.
 
Dave, In the last picture I am curious about the filament coming out of the flower. It looks to be made of bone. How do you cut the bone thin enough for inlaying and how thin can it go without breaking when installing? I have inlet bone but never tried to cut it thin enough for using it as an accent for wire.
 
Hi Barry,
It is silver ribbon not bone. I had the same question as you about doing the thin bone curled inlays found on many wheellocks and I found a source that said they were curled strips of horn, not bone. They were shaved off like wood chips from a plane and then inlet on edge.

dave
 
Hi Larry,

By the way, let me share a little trick I learned from Dave Price about inletting small metal inlays. They can be hard to hold in place and trace around on the wood. Instead, I tape them in place, then hold a flexible metal ruler on top and smack it with a hammer. That marks the outline on the wood making cutting the tiny mortice pretty easy.
dave

Dave,
As usual, you have good sound advice along with amazing proof of your God given talent! I have never tried your suggestion, which has also been posted by others. For me, I like to place a small dot of super glue on the inlay, and outline it with a very narrow thin chisel shaped blade. A brass punch tapped at right angles pops it off. I like brass ovals with my barrel keys, I would for sure not want to smack one of those against the thin wood along the barrel. They are also too small to hold down while tracing a blace around.
Flintlocklar 🇺🇸
 
Hi,
Wire ribbon is held in by wetting the wood and letting it swell and the gluing effect of the finish. There is no need to glue wire inlay in place. Also, I pinch the ribbon between two coarse files and pull it through. That scratches lines along the length of the ribbon helping the wood grab it better.

dave
 
Do you typically put varnish under your inlays before you re-install them Dave? With PB's when I've done that, it's been very hard to get the inlays to lay flush again with the varnish under them. Maybe a fix would be to put varnish and stain under there BEFORE getting the files and sanding sticks out to get everything totally flush?
 
Hi,
No, I may use glue if the inlay is pinned and small or nothing if the inlay is screwed in place like a patch box. All small inlays including those I remove for engraving and those I do not are always reinstalled on the gun before finish is applied. I usually use a little epoxy to hold them in place along with a pin. Any glue that oozes up gets scraped off and then stain and finish are applied to the stock. When doing final pinning, I often mar the engraved surface a tiny bit with files or stones and have to go back and refresh any engraving and polish after the inlay is attached. It is never a problem to do.

dave
 
Back
Top