• Friends, our 2nd Amendment rights are always under attack and the NRA has been a constant for decades in helping fight that fight.

    We have partnered with the NRA to offer you a discount on membership and Muzzleloading Forum gets a small percentage too of each membership, so you are supporting both the NRA and us.

    Use this link to sign up please; https://membership.nra.org/recruiters/join/XR045103

1st time ever Bag / leather work

Muzzleloading Forum

Help Support Muzzleloading Forum:

This site may earn a commission from merchant affiliate links, including eBay, Amazon, and others.

huntman58

40 Cal.
Joined
Mar 9, 2008
Messages
204
Reaction score
0
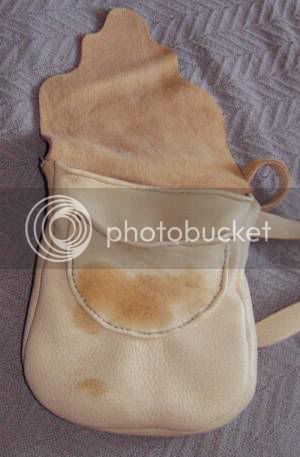
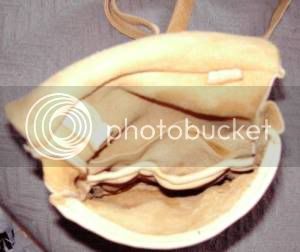
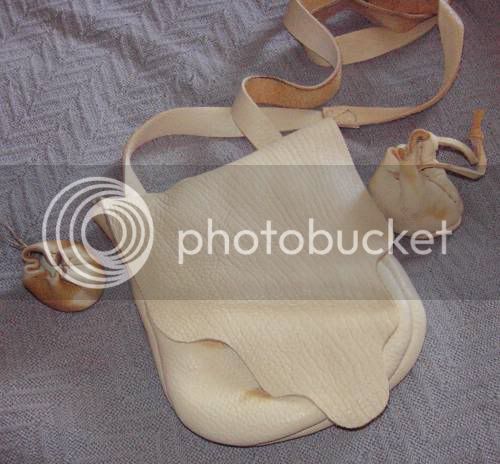
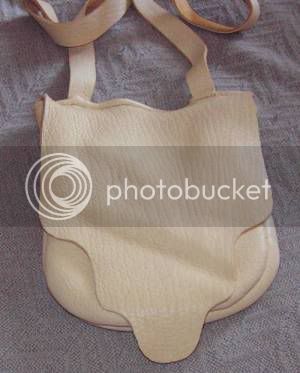
Well here it is. I tried to make a bag .I have never worked with leather before. It is made from elk skin. Two main pockets with three little ones for tools on the divider. The front pocket dose not look to good but better then the holes now if I remove it.It is all hand sewed and with a 1 1/2 inch guset on the sides.the bag is 7"wide x 8"tall with 1" wide strapes for now. The stains are from my patches they were in the front pocket first then I made a small patch bag and a stand up ball bag. The rolled edges on the bag and pockets help it a lot and give it I feel some body. I know the bag will stay open because of them unlike the soft bag I have been using that was just a limp noodle open or closed .I am thinking of staining the bags all a dark brown and may later change the strap to a adjustable one or card woven strap with buckles. For now it is useable and works so much better then what I have used for the last 25 plus years.I do need to still add a knife sheath and short starter holder to it but they have to wait tell the knife is done and I make up my mind for placements tell I will be trying deferent places to see how they work for me.
PDR_1889.jpg
PDR_1891.jpg
PDR_1890.jpg

PDR_1892.jpg
 
For a fist bag thats not bad at all. One thing to think about on the next one or even that one, you can construct an outside pocket the same as you did the main bag if you just take the time to think through the steps. That is, a welted, gusseted pocket which looks and preforms much better. :thumbsup:
 
thanks ya all. Swamp Rat I like that Idea big time and I may just have to try it as I believe it would also cover the front pocket and I do hate how it looks now. This bag was thought out and yet was not as many things on it as I went I changed from what was planed and then even added more on the go. I was scared I would really mess it up so I did not use good leather but craft grade. to make it a bit stronger on the sides there 4 layers thick because of the pockets and divider so it really made the sides nice I think. Swamp rat after seeing your bags I almost did not post any thing on this one but at the same time your one of the ones I hoped to learn from thanks.
 
Just to add, one making the outside pocket. I found it easier to lay out where you want the pocket and mark the top of both sides and the center of the bottom of the pocket. Put your gusset on it if you desire one then start at the top of one side and work your way to the center of the bottom stitching the pocket/welt to the front bag panel. Stop at the center of the bottom and back stitch a few times ,now start again at the top of the other side, working to the center again. This method works for me and ensures the pocket sits nice and even on the bag.

romeohbag1.jpg


romeohbag2.jpg
 
I think it looks good! And the front flap does cover the pocket. With Swampy's advise your next bag will be even better.
 
Nice bag huntman58! :thumbsup:

Wait, you said this is your first try at leatherwork...

VERY nice bag! :thumbsup: :hatsoff:

I have a couple of suggestions for ya;

First, I kinda like the color where your patch lube got on it. Why not just rub some patch lube all over it? :hmm: Would make it a nice color, even all over, and water repellent.

Second, on your next bag, if you taper the gusset at both ends, so it comes to a point somewhat below the top of the bag, the top of the bag won't gap open all the time. Lets the bottom spread out to hold all your junk. :thumbsup:
 
Nice bag, Marty! :thumbsup: You may find that the strap is OK as it is. Once ya figgur out how high you like the bag to ride there's no need to adjust it. Wearin a bag you made yerself is better than a store-bought one for sure. GW
 
Thanks Gray whiskers.
by the way enjoyed meeting ya at the RV. and talk about a nice range you folks are lucky. Also thanks for all the help and pic you sent me when making or trying to make up my mind on to make one or not ya pushed me over the edge so to speak LOL.
 
A very nice bag especially for a first timer. Now when you make the next one use nicer leather. The amount of work is the same and it will be a much nicer bag and sell for more money if you want to sell it.
 
huntman,
Great job! You will most likely want
to go to a little heavier leather and a bit
darker on your next project.Maybe not...What's great is you can do what you want.You only have to
enjoy the process and satisfy yourself...IMO
snake-eyes :hmm:
 
Thanks again all there is a new bag in the works now same leather as I like it but with the ideas here that will be used it will be a late graduation gift with a horn scrimed with a boa snake for my step son .ya I know a snake is not PC but it is why he going to collage for and it is some thing he really like so a snake he gets and this one will not have to be feed mice or cleaned up after that’s the kind of pet I want for a kid LOL
 

Latest posts

Back
Top