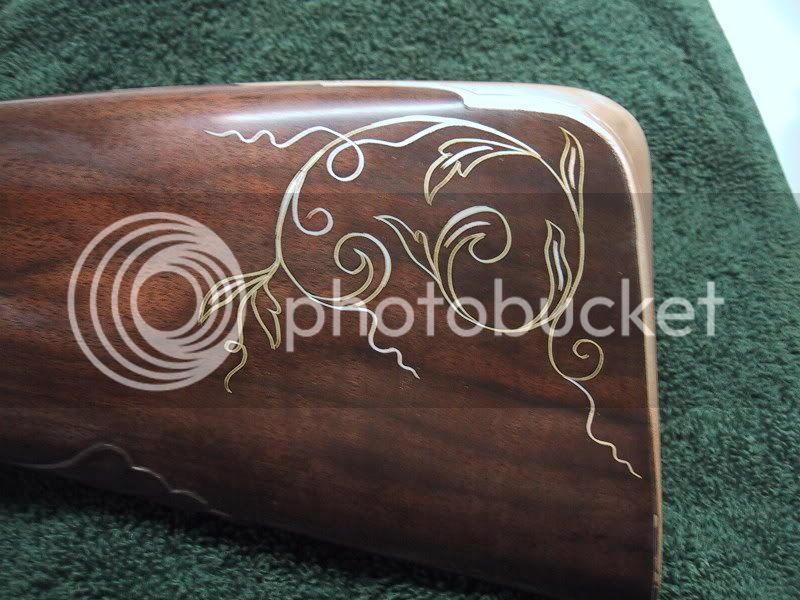
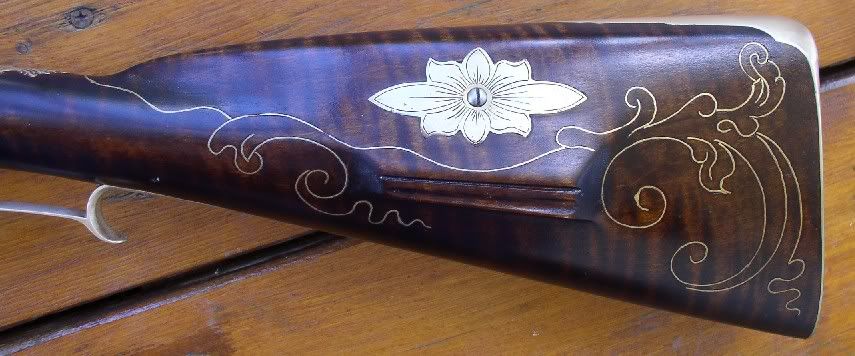
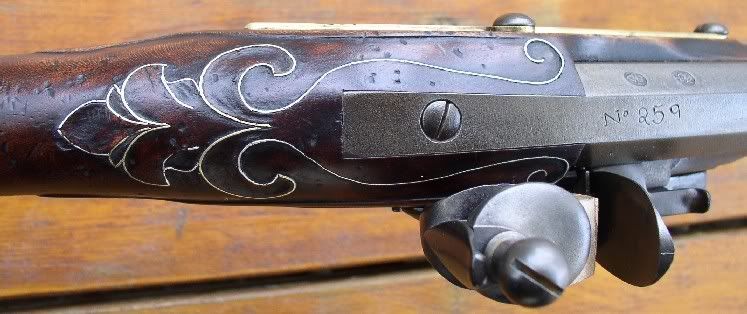
I am planning on doing some wire inlay work on my Lancaster and was wondering what glue, if any, is good to use ? I used a water/white glue mixture on an earlier kit I put together but after 10 yrs. the wire is separating. Any ideas ?
-
Friends, our 2nd Amendment rights are always under attack and the NRA has been a constant for decades in helping fight that fight.
We have partnered with the NRA to offer you a discount on membership and Muzzleloading Forum gets a small percentage too of each membership, so you are supporting both the NRA and us.
Use this link to sign up please; https://membership.nra.org/recruiters/join/XR045103
You are using an out of date browser. It may not display this or other websites correctly.
You should upgrade or use an alternative browser.
You should upgrade or use an alternative browser.
Brass Wire Inlay
- Thread starter ski76
- Start date

Help Support Muzzleloading Forum:
This site may earn a commission from merchant affiliate
links, including eBay, Amazon, and others.
shortstring
40 Cal.
- Joined
- Sep 3, 2006
- Messages
- 357
- Reaction score
- 2
Take the wire & while it is stood on edge on a steel surface, tap the edge of it with a chisel. Each place the chisel strikes, it forms a small burr. These burrs go down into the wood & help to lock it in. Kind of a tough one to put into words, hopefully I got the job done understandably?
Guest
I am thinking of adding some brass wire accents to my GPR. I would be interested in what reference material you may have used as a guide on the subject. it is my understanding that the channel cut into the wood for the wire must have a certain undercut and the wire itself pressure fit into the groove. I am having a dickens of a time identifing what tools I need to cut the wood and the whole process in general.
I made a whole bunch of small chisels from hacksaw blade with a lot of different radius for the different cuts. I score or sribe the wire using an edge of a file to give the wood something to hold onto and press it in the wood. Then use water to swell the wood back around the wire.

sorry its a bit blurry, I need to take some better pics. The tricky part is not to blow out any wood. :shocked2:

sorry its a bit blurry, I need to take some better pics. The tricky part is not to blow out any wood. :shocked2:
Mike Brooks
Cannon
- Joined
- Jul 19, 2005
- Messages
- 6,686
- Reaction score
- 33
I do my wire the same way Roy does. No glue needed and it doesn't come out.


AeroncaTAL
50 Cal.
- Joined
- Jun 19, 2006
- Messages
- 1,196
- Reaction score
- 0
Dixon's "The Art of Building the Pennsylvania Longrifle" has a chapter on wire inlay.
Scott
Scott
Guest
Thanks -- Dixon's is not too far from where I live and I visit them semi-frequently. The next time I am there I will look for the reference.
Guest
Outstanding work there Roy and thanks for the tip!
Make sure to take the temper out of the brass.
That will make it easier to form and not "spring
back..You can also scrape it through an open
pair of scissors to creat a knife edge and jagg-
ed that like a saw. After tapping in place apply
a bit of hot water..trim with a chisle instead
of a file...My opinion...not based on any facts.
That will make it easier to form and not "spring
back..You can also scrape it through an open
pair of scissors to creat a knife edge and jagg-
ed that like a saw. After tapping in place apply
a bit of hot water..trim with a chisle instead
of a file...My opinion...not based on any facts.
I honestly couldn't tell you what references I used to come up with the idea to do brass wire inlay. I know that I read many books and magazines of BP firearms that showed inlays and came up with my own pattern. Also this site and the internet in general is also a good source. As far as tools, I used an Exacto knife that has a small chisel to cut the grooves into the maple
Thanks to everyone for their ideas and the few pictures that were posted. This helps me further to what I want to create. I didn't know about the undercutting and creating burrs for a better hold. I figured this forum wouldn't let me down :hatsoff:
Several folks have mentioned that the "cut" the groove for the wire ribbon, and indeed they did cut it however I don't want anyone to get the idea that there was any material removed from the wood.
The "cut" is more like a "stab" in that the tool is driven down into the wood cutting the fibers as it goes and leaving a little trench.
Because no material was actually removed, the wood would like to go back to it's original position. This is why, after the ribbon is inserted into the groove and the wood is moistened it pinches the sides of the ribbon, holding it in place.
I usually use a very fine toothed triangular file to create the grooves on both sides of the ribbon.
I do this by laying the ribbon on a wooden table. Then holding the triangular file so that one of it's points is resting on the ribbon, I pull it along the length of the ribbon leaving several small grooves for the wood to "bite" on when it closes after wetting.
By the way, insert the ribbon to bottom out in the groove or be flush with the surface, whichever comes first. If some ribbon is protruding, gently file if down after the stock drys.
zonie
Similar threads
- Replies
- 5
- Views
- 480
- Replies
- 22
- Views
- 2K


