• Friends, our 2nd Amendment rights are always under attack and the NRA has been a constant for decades in helping fight that fight.

    We have partnered with the NRA to offer you a discount on membership and Muzzleloading Forum gets a small percentage too of each membership, so you are supporting both the NRA and us.

    Use this link to sign up please; https://membership.nra.org/recruiters/join/XR045103

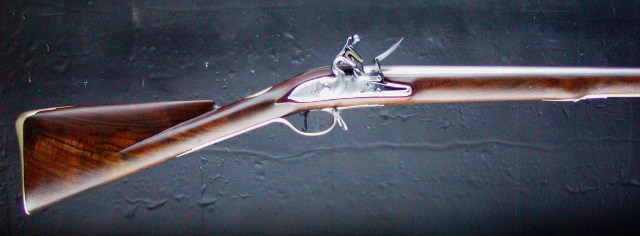
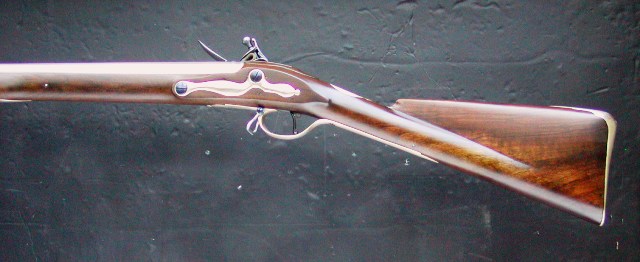
British Pattern 1760 Light Infantry Carbine Finished

Muzzleloading Forum

Help Support Muzzleloading Forum:

This site may earn a commission from merchant affiliate links, including eBay, Amazon, and others.
Joined
Nov 26, 2005
Messages
5,218
Reaction score
10,867
Hi,

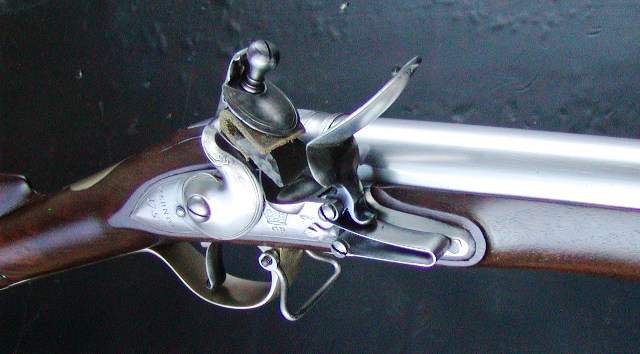
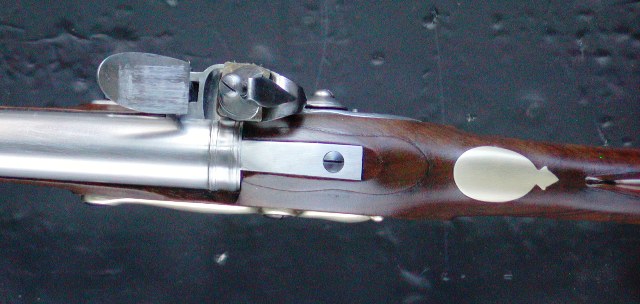
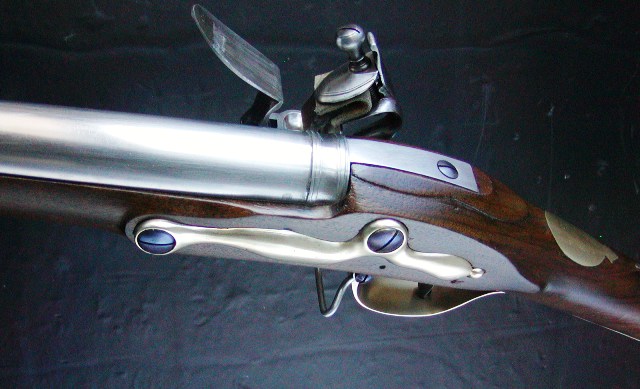
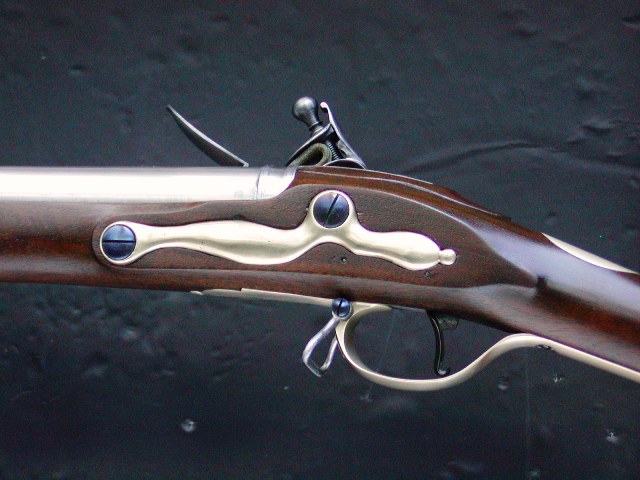
It is done. The final tung oil-varnish finish came out nicely. I finished the ramrod and filed and polished up the bayonet. The front sight/bayonet lug on the barrel is fitted to a shallow dovetail and then silver soldered in place. On originals it would be brazed but you won't be able to tell the difference. The vent hole was a problem because the pre-inlet stock did not allow me to move the barrel back very much or position the lock further forward. As such, the vent hole hit smack into the end of the breech plug. This is why locks should never be pre-inlet unless you have a Kibler kit. I solved the problem by installing a white lightning vent liner at a slight forward angle and drilling the vent hole larger. The hole is a little forward of center of the pan but that will not make any difference. Ignition will be fast and reliable. The bayonet is fitted to the barrel with no slop or wobble and the forward slot for the lug has a slight taper so the lug snugs in place. This is a bayonet and installation that could really be used and is not just for show.
DVPseh9.jpg

jVwKHcg.jpg

The stock is American black walnut but finished to look more like English walnut. I used sandpaper to some extent but the finished surface was created mostly with files and scrapers. The finish is Sutherland-Welles polymerized tung oil for the first sealer coats and then S-W wiping varnish after. The wiping varnish is polymerized tung oil mixed with polyurethane varnish and is medium gloss.
p7GXXU1.jpg

dJw9usG.jpg

u7r17tM.jpg

NYXChse.jpg

This is likely the most slim and elegant of all the regular issue British military guns of the 18th century. However, the parts set has some errors and limitations. First, and foremost, the butt stock is too thin. They needed to leave more wood on the sides of the comb to give it a more bulbous shape more like the earlier pattern Besses. Instead, after removing all the router marks, what is left is too flat sided and is more like later Bess patterns. Of course, there was certainly variation in the stocks so mine may still be historically accurate but I wish TRS would let the maker make that decision.
xvigYuD.jpg

The parts set has a typical Bess brass trigger plate supplied and pre-inlet. That is a huge mistake because these carbines did not have trigger plates, just a slot in the wood and the tang bolt was threaded into a rectangular iron nut inlet forward of the trigger. I fitted a wood patch into the inlet for the trigger plate and then made and inlet a steel nut.
Z2vLY5W.jpg

The stock was routed and drilled for a metal ramrod. None of these carbines were issued with metal rods. All had 5/16" wooden ramrods. I had to widen the ramrod groove and drill out the hole to fit a proper wooden rod. That also meant drilling out all of the ramrod pipes.
bqPMKvL.jpg

. The parts set uses the trigger guard from the Lord Loudoun carbine. The rear extension of that guard flares a bit at its end. The pattern 1760 guard does not flare out and would be much easier to inlet. The machine inlet for the wide flare at the end means the edges of that inlet are so thin and fragile that they cannot possibly survive the building process. They simply crumble away particularly since the stock is American black walnut. I had to fit the rear extension deeper to solve that, which also meant filling the old hole and drilling a new one for the cross pin.
CMnJBaE.jpg

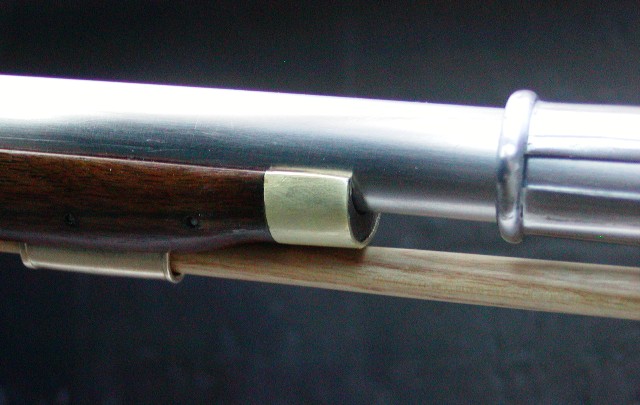
The parts set also has a cast nosecap, which is wrong. They all had sheet brass nose bands of which mine is open on the end like most of the originals.
5i5om5g.jpg

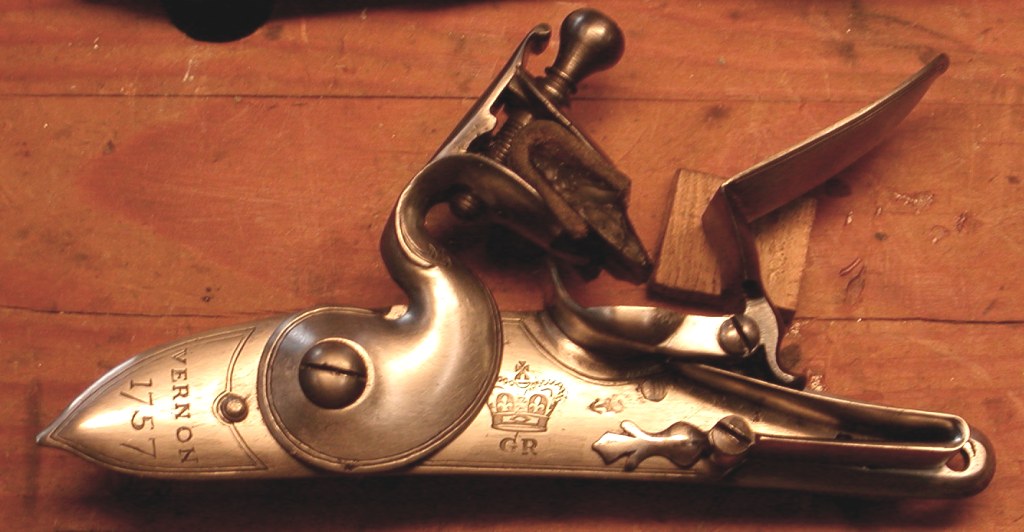
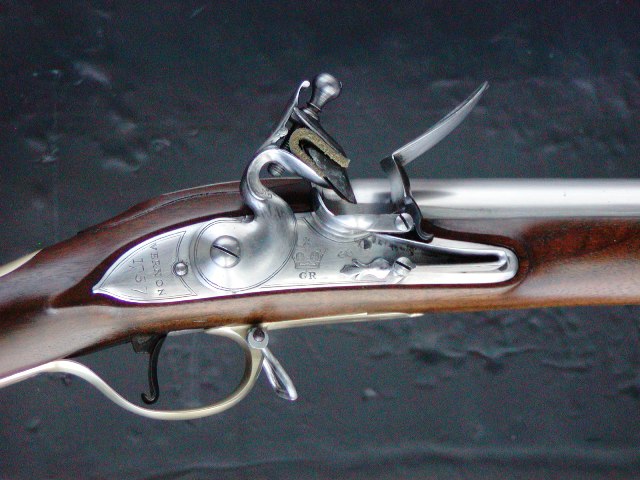
The pattern 1756 carbine lock is superb. I am sure it will work all the time. The lock plate as purchased had "Farmer 1759" cast-in engraved on the tail. It is possible Farmer made locks used on the carbines but none of the surviving examples of which I am aware have that contractors name. So I filed it off and engraved "Vernon 1757", which is known on several surviving examples in North America.
4c0Z98H.jpg

FGUdyKs.jpg

jWFjtp5.jpg

ygg7TA8.jpg

T5PHq8l.jpg

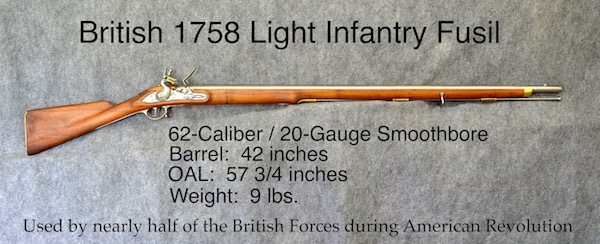
The 0.65 caliber Rayl barrel is beautiful and very well balanced. I'll take it out for a test run later in March and then I'll offer it for sale first to the British Brigade. If not sold by summer, I'll have it at Dixon's for sale. For comparison, below are some photos of an India-made version currently sold by some vendors. I think mine is almost as good. By the way, mine weighs 7.5 lbs. and is 65 caliber.
KtN3fm5.jpg

aRtXfSJ.jpg

ABFC7j7.jpg

GWRB6aU.jpg


dave
 
Last edited:
Wow! That is so incredibly beautiful. So clean looking and,,, just,,,, wow.
Military arms never looked so good. I hope it goes to Dixon's,,,,, and that I've won the lottery by then.
 
I'm not a fan of military rifles...just never cared much for the "style" of them. BUT...if I were to own one, that would be it! Beautiful work, as always. :thumb:

I saw an original Brown Bess once...can't remember what museum I was in...and frankly I was surprised at how thin the wrist and other areas were compared to the commercially available ones I see around today, like Pedersoli's, etc. That one lead me to believe that perhaps the originals weren't as bad looking as I thought based on only having seen production "copies."
 
Oh my Heavens,

Well, Dave, you have definitely proven that at least one person can really take LESS than a Sow’s Ear Parts Kit and turn it into a Silk Purse LI Carbine. Here is another example where your superb craftsmanship turns out a piece of most impressive artistry.

The Iron Nut you mentioned in front of the trigger, that the Breech Screw threads into is shown clearly in a Photo in Bailey's book, Small Arms of the British Forces in America, 1664-1815, under the P1745 Lord Loudoun’s Light Infantry Carbine. That is a detail I think most folks would never have noticed. I know I missed it and only noticed after you mentioned it.

I was loudly exclaiming, “Yes! YES!!” when I read of how you fitted the bayonet socket to the barrel and front sight. Far too many reenactors have such loose bayonet sockets that they almost disassemble themselves from the barrel when the barrel is pointed downward. That is an exceptional detail in my book.

Did you assemble the P1756 lock from TRS castings or was it already assembled and then you tuned it? How does it compare in quality to Jim Chambers English Lock? I know the Chambers lock is a tiny bit short in length and distance from top to bottom, but I think it is still in the range of a British Carbine?

Gus
 
Hi and thanks folks,
Mike, the modern production Besses do not represent the real guns very well. The truth is none would likely pass 18th century British Ordnance inspection. None. Years ago, my brother, Nils, joined Knowlton's Rangers, and most carried Pedersoli Besses. One of the members had an original British marine musket and everyone was amazed how slim and well made it was compared with their Pedersolis. The carbine I built is one of the most elegant and slim British military guns made but that is also its weakness. It did stand hard service as long as the typical muskets of the time and eventually they were replaced with pattern 1769 and 1777 short land muskets.

dave
 
Hi Gus and thanks,
I hate sloppy bayonets as well. In the process of final fitting bayonets I typically do 3 things. I usually heat the front end of the collar red hot and peen around the circumference of the end just a little. Then I jam it on the barrel as far as I will go and file the peened end until the collar fits snug on the tapered barrel with about 1/4" of barrel protruding from the end. I remove the bayonet and mark a center line on the barrel by turning the barrel over on a flat surface and slipping a thin flat file under it. I then pull the file out and that makes a perfect center mark. I put the bayonet on and locate that center mark in the forward slot in the collar and I mark the end of that slot on the barrel. After removing the bayonet, I cut a shallow dovetail in the barrel with the front edge lined up with the mark and centered on the center mark. I cut my lug/sight and fit it in the dovetail and then solder it in place. I make it a little over sized and I file a slight taper in the final part of the slot on the collar. Then I just file the lug and slot carefully for a snug fit. I want it such that you have to rap the bend of the bayonet with your palm to loosen it from the lug and take it off.

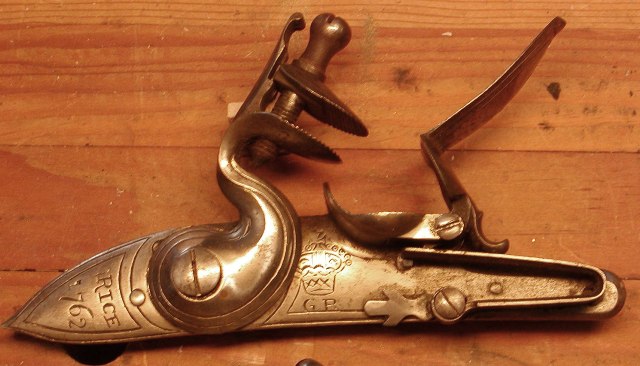
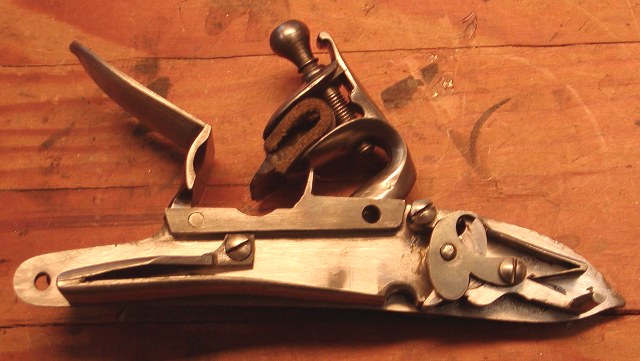
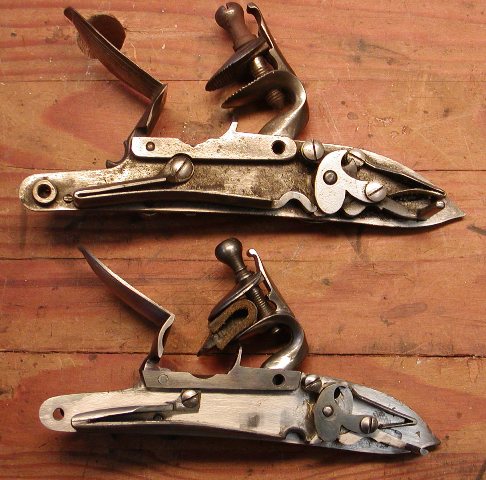
I built the lock. It is a good design and very similar to the Chambers lock although it is fatter in the tail. I fitted the internals as precisely as any Chambers lock but I came close to forging a new mainspring. I hate cast springs not because they don't work as well but they often have flashing from casting inside the bend of the spring. It is a royal pain to clean and smooth that out and I find most often I can forge a new spring quicker than cleaning up a cast one. I decided to use the cast spring on this lock and see how it felt before deciding to replace it. After shaping, polishing, and heat treating it turned out to have a very nice whippy feel so I kept it. The lock is fitted together, polished, and tuned better than the originals. I included a Pedersoli lock for comparison.
65uNnCl.jpg

I3LK6qo.jpg

l2c8bGs.jpg

6PzgDrx.jpg


dave
 
I built the lock. It is a good design and very similar to the Chambers lock although it is fatter in the tail.

dave

Dave,

Sorry to have to ask again, but I’m not sure. Did you build the lock from a TRS lock kit, then? Oh, I love the fact you changed the lock engraving to a known lock contractor. Another NEAT detail.

I very much appreciate your detailed explanation of fitting the bayonet. Thank you.

That reminds me of when Val Forgett, Jr. bought a huge pile of original bayonets and scabbards for the Enfield P1853 “3 Band” Rifle Muskets back in the mid 80’s. Though these were made in India, they were made for the British Army back in the 19th century. Bucky probably brought 5 or 6 dozen from Navy Arms to the first NSSA shoot they were available. I got out my repro copy of the period Ordnance Manual and tested them according to it. I was surprised they were excellent quality bayonets, having come from India, but that just told me they were indeed ones made for the British Army. We could sell them for only 5 bucks more than the rather poor quality repro bayonets and that was a real bargain.

After we first set up the booth that shoot, I began testing the fit of them to both Parker Hale and Navy Arms/Euroarms Muskets. After a while, I had little piles of “correct fit” and “loose fit” for both Muskets, as well as “need to be filed” to fit each musket. Bucky walked in before I finished sorting them and asked what I was doing, so I explained. He was used to original bayonets on original U.S. UnCivil War that needed little or no fitting, so it took a while for him to understand. So I decided to make a small sign that read, “PLEASE bring your musket and we will find the one that best fits it for you.” It took a while for many of the shooters to get it, but by noon the next day we often had a couple to a few guys in line while I selected the bayonet that best fit their musket. Some wanted the loose ones and some wanted correctly fitting ones, so I picked out what they wanted for them. Once they caught on, that proved very popular with the shooters. I also bought half dozen I had checked that correctly fit the Navy Arms/Euroarms Muskets to sell to reenactors later on.

Gus
 
Hi Gus,
It was built from the TRS parts set that I used for the entire project. The castings were pretty good but I really cleaned then up and fit them precisely. A detail you will notice is all the internal parts have sharp crisp edges like they were forged and filed, not cast. It is pretty easy to do that on military lock part sets because they are large. It is really hard when the lock is small like for a pistol. By the time you get them cleaned up, you filed away too much metal. Now, when I build civilian locks, I buy the plate, cock, frizzen, top jaw, and often the frizzen spring but make all the other parts or better, substitute modern internals that are more precisely made.

The carbine lock I made is as good as any Chambers or Kibler although it has a more "over movement" by which I mean the amount the cock can be pulled past the full cock notch. That is because the cast tumbler had such a large spacing between the half cock and full cock notches. Perhaps that is how the original version was but the bend in the cock would never clear the stock when pulled to full. So I reduced that spacing as I also do on many Pedersoli Besses. That extra throw of the cock is not needed and it just makes it difficult to give the trigger a lighter pull without the sear falling into the halfcock notch on firing. So many of the Pedersolis I reworked show damage to the lip of the half cock notch on the tumbler because of that. The feel of my lock is more like a fine watch than a musket lock.

dave

dave
 
Last edited:
Hi Gus,
It was built from the TRS parts set that I used for the entire project. The castings were pretty good but I really cleaned then up and fit them precisely. A detail you will notice is all the internal parts have sharp crisp edges like they were forged and filed, not cast. It is pretty easy to do that on military lock part sets because they are large. It is really hard when the lock is small like for a pistol. By the time you get them cleaned up, you filed away too much metal. Now, when I build civilian locks, I buy the plate, cock, frizzen, top jaw, and often the frizzen spring but make all the other parts or better, substitute modern internals that are more precisely made.

dave

Hi Dave,

Yes, I did notice the Info you mentioned and I emboldened/underlined the info above and that's exactly why I was asking. Your internal parts look so good and neat, I had a bit of a hard time imagining you took cast parts and got them finished so nicely. It was not I was doubting your ability, mind you, but rather the cast parts themselves on whether they could be cleaned up to work well. I'm sure you have seen cast parts and especially tumblers and bridles that were so "cattywompous" that it can be difficult to impossible to clean them up "to true" and work properly. Heck, I ran across too many times when even some finished repro tumblers had the bodies not perpendicular to the axis of the shaft/arbors. I have not worked with many TRS basic cast parts at all, so that was also a part of the reason I was asking.

Thank You,
Gus
 
Hi Gus,
TRS parts can have problems even the large musket part sets. I am building a TRS Tower lock for an upgraded pattern 1730 Bess. The lock plate has an 1/8" deep void on the top of the bolster right about where the frizzen screw will thread. It was hidden under casting sprue and exposed when I cut off the excess sprue. So I drilled it out to expose the full extent of it, and then got my trusty gas welder and filled it up. I just hope I don't find other casting flaws as I go. TRS parts most often need to be heat soaked at about 800-900 degrees for an hour because they are a bit surface hardened coming out of the molding process. They can ruin your files without the heat soak. Usually, the lock plates are warped, even the big musket ones. You have to heat and hammer or bend them flat and then file the inside surface perfectly flat. I rarely used their screw sets and always make mine from screw blanks so I can get the threading right such that, for example, you can tighten the sear screw down and it does not pinch the bridle and sear. The locks take a lot of work, time, and patience. Knowing what you are doing also helps.

dave

That is excellent info, especially on heat soaking the parts before one begins working on them.

Thank you,
Gus
 
Hi,

It is done. The final tung oil-varnish finish came out nicely. I finished the ramrod and filed and polished up the bayonet. The front sight/bayonet lug on the barrel is fitted to a shallow dovetail and then silver soldered in place. On originals it would be brazed but you won't be able to tell the difference. The vent hole was a problem because the pre-inlet stock did not allow me to move the barrel back very much or position the lock further forward. As such, the vent hole hit smack into the end of the breech plug. This is why locks should never be pre-inlet unless you have a Kibler kit. I solved the problem by installing a white lightning vent liner at a slight forward angle and drilling the vent hole larger. The hole is a little forward of center of the pan but that will not make any difference. Ignition will be fast and reliable. The bayonet is fitted to the barrel with no slop or wobble and the forward slot for the lug has a slight taper so the lug snugs in place. This is a bayonet and installation that could really be used and is not just for show.
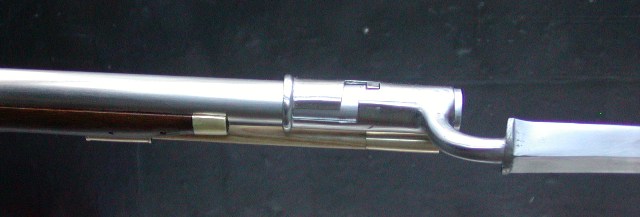
DVPseh9.jpg

jVwKHcg.jpg

The stock is American black walnut but finished to look more like English walnut. I used sandpaper to some extent but the finished surface was created mostly with files and scrapers. The finish is Sutherland-Welles polymerized tung oil for the first sealer coats and then S-W wiping varnish after. The wiping varnish is polymerized tung oil mixed with polyurethane varnish and is medium gloss.
p7GXXU1.jpg

dJw9usG.jpg

u7r17tM.jpg

NYXChse.jpg

This is likely the most slim and elegant of all the regular issue British military guns of the 18th century. However, the parts set has some errors and limitations. First, and foremost, the butt stock is too thin. They needed to leave more wood on the sides of the comb to give it a more bulbous shape more like the earlier pattern Besses. Instead, after removing all the router marks, what is left is too flat sided and is more like later Bess patterns. Of course, there was certainly variation in the stocks so mine may still be historically accurate but I wish TRS would let the maker make that decision.
xvigYuD.jpg

The parts set has a typical Bess brass trigger plate supplied and pre-inlet. That is a huge mistake because these carbines did not have trigger plates, just a slot in the wood and the tang bolt was threaded into a rectangular iron nut inlet forward of the trigger. I fitted a wood patch into the inlet for the trigger plate and then made and inlet a steel nut.
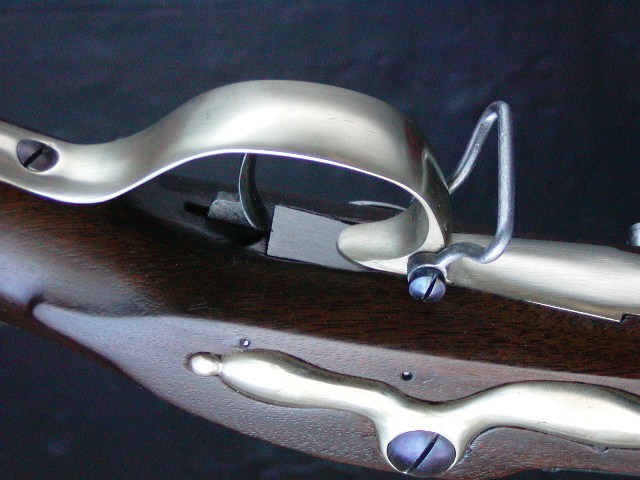
Z2vLY5W.jpg

The stock was routed and drilled for a metal ramrod. None of these carbines were issued with metal rods. All had 5/16" wooden ramrods. I had to widen the ramrod groove and drill out the hole to fit a proper wooden rod. That also meant drilling out all of the ramrod pipes.
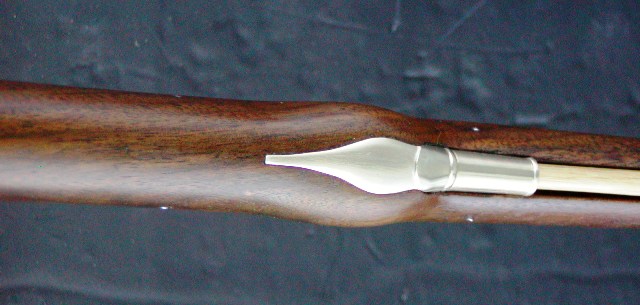
bqPMKvL.jpg

. The parts set uses the trigger guard from the Lord Loudoun carbine. The rear extension of that guard flares a bit at its end. The pattern 1760 guard does not flare out and would be much easier to inlet. The machine inlet for the wide flare at the end means the edges of that inlet are so thin and fragile that they cannot possibly survive the building process. They simply crumble away particularly since the stock is American black walnut. I had to fit the rear extension deeper to solve that, which also meant filling the old hole and drilling a new one for the cross pin.
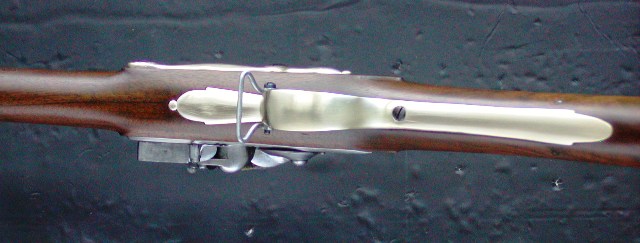
CMnJBaE.jpg

The parts set also has a cast nosecap, which is wrong. They all had sheet brass nose bands of which mine is open on the end like most of the originals.
5i5om5g.jpg

The pattern 1756 carbine lock is superb. I am sure it will work all the time. The lock plate as purchased had "Farmer 1759" cast-in engraved on the tail. It is possible Farmer made locks used on the carbines but none of the surviving examples of which I am aware have that contractors name. So I filed it off and engraved "Vernon 1757", which is known on several surviving examples in North America.
4c0Z98H.jpg

FGUdyKs.jpg

jWFjtp5.jpg

ygg7TA8.jpg

T5PHq8l.jpg

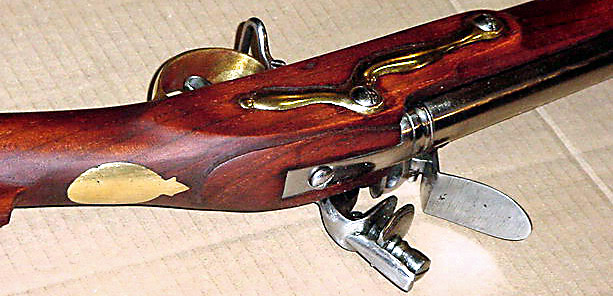
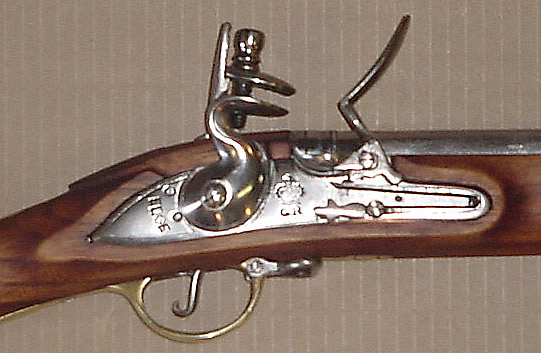
The 0.65 caliber Rayl barrel is beautiful and very well balanced. I'll take it out for a test run later in March and then I'll offer it for sale first to the British Brigade. If not sold by summer, I'll have it at Dixon's for sale. For comparison, below are some photos of an India-made version currently sold by some vendors. I think mine is almost as good. By the way, mine weighs 7.5 lbs. and is 65 caliber.
KtN3fm5.jpg

aRtXfSJ.jpg

ABFC7j7.jpg

GWRB6aU.jpg


dave
Mr. Person, absolutely beautiful
Work!
I would appreciate you’re opinion on the Officers Model Musket made Northstarwest before they closed. It is supposedly modeled after an original at the Smithsonion. Your thoughts would be appreciated.
 
Mr. Person, absolutely beautiful
Work!
I would appreciate you’re opinion on the Officers Model Musket made Northstarwest before they closed. It is supposedly modeled after an original at the Smithsonion. Your thoughts would be appreciated.

Of course I'm not Dave and I'm eager to read his answer as well.

I've heard a lot of good things about the Officers Model Musket, but for historic accuracy there really was no such thing in the period. I have no idea where they got the name of that gun and if it was marked that way in a Museum, then the Museum marked it wrong.

What they DID have in the period was an Officer's Fusil and that was often smaller bore than Musket Caliber and often "Carbine Bore" of .66 cal. Inevitably such Fusil's were made and sold by private contractors, as Officers had to procure their own arms in the period. There are only a couple of things NorthStar West's "Officers Model Musket" has in common with an Officers Fusil and they are "Carbine Bore" and the sideplate is fancier than British Ordnance used. The trigger guard could go either way, though. What often sets this period's Officers Fusils apart from Issue guns is checkering around the wrist, which the NorthStar Musket does not have.

Now, I hope no one thinks I'm talking down about the NorthStar West gun because in fact besides the fancier side plate, it otherwise is a really good Copy of a British Pattern 1756 Artillery/Serjeants'/Highlander Carbine and far better than anything on the general market when the NorthStar West Musket was made then or now. Of course Dave can make a much more exact copy of either an Officer's Fusil or a P 1756 Carbine, but the NorthStar West Musket has an excellent reputation as a semi custom/factory gun.

Gus
 
Last edited:
Hi,
I cannot really comment on the NorthStar West fusil as I've never handled one. However, looking at the photos I just don't really know what it represents. As Gus mentioned, it is hard to figure out what it is. Gus suggested a pattern 1756 artillery carbine but it does not appear to have the right front ramrod pipe for that, even those converted to a metal rod. Carbines and fusils during the F&I war are a mysterious lot because the descriptions of those actually sent and used are so vague. The listing is usually "carbine of sorts". We know that even rifled carbines were sent but no one knows what those were. In fact, some of the engineers and pioneers under Thomas Gage that were the first to contact the French at Braddock's defeat in 1755 carried those rifled carbines. Anyway, I am sure it is made well and works well as most NorthWest products do. I just don't know where it fits in and what it really represents. There were bulk purchases of officer's fusils from private contractors but I am not aware of any official ordnance pattern Officer's fusil in the 1750s.

dave
 
Hi,
I cannot really comment on the NorthStar West fusil as I've never handled one. However, looking at the photos I just don't really know what it represents. As Gus mentioned, it is hard to figure out what it is. Gus suggested a pattern 1756 artillery carbine but it does not appear to have the right front ramrod pipe for that, even those converted to a metal rod.

dave

Good eyes, Dave and I completely agree!

Shortstart,

Dave is also being kind in that the lock "aprons" or lock panels are too wide, the Nose Band is a bit crude even for a Carbine converted from Wood Rammer to Steel Rammer "in the field" by a Regimental Artificer/Armorer and some other small details that Dave would not allow on a gun he built.

But before you or anyone else thinks I'm talking down on the NorthStar West fusil, you should read/hear about how I mention the historic things wrong with my own rather beloved Pedersoli Brown Bess. :confused::D Of course Dave does a bang up job on making them more historically accurate as well and if you haven't seen his thread on that, you are in for a real treat.
https://www.muzzleloadingforum.com/threads/new-reworking-a-pedersoli-brown-bess.107405/

Gus
 
An absolute beauty! As you know, I fully appreciate all those subtle things in thr build that make a BIG difference in the finished product.
 

Latest posts

Back
Top