• Friends, our 2nd Amendment rights are always under attack and the NRA has been a constant for decades in helping fight that fight.

    We have partnered with the NRA to offer you a discount on membership and Muzzleloading Forum gets a small percentage too of each membership, so you are supporting both the NRA and us.

    Use this link to sign up please; https://membership.nra.org/recruiters/join/XR045103

Building a Chambers Isaac Haines rifle kit

Muzzleloading Forum

Help Support Muzzleloading Forum:

This site may earn a commission from merchant affiliate links, including eBay, Amazon, and others.
Hi,

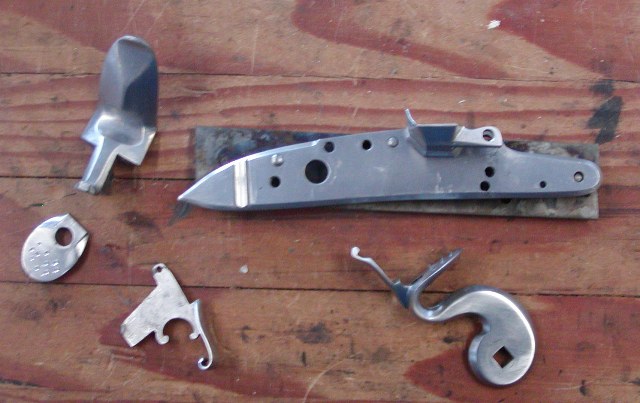
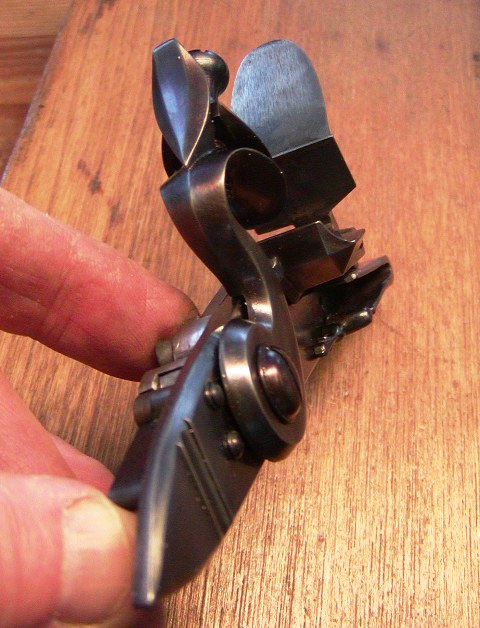
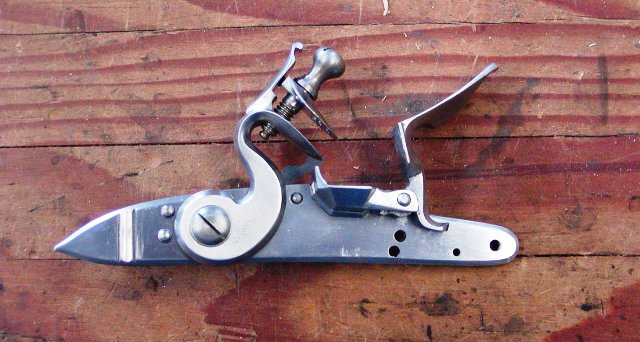
I had several breaks in gun making last month but I am now back full time. I am finishing the lock. The lock on the original gun appears to be left in the white although it could have had some heat coloring when the plate, frizzen, and flint cock were case hardened. Haines may have polished off those colors but they could just as easily faded over time or been polished off when the gun was cleaned by the owner. I chose to keep a translucent hint of the heat treating colors on the lock. The first step is to file the parts to get rid of the textured surface, mold seams, and any irregularities. To me, a lock with seam lines and the textured cast and bead blasted surface, often browned, is evidence of amateurish work. I use regular and needle files to get rid of the surface and seams. I also square up edges of parts.
3t47QPD.jpg

Then I use stones and parafin oil to polish off the file marks. After the stones, I may use 600 and 800 grit sandpaper dipped in water and always backed by a block of wood or file. I never, ever use a buffing wheel because they dish out screw holes and round corners too quickly. Look at any over buffed India-made guns to see what I mean. Finally, I use silicone polishing wheels to get into tight corners and then 3-M bristle burrs for a final polish on all surfaces. The burrs do not dish out holes and round edges and also are really useful for polishing pans and getting rid of heat treating scale.
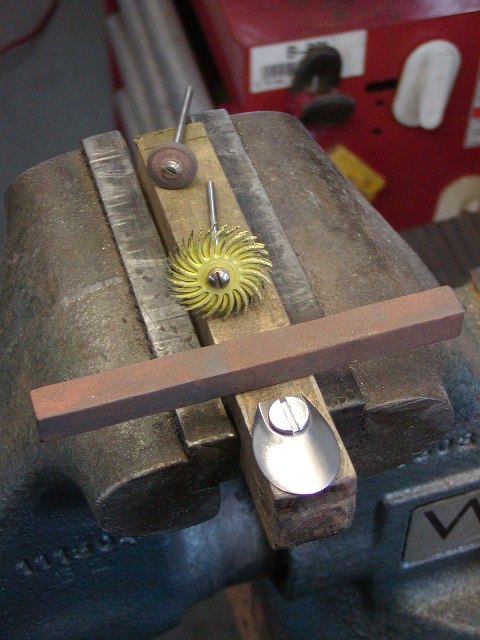
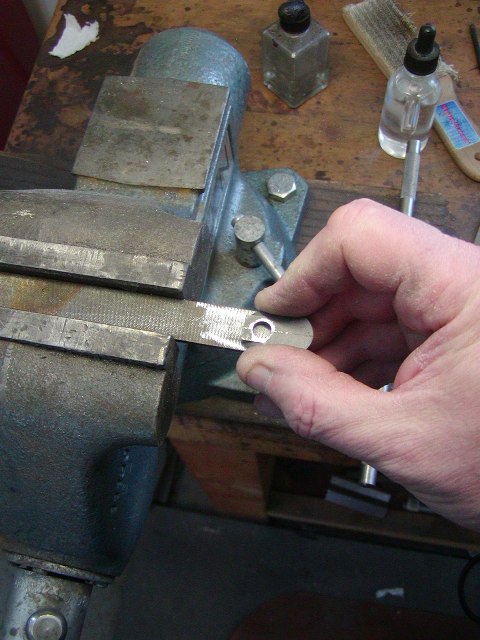
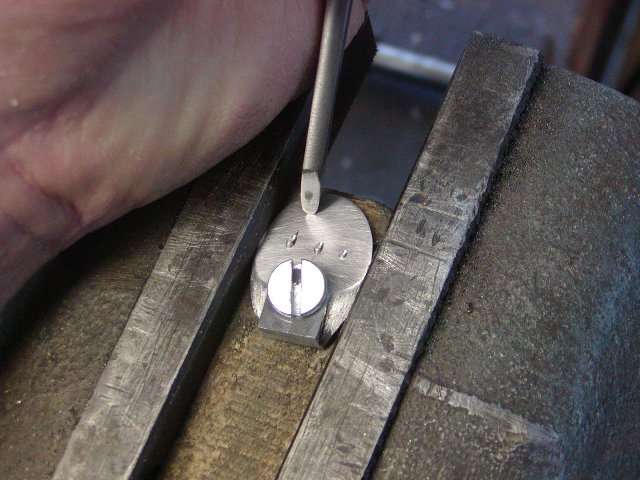
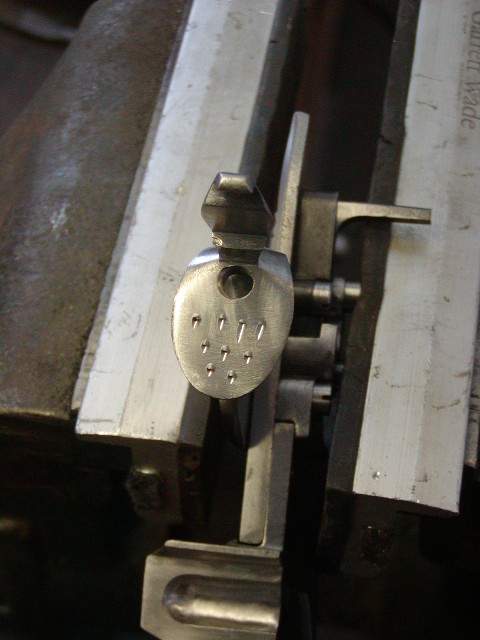
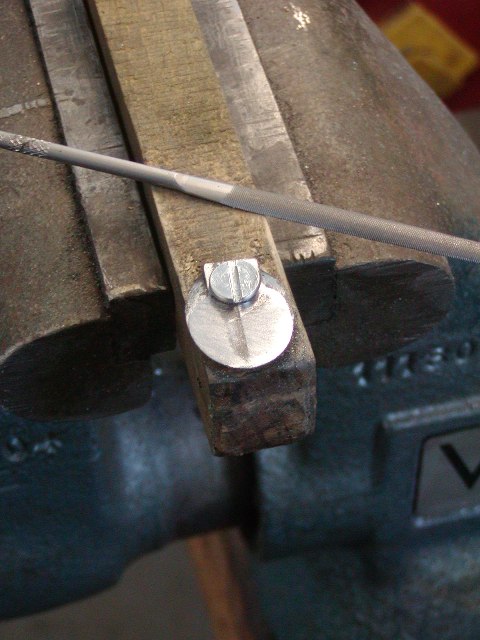
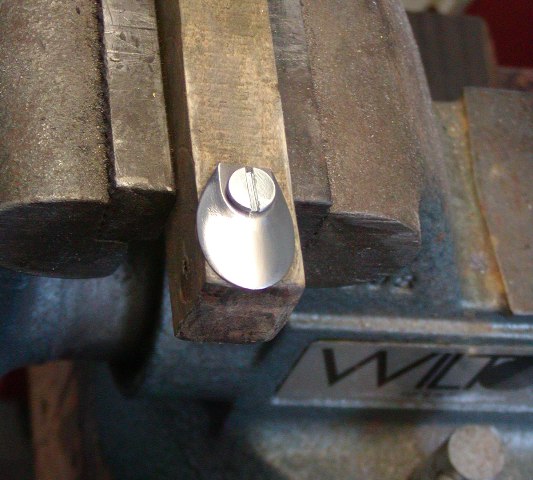
When polishing locks, many parts are hard to hold. They can be glued to wood or held in small jigs made for that purpose. I show the top jaw attached to wood by a screw. I file and polish it and then clean up the flats hidden under the screw head by rubbing it against a file held in my vise. The I do the same with stones. Before heat treating, I cut teeth into the flint cock jaws using a round bottomed die sinker's chisel and chasing hammer. Most original locks had teeth and they really work well holding flints wrapped in leather. The ridges you see in the jaws of many modern locks are useless.
IwTTAHi.jpg

3HmnGIE.jpg

l66SYJT.jpg

ndywiSL.jpg

BoJ5jWe.jpg

On this lock, I did not anneal any of the internal parts to polish them. I just used stones and bristle burrs. However, some manufacturer's locks I routinely anneal all hardened parts because they all need a lot of work. I did anneal the frizzen, which made it easy to polish. I am case hardening the frizzen anyway so that did not matter. I also annealed the mainspring and frizzen spring so I could grind and polish them. In this process, I balance the springs for best performance. I want the force to open the frizzen to be 30-40% of that needed to draw the flintcock back from rest to full cock. I also ground the toe of the frizzen where it contacts the spring such that it snaps open at a lower angle to the pan than before. These changes create a lock that produces sparkler sparks, most in the pan, and will do so even when he flint is dirty and dull. I always test the lock by turning the flint around so the blunt end hits the frizzen. It should still produce abundant sparks. The annealed and polished springs are heated bright red, quenched in canola oil, and then tempered for 1 hour at 750 degrees.
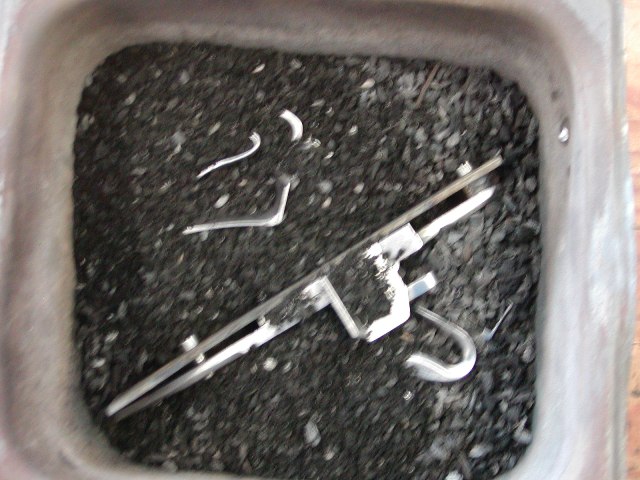
I case harden the frizzen, plate, flintcock, trigger, and top jaw. Hardening the frizzen needs no explanation but with respect to the other parts, it helps them resist rust and wear, particularly where the cock shoulder hits the lock plate. It also colors the metal and makes for a very attractive finish. I pack the parts in a metal box with wood and bone charcoal. They are completely covered with charcoal, the photo just shows their orientation.I attach a metal plate to the lock plate to eliminate risk of warping when quenched. Also note, I pack it in the charcoal on edge so it will hit the quench water on edge reducing any risk of warping. I heat the parts to 1550 degrees for 90 minutes and quench in room temperature water.
kTtZFn4.jpg

EDm2MSv.jpg

45dSks4.jpg

ii6aANb.jpg

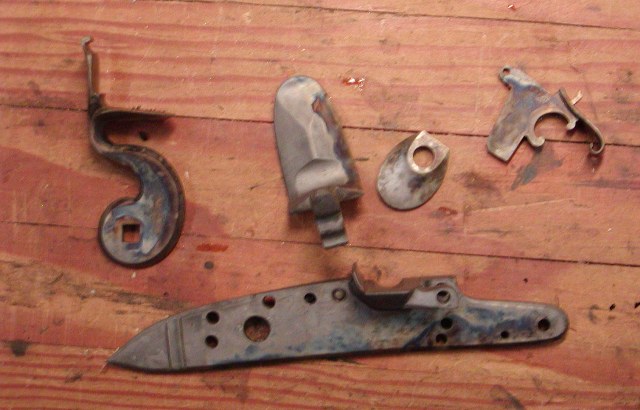
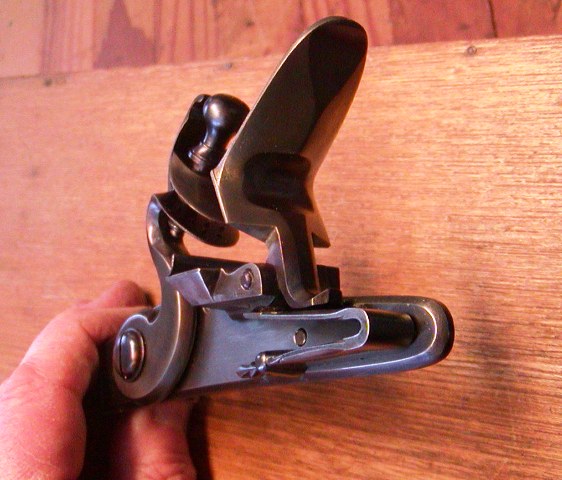
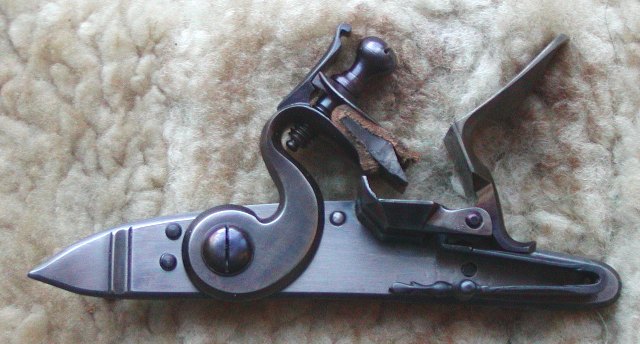
Next I temper the parts. The frizzen gets tempered for 1 hour at 375 degrees and air cooled. The other parts are tempered for the same time at 590 degrees imparting a deep blue color. After cooling I heat the toe of the frizzen to deep blue with a butane mini torch. I do not let the color migrate up the pan cover and on to the steel. I lightly polish the other parts with my bristle burrs to create a translucent blue color that looks gray under bright light. I believe, based on examining original locks, that this was a common appearance for new locks in the 18th century. It will fade to grey over time and can be easily polished off matching the appearance of relatively the pristine guns that survive until today. The top jaw and tumbler screw were polished and hardened using Kasenit. Then polished again and tempered to brilliant blue. All of the external lock parts were heated and dipped in carbolated (medicated) Vaseline, a product you cannot easily obtain anymore. It is Vaseline mixed with phenol, which is very rust resistant. I get it from Ron's apothecary in Juneau, Alaska The parts are coated with Vaseline and then heated until they smoke. That creates an invisible but very rust resistant coating on the metal. I think the final finish on this lock is very beautiful and functional.
pyRZxWK.jpg

ZOjP4qJ.jpg

MSCI6SR.jpg


dave
 
Last edited:
I am amazed at all the process steps and how they vary by certain parts. I've been on the forum for a number of years and generally read the Gunbuilders forum pretty thoroughly and have never seen such a detailed account of finishing a lock. And the carbolated vaseline treatment? Is that something that most top-notch makers do or is that your own special finish?

Lock looks great! I have a feeling it will outperform any other I've owned. :thumb:
 
Unreal.

I'm just blown away.

While part of me is anxious to see how all this fantastic work comes together as a whole, I also don't want this detailed "behind the scenes," documentary to end.
 
Hi Guys,
Thanks for looking and commenting. I do need to get this gun off to Mike soon and get on with other work. In addition to working with Josh (the blind fellow) on his gun, I have a British pattern 1760 light infantry fusil and a British pattern 1730/40 Brown Bess to get done by early spring. I cannot remember where I learned to use medicated vaseline on metal. When I was living and making guns in SE Alaska, I experimented with heating it after applying and found that heating the metal just until the medicated vaseline smoked a little was the best. Then wipe off the excess. The harsh conditions of heavy rain and sea spray really tested my metal finishes. Used to finish off a good brown, a heated coating of medicated vaseline was was the best I found.
dave
 
Amazing work Dave! Would the medicated vaseline be the same as Vicks Vapo-Rub?
Hi Poker,
No, it is vaseline with carbolic acid (phenol) in it. If you want a glassy smooth brown on a barrel, don't use it. It darkens the brown and gives it a slightly textured but mat finish. However, on some guns, that is exactly what I want, and despite the slight texture, the finish is very tough and weather resistant. On polished, clean steel it doesn't affect color or texture but does inhibit rust. The problem is medicated vaseline is no longer made so I get a mix made at Ron's Apothecary in Juneau, Alaska.

dave
 
Your detailed explanations always blow me away. You need to write a book so this information will live on long beyond your lifetime. I can attest to the beauty of that process on lock. My heart takes a couple extra thumps whenever I look at mine on my DP build 'Little Fella' rifle.
 
Hi and Thanks for looking and commenting. Thanks Frank. I really work at this stuff and am always learning and improving.
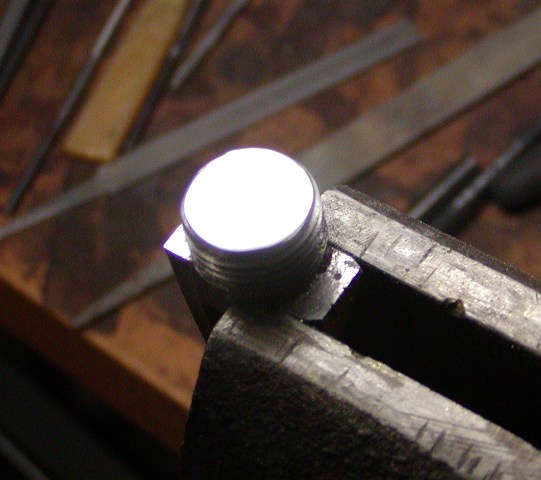
Some final details. One thing I do is polish the face of the breech plug. I doubt many originals had that done but I find the polished surface resists corrosion and acts as a bright mirror for a bore light. It really helps. I had to remove the plug to install the "white lightning" touch hole liner that came with the kit so I took the opportunity to polish the face.

RXBtxA2.jpg

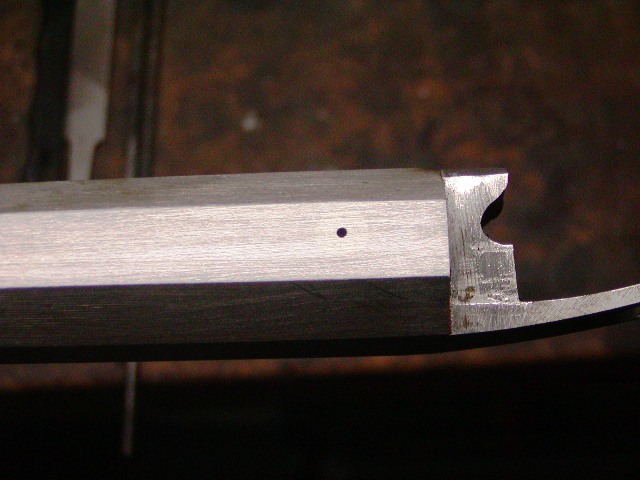
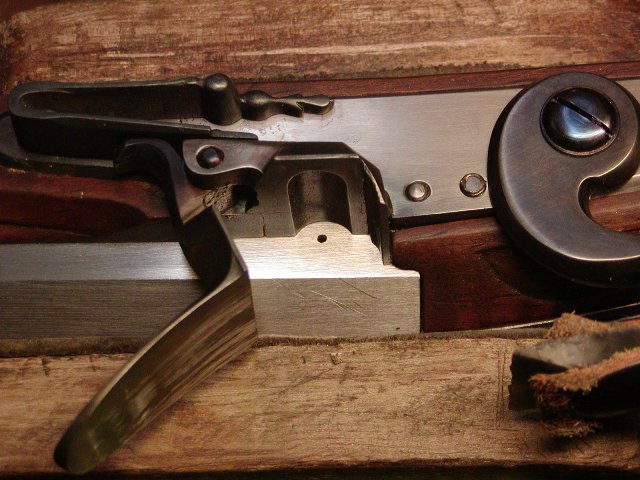
I never find installing "wl" liners any trouble. I have the right drills, taps, and counter sinks for all the sizes and I plan on the liner when drawing my gun plans so it won't crash into the breech plug. However, on the Chambers kit I had to make sure the barrel was inlet back and down in the stock to achieve this. It is not fatal to have the hole overlap the face of the plug. The liner can simply be filed so that it does not reach the plug just the threaded hole. I've pulled breech plugs on guns made that way and never found a problem. However, you do not want the liner itself interfering with the plug. I like to make the job clean so I position the liner hole far enough forward to avoid the breech plug threads. That meant on this kit, the barrel had to go back and down a little. I usually use my drill press to drill the hole but I've done it easily with just a hand drill. I always drill a smaller hole first, and then make it bigger in case I need some adjustment. The image below shows the installed and almost invisible liner.
TrOsHbI.jpg

Note that it is not centered on the barrel flat. There is no a priori reason that it should be as long as the liner fits the flat off center. This liner hole is also drilled out with a 1/16" drill. Mike will find that the combination of the liner position, hole size, and my tuned lock will result is fast, superior, and reliable ignition even after 20-30 shots without cleaning anything (lock or barrel) and a dull flint. In other words, load, aim, and pull the trigger and it is going to fire.
Fb2ZmjT.jpg

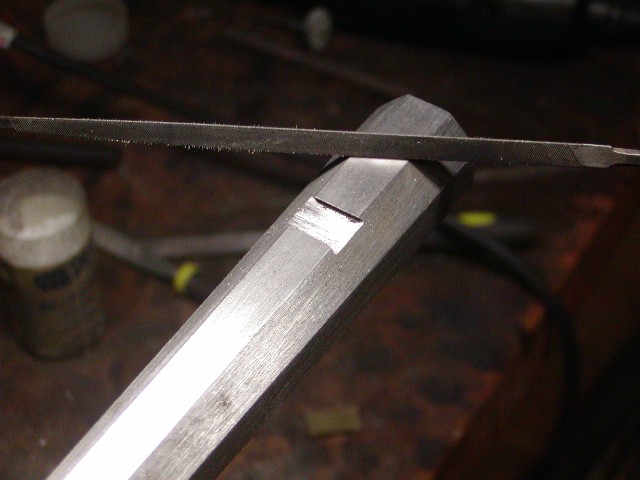
Chambers milled a slot for the front sight and provided a dovetailed brass base and a German? silver sight blade. The sight base is nice with a reinforced groove for the blade. The slot needed a little filing with my sight file to fit the base. My file is just a triangular file with one face ground smooth. It is not parallel sided as is the dovetail file sold by Brownells but I am careful to keep the slot square and parallel.
HyStFQe.jpg

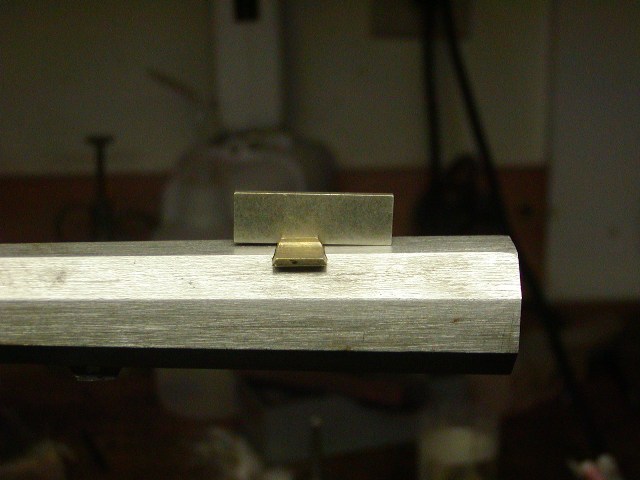
The milled slot just required a little filing to fit the base. The sight blade provided seems to be German silver but it hangs above the surface of the barrel when placed in the sight base. I hate that and consider it evidence of amateur work. The sight should sit down on the barrel snugly.
8FaiIIz.jpg

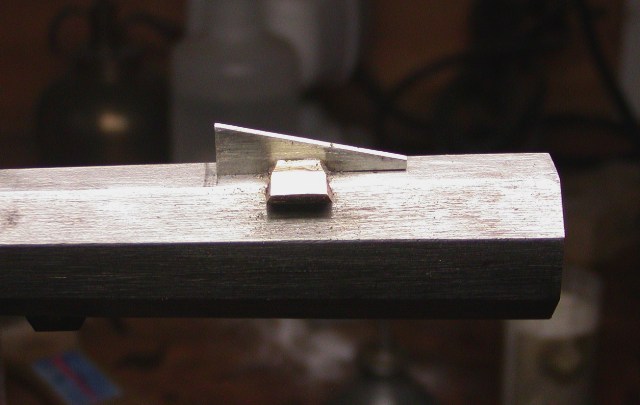
I filed the slot in the base deeper with the edge of a flat needle file. Then I cut the blade profile and filed it to shape. I left it high and the gun will shoot low, so Mike can file it down and reshape it as he desires. I coated the slot in the base and the blade with flux, and used Stay Bright solder to attach them. Brownells Hi-Force 44 is my other preference for solder. I sweat the solder into the slot by touching the solder to one side and heating from the other. When you see solder flowing on the side you are heating, you know that you have a good joint. My last image shows the soldered and installed front sight. It needs some clean up but the whole process took me less than 30 minutes.
QVMAAb3.jpg

The owner will install the rear sight. That way he can position it for his eyes. Something to consider, as we get older, the rear sight tends to migrate further down toward the skinny waist of a swamped barrel. However, on a barrel with substantial flare at the muzzle, a front sight near the muzzle may end up being very low to the barrel given the low height of the rear sight positioned far down the taper from the breech. Although on this rifle kit, I have no choice for the front sight, consider moving it further back from the muzzle if your rear sight has to be position far forward. That way you can preserve a taller front blade less obscured by heat waves from the barrel. Something to think about.


Well I am at point where I need to write the owner's manual for this gun.


More to come.
 
Awesome tutorial! I will be pouring over your builds again as I work through my second build... With the White Lightning liner, do you recommend drilling out to 1/16th for all rifles? Just curious if this is something that would benefit my 54 cal.
 
While I don't see the harm in drilling a Chamber's White Lightning liner's touch hole to 1/16", it may be worthwhile to try the White Lightning touch hole at the original diameter. If it works, you have less (very slight) power lost through the touch hole and a slightly smaller flash to the pan from the main charge. Chamber pressure with the smaller touch hole would be more uniform and consistency improves accuracy. You can always drill the touch hole out. You have to replace the liner to make the touch hole smaller.
 
I have tried it both ways, original hole, 1/16" hole and drilled out to 5/64". I found the original hole to have inconsistent ignition, I prime with 4F. The 1/16" hole is very consistent but I prefer the 5/64" hole for guns I shoot 1F or 2F in. I am not a flintlock expert by any means but this is what I found for my own use.
 
Hi Guys,
The rifle is almost done and I should be posting final photos very soon. I've been having trouble with drying conditions. My shop is well heated and insulated but our weather was such a roller coaster earlier this month that it is causing me some problems. This happened the last 3 years. We go from temps in the 40s, high humidity, and rain, to 0 degrees or below and really dry within 24 hours. Then it cycles again. The finish takes forever to cure as a result despite the constant shop temp of 75 degrees. It is the drastic change in humidity that is the problem. I had to put Mike's rifle aside for a week and work on other projects until we got back to less extreme weather changes. The good news is the finish is about done and I also got a lot of work done on the light infantry fusil.

dave
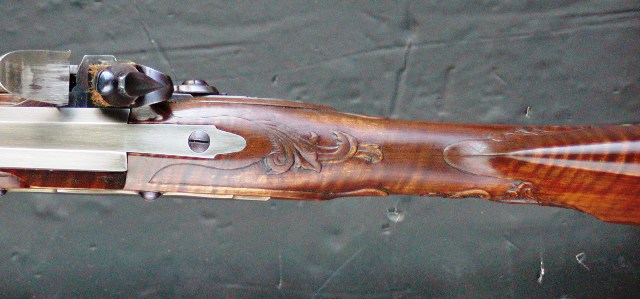
 
Hi,
With respect to the vent hole, I've found that barrel wall thickness plays a role. The thicker the barrel the larger the vent hole needs to be for reliable and fast ignition. For example, I rarely have to make the existing hole larger if the barrel is 13/16"-15/16" at the breech. I rarely build guns with those diameters any more and find ignition reliability is improved a lot when the hole is drilled out to 1/16" for barrels 1"-1 1/8" at the breech. Most guns I build these days fit into that category. On Brown Bess muskets in which I install a white lightning liner, I drill it out to 5/64" and test. If I am not installing a liner to be completely historically correct, I drill a 3/32" vent hole. On those big muskets, I prefer to install a liner because I consider reliable ignition a safety feature for shooters and reenactors, especially the latter. They may have misfires during a battle event and not know it putting them and their friends at risk.

dave
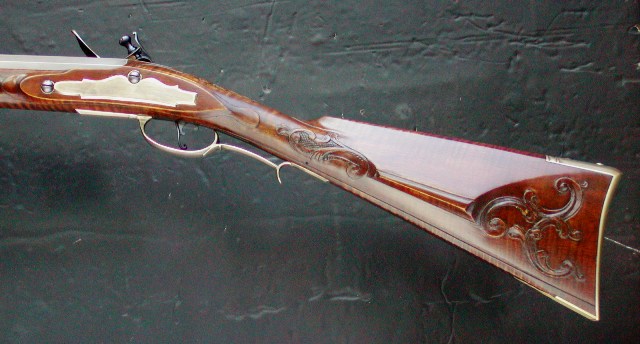
 
Hi,

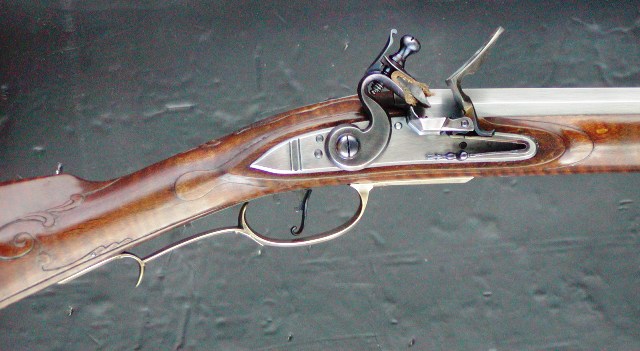
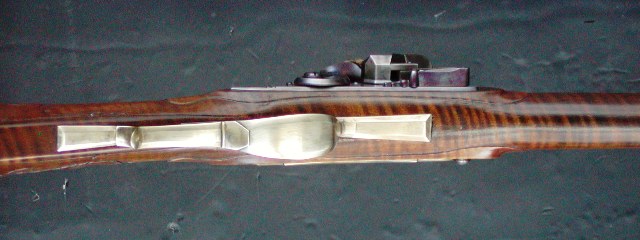
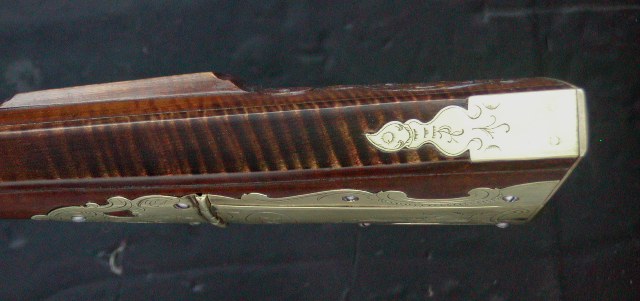
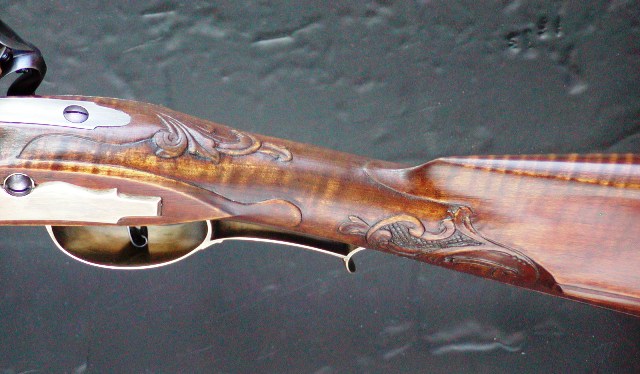
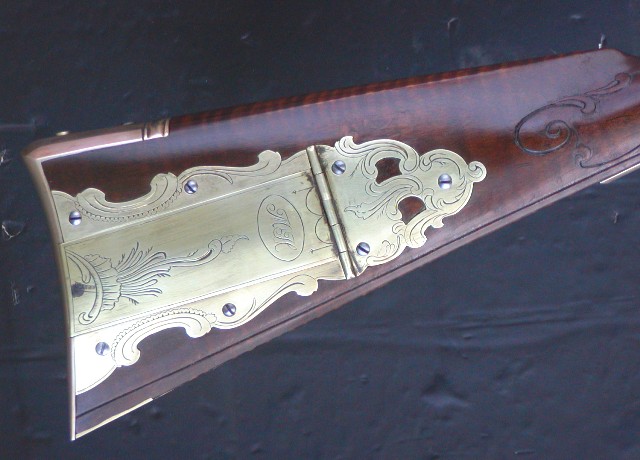
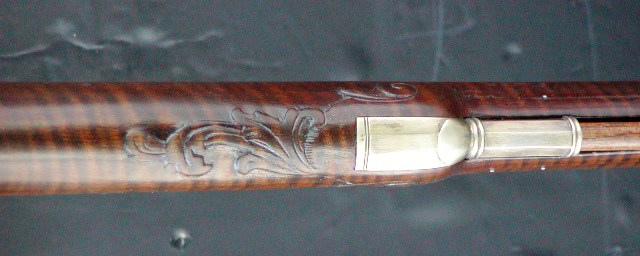
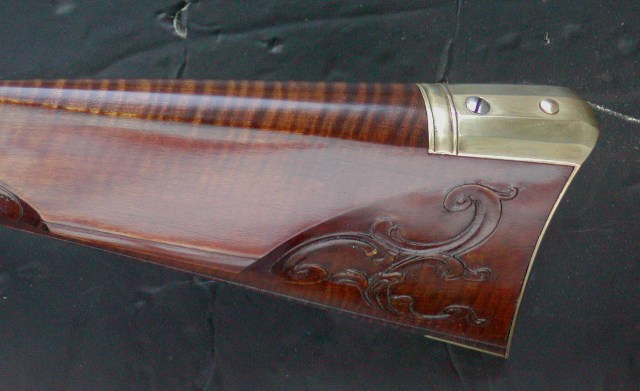
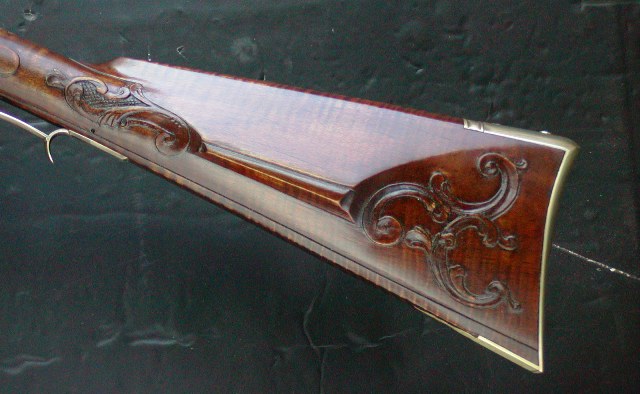
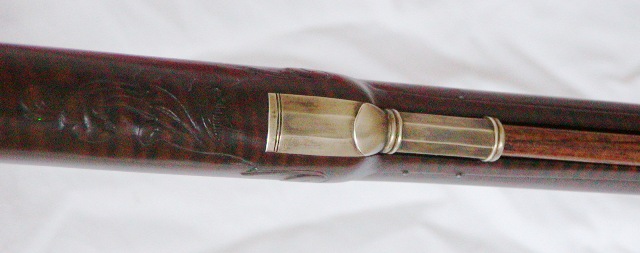
Here is the finished rifle. I will rub in some wax after Xmas as soon as the finish is fully cured. The finish was a struggle due to the roller coaster temperatures and humidity. I used sandpaper to smooth the wood before staining but the final step was a light scraping. The slight texture from that is evident in some of the photos. The barrel is just degreased and coated with instant bluing. Then I rub it back to a tarnish. I installed a front sight but not the rear. The owner wants to install it where he can see it best. It came out pretty nicely and looks credible as a Haines product.

dave
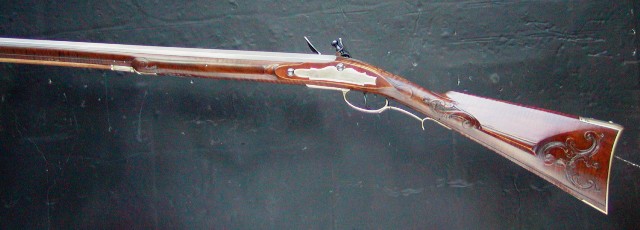
BHRqTxh.jpg

PQgektc.jpg

CblcAZI.jpg

RbFBmkx.jpg

lW8E4sU.jpg

hYJ6Ldf.jpg

zp9U5yj.jpg

bKMuzWs.jpg

ZZ4AuP9.jpg

ykoKW55.jpg

y2Qnlh2.jpg

X72EgvF.jpg
 

Latest posts

Back
Top