• Friends, our 2nd Amendment rights are always under attack and the NRA has been a constant for decades in helping fight that fight.

    We have partnered with the NRA to offer you a discount on membership and Muzzleloading Forum gets a small percentage too of each membership, so you are supporting both the NRA and us.

    Use this link to sign up please; https://membership.nra.org/recruiters/join/XR045103

Building an Edward Marshall Rifle

Muzzleloading Forum

Help Support Muzzleloading Forum:

This site may earn a commission from merchant affiliate links, including eBay, Amazon, and others.
Joined
Nov 26, 2005
Messages
5,224
Reaction score
10,884
Hi,
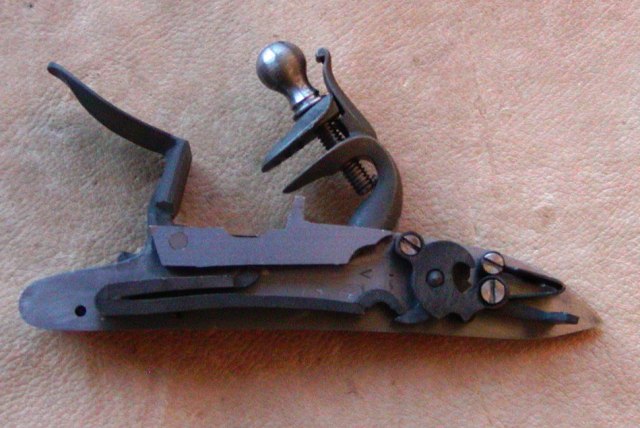
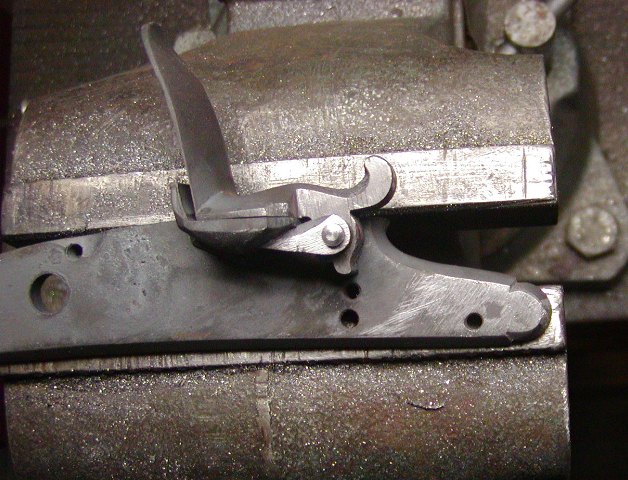
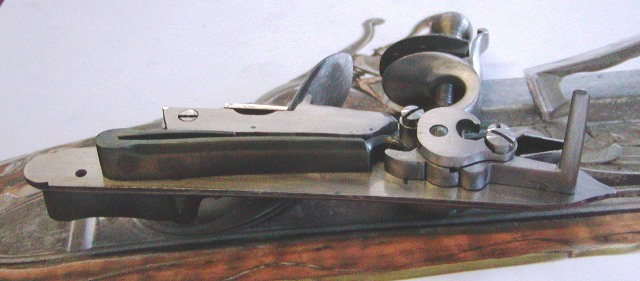
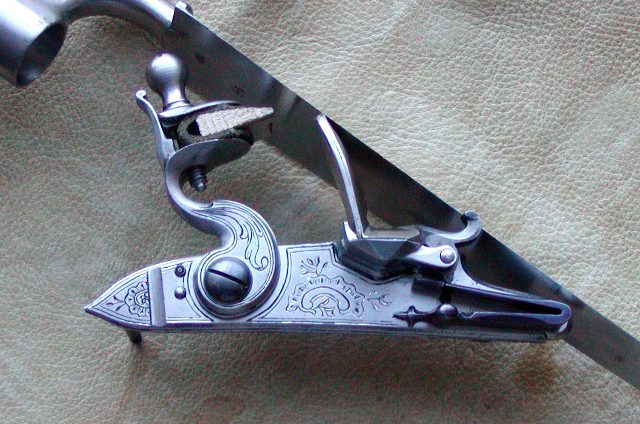
I am building as close a copy of the Marshall rifle as I can without having the original on my bench. I've examined the original rifle and have a large photo library of images to work from as well as Houston Harrison's excellent drawings. The first problem is the lock. No one makes the right lock. All the locks sold with EM rifle kits are too large and have curved plates. They make it impossible to capture the look of the original. So, I had to make a lock. The best choice for size and shape was M&G's "Albrecht" lock. I had low expectations and wasn't disappointed. It was good raw material but needed a lot of work.
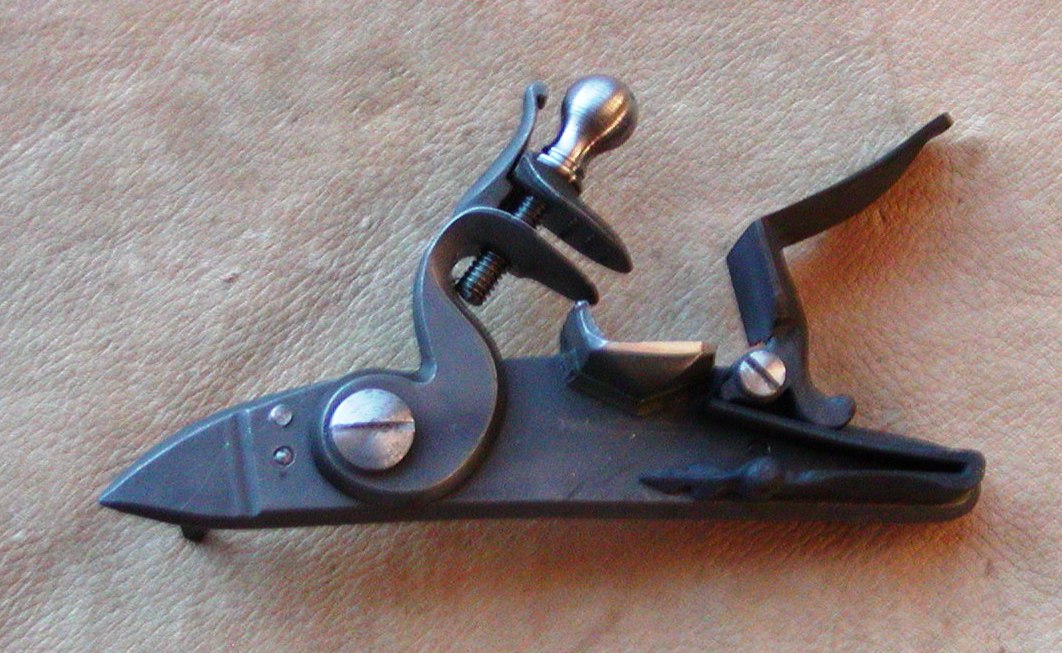
xElqWHZ.jpg

11Du7lI.jpg


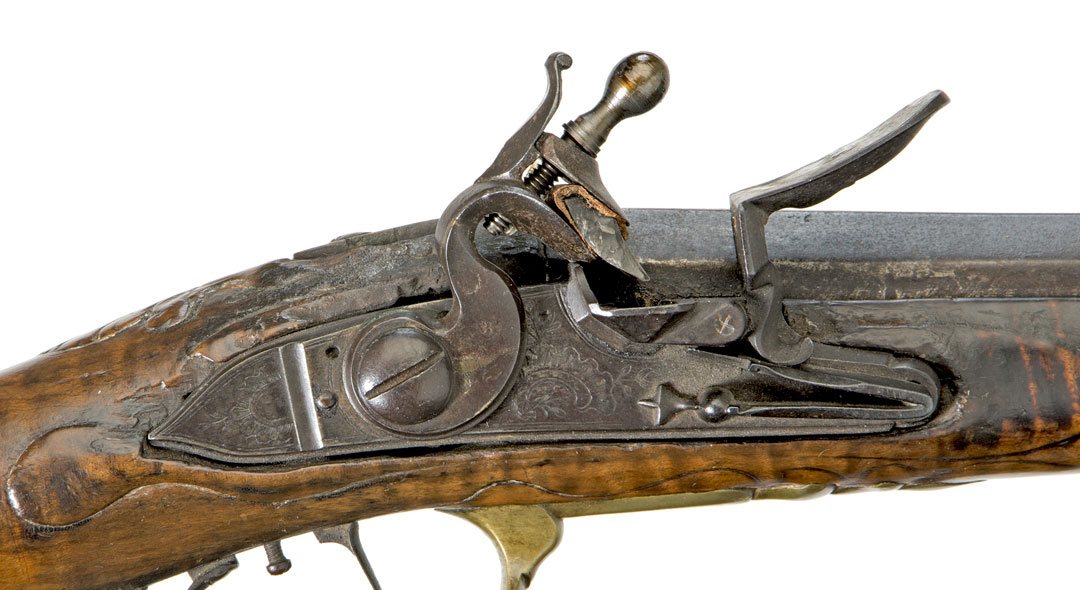
Hear is a photo of the original lock.
9Ql98jW.jpg

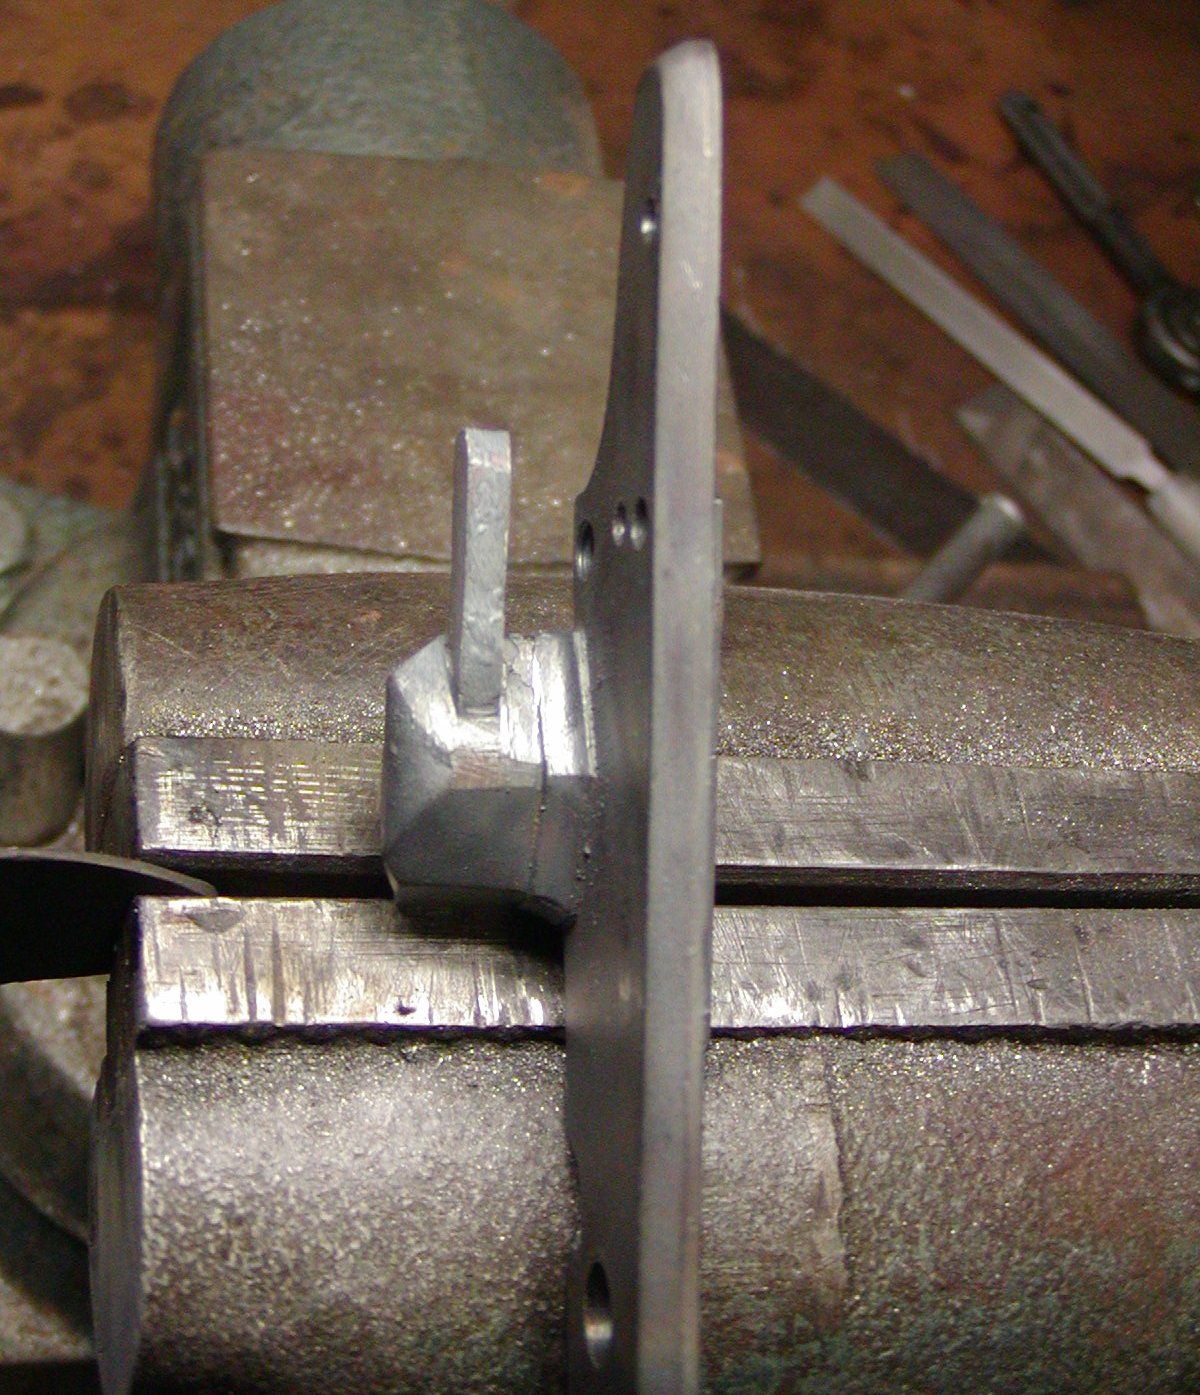
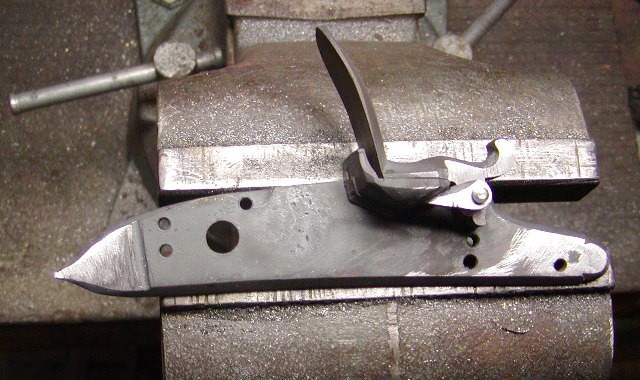
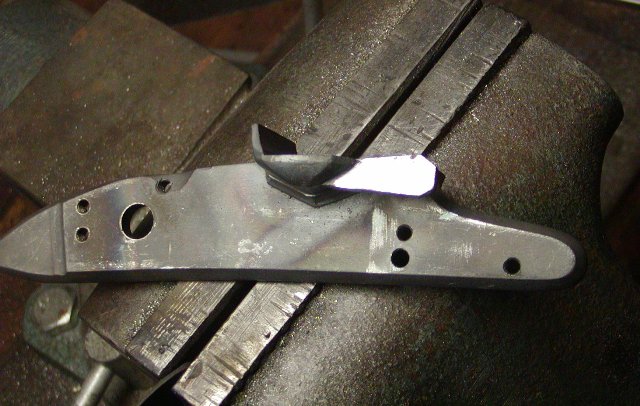
The first task was adding a pan bridle, which I welded on and shaped.
oLARn62.jpg

biR5Nz6.jpg

Next I had to drill it for the frizzen and mount a screw from the inside of the lock plate. That meant filling the old hole in the frizzen and drilling and fitting everything. It came out well.
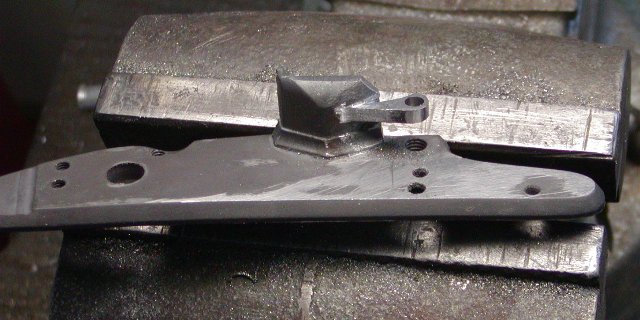
eKtFLl1.jpg

XzRZZWj.jpg

IeW1Vgc.jpg

The original lock has a blind hole tapped for the rear lock bolt. For some reason , M&G ground away most of the bolster where that screw goes so I filled it with weld. I also added weld to fatten the tail of the plate and filed the nose to the shape of the original.
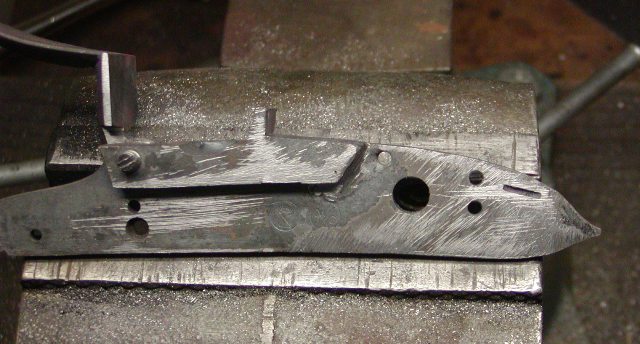
k1BhhfW.jpg

Fq7G3Bj.jpg


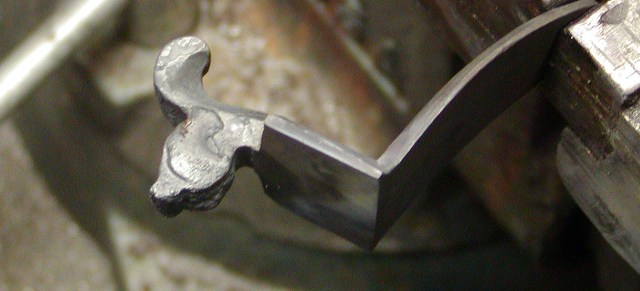
Then I had to clean up the plate and all the parts, reshape the flint **** and frizzen, and cut the border on the plate and flint ****.
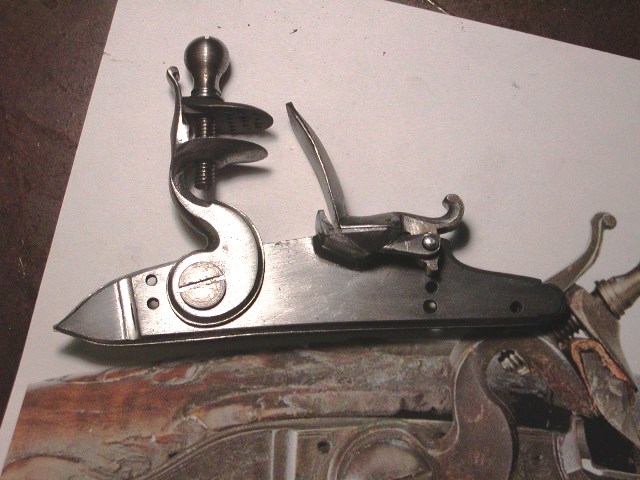
dSGa9sB.jpg


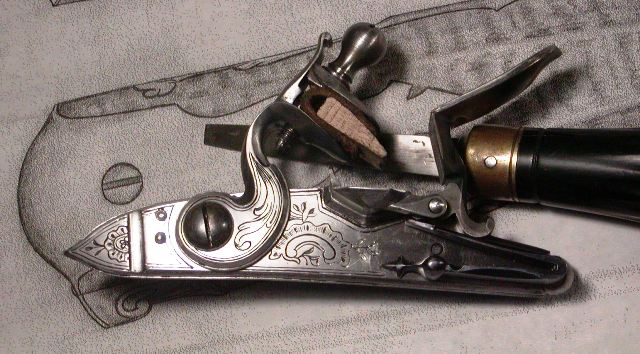
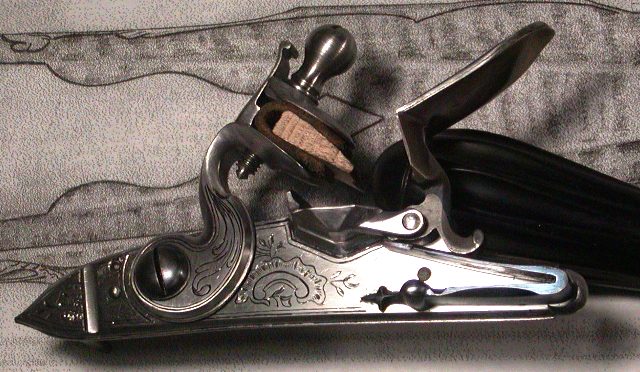
Finally, I worked over the springs, reshaped the finial on the frizzen spring, fitted a high carbon sole on the frizzen to add mass, fitted and polished all the parts, heat treated everything, and engraved the lock as close to the original as I could.
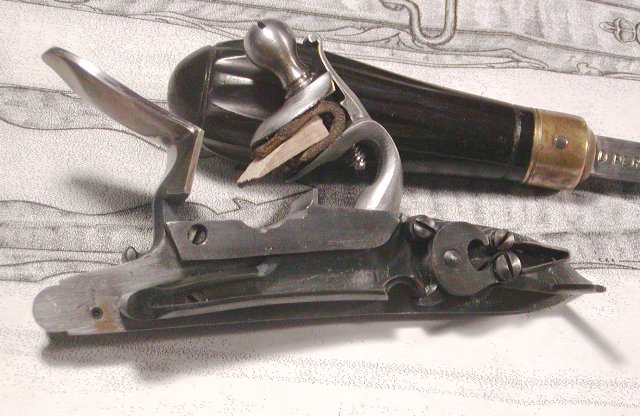
iq0phtA.jpg

xEIu1Q9.jpg

p01S0pR.jpg

7HaKAB5.jpg

mZSRcfZ.jpg


The lock now has a wonderful feel, smooth, silky action, and sparks like crazy.

dave
 
You Sir are to be admired. As some master craftsmen I have had the honor of knowing or talking too, I would suggest you publish a book on your endeavor's, for the future generations to reference. Skill and knowledge of your possession needs to be preserved.
 
I am very much looking forward to this one, but wish you would have built it 2 years ago when I was doing my Ed... Not that it would've mattered all that much, but would have been fun.
 
Hi,
Thanks for looking folks and the kind comments. Gus, I annealed the spring and then just filed it to shape. It is not an exact copy of the original frizzen spring because I was limited by the existing finial but it is close. I annealed all of the springs and internal parts because they all needed extensive work even just to bring them up to an acceptable standard.

dave
 
What did you weld it with, a MIG, Stick, or TIG?
Hi Bud,
I just used an acetylene-oxygen gas torch. For the bridle I just filed a small bevel around all the edges that contact the pan. Then holding it in place with pliers, I just tacked it in place with my torch to hold it in position and filled the bevel with a tiny fillet of weld. Finally, I filed off the excess metal and trued up all the surfaces. The bridle is thin such that fusion to the pan extends well into the thickness of the bridle rather than just involving the fillet of weld. Kit Ravenshear was one of my early mentors and I kind off carry on his low tech tradition. Although this lock project required more time and effort than if I just prepared the lock for use as I bought it, that extra time was not all that much. I always have to put hours into working over and polishing every L&R, Davis, and M&G lock I've used, much less so for Chambers. I would never put one of those locks on a gun right out of the box. The only locks made that I would be totally happy with as bought are Chris Laubach's new CNC manufactured lock and perhaps those by Jim Kibler.

dave
 
Hi and thanks for looking and commenting,
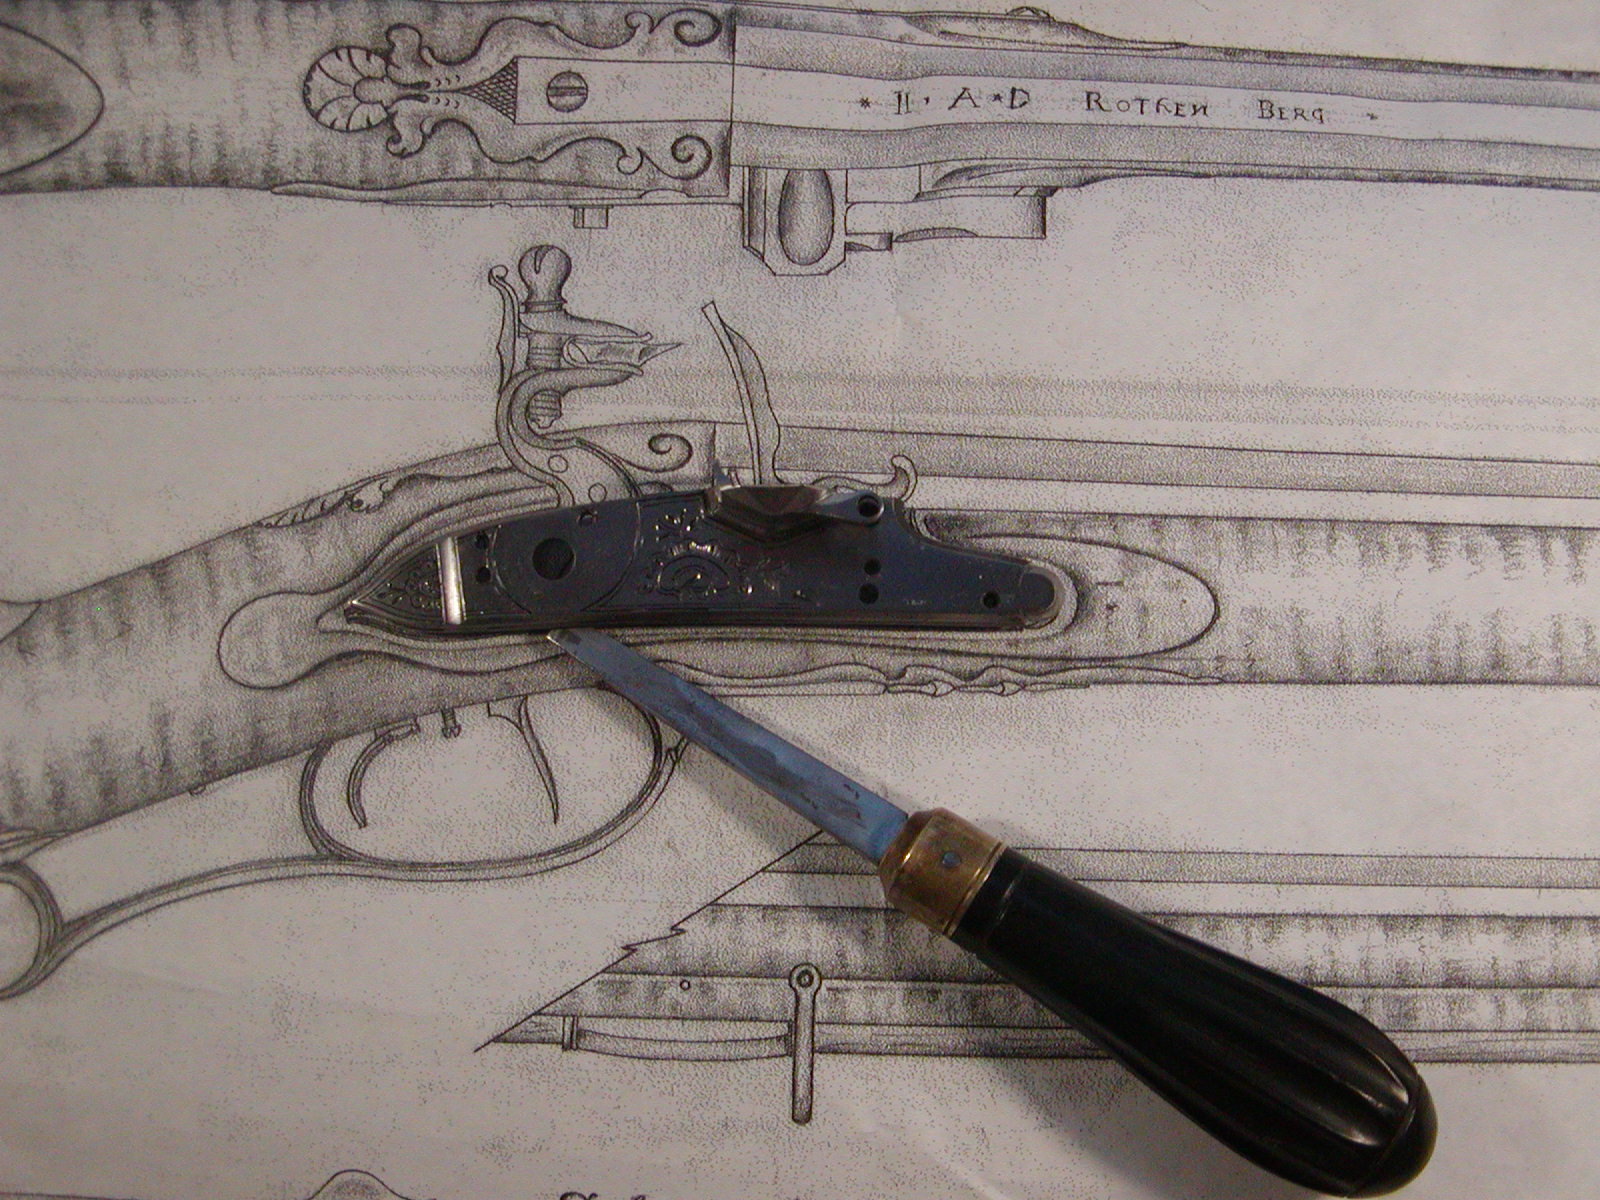
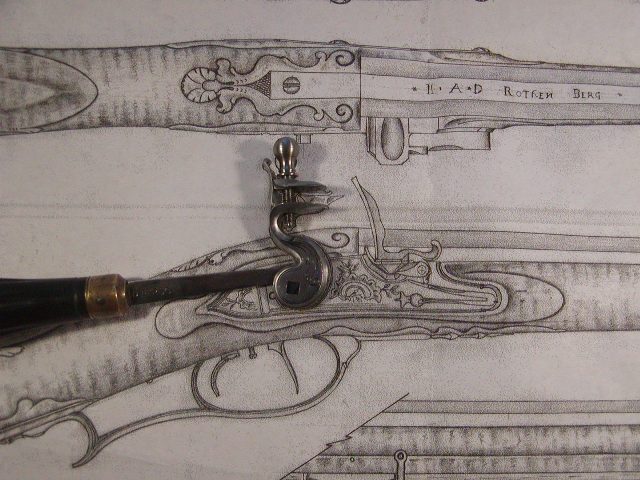
Got some work done on the piece. First, let me show the lock against scaled drawings of the original by Houston Harrison. We are very lucky he did those drawings and they are beautiful. As you can see the lock plate and flintcock are very close to the original but not exact. However, they will preserve the look and architecture of the original very well.
Eh41cHJ.jpg

XpBZyT0.jpg


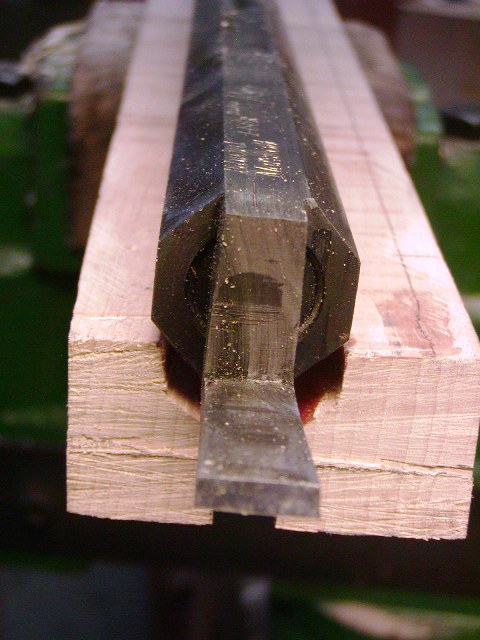
I inlet the barrel. It is the Rice barrel typically sold for Chambers EM rifle kits. This one is 62 caliber. I originally wanted 58 caliber but could not get one despite waiting for over 6 months. My client and I decided the 62 was fine and it will be a little lighter. I first cut a "T" groove the minimum dimension of the barrel using a dado blade and table saw. Then I just inlet the rest of the way with hand tools including octagonal barrel channel scrapers. After the barrel sits down nicely in the stock, I scrape a little extra space around the barrel. Then I bed it in a varnish thin coat of Acra Glas tinted close to the eventual color of the stock. It is so thin you can see the wood beneath. I do that on all my guns because it greatly strengthens the barrel channel, particularly the thin side walls.

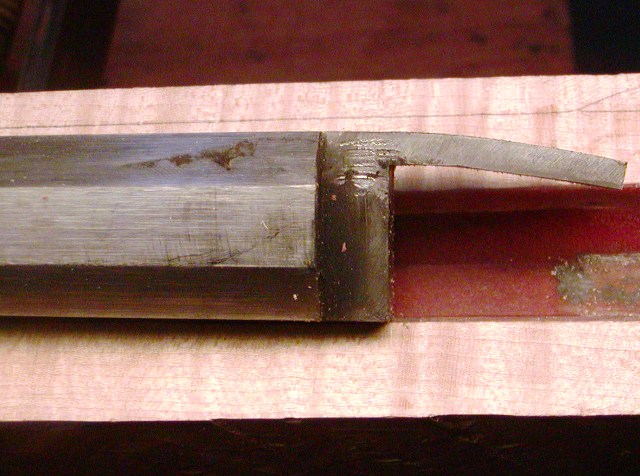
Next up is the barrel tang. I traced the outline of the original on the tang, and filed it to shape. To bend it close to the stock profile, I simply install it in the barrel, place the tang in a sturdy vise and bend using the barrel as the handle. No heat, no muss, no fuss.
q8IeRG9.jpg

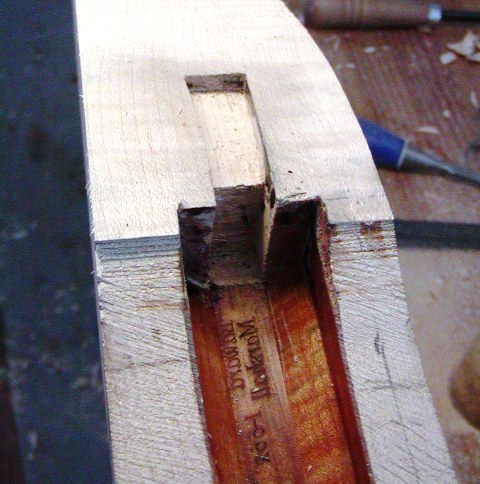
After I remove and reinstall the plug for the last time during the build, I file the sides of the bolster a little to remove most of the wrench marks. I also immediately get rid of any radius of metal where the bolster joins the tang. Almost all machined plugs have the bolster curve up and into the tang on the bottom. That makes it a nightmare to inlet in the stock. I always file it in a right angle, which makes it very easy to fit in the stock. I also give the bolster a very slight taper top to bottom, which helps during inletting and making sure you get a snug fit. Finally, before inletting, I file draft on all the edges of the tang which also helps create a snug mortice.
cIdV5Eq.jpg

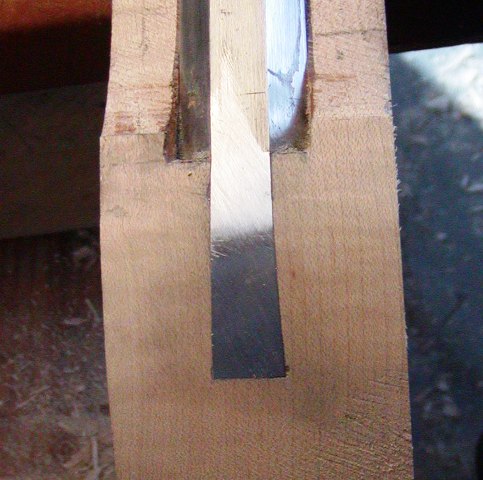
I place the barrel in the stock, trace the sides of the bolster on the wood, and cut it in with a 1/2" flat chisel. It is sometimes difficult to center the bolster at the end of the barrel channel because the barrel is cannot be seated in the channel. I eye ball the centering but this is where the taper on the bolster helps because when you trace it on the wood, the lines are undersized a little, allowing you to adjust its position side to side as you cut the mortice deeper. That way you always get a nice snug fit when the barrel and tang are fully seated in the stock.
um6nb0r.jpg

kCvkjbl.jpg

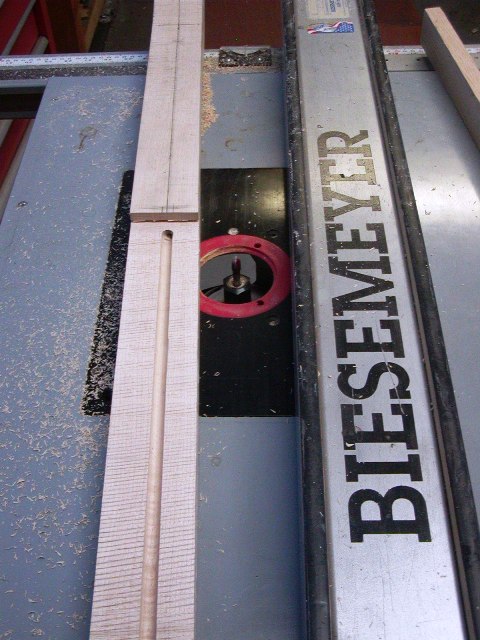
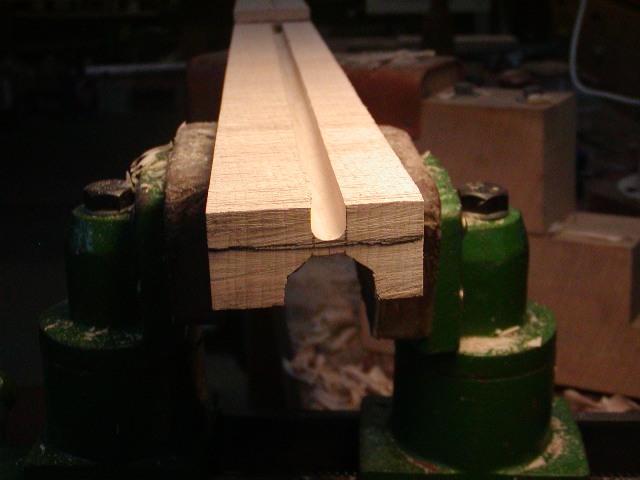
The square ended flared tang is easy to inlet. Next up was routing the ramrod groove. I make sure the bottom and one side of the stock are flat and square to each other. Then I use my router table and a 3/8" round nosed bit to cut the groove.
040jnaA.jpg

On the EM rifle this job is straight forward because the groove and ramrod hole are parallel with the bore of the barrel. So I just needed to flatten the bottom of the stock and determine the thickness of the web of wood between the barrel channel and ramrod groove at the muzzle. It is 0.22" at the muzzle and 0.1875" at the breech.
Ax5WSkA.jpg

This is more complicated on some of my really slim English fowlers because the groove and ramrod hole are parallel with a line drawn from the bottom of the muzzle to the bottom of the breech so that they are roughly parallel with the bottom profile of the barrel not the bore. Therefore, I have to make sure the bottom of the squared stock is parallel with that line. In that case, the web of wood is of constant thickness at the breech and the muzzle. Requires a bit of calculation but it results in really slim and elegant fore stocks.

More to come.

dave
 
Hi,
I just thought I would share this little trick with you. When you inlet a barrel tang, if you've filed draft (beveled the edges a little) on the edges, your tracing of the tang on the stock will be undersized initially, which is good. As you inlet the tang deeper, you have to scrape or cut the sides of your mortice a little bigger because the outer dimensions of the tang are getting slightly larger because of the draft. In particular, the back edge of the mortice tends to push the barrel forward creating a gap at the breech of the barrel against the stock. The solution is to inlet the tang a little until tight, then retrace the outline on the stock with a very sharp pencil with the barrel in place. Then using a scary sharp flat chisel cut away most of your pencil line. After deepening the bottom of the mortice the tang will now sit in lower. Then repeat the tracing and cutting process until the tang is all the way down.

dave
 

Latest posts

Back
Top