• Friends, our 2nd Amendment rights are always under attack and the NRA has been a constant for decades in helping fight that fight.

    We have partnered with the NRA to offer you a discount on membership and Muzzleloading Forum gets a small percentage too of each membership, so you are supporting both the NRA and us.

    Use this link to sign up please; https://membership.nra.org/recruiters/join/XR045103

Building an Edward Marshall Rifle

Muzzleloading Forum

Help Support Muzzleloading Forum:

This site may earn a commission from merchant affiliate links, including eBay, Amazon, and others.
Hi Guys,
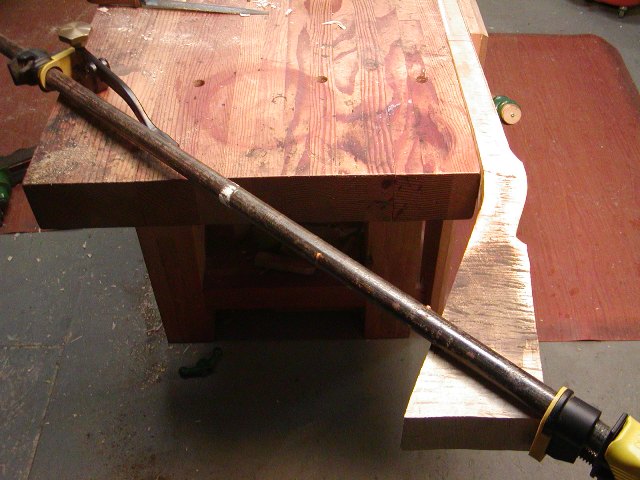
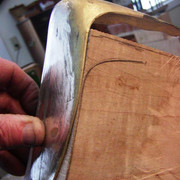
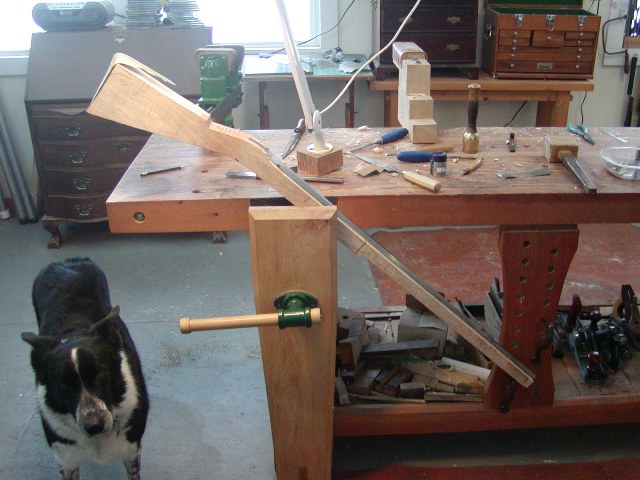
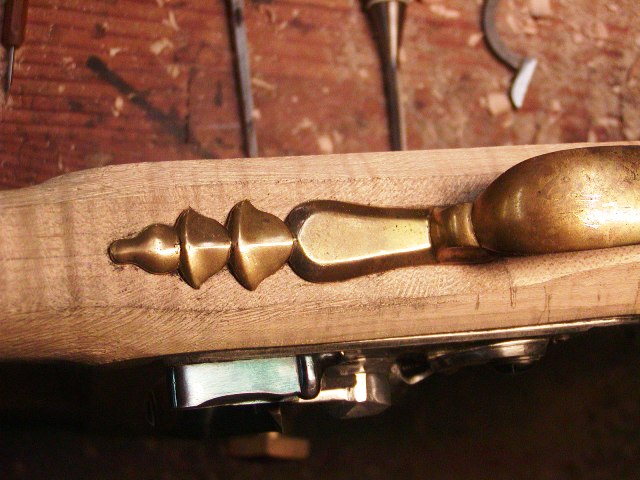
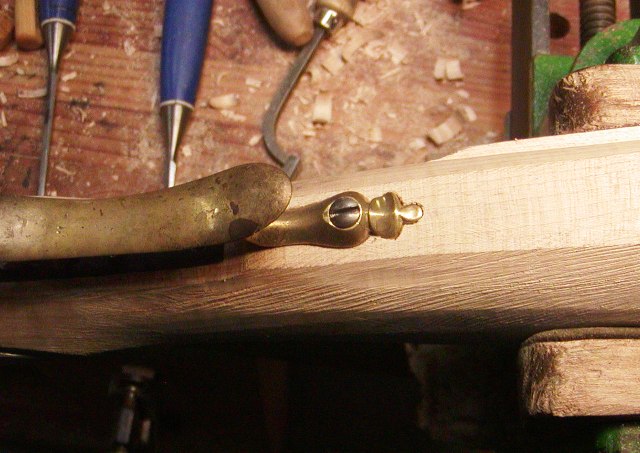
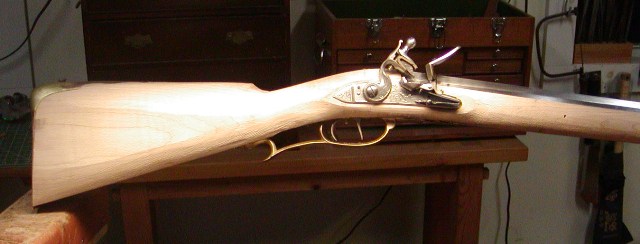
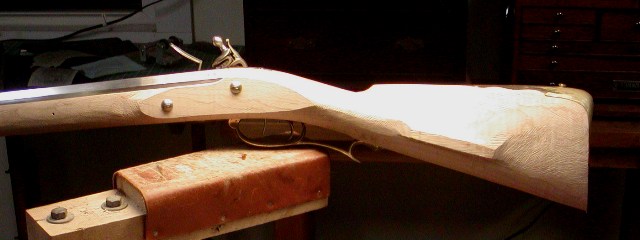
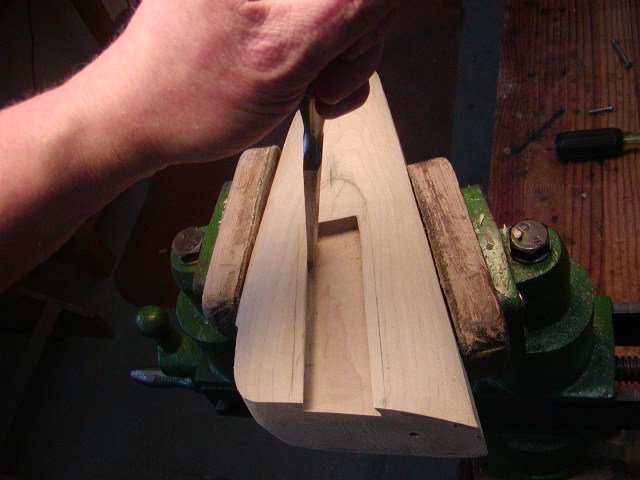
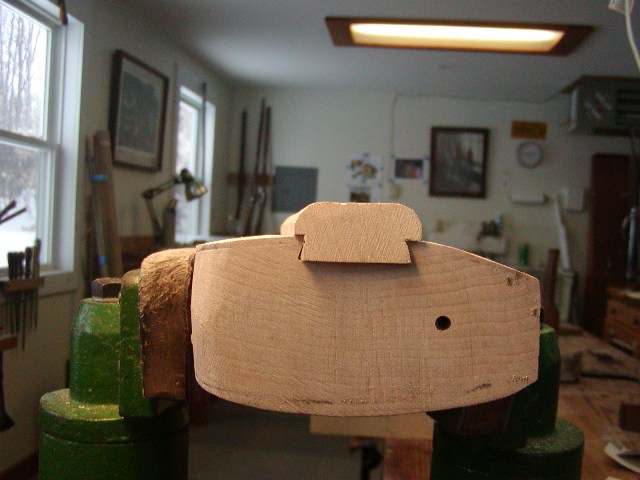
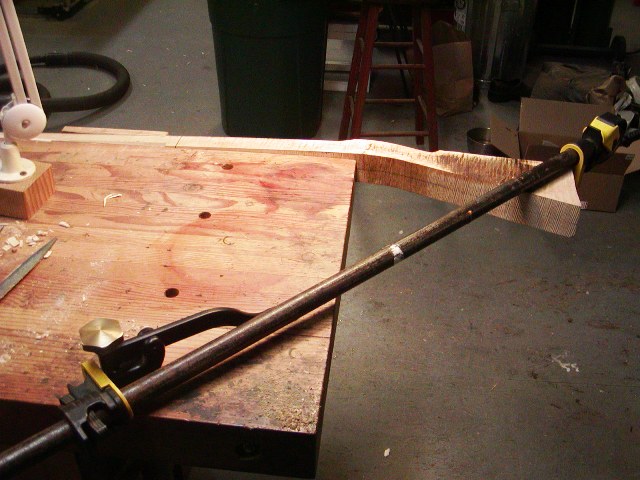
Well, I had to make a correction. I was so focused on the dimensions of the original gun that I failed to adapt the stock to the dimensions of my client. Based on his handling some rifles in my shop, he needed about 3/8" more drop at heel (of the butt plate) than the original gun. I already band sawed out the stock based on the original so what to do. Well here is the solution. This shows why I love my bench and vise arrangement. I clamped the stock in my one of my wooden leg vises and fitted a pipe clamp anchored by a dog in one of my bench holes. That provided the force for bending. Then I wrapped the wrist of the stock with an old sock secured with twine. I heated canola oil to the point of smoking and ladled it on to the sock. When the wood was saturated with the oil on the surface, I applied pressure to the pipe clamp until I'd added about 1/2" of drop to the stock. After the oil cooled, I released the clamp and he stock rebounded to a shape with 3/8" more drop. I bet no one has shown you guys this trick before.
dQQkdDt.jpg

2Qjystz.jpg


dave
 
Dave,

I've read the "Best" Double Barrel Gun Makers in London do this when they adjust a gun for a different customer than it was made for. However, you are correct I've never seen pics of how it is done. Thank you.

Gus
 
Hi,
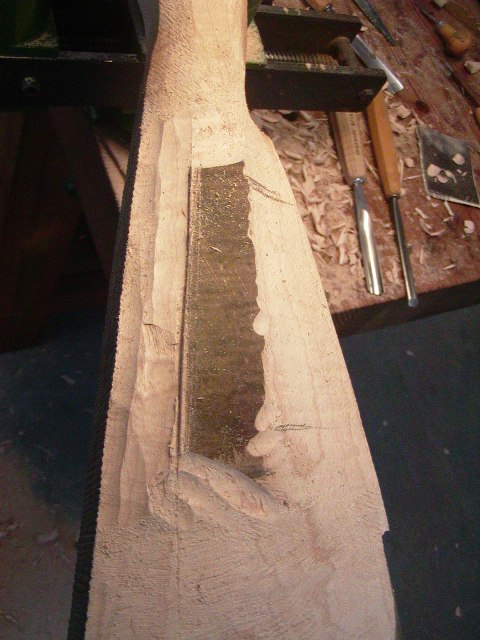
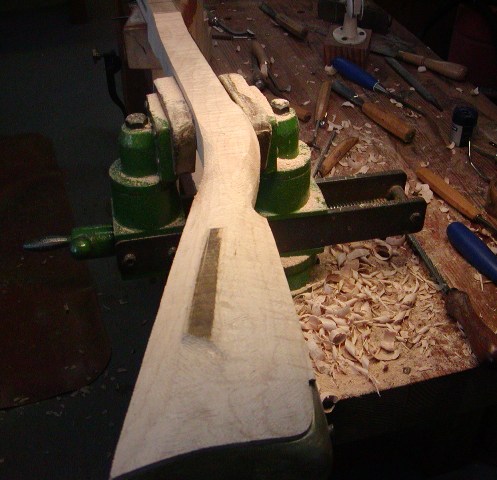
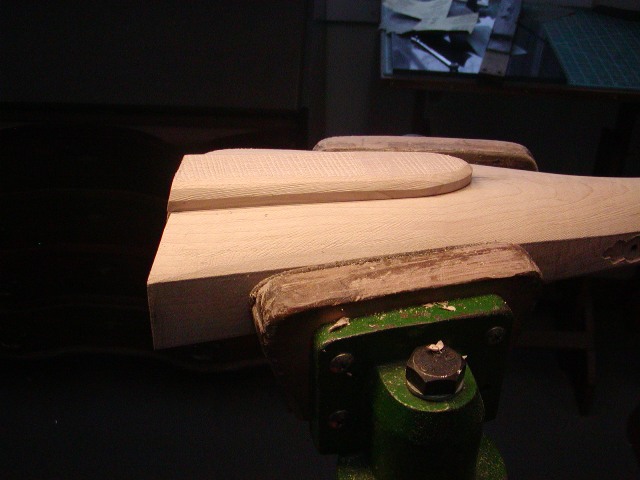
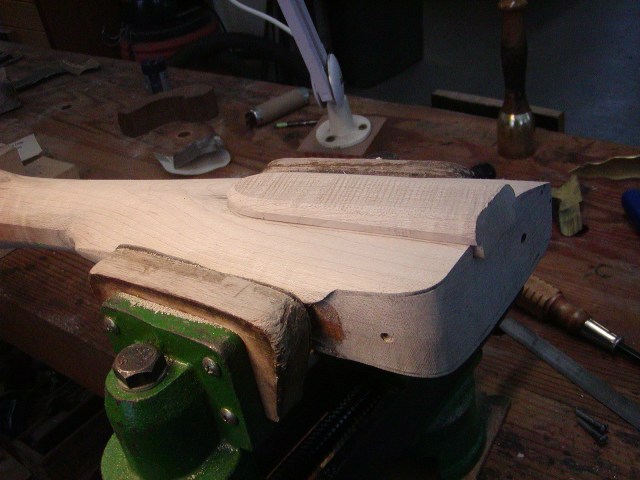
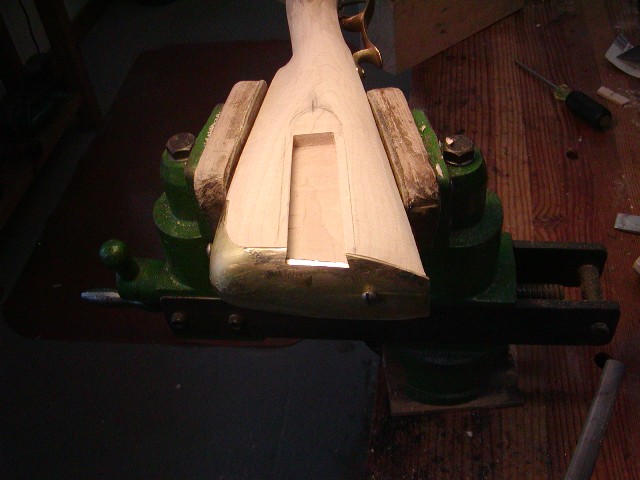
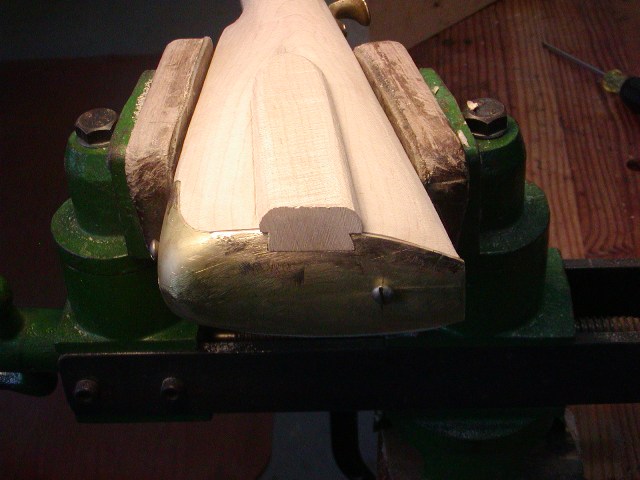
Here is how I install the style of butt plate on the Edward Marshall rifle. Bigmon asked for help a week or so ago and I thought I would post this for him and others. I am building the gun from a rough stock and using a wax cast plate from Barbie Chambers.


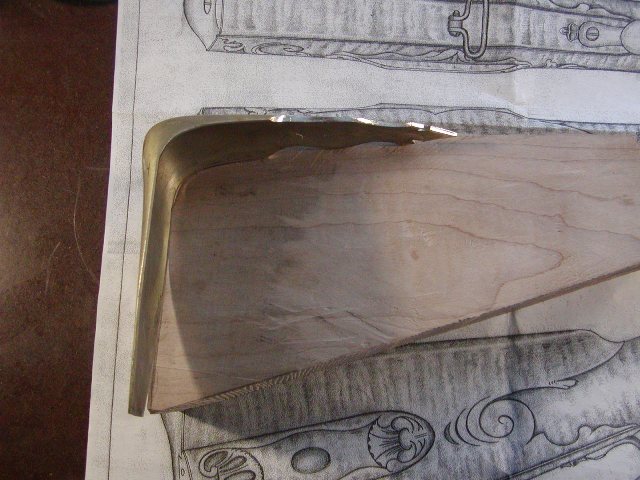
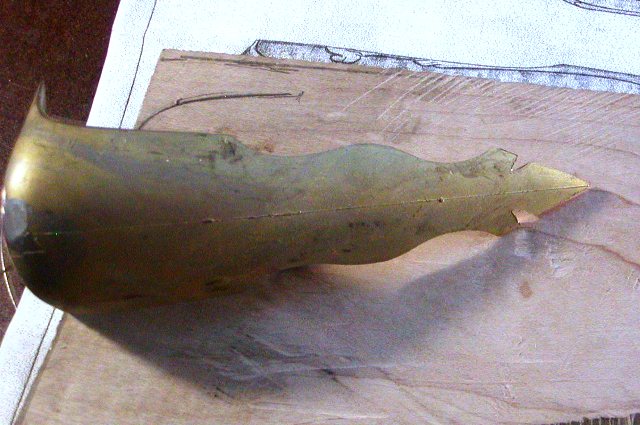
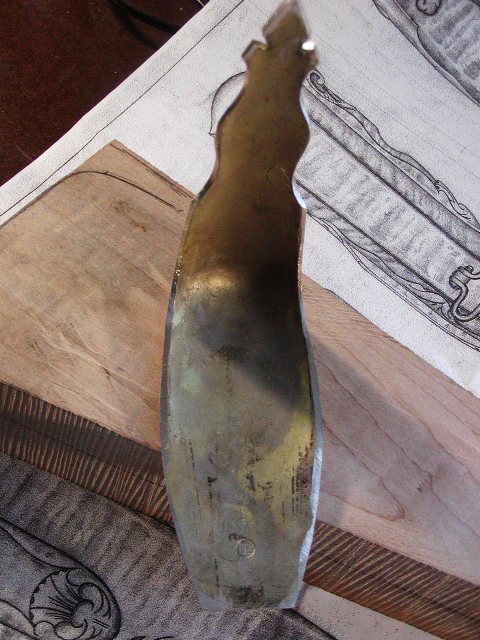
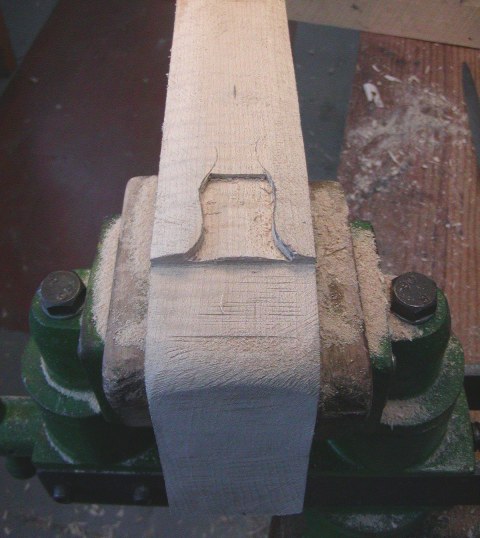
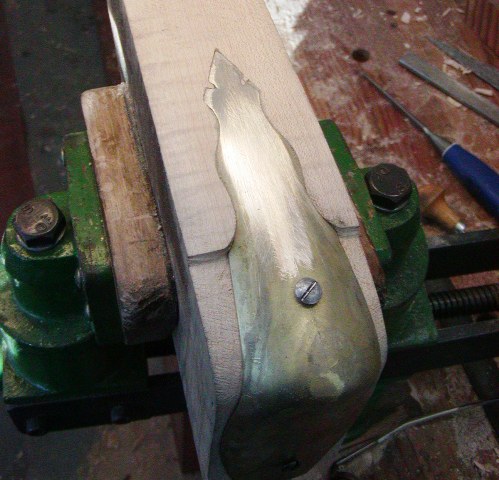
The first task is to prepare the plate. Two notches have to be filed into the triangular finial on the front of the plate. They are the exact profile of the edge of a half round file so filing them was a piece of cake. The butt plate has a slight concave arc to the face that needs to be straightened. I annealed the brass and simply squeezed each edge in a vise to straighten it. Next I flatten all the inside of all edges that sit on the wood and file draft in all edges that inlet into the wood.


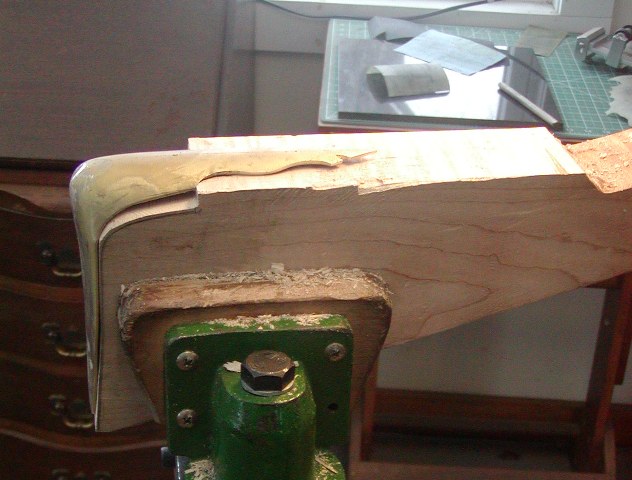
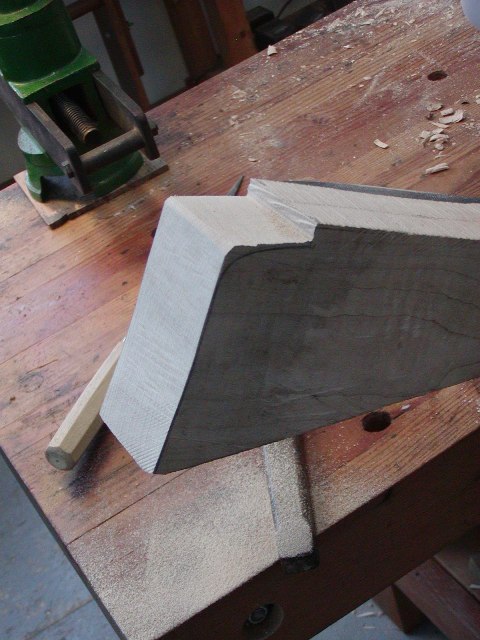
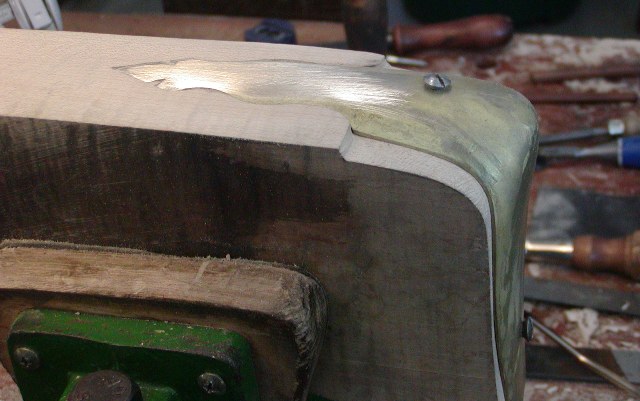
When the plate is ready for inletting, I carefully trace the profile on the stock. Now, I normally don't install a butt plate until the stock is roughly shaped and in this case, that would make the job easier. However, I decided to do the plate now so it might still be in time to be of some use to Bigmon. After tracing the outline I cut very close to the line on the end of the stock. That face is almost perfectly straight down, which makes installing this plate much easier. The original rifle is also very straight. I mount the stock in my leg vise with the muzzle supported by a dog in the sliding deadman. Note how the face of the plate needs very little work to bring it flat to the stock. Basically, once it is flat against the stock, the butt plate no longer will be moved forward during inletting, just straight down. Again, this is so much easier when the plate is flat with no arc.


The dog I mean is an iron hook not my little black and white buddy. That positions the butt end high up and eay to see and work on for the initial tasks.


I determine where the shoulder of the part of the tang that sits down on the wood ends and where the part that is inlet into the wood begins. I cut and file away that shoulder.


I shape the shoulder and radiused heel until the plate fits down on the stock. Then I can trace the forward part of the tang and start inletting it.


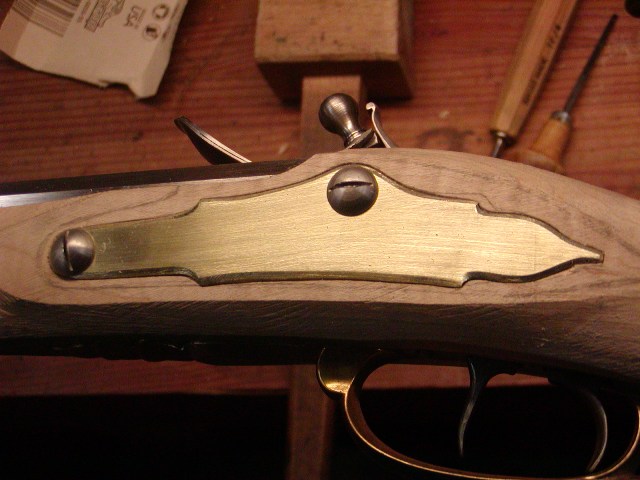
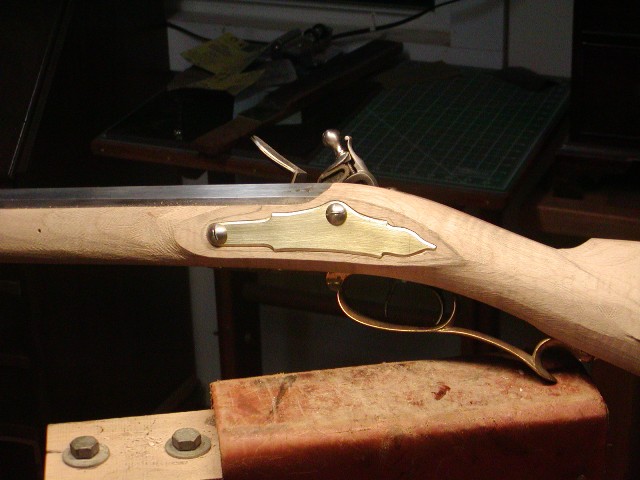
I just keep working forward with the inletting until the tang sits down into the wood. I use inletting black to check the fit and make minor adjustments. The job would be easier if the top of the comb was already rounded close to the final form. The edges of the tang sit below the level of the wood so I have to be careful removing the plate so I don't chip the wood. The job came out nicely and I am pretty happy with it. As per the original, the wood screw on top is 1 3/4" from the end of the heel of the plate and the lower screw is 1 3/8" up from the bottom of the toe.


dave
 
Dave,is the oil bending trick permanent, or will it spring back over time? I would have never thought of that idea!
 
Thanks for the buttplate tutorial, Dave. I wish I had seen that before I ever did my first build years ago, which was a Jaeger with a complex bunch of curves on the top. Yuck.

I generally hate buttplates and highly curved steel ones are the worst! On the Hawken build I did I completed about 1/2 of the buttplate work, then left the bleeping thing sit for two weeks before feeling brave enough to go back and finish it. I swore I'd never do another highly curved steel buttplate, but then along came a Kibler SMR. Fortunately, Jim does such a nice job the one I got was nearly a snap-fit. He probably saved me a dozen Hail Mary's of penance and possibly getting locked out at the Pearly Gates due to reduced cussing! ;)
 
Hi,
hBUINyD.jpg

vjjdI2X.jpg


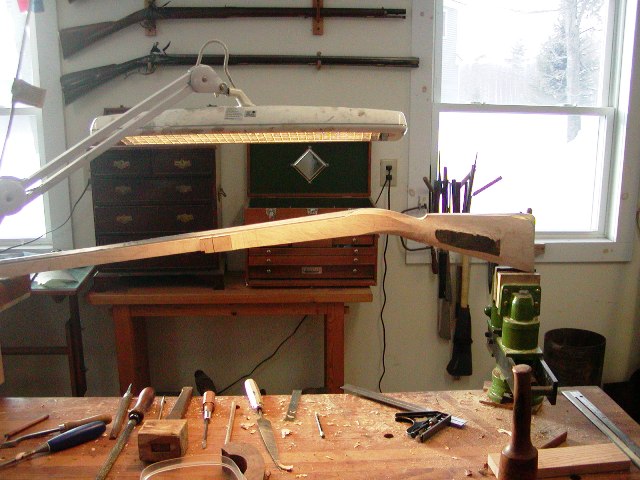
There is an Edward Marshall rifle hiding in that slab of wood and I am going to find it. As Allen Martin used to say, "It's easy, you just cut away everything that isn't a long rifle."

I've band sawed, chiseled, and rasped away a lot of extra wood. The lock panels are starting to appear and I inlet the lock plate as a reference for shaping around it. It is always best to remove a bunch of extra wood before inletting parts like the lock so you don't have a lot of extra depth of wood to go through. Many of these early rifles have straight cut bottom edges on the cheek pieces. That makes it easy to start shaping them because you can cut down with a saw to the depth of the cheek piece and then just back cut with a flat chisel to create the bottom surface of the cheek piece.
7yVxNol.jpg

EZvgkBa.jpg


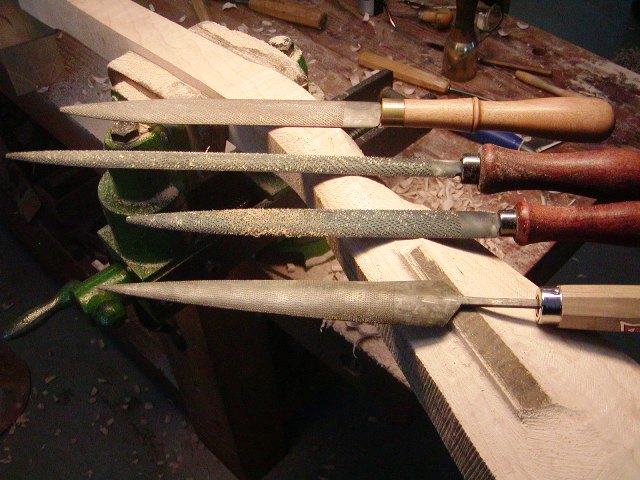
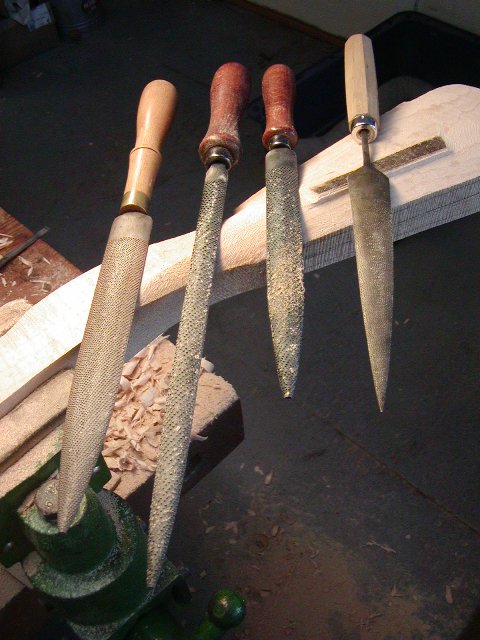
I am finding that EM rifle in there. I want to show you 4 pattern maker's rasps that I depend on for almost 75% of my stock shaping. I owned several Nicholson #50 pattern maker's rasps over the years and they were my essential tools. I gave my last one to Josh, my blind gun building friend, and replaced it with a selection of new ones by Auriou, Liogier, and a Japanese Dragon rasp.
QBWxfv9.jpg

WasrSSf.jpg

The upper rasp in the first photo is an Auriou. It is a direct replacement for the Nicholson and does the same job. The cut is medium and is wide profile is great for smoothing large surfaces. The second rasp is a Liogier Sapphire gun makers rasp. It's long and arrow length is perfect for shaping combs and cheek pieces because the handle easily clears the butt of the stock. It is fairly coarse cut and mows through hard maple like butter. The next rasp is a finer cut Liogier standard rasp. It is a general purpose tool similar to the old Nicholson. I have coarse and medium cut versions. The bottom is one of my favorites. It is a smooth cut Dragon rasp from Japan. I cannot praise this tool too much. It cuts fast but very smooth and basically replaces all of my coarse standard files for smoothing wood. The acute point on the rasp makes it incredibly useful in tight corners and spaces. I love Japanese woodworking tools. All of my wood working hand saws are Japanese that cut on the pull stroke. I will suffer using no others. The rasps I show are expensive but they last for years. They all have random patterns of teeth, which means the cut surface is smoother than when using rasps with teeth in rows. They are also just beautiful tools, particularly the Liogier Sapphires.

dave
 
The rasps I show are expensive but they last for years. They all have random patterns of teeth, which means the cut surface is smoother than when using rasps with teeth in rows. They are also just beautiful tools, particularly the Liogier Sapphires.
dave
This is why the hand cut rasps file so much smoother than machine cut rasps. Those of us used to only modern machine cut rasps often don't grasp the difference until we try a rasp with random patterns of teeth. This is an excellent example of how modern manufacturing techniques have actually screwed up the usefulness of a hand tool.

Gus
 
Hi Folks,
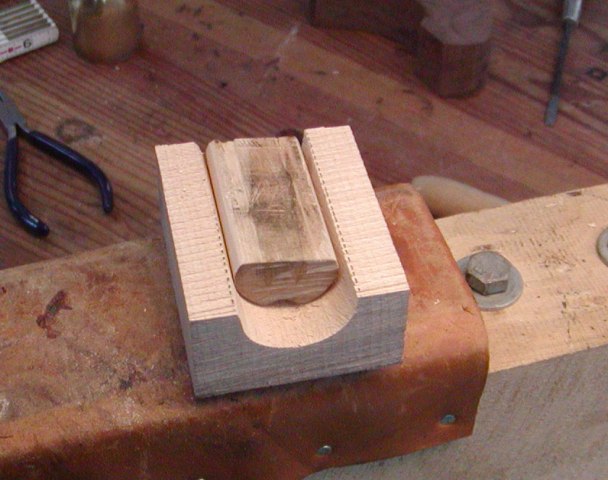
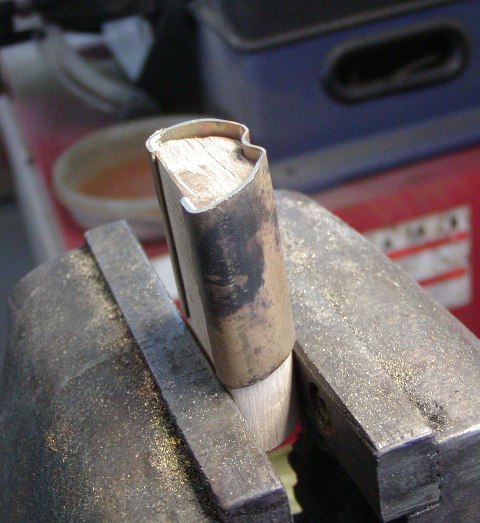
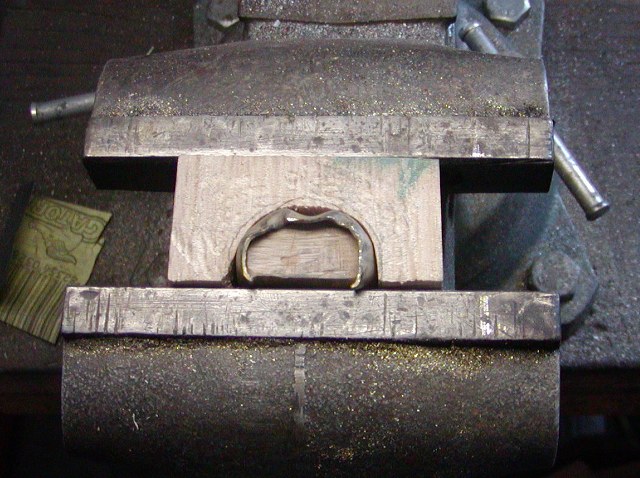
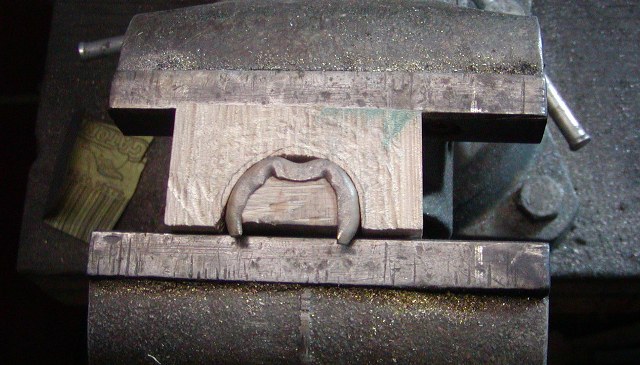
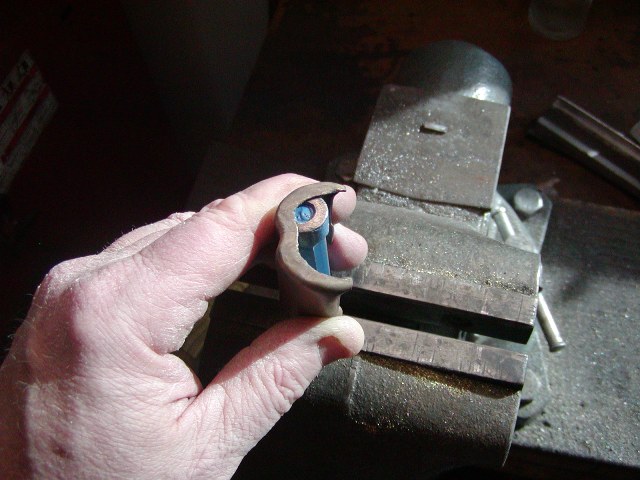
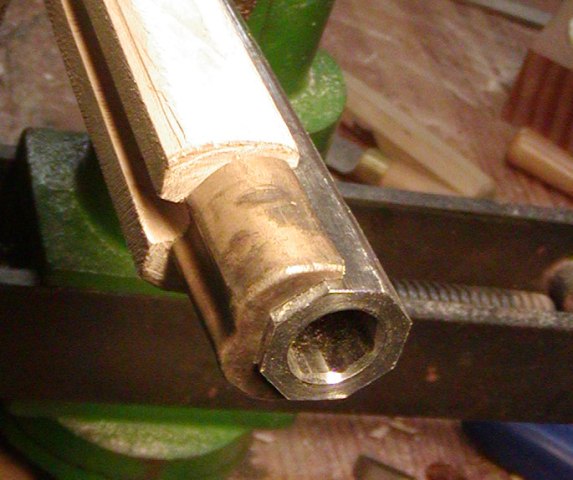
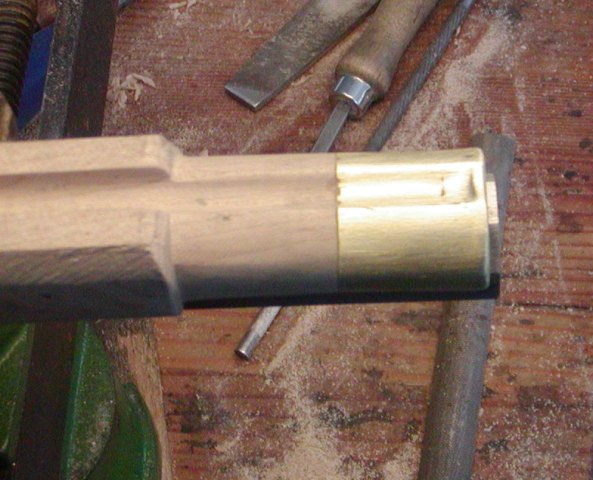
Thank you all for looking and commenting. First, I want to say that I love this rifle. The more I work on it the more I can see and understand the European trained master who produced the original. The sophistication of design and decoration is of the highest order despite it being a fairly simple working gun. What I mean is that it is not a gift of the wealthy but was made by a man who could approach that level of work given the demand or opportunity. One of my reasons for posting about my projects is not to do step by step essays on gun building, rather to fill in some gaps of design, details, techniques, and skills that are rarely covered in other contributor's threads. I try to fill in the gaps and contribute details and tips that can make big differences in the scope and quality of your work. With that in mind, I had to make a one-piece muzzle cap for the Edward Marshall rifle. Most early long rifles had one-piece muzzle caps. Soldered 2-piece caps came later. That cap on the original has a special quality in which the lip of the formed cap has a slight bulge. It is a very elegant detail that you cannot capture with commercial product. So here is how I did it. The method I show is one I learned years ago in a tutorial posted by Tom Curran and Rich Pierce on the ALR website. The first step is to make hard maple forms to shape the sheet brass. These forms are based measurements from the Marshall rifle but I have others I use on different guns.
9dYAgpH.jpg

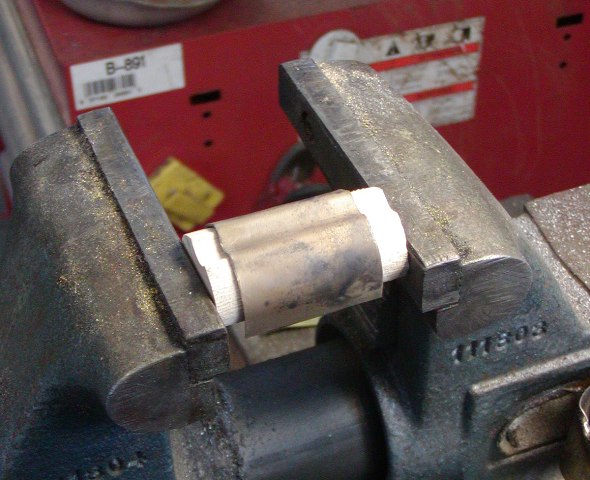
Next I cut the 0.031" thick brass using a paper pattern folded around the form. I annealed the brass and then using a 3/8" drill as a mandrel, hammered it into the form to make the ramrod groove.
6utE5Dh.jpg

Then I just bent the brass around the form with finger pressure.
lMooHlq.jpg

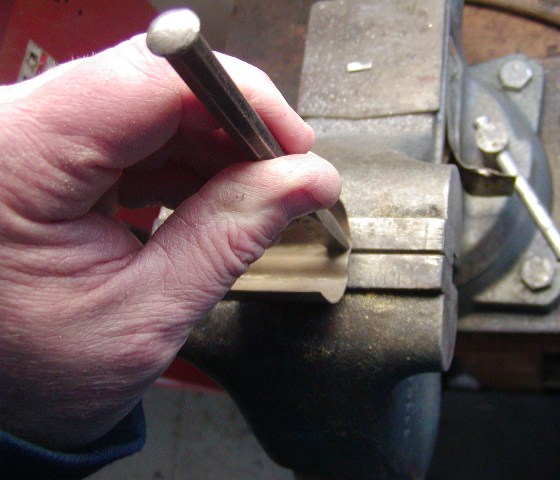
I use a small cold chisel to define the edges of the groove.
4UbpUrw.jpg

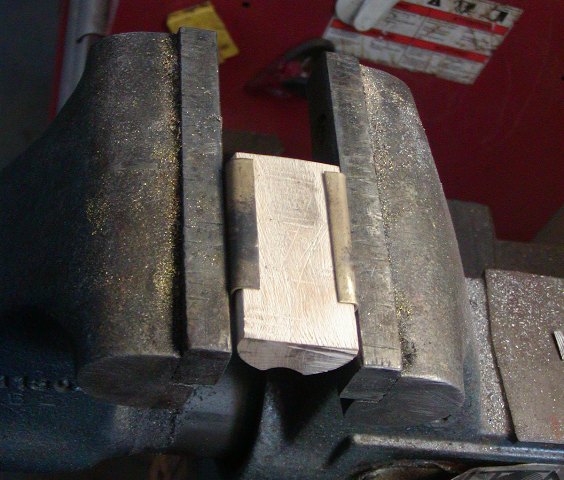
I squeeze the brass and form in a vise and hammer down the top edge to allow for some thickness on the sides of the barrel.
qcb05Ii.jpg

I grind the front so there is less brass to peen over from bottom to top of the face of the muzzle cap.
IJYwulC.jpg

Then I placed the cap and form in the outside form allowing for the amount of brass to be peened over to form the face of the cap. I slightly chamfered the front edge of the inner form so a raised "squeeze" of brass would form at the bend, like the original. If I wanted a smooth curved radius, I would have filed more chamfer. I direct all hammer blows toward the center of the face. I annealed the brass again before the final blows.
d4VHOiV.jpg

PzI5ITk.jpg

I remove the cap and using a stake, define and flatten the front.
Y3YmXoI.jpg

I filed the edges along the barrel, and fitted the cap to the stock. Then scribed the barrel profile using the barrel channel on the inside of the front panel. I filed the barrel profile and fitted the cap in place with the barrel in the stock. It came out very well and looks exactly like the original.
tLSkAEM.jpg

Later, I will clean and polish it and rivet it in place. On the original, the muzzle cap is secured by a screw from the outside threaded into the barrel. This is a bad design because inevitably the owner or descendant forgets to remove the screw when taking out the barrel and damages the gun. I usually deal with this by inletting a nut in the barrel channel for that screw rather than a hole in the barrel. The slimness of the Edward Marshall rifle at the muzzle makes that impossible so I will rivet it in place from the oblique sides where the thickness of wood is greatest.

dave
 
Hi,
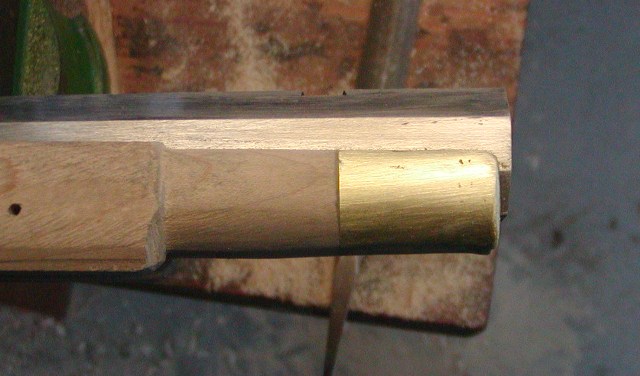
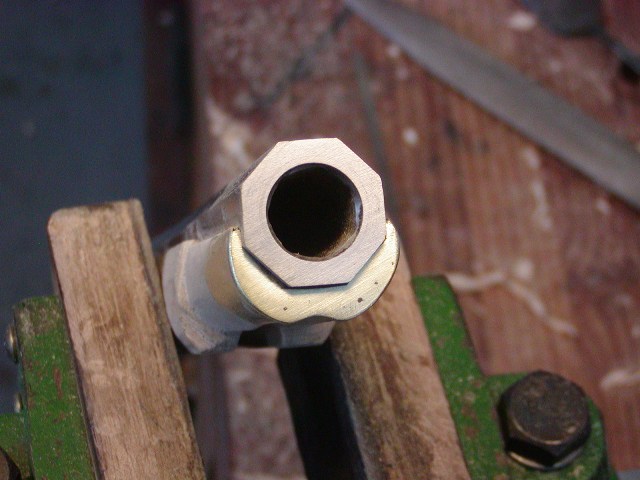
A few more muzzle cap photos showing it done and installed. It will be polished later in the project just before permanent attachment with rivets. The photos show the little swell at the lip just like on the original gun. It is a very elegant cap. The photos also show how much wood comes off the fore stock.

dave
lLT61Lm.jpg

GL7mPNE.jpg

UrGOjOJ.jpg
 
Thank you for the photographs and accompanying descriptions. I started a Marshall rifle years ago but sadly sold it uncompleted and many other related items, to include tools, when i thought that my interest had waned. But, my interest in flintlock rifles is now re-kindled and I am in the process of creating a builder's bench and assembling tools. Fortunately, I still have my #49 and #50 Nicholson cabinet makers rasps.

Please continue with your posts and pictures of this build, as is makes for great reading.
 
Hi,
Got a bit more done. The lock is fully in and I've pared down the stock a lot. It is still too pregnant up front but that will go in time. I was originally going to make the ramrod pipes, which are a bit unusual for long rifles. They are octagon but have a slight barrel shape. However, I talked with Barbie Chambers and she said the cast thimbles they supply with their EM kit are copied from the original. I ordered a set and they are beautiful castings. I cleaned up them up a bit and inlet them. They were a little more challenging than other pipes but not really difficult. They went in nice and tight.
0bpi9q6.jpg

xix8FfI.jpg

KBgwABy.jpg

VXRWlaN.jpg


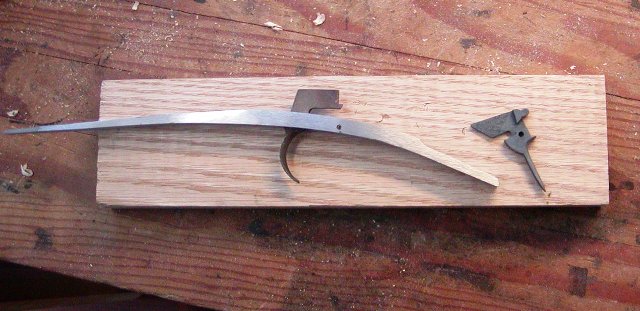
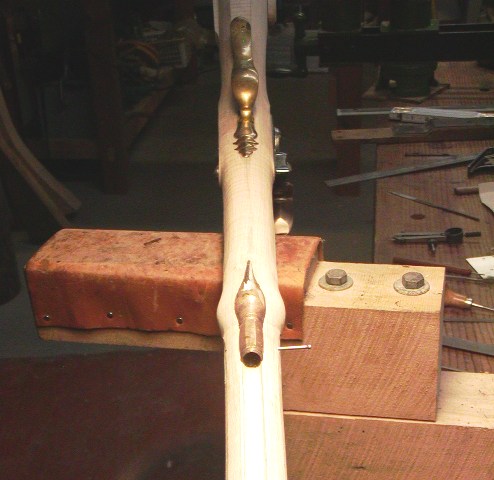
I have to figure out the set triggers. I have a set of Davis tall double lever triggers from Chambers, which could work. I also have a set of L&R Hawken triggers with tall double levers. I am tending toward using the Hawken triggers because they are more robust but I may make a new front trigger for them to match the original and create a better trigger for use unset. Regardless, you won't recognize the Hawken triggers when I am done. More to come.

dave
 
Hi,
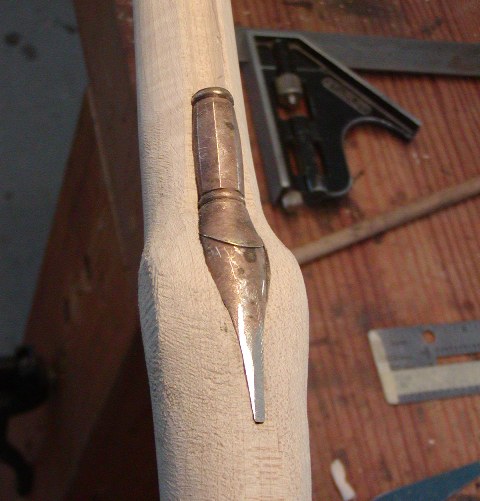
Dealt with the set triggers today. I bought 2 kinds to see which I preferred. One was by Davis with tall levers that Chamber's sells with their EM kit. They are nice triggers but not quite as tall as I would like to be able and produce a decent unset trigger pull. The set I chose was the L&R Hawken triggers with straight front trigger. They are taller and stronger and will work fine.
HgtrACb.jpg


However, look how close the triggers are to each other. The EM rifle has a big trigger guard and those set triggers will be packed in a little part of it. The triggers on the original rifle are spaced quite a bit more plus the owner of the gun has big fingers. So, time for my favorite things, my welder and ball peen hammer!!!! 😈
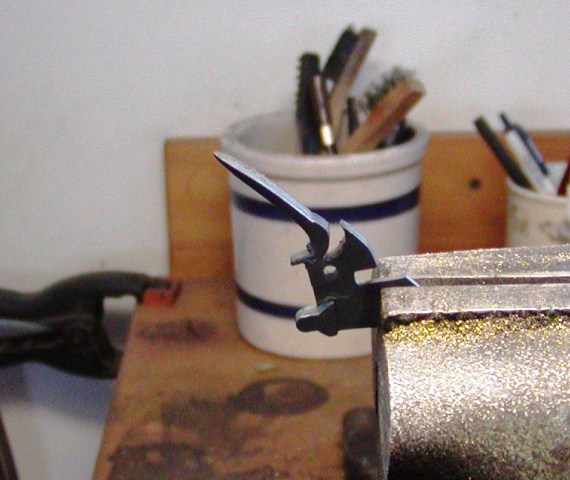
I took the triggers apart and annealed them. They actually were not well hardened or tempered to begin with.
7KyHnXU.jpg

Next I cut behind the front trigger with a jeweler's saw, heated the trigger red, and pried the cut apart to move the trigger forward.
BYaPL2v.jpg

Then I filled the cut with weld and added a little extra metal here and there. Finally, I peened the welds, heated and bent the trigger to shape, and further shaped it with files. It came out great. I cut and ground the trigger plate to fit the rifle and away I went.
txZ1nEs.jpg

Tomorrow, I'll inlet them.

dave
 
Hi,
Got a bit done. The set triggers are inlet and function properly.
AiZBFQ0.jpg


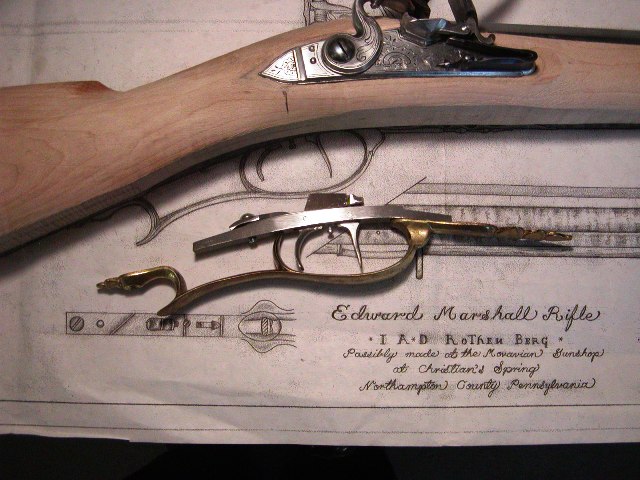
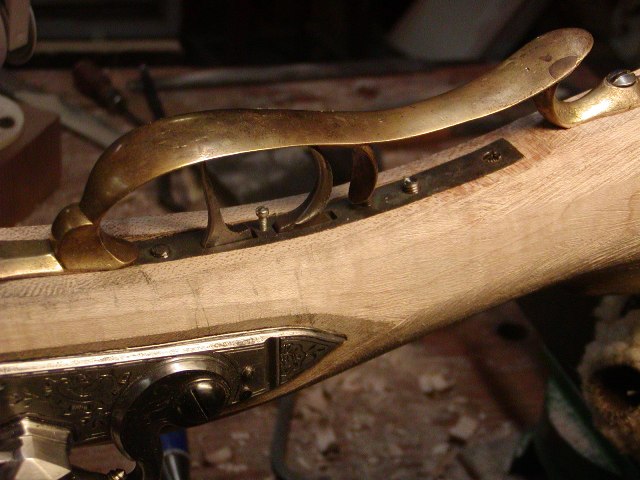
I inlet them much like the lock. I do the plate first, then cut the slots for the triggers, and then the springs. I had to do some bending of the plate, which required heating the metal red hot. I guess the steel alloy in the plate has enough carbon to harden. As a result, after heating and slowly air cooling, the plate could not be drilled so I had to anneal it in my oven at 1450 degrees and letting it take about 1 hour to cool below 1000 degrees. Then it was butter. The triggers work fine but I hate the fact that the slots in the plate are wider than the thickness of the triggers. That is just sloppy manufacture and I will fix it somehow.

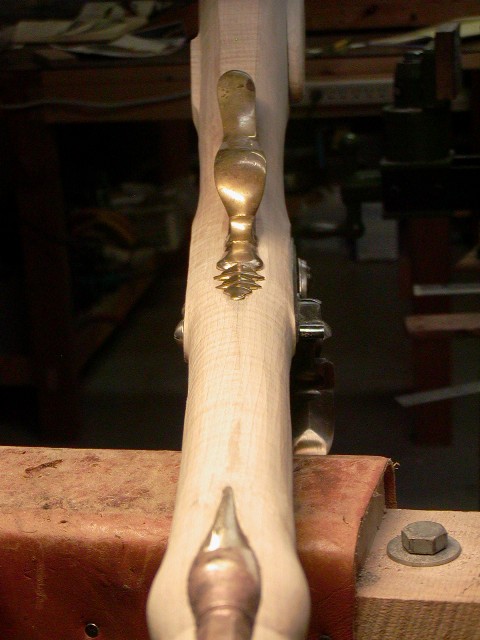
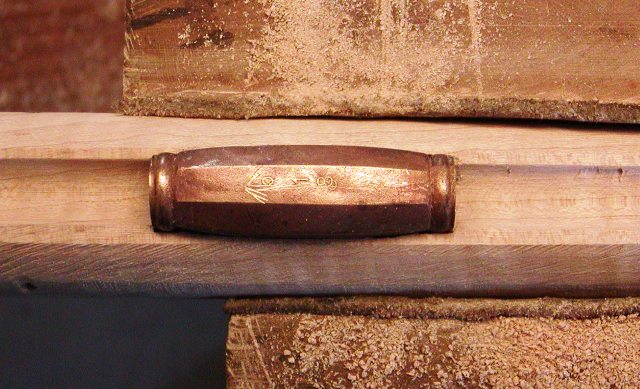
Because the height of the stock at the lock is substantial, I decided not to use a pinned lug to anchor the front of the trigger guard. It would have to be really tall to be hidden inside the lock mortice and side plate as was the original. Instead, I drilled a deep hole from the inside of the trigger guard at the bolster in front of the bow, tapped it, and then drilled for a machine screw through the trigger plate in front of the tang bolt. The counter sunk screw threads into the guard securely anchoring it to the trigger plate. The rear of the guard is screwed to the stock as was the original. Inletting the guard was not hard. I simply placed it on the stock attached to the triggers, traced the front finial with a knife, and stabbed in the outline with my inletting chisel. It did not take long. Then I secured the rear finial with a screw, traced it, and stabbed in the outline. It took about 15 minutes to cut the mortice and install the rear finial. With that, the triggers and trigger guard are in.
E6uiITu.jpg

JJu2rd6.jpg


I am finding that Edward Marshall rifle inside that slab of wood. It is all coming together.
v3OBFhf.jpg

LMVXUqk.jpg


Tomorrow, I'll make the side plate and get that inlet. Then the patch box and final shaping.

dave
 
Looks great Dave! The pic of the acorns on the trigger guard gave me chills... I remember when I did my E.M. and that trigger guard gave me fits, broke the first one and that inletting was a challenge for me... I'd love to be a fly on the wall and watch you work.
 
Hi,
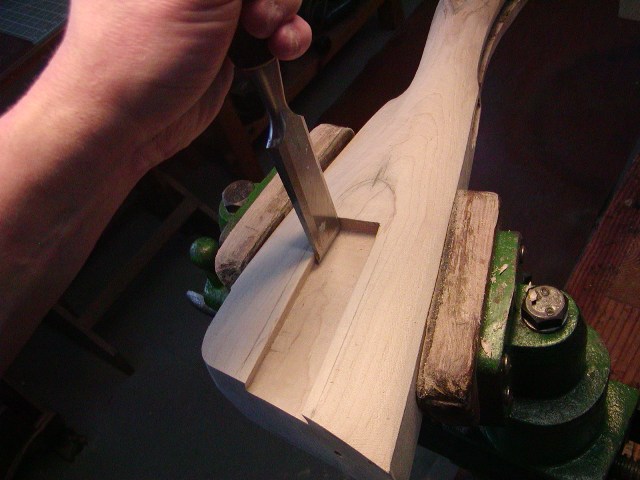
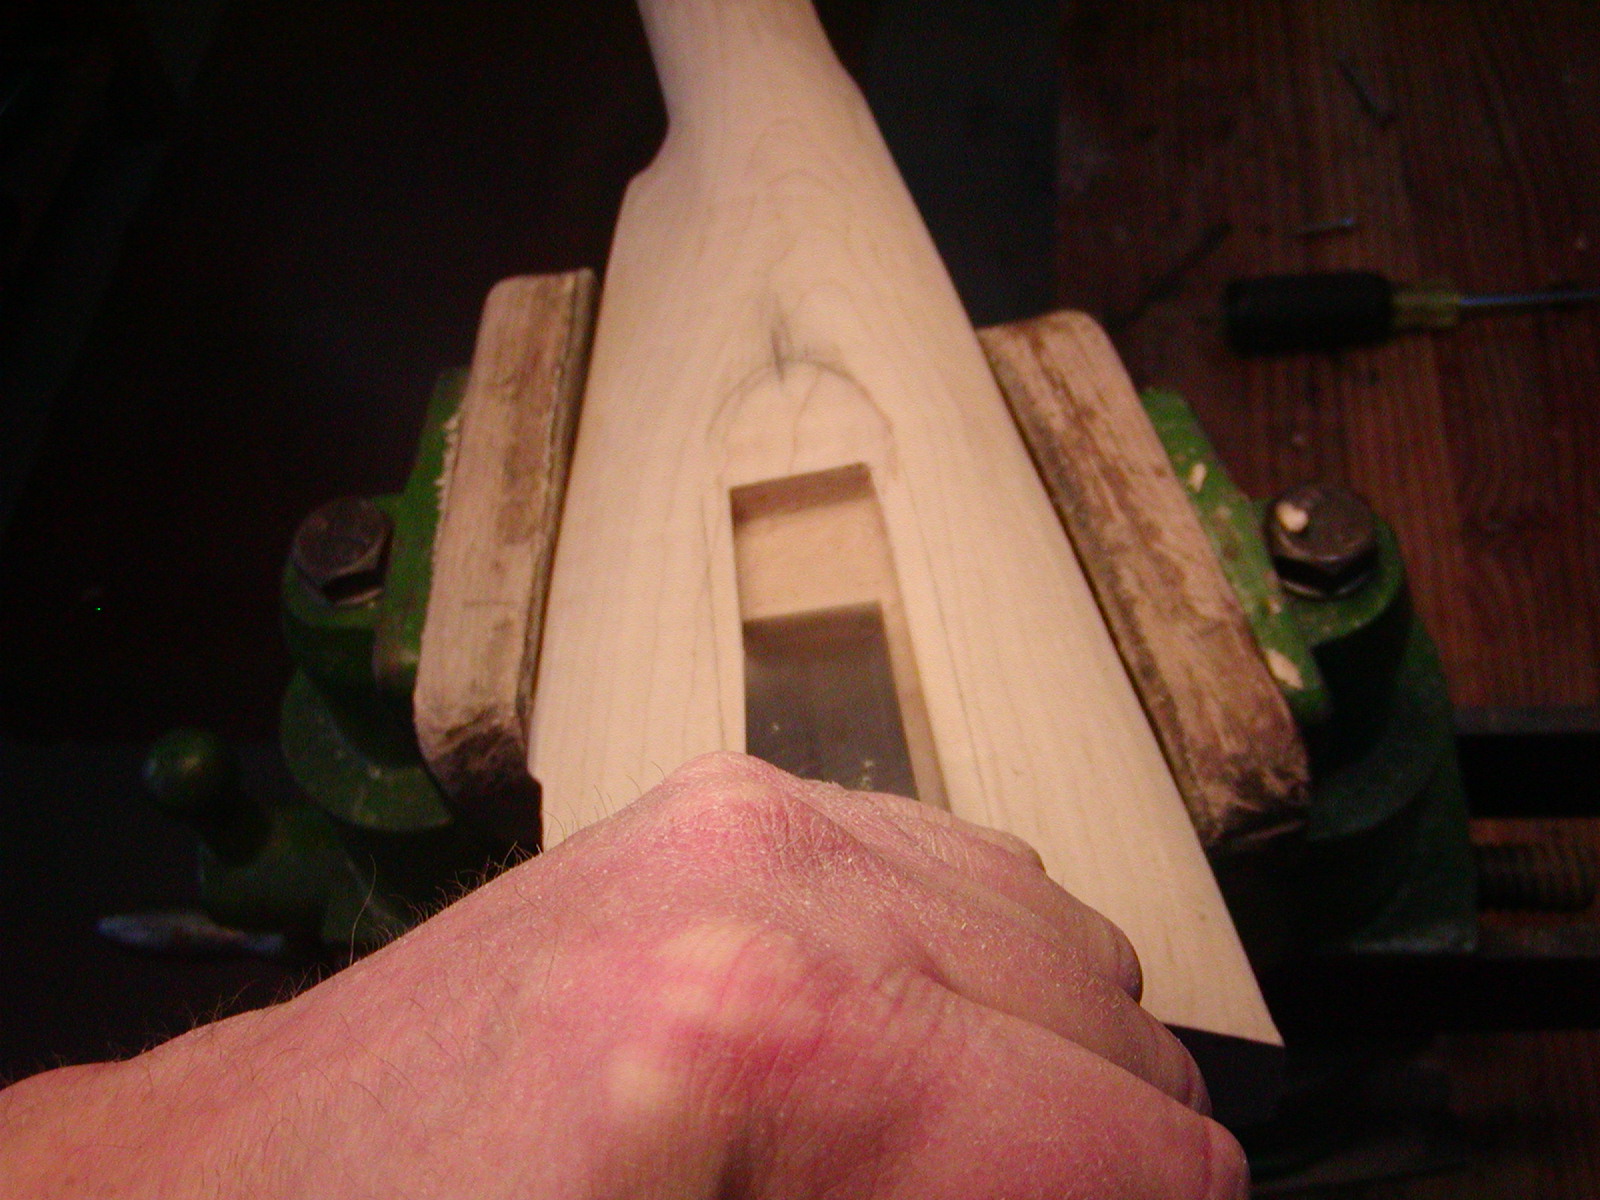
More done. I made the patch box lid and inlet it. Some folks use jigs and milling machines for precise dove tails and mortices but the truth is, the first humid day and those precise dovetails swell and lock the lid shut. The dovetails and mortice simply do not have to be nor should they be that precise. You want the lid flat and fitted to the surface of the stock but below decks in the dovetail you should make things slide easily. I just use chisels and files and my eyes. For the lid, I cut straight in from the bottom to define the outer edge of the dove tail.
LMjQXv0.jpg

I cut in straight from the sides to create a square shoulder on the bottom edges, and then cut the angle into that shoulder.
MlPIrAu.jpg

The patch box lid on the Edward Marshall rifle is tapered and the dovetails and mortice follow that taper. The advantage of that is the taper snugs up the lid as you push it in but it is much less likely to bind with humidity. The downside, is that the lid completely comes out of the mortice when slid back only half way. It could be more easily dropped and lost. If the dovetails and mortices are parallel, the lid must be slid all the way back to disengage it from the mortice. The downside to that is it is much more likely to bind up in humid weather. Its a trade off.

I cut a rectangular mortice in the stock with a morticing chisel and then hand cut the dovetails.
WOvb0NK.jpg

si4VObU.jpg

i44F7iv.jpg


The fit is nice and snug and I will give it a little bit more clearance as I finish things up.
4pIvmwy.jpg

XmZFVxs.jpg

ZmqHOQ2.jpg

It is important before fitting the lid that the surface of the wood that the lid rides over is perfectly flat.

Next I file the dovetail in the butt plate and I am done for now. I'll cut the actual mortice for storage later.
mvcP1L1.jpg

ZLJSRMS.jpg


Next up is the side plate. I cut it out of 3/32" thick brass using the drawing by Houston Harrison as a template. I drilled the rear lock bolt first and measured the distance between the center of that hole on the stock to the center of the forward hole with calipers. Then I simply place one jaw of the caliper in the center of the rear lock bolt hole in the plate and scribed and arc with the other jaw across the front end of the plate. The front lock bolt hole can be anywhere along that arc so I just find the center line of the forward part of the side plate and where it intersects the arc is where the hole goes. I drilled it and I was ready to inlet the plate. I mounted it in place with the lock bolts and scribed the outline with a knife. Stabbed in that outline, back cut all the edges, gouged out the middle of the mortice and then flattened the bottom and cleaned up the mortice. The side plate went right in. I think it took me 20 minutes to outline the plate and cut the mortice.
nD2UElH.jpg

hQfuERm.jpg

Abcr1hA.jpg


I am definitely finding that Edward Marshall rifle in the slab of wood. More to come.

dave
 
Hi,
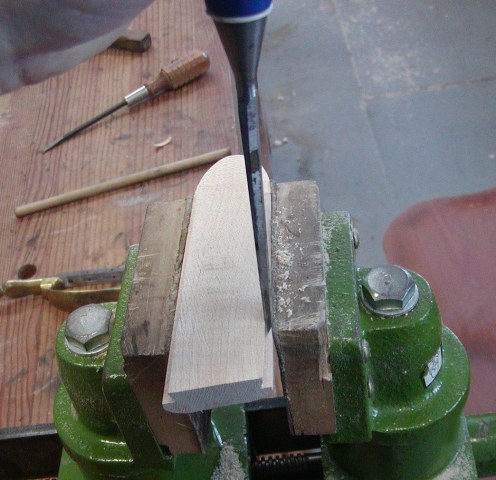
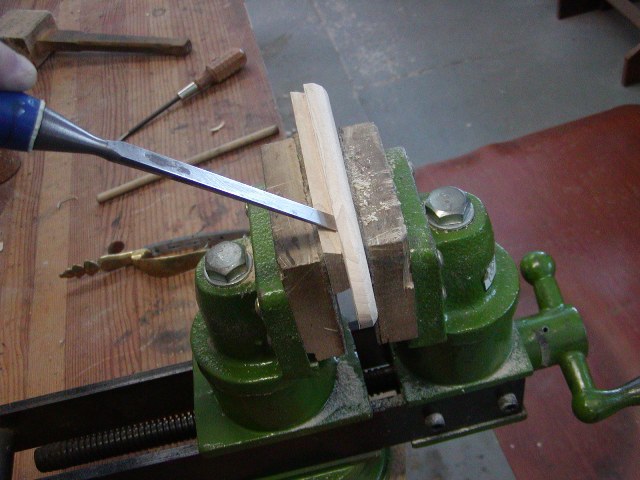
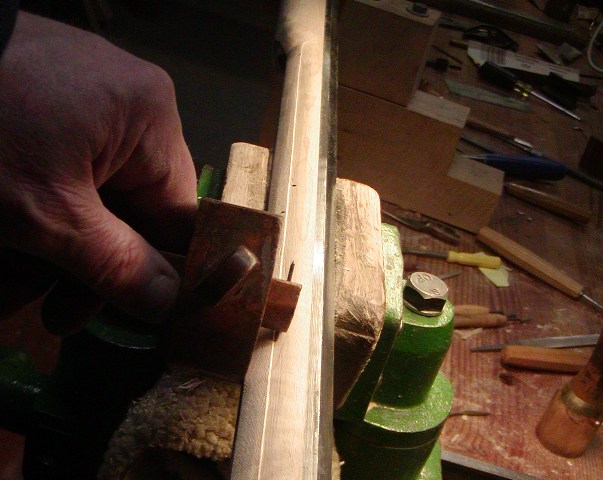
I posted these pictures because a forum member was struggling with how to cut ramrod channel moldings. I do this so quickly that I was done before I saw a need to take pictures of the process, so I took some photos after the fact to show my process. The first step is to make sure the top edge of the ramrod channel is flat and where you want it. Then using it as a guide, I scribe lines on both sides of the stock where I want the edge of the molding to be. I use a marking gauge that was my great grandfather's.
uH3Bbwa.jpg

Then I run a coarse checkering tool down that line.
JMu1eWO.jpg

Then I deepen the line with a 60 degree checkering tool.
Nc16TL9.jpg

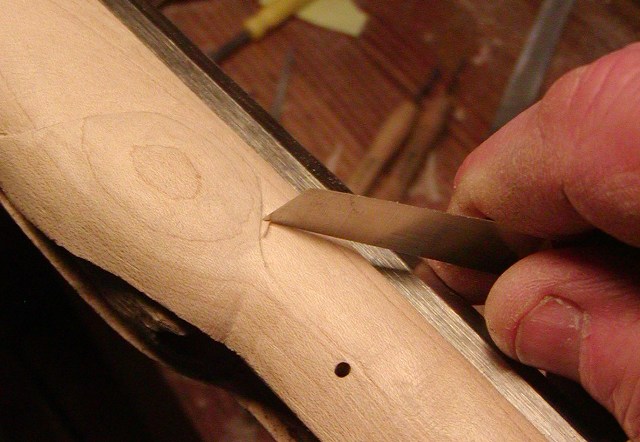
Next, I back cut the incised cut with a skew chisel to create the edge of the molding.
X3H7V3R.jpg

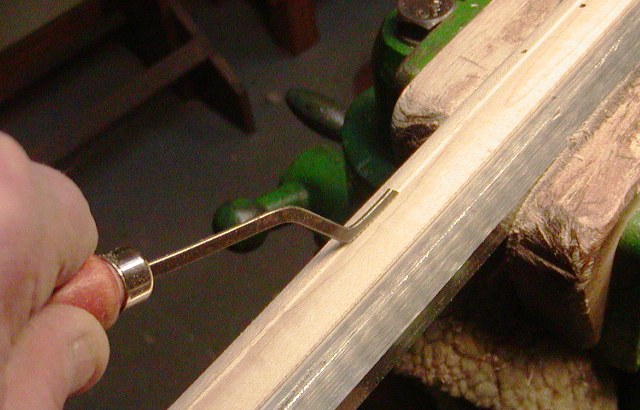
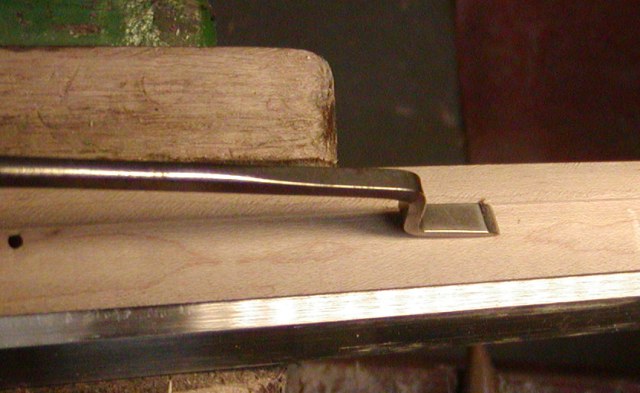
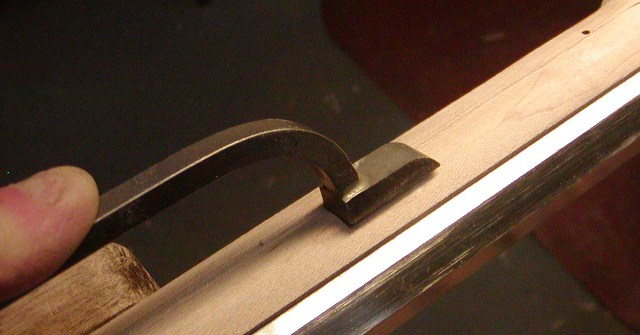
I smooth the cuts along the edge with a dog leg chisel.
EZmT9u2.jpg

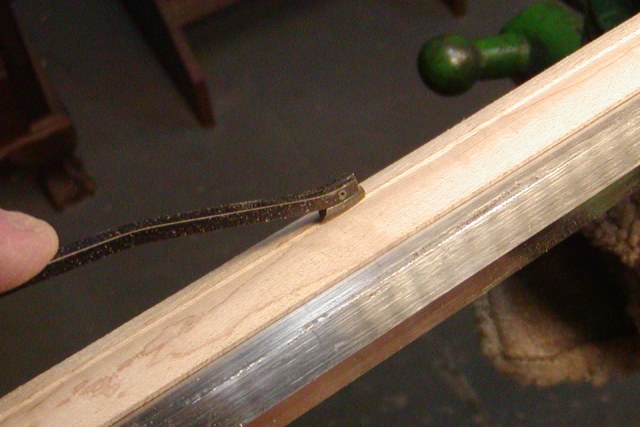
I then file the edge with a bottoming file to smooth the background and clean up the edge.
Uuj7W7M.jpg

Finally, I scrape off the file marks with a 3-edged chip carving knife sharpened for this purpose.
D4eruSC.jpg

I probably spend about 30 minutes each side but I make sure the stock is pared down almost to final shape before doing this.

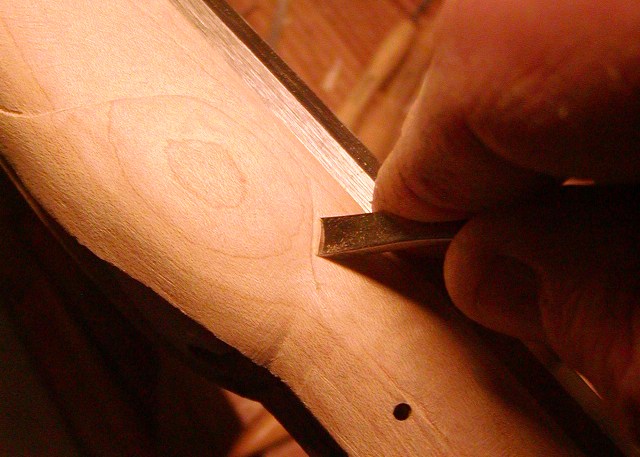
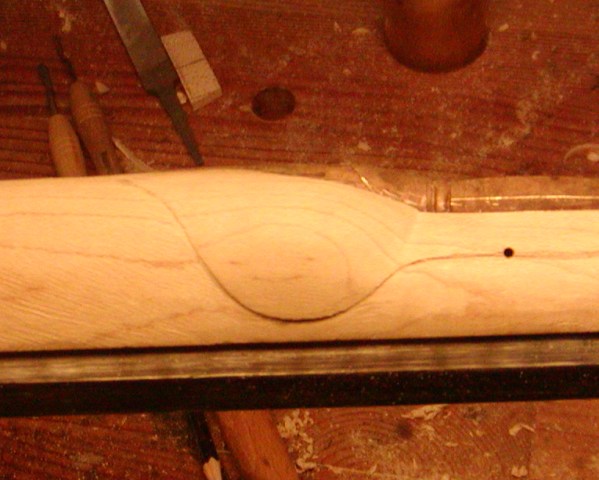
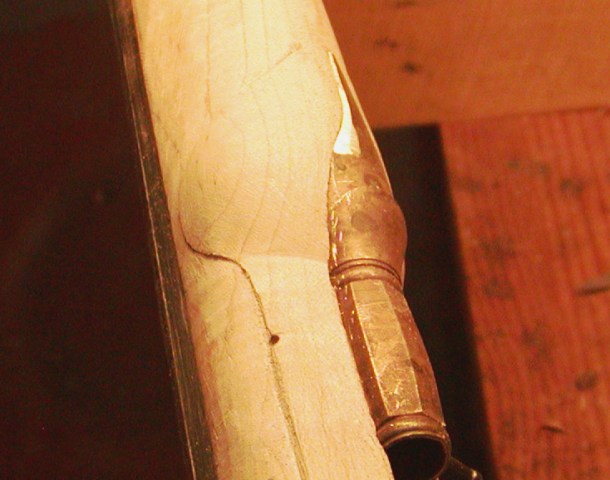
The Edward Marshall rifle has a swell at the rear ramrod pipe. It is not like that on Brown Bess muskets. It is actually a carved feature and is quite small. It is a little larger than a golf ball but quite round, and it only sticks out from the side of the stock less than 3/32" maximum. It also has a distinct "crease" where it joins the ramrod molding. It is a bit of a challenge to get right and even.
fyYkJ9U.jpg

j2nLJ0c.jpg

8jTkTd1.jpg


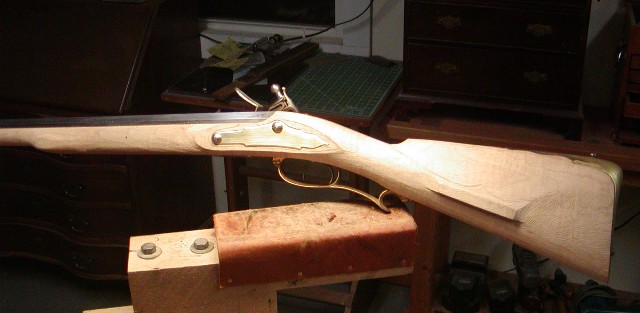
Finally, I shaped the stock through the lock area. It is very important to keep the stock curved rather than flattening it. You can see the curve in the photos.
msYz6Aa.jpg


More to come.

dave
 

Latest posts

Back
Top