• Friends, our 2nd Amendment rights are always under attack and the NRA has been a constant for decades in helping fight that fight.

    We have partnered with the NRA to offer you a discount on membership and Muzzleloading Forum gets a small percentage too of each membership, so you are supporting both the NRA and us.

    Use this link to sign up please; https://membership.nra.org/recruiters/join/XR045103

Cold browning Lyman .54 GPR Barrel

Muzzleloading Forum

Help Support Muzzleloading Forum:

This site may earn a commission from merchant affiliate links, including eBay, Amazon, and others.

maniac424

32 Cal.
Joined
Jul 26, 2012
Messages
12
Reaction score
0
I have a Lyman GPR .54 cal and want to brown the barrel and tang. I have Birchwood Casey blue and rust remover and will be using Laurel Mountain Forge Barrel Brown & Degreaser. The gun came with a 3" area of the barrel in front and behind the rear site that had fine scratches which I want to sand smooth. I'm wondering should I remove both the front and rear sites and brown them separatly
 
I browned my 54 GPR and did remove the front sight to brown the barrel. The rear was already out as I use a lyman peep because of my old eyes. I also did all the rest of the furniture and the Laurel mt worked great. Just do it exactly as the directions say. FRJ
 
I stripped the bluing off all the metal parts (except the lock) on my Lyman GPR. I used Birchwood Casey blue and rust remover to strip the bluing. It works great I used fine steel wool to scrub the parts and it came right off. I also used Laurel Mt. Brown to finish all the parts and it looks nice. Be sure to plug to muzzle with something to keep the solution out of the bore. You should have a nice authenic looking rifle when your finished. Did you install the fixed rear sight on your GPR or keep the modern adjustable? I went with the fixed sight it looks a lot more authenic to me. Good luck with the project.
 
I'm stripping my brand new Green Mountain barrel down as we speak. I too am gonna use the Laurel Mtn stuff. Anybody have pics? Would like to see the color. Oh yeah... Thanks for reminding me, almost forgot the tang!
 
maniac424 said:
I'm wondering should I remove both the front and rear sites and brown them separatly

I'd sure take them off so you don't accumulate browning solution, neutralizer and whatnot in the dovetails. Browning the sights separately is merely a side benefit, but the bigger question is the joint between them and the barrel.
 
A handy reference for browning:
http://www.laurelmountainforge.com/barrel_brown_inst.htm

Generally speaking, if the surface is sanded it should not be done with a very fine grit material.

The browning agent will have difficulty "biting" into the metal if it is too smooth.

The best results seem to be with a surface that was sanded with 220 grit or courser paper.

Also remember the black silicone carbide wet/dry paper is made for sanding metal.
The garnet or silicone oxide papers are made for sanding wood.
 
Last edited by a moderator:
I built a .54 GPR flint kit. I used LMF browning solution to brown the barrel, tang, trigger guard, nose cap, butt olate and the toe plate. LMF is easy to use and does a great job. The directions are easy to understand. For contrast, I blued the front and rear sight. I used the primitive rear sight. DC, I hope you get out of there before Tropical Storm Issac hits. Be sure to take your barrel with you when you evacuate. May not be there when you get back. Good luck!
 
I just fired it for the first time on Saturday, so it still has the modern sight. Did you have to do much filing on the fixed site? I had used 1000
grt wet dry to sound out the scratches, is that going to cause a problem? ill the rest of the barrel brown differently, causing an uneven look. Also how much force is necessary to knock the sights free of the dove tail and is it really necessary to use a brass punch to do.
 
dc7x64 said:
Anybody have pics? Would like to see the color.
LMF on a Jukar 45;

HPIM0890-1.jpg
 
I seldom sand a barrel for browning. I carefully draw file it parallel with the barrel length til all major scratches are gone & all fine lines are parallel with barrel length, using a fine metal file. DOne carefully & with some practice, it will look as good as if you sanded it.
Then I Bead Blast the barrel & parts, then get it washed for browning.
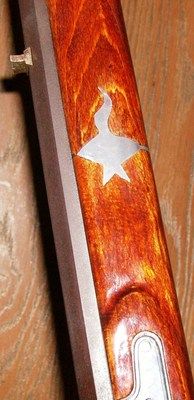
Also sights have been removed from the barrel, disassemble the lock as well & do all the small parts when ya brown the barrel.
I card everything with a Dixcel Wheel from Brownells, mounted in a drill clamped in a vice at about 1000 RPM. Light pressure on it & just card the rough off raised rust & recoat the browning solution.
ALL is done in powder free nitrile gloves, even the doorknobs ya touch must be Clean.
All browning done in a steamy bathroom @ aprox 85 deg or warmer works the best for me.
In winter time I put a small electric heater in the bathroom to keep the temp up. Block off the air cond/heat duct.
I lay down an old shower curtain, them a large piece of brown paper, then 2 pieces of 2" x 2" about 5" long to support the barrel off the paper.
Apply solution to bottom 3 flats of barrel first & underside of tang, flip it over & do remaining flats. I use a cotton ball barely wet with solution so I can just tell I just did wet or wipe the barrel. Do not want puddled or sloppy wet solution on the steel.... just barely wet enough that you can visibly see you rewet the barrel.
Apply the browning solution in Long even strokes parallel with the barrel.
On small parts I use a cotton ball & a Qtip to get into the tight crevices.
The first 3-4 applications will look like manure. Just hang in there & keep doing it, it will get better. Don't stop at 5 or 6, as you may have a place not browning as well & you cannot see it. Usually by 6th application is looks great. by 7 you have it done, one more just for a secure job.

I card every 3 hrs for about 7-8 applications. Thus all can be done in 24 hrs & then kill the browning process & rub it down good each day twice a day for 4-5 days til you are sure.. it has stopped browning, then start putting it all together.

Remember Clean, Clean, Clean... is most important with most browning solutions. With some solutions, any oil from bare fingers, grabbing the contaminated doorknob, touching the oily trigger on a drill, etc. then back to the barrel :shake: ya just screwed up big time & may have to start over. I am told this is not the case with LMF, but I don't use it so cannot comment on that. I have been using Tru-Brown on my rifles to be browned for the past ? 10-12 years & with good success.

If you have the barrel slick, IMHO it will not brown as easily or as uniform as if it were draw filed or sanded with a 220 grit with a small flat block of oak backing the paper..

Your mileage may vary..

Keith Lisle
 
Cowpoke1955, how did you remove the nose cap? Also,what about the entry pipe and the escutcheons?
 
The nose cap is held to the stock by a pin that can be punched out. The toe plate is the flat piece of metal located on the toe of the stock (bottom of the stock, next to the butt plate). Don't worry about the questions. We all had to start somewhere at some time. A lot of folks on this forum are happy to help.
 
Thanks Cowpoke, haven't had my GPR long and didn't have it in front of me. In my mind, I was picturing it as part of the butt plate, then I remembered the user guide had an exploded view. Are there specialized punches that small in diameter as to not leave a large hole in the stock,or do you pry the pins out, once they're sticking out the other side? Will I have to purchase replacement pins from Lyman?
 
The fixed sight that came with my GPR was too small for the dovetail so I measured the base on the adjustable sight that was on the barrel and sent the fixed sight back to Lyman with a letter giving the measuements I needed. They sent me another fixed sight that fit perfectly. You will need to apply the solution to your sight with them removed from the barrel. If you don't have a brass punch use a brass cartridge case with a bolt inserted in the case and it makes a decent punch.
 
I believe it's a 1/16th inch punch. When I built that .54 GPR flint kit, the wife and I were living in our RV while our house was on the market and tools were limited. I just used a thin finishing nail. Tap it until you can pull it out. The same pin can be reused. Like everything else with muzzle loaders, just go slow and easy. You'll do just fine :thumbsup:
 
Thanks bamaboy the bolt in a cartridge case trick worked like a charm. I've got a question about GPR sights, I've read on a number of sites that with the adjustable sight the GPR shot low (I think by about 6") and as a result the front sight had to be filed down quite a bit. Since the height of the primitive sight is lower than the adjustable sight, wouldn't the front sight have to be filed down even more?
 
Maniac, after I installed the fixed sight on my GPR it was doing good at 50 yards as far as elevation goes. It was shooting a little left and I was able to correct that by tapping the rear sight over. My GPR has a slow twist barrel and it shoots great using 100 grains of Goex FFG under a .530 ball and a .15 patch. A lot of GPR tend to group better with heavy charges for some reason.I would try it with several charges before I filed the front sight any.
 
Following the LMF instructions I've sanded the barrel down using 400 then 800 grit w/d paper. I then used the Birchwood Casey blue and rust remover to strip the bluing. The instructions for the Birchwood Casey blue and rust remover recommend using steel wool to "polish" the metal. I can see there is still some small amount (almost a film)of blueing left, so I thought I would use 0000 steele wool along with the Birchwood Casey blue and rust remover to scrub down the barrel & other parts to remove this last bit. My question is, will using the 0000 steele wool make the metal to smooth, or as I suspect not have much effect on the barrel since they are similar in hardness?
 
Because the steel in steel wool is not any harder than the steel in your barrel it won't have any real effect.

I recommend that any steel wool used on your barrel should be thoroughly degreased though.

The makers put a waxlike substance on it to keep it from rusting on the shelf and you don't want any of this contamination on your barrel when you start the browning process.
 
Back
Top