drum installation

Muzzleloading Forum

Help Support Muzzleloading Forum:

This site may earn a commission from merchant affiliate links, including eBay, Amazon, and others.
Joined
Aug 17, 2019
Messages
73
Reaction score
25
Location
lake Oconee Ga
So, the rifle I bought from a pawn shop was missing the drum and nipple. I bought a drum/nipple from DGW.
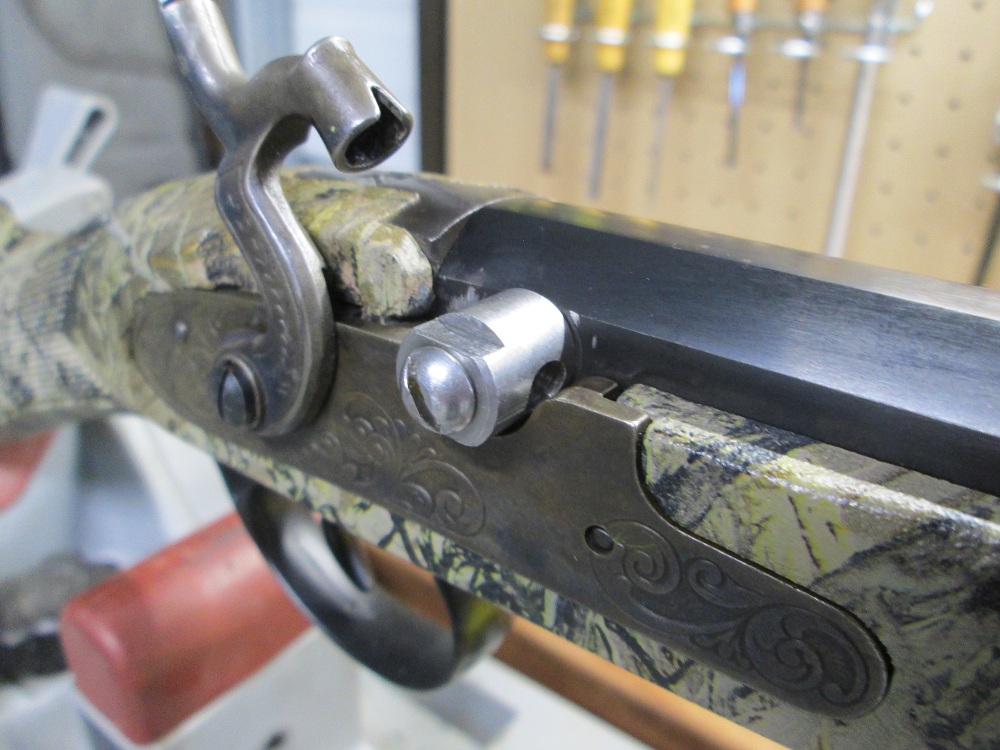
It screws in easily, and stops on the shoulder above the threads, the nipple is way out of alignment.
Maybe I should have bought a drum with no nipple installed, and drilled / tapped it for the nipple myself?
Or, can I "clock" the drum using shim washer, start with thick washer and thin down until the drum is clocked?
Also, do you recommend using blue LocTite, Teflon tape, pipe dope, or what?
Thanks, Dan
 
I wouldn’t use anything like loctite or tape, maybe a small dab of anti seize. Personally, I’d use an untapped drum and drill and tap it after I’d located the nipple. I think that would be easier.
 
The thin washer method would be good.
For that matter, the Blue Locktite would work just about as good. It's only problem is it is very thin and it would not do much to seal the threads against leakage.

One of the fast curing, 2 part epoxies could also be used. This has the advantage of being thick enough to seal the threads to prevent leakage. The only problem with it is, if you ever want to remove the drum, you will have to heat up the breech end of the barrel around the drum to get the epoxy to soften so the drum can be unscrewed.

As for buying a drum without a hole in it for the nipple goes, that's what I did on the percussion ML's I've built.
I found that the special drill jig made for doing this was a valuable thing to have and use. Even so, there isn't much room for errors so it's a good idea to have more than one undrilled drum if your going to try this.
 
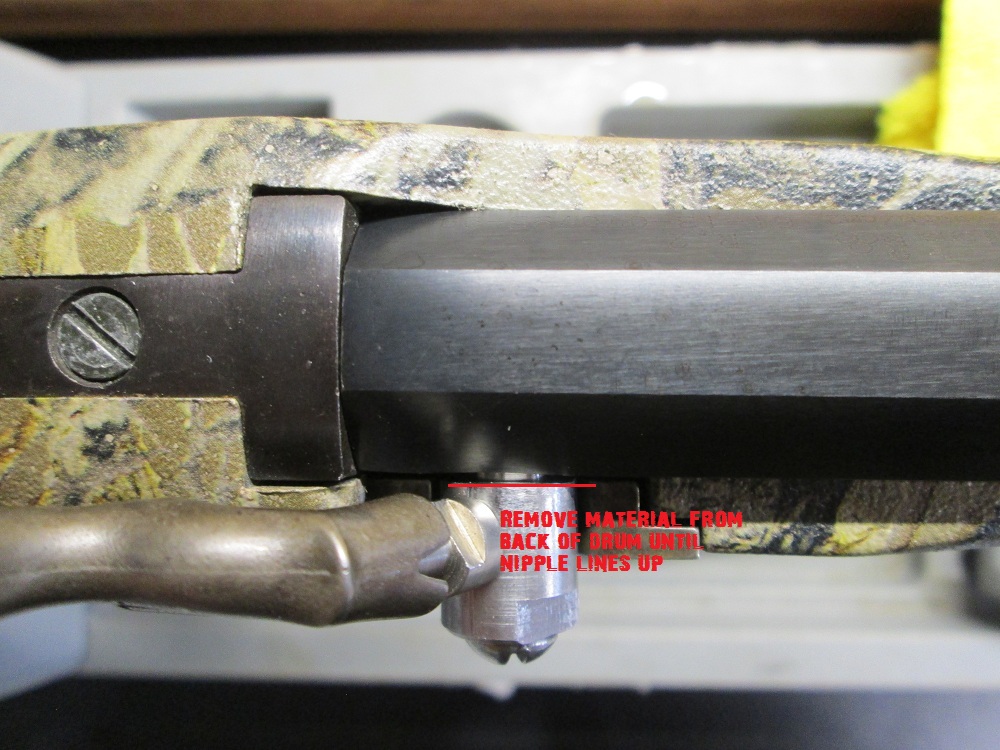
No need to worry, do you have a drill press? Chuck that drum into it and use a jewelers file and remove a little at a time from the back of the drum.
img_0318.jpg


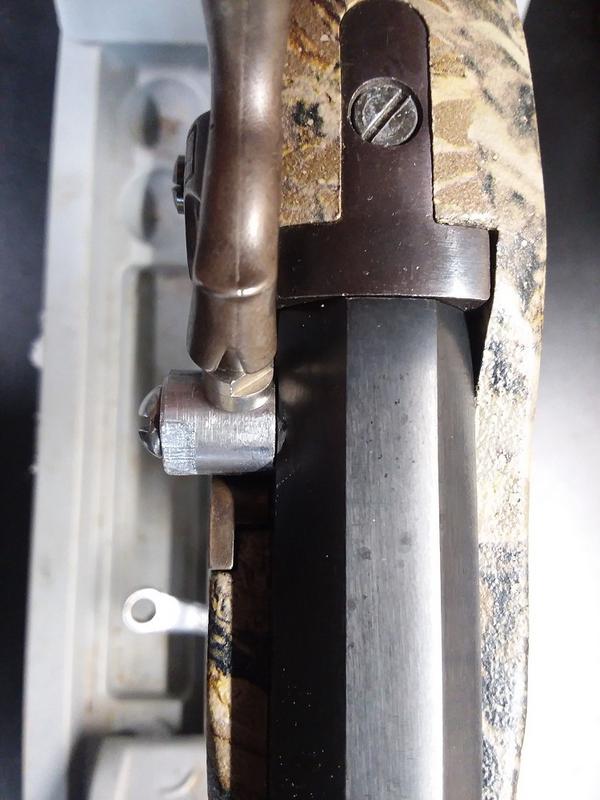
I just used a small jewelers file, removed the material by hand and checked it OFTEN. Once it was close, I greased the threads and installed it snug. Always leave a little extra so you can actually SNUG it down.
img-0319.jpg


Finished product

 
Thanks for all your responses, and GREAT tutorial Frontier's!
I just discovered the drum I have is too big, it was the only one with the proper size threads in Dixie Gun Works.
So...I will buy the proper size drum from TOW, and also the drilling jig.
This is quite a good group we have here!
 
Thanks for all your responses, and GREAT tutorial Frontier's!
I just discovered the drum I have is too big, it was the only one with the proper size threads in Dixie Gun Works.
So...I will buy the proper size drum from TOW, and also the drilling jig.
This is quite a good group we have here!
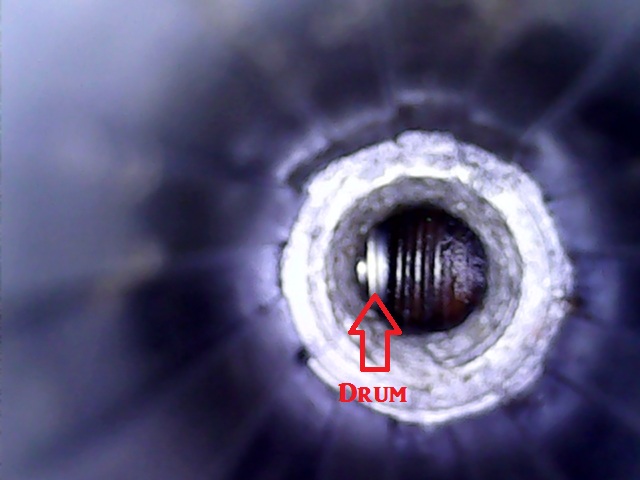
Please remember you need to trim the threaded drum end to match the rifling diameter of the barrel. Or face cleaning troubles later. I prefer to add 10 or so thousandths shim under the barrel and tang while fitting a drum. This allows good support of the drum by the lock plate. Remove the shims after the drum installation. You may need to back off the tang screw for cleaning. Two thickness of writing paper. BJH
 
Please remember you need to trim the threaded drum end to match the rifling diameter of the barrel. Or face cleaning troubles later. I prefer to add 10 or so thousandths shim under the barrel and tang while fitting a drum. This allows good support of the drum by the lock plate. Remove the shims after the drum installation. You may need to back off the tang screw for cleaning. Two thickness of writing paper. BJH
Thanks BJH
 

Latest posts

Back
Top