• Friends, our 2nd Amendment rights are always under attack and the NRA has been a constant for decades in helping fight that fight.

    We have partnered with the NRA to offer you a discount on membership and Muzzleloading Forum gets a small percentage too of each membership, so you are supporting both the NRA and us.

    Use this link to sign up please; https://membership.nra.org/recruiters/join/XR045103

Early plains rifle build

Muzzleloading Forum

Help Support Muzzleloading Forum:

This site may earn a commission from merchant affiliate links, including eBay, Amazon, and others.
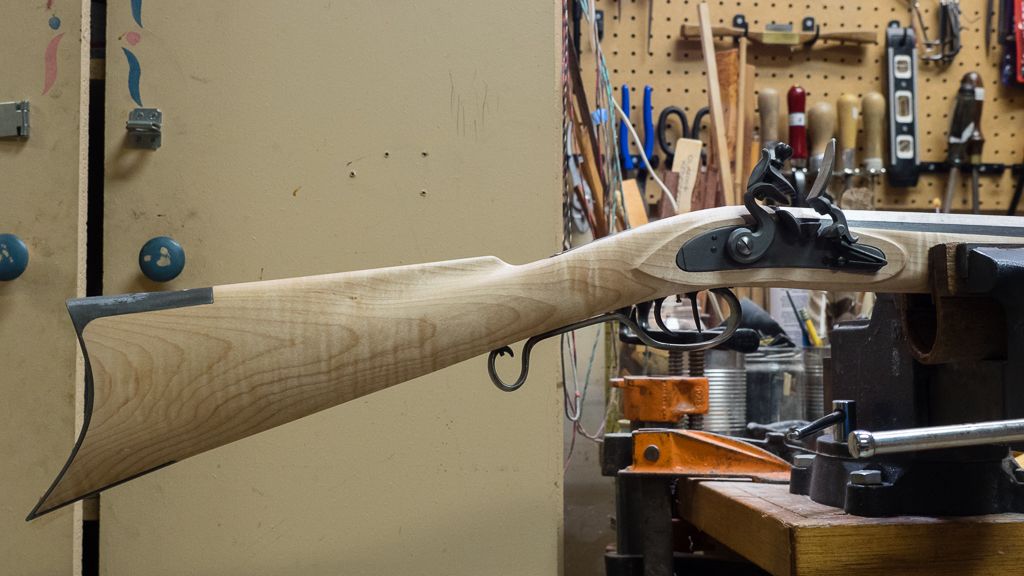
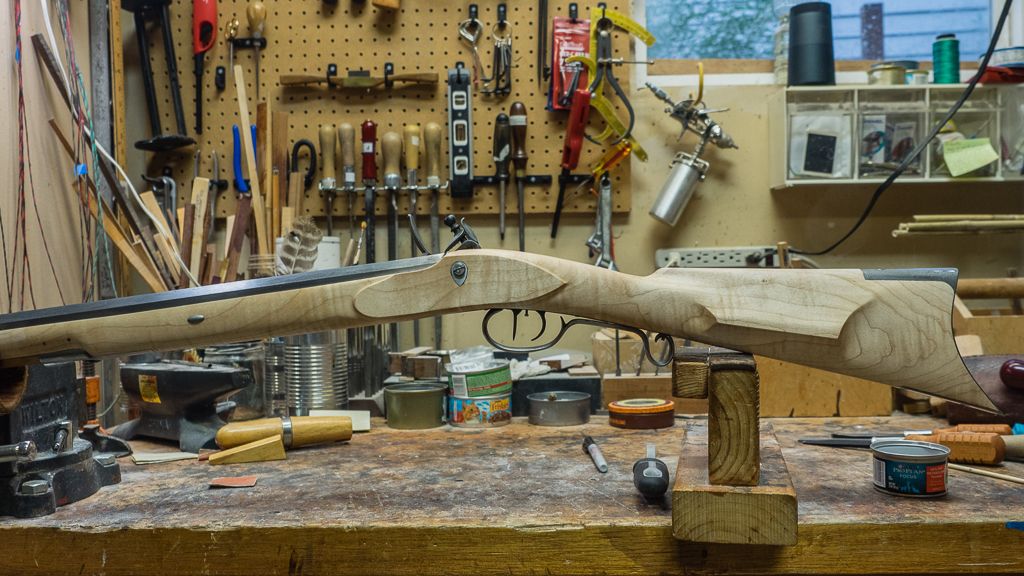
I agree focusing on one thing at a time is key. But sometimes it pays to step back and reappraise your work after a few days. I'm doing just that today. I've been evaluating at the butt stock for a few days and decided that I need to do a better job delineating the comb from the stock and extending and rounding the wrist. After a few hours of rework I am much happier with this part of the gun.
 
Absolutely! I get that way particularly when it comes to drawing on the designs (in pencil) for carving. I usually have to draw, erase, re-draw, and draw again for about a week before I take out the chisels. Only when my erasures and "improvements" in the design seem to yield something I like less than before do I think I am ready. And even then I have to give it a couple of hours between a couple more viewings before I'll start the cutting.
 
I'm impressed this was your first as this is not an easy kit to build. If you have any pics of your rifle I would love to see them.
 
I look forward to learning how to carve a stock, but that is a whole other chapter that I will reserve for a future build.
 
It's not as hard as you might think, but hooked breech Hawkins are not typically a profusely carved gun, as were royal presentation pieces in French Court.

You might look at some originals to see if maybe a few of them had incise border lines. Those might do a good job of "framing" the stock. Just remember that straight borders are generally harder to do than curvy scrolls.

You're doing the smart and prudent thing though. Walk before you run. Getting the architecture right is like getting the foundation right in building a house. Having nice carving and engraving on an otherwise poorly built rifle is still a poorly built rifle. Having mediocre carving on an otherwise well built rifle is still a well built rifle, but with a "folksy" touch, as was quite common in originals.

To make the point even more poignantly; Picture Rosie O'Donnell in a designer dress, and then picture Melania Trump in Wal Mart "off the rack" women's wear. Which one looks better?

The funny thing with builds though is, for our first builds, we get through them pretty fast. Then, the more experienced we get, and surer our hands, the longer it takes us to build them.
 
I had made many serious mistakes with my first build though I ended up with a functional and reasonably nice looking gun. For my second effort I decided that I would focus on the fundamental elements of construction: inletting, precision drilling, architecture and layout, shaping, metal bending, and lock and trigger tuning. My finishing skills were already pretty advanced from years of building wooden longbows. I picked this particular style of rifle because historically it did not have much (if any) carving and very little engraving. Unlike my first attempt, I have purposely gone very slowly and deliberately so as not to repeat the same mistakes. I think that I have at least 200 hours into this rifle already and probably need another 40-50 to complete it. It is an inordinate number of hours, but I feel like my skills are improving as a result so it is worth it. Thank you for all of your support. It means a lot to me coming from someone who is as advanced as you.
 
200 hours is NOT a lot of hours. In fact, it shows in the fact that the lines are clean, and you are being very deliberate and self-critical in re-visiting areas that you previously thought were "good enough". This particularly in the details, like the aft portion of the cheek rest line sweep. It's not a particularly critical functional feature, but it IS a very visible architectural one. Every hour that you spend at the bench sitting on your butt on your stool will show when the gun is sitting in the rack on its' butt. And it will spend a LOT more time in the rack than on the bench.
 
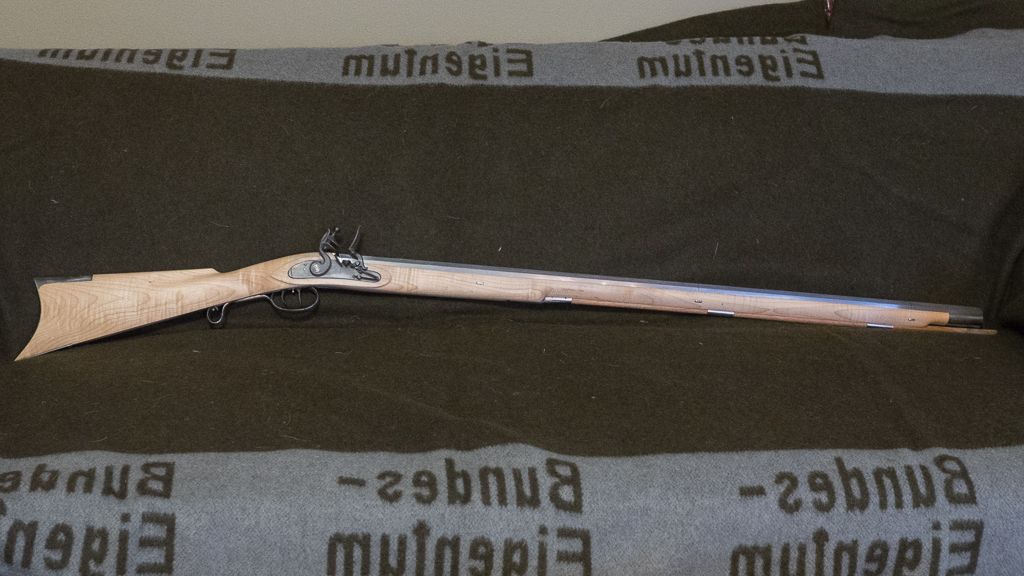
Did some work rounding the wrist and getting it to extend more into the stock. I think I'm about ready to put a finish on the stock. Here are some pics. Click on the pics to see higher resolution versions.


You might want to look at those lock panel sweep radiusses vs. the originals. A bit more of an "applied" look rather than "growing out of the stock. Yours seem a little abrupt and constant. Did you use a rat tail file to get the profile, or did you vary it by using rounded scrapers? I'm not saying it's wrong, because I don't know what the originals did. I just know that on more traditional LR's, it can and does vary in radius as it moves around the lock panels.
 
For the panels I used a combination of a gouge and a small rounded file. I was trying to make the radius as consistent as I could. It honestly never occurred to me to vary the radius. At my current skill level that sort of nuance is simply lost on me unless someone more knowledgeable points it out.
 
Take a good hard look at what the originals did and see if yours is consistent with that. Here's a link to an original S. Hawken that sold on Julia this fall, plus another couple of his. Look how the lock panel radiusses vary, particularly at the nose of the lock.
https://jamesdjulia.com/item/2269-391/ https://jamesdjulia.com/item/lot-2402-percussion-plains-rifle-marked-s-hawken-st-louis-37381/ https://jamesdjulia.com/item/52461-1-397/

I know you aren't doing an "S. Hawken" bench copy, but he was a pretty well known maker of plains rifles in his day.
 
Last edited by a moderator:
You are right. I never noticed that until you pointed it out. I learned something today. Thank you.
 
Making a gun (particularly traditional muzzle loaders) is a 2-part process (or "score" if you prefer). Much like figure skating. There is a score for technical merit, and then there is the score for artistic impression. Both count, and are added together to determine the winner in a competition.

The lock panel margins and sweep radius thing is one of those things that people early in their building careers tend to make the same all the way around. The result is a gun that very much looks like it was built "by the numbers". To my eye anyway, those aren't guns that "flow" or are graceful looking. In fact, to my eye, they're kind of soul less, and clunky looking, like the factory guns.

It's the transition areas of the gun that define the architecture for the artistic part of the build. The inlays, carving, and engraving are just the bling that captures or draw the attention to the areas in the first place.

Does that make some sense?
 
It does make perfect sense. I've made wooden bows for many years and am considered an expert builder by my peers. When I look at my early work it makes me shudder a bit. But the reality is few people who are new to such an endeavor are going to build something that is beautiful to someone with a highly trained eye. It takes time to develop a sense of aesthetic and the skill to execute it. I'm not going to be too hard on myself for missing such nuances (albeit important nuances) on my second build. With time and help from experts like you I will get there.
 
BTW I saw photos of a fowler recently built by a well known builder on another forum. I noticed how the rear of the panel flowed gracefully into the wrist while the front radius was more pronounced. It was a very pleasing look. It is too late to replicate such a style on my gun because too much wood has already been removed, but I will be much more conscious of it on the next rifle that I build. And there will be another build in my near future!
 
The first Julia link is well worth saving the pictures for reference on future builds. Finding good pictures of originals is very difficult.
https://jamesdjulia.com/item/2269-391/

I have pulled pictures from their site in the past by right click, copy, paste. That no longer works. Is there an alternative to screen dumps?
 
Last edited by a moderator:
Scota4570 said:
...I have pulled pictures from their site in the past by right click, copy, paste. That no longer works. Is there an alternative to screen dumps?
Windows snipping tool will capture images on your screen.
 
Scota4570 said:
The first Julia link is well worth saving the pictures for reference on future builds. Finding good pictures of originals is very difficult.
https://jamesdjulia.com/item/2269-391/

The rifle you linked to may not be the best choice for an example of an original Hawken. It has several suspicious characteristics.

If you are a collector, #1 rule is "buyer beware". If you are a student, "look critically". Lot's of fakes out there, especially Hawken.

Phil
 
Last edited by a moderator:
Back
Top