• Friends, our 2nd Amendment rights are always under attack and the NRA has been a constant for decades in helping fight that fight.

    We have partnered with the NRA to offer you a discount on membership and Muzzleloading Forum gets a small percentage too of each membership, so you are supporting both the NRA and us.

    Use this link to sign up please; https://membership.nra.org/recruiters/join/XR045103

Finished my first build

Muzzleloading Forum

Help Support Muzzleloading Forum:

This site may earn a commission from merchant affiliate links, including eBay, Amazon, and others.

Staggerwing

40 Cal.
Joined
Dec 28, 2009
Messages
194
Reaction score
6
Location
Marietta, Ohio
On Christmas, 2009, my wife bought me a stock and barrel from the local muzzleloading store. The barrel and ramrod channels were inlet but the side panels were not. I bought and read books for the first year. January, 2011 I put chisel to wood. There were periods of time I walked away from it but I took my time and did the best I could for the first one. I finished it last week and fired it two nights ago. I already placed an order for a Chambers Pennsylvania Fowler kit for my next build. Sorry the pictures are not the greatest. It was raining outside so I took them in my basement/shop.
IMG_7118.jpg
[/URL][/img]
IMG_7120.jpg
[/URL][/img]
IMG_7121.jpg
[/URL][/img]
IMG_7122.jpg
[/URL][/img]
IMG_7123.jpg
[/URL][/img]
IMG_7124.jpg
[/URL][/img]
 
:hatsoff: you done goodt!
It was a lot of work wasn't it?!
I would brown my metal...... :hmm:
Hard "school" of rifle for your first gun too!
Your to be commended to start and finish one with only books to show the way!
:thumbsup:
Marc
 
You must be a quick study or a natural. Excellent job in my opinion .. except you made one mistake by putting the lock on the wrong side. I'm sure you'll correct that in your next build. :wink:
 
Thanks, guys. Several things I can improve on for sure but that's to be expected. Books wasn't the only resource I had. My point was I didn't touch a thing till I read three books. Ones that are often mentioned here. I asked questions on this forum and I live near one of the best builders. I made three or four trips to his shop for advice. I owe a lot to him. He's built guns for over 40 years and he took the time to offer advice and teach me some tricks.
Kaintuck, I have pained over the metal....what to do. I really like it in the white. I went back and forth on the issue of browning. I guess my thoughts are if I get tired of trying to keep it clean I can always brown it at that time.
I shot it the other night and it was awesome! It's going to be fun figuring out the optimum load, etc. I intend to hunt deer with it this fall.
 
I think your comment about leaving it in the white because you can always brown it later is right on.

More than a few of the original longrifles seem to have been left in the white.

Some deer hunters will say there is too much glare off of a steel colored barrel and it will scare the deer away.

If shiny steel colored things scare deer away I wonder why they sometimes jump out in front of shiny 5000 pound steel colored cars? Obviously they aren't trying to get away from them. :grin:
 
Tenngun, even though the side panels were not inlet, a block was left for the cheek piece so it was obviously meant for a right hander. My dear wife bought this for me. They didn't have any left handed stocks. That's one of the questions I posed on this forum was to leave the cheek piece there or take it completely off. The information I received was I should leave it on so that is what I did. Even though it's useless to me it looks nice. But that was a good question.
Zonie, You are correct, I am not concerned about the glare scaring any deer off. My turkey gun will be browned for sure! :)
 
I had previous wood working experience but no wood carving experience. That was another thing I went back and forth on whether to try any carving or not. I was afraid to mess it up.
The first thing I did was practice drawing the shapes. I doodled alot and the eraser is your friend! Typically you can't carve something if you can't draw it first. Once I did that I practiced on scrap wood for quite a while. Then I did a fairly simple carving around the barrel tang and finally did what I would consider a somewhat basic design behind the cheek piece. Patience and sharp chisels and blades are key. If you don't feel like you're on top of your game at any given point it's best to put the chisel down, turn out the light and do something else.
Now I want to learn to engrave. I have some gravers I bought from TOW but I don't even feel like I know how to properly sharpen them let alone use them. The only thing I didn't do myself on this gun was engrave my name on the barrel. My mentor did that for me and gave me a quick engraving lesson while doing so. He made it look so simple. I would like to find a class to take. Engraving is a fine art IMO, and I envy those that have displayed some incredible skill on this website.
 
Very nice first effort! :hatsoff: You took on a really tough school, and dove right in on what intimidates a lot of guys, raised carving. If you look really closely at the butt carving, are some of the volutes a little squared off, and not flow? It's sort of hard to tell from the picture. Though it sounds harder, actually I think raised carving is a little easier to do than incise carving. It takes longer, but it's easier. Reason; you can always remove a little more wood to fix something in a design, but once you take it away, such as in incises, it's gone, and rounding out a squared-off volute makes a bigger hole, and another problem. So you were wise to do what you did.

In my opinion, the proper dimensions and feel of lock panels is one of the more difficult areas to get "right". Question, why did you leave an incise or rib off of the belly of the butt? Do you have anything on the fore stock or around the entry pipe for decoration?
 
Again, I apologize for the pictures. Probably raises more questions than answers. There is definitely room for improvement on the carving. I don't believe any of the volutes are squared off badly but no doubt they could be better. From what little I have done, you are correct that the incised carving is more difficult. When you make that cut that's pretty much what you're left with.
I'm not sure what you're seeing with the incised line near the butt. There is an incised molding line that travels from the butt plate and wraps around the rear of the trigger guard. On the forestock, the stock rounds down from the barrel to an incised line. Then I fluted the area between the incised line and the ramrod channel. Other than that there are no decorations. None around the ramrod pipe or the front of the trigger guard. I just decided to "quit while I was ahead."
Thank you for the comments. I certainly want to get better so I appreciate constructive critique!
 
OK then the pictures just didn't show the incises. there's still time to do engraving. I would suggest being conservative in your first efforts though.
 
I agree and intend to eventually add some engraving. I have a nice shiny thumb piece I want to add my initials to and a toe plate as well. Good carving and engraving really adds to a rifle but done poorly it really detracts from the esthetics.
 
Hi Staggerwing,
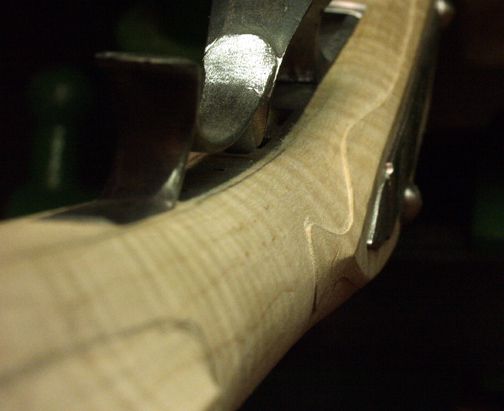
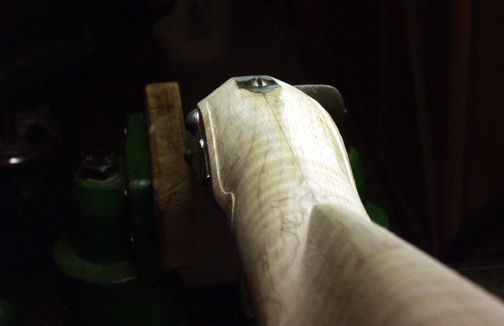
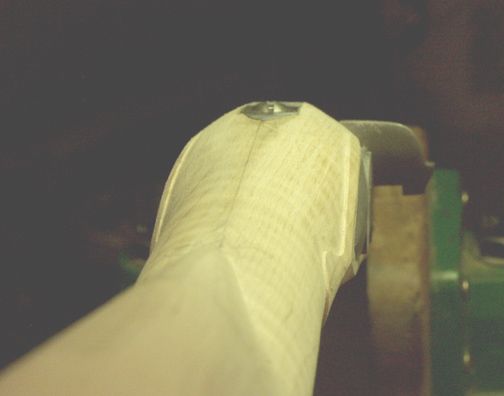
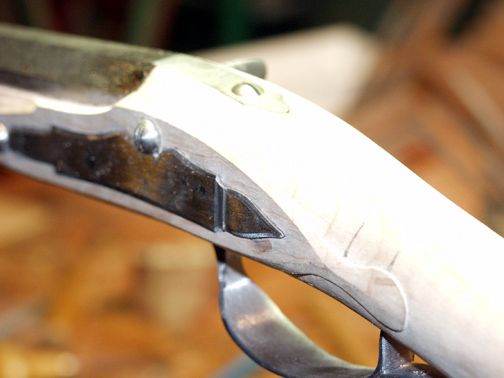
You did a fine job on your first gun. You asked for constructive comments so let me provide one. Your stock needs to be more oval or circular in cross section through the lock area. The lock panels should seem more like they are extruded from the round stock rather then cut into it. You accomplish that by shaping that area almost to its finished shape with files and rasps before ever cutting detail in the lock panels. The photos below may give you a sense of what I am talking about. The last and over exposed photo actually helps to visualize the level of shaping done before cutting in the moldings, which are washed out in the photo. The lock area is the hardest to get right because you have to blend flat surfaces with a round stock. Your Chambers kit will have taken care of a lot of this before you even start working on it. Good luck and nice start.

dave

Jimsriflelockpanels3.jpg

Jimsriflelockpanels2.jpg

Jimsriflelockpanels1.jpg

Jimsriflelockpanels5.jpg
 
Back
Top