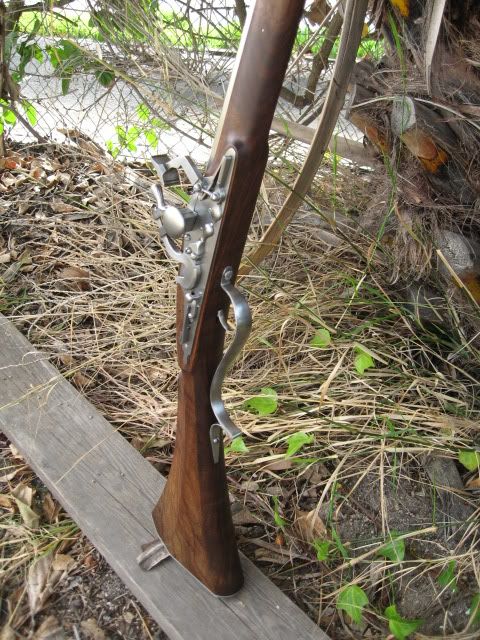
Finished Snaphaunce lock-

Muzzleloading Forum

Help Support Muzzleloading Forum:

This site may earn a commission from merchant affiliate links, including eBay, Amazon, and others.

Erzulis boat

45 Cal.
Joined
Jul 14, 2005
Messages
566
Reaction score
78
001-1.jpg

002.jpg

003.jpg

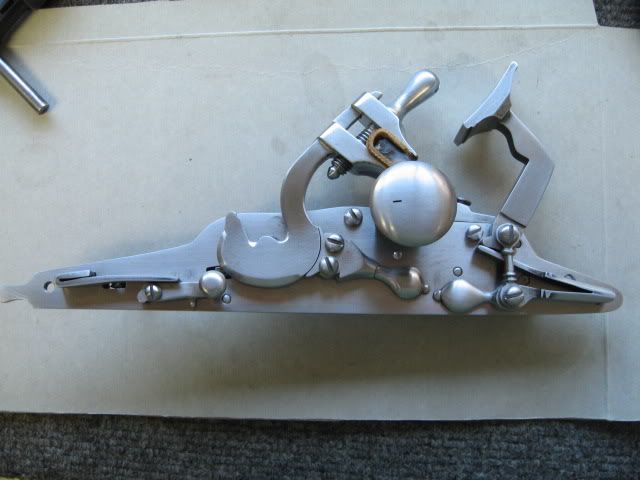
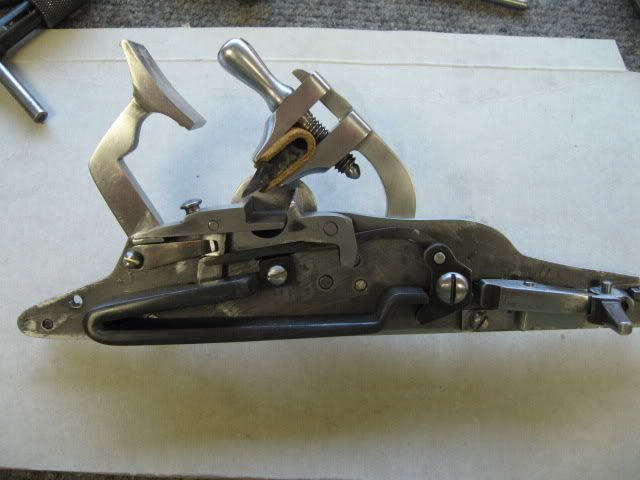
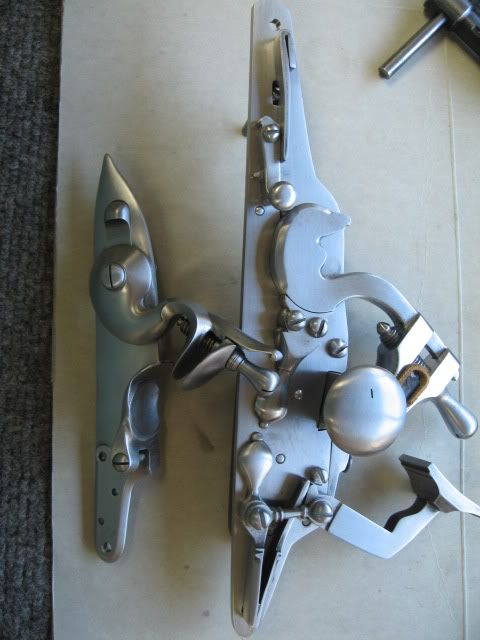
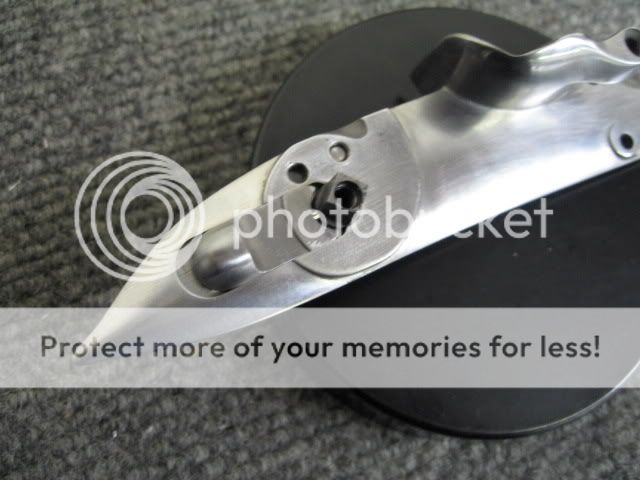
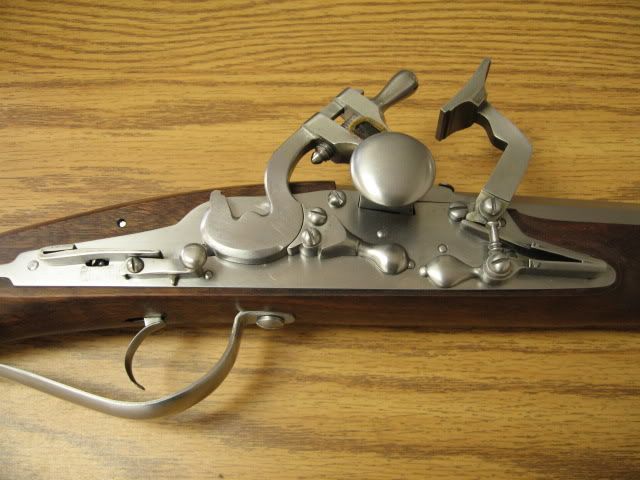
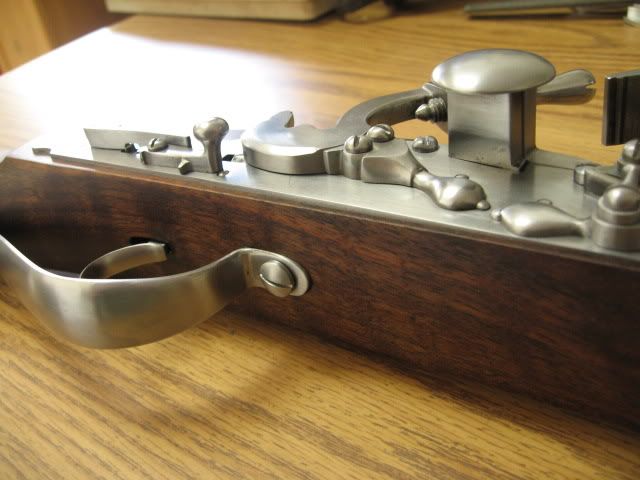
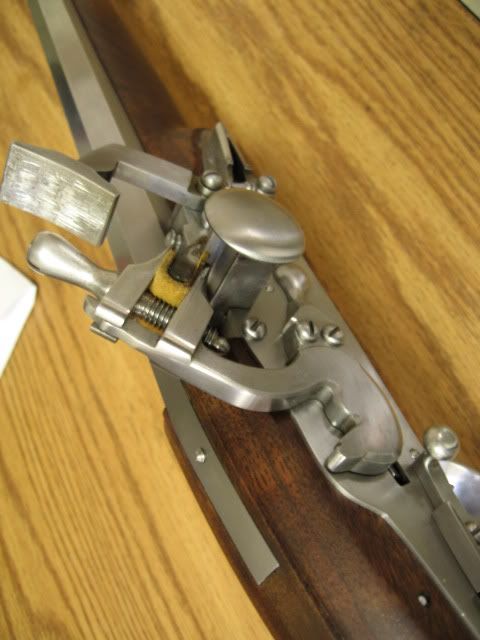
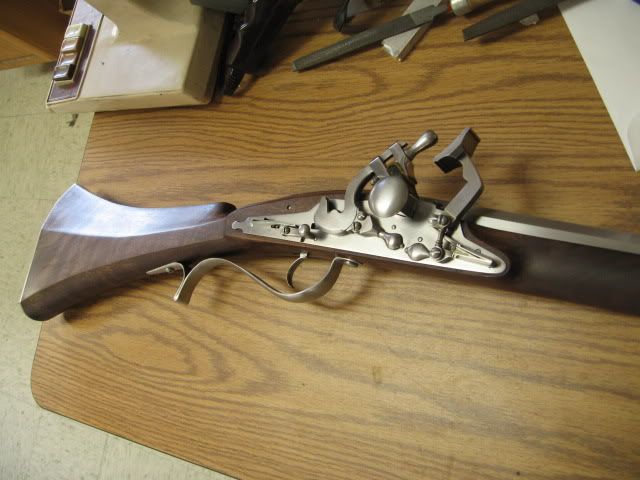
Front and backside shots with a Chambers (modified) lock for a size comparison.
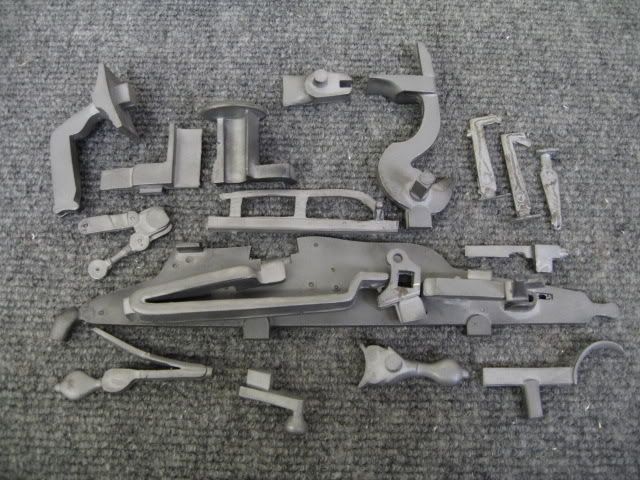
The castings are from the Rifle Shoppe, and I did have to scratch-build some springs out of 1095 (vs. the provided cast articles)and some screws to get the look/function I wanted.
Surprisingly smooth action, is good on flints after really fine tuning the frizzen angle.
It has a sliding pan, and the mechanism is very cool.
Trigger release is light and smooth. The mainspring looks frightening, but starts really fast and strong, but mellows out after the lock does it's thing. It has a fantastic quiet sort of whack sound.
Anyway, after I go about 3 more days with the linseed on the stock, I will show the finished gun.
 
Picture028.jpg

Thanks, Roy-

This is how the castings come, it is not for the faint of heart.

I shaped all the screw heads by hand, and hand cut the slots. Under close scrutiny, nothing is perfect, and I feel this looks better on these really old locks.

You will notice the safety at the rear of the lock,(on the front side, completed lock pics) I wouldn't call it a Dog, as it blocks the secondary Sear and doesn't grab the Cock- This little feature gave me some trouble, as you have to get the mating angles perfect, or the safety will just be for show. I got it to work as intended, and it really stops the Sear dead cold.
 
Hi,
Very nice work on both locks. Did you have to make a new tumbler and bridle for the Chamber's lock to fit the safety bolt?

dave
 
On the Chambers, I just made a "Pin in Tumbler" style, so I used the Chambers tumbler.

The sliding safety has a heat-treated pin that goes into a recess right at the square to round junction on the tumbler.

I cheated, and used a milling machine to cut the "pocket" into the lockplate's face and then machined a sliding safety.

The pin goes into the Tumbler at halfcock if the safety is used. The pin is small, but it is in shear, so it actually works. I doubt I will ever actually use the safety, but it goes along with another build.
 
Hi,
Did you also make the flat spring that fits inside the leaves of the sear spring and locks the safety bolt forward or back?

dave
 
The Snaphaunce spring (external)was made from scratch, but if you are asking about the Chambers, then I also made the spring, and it has 2 detents- the cock holds everything in place basically.
 
Picture002.jpg


The pin is shown not all the way in the tumbler (so it can be seen) but you can see how it works.

The raised "pad" on the safety is precisely mated to the cock's backside.

As to the spring system, that is a secret. :grin:

But all this is for another project anyway-
 
001-2.jpg


002-1.jpg


004-1.jpg


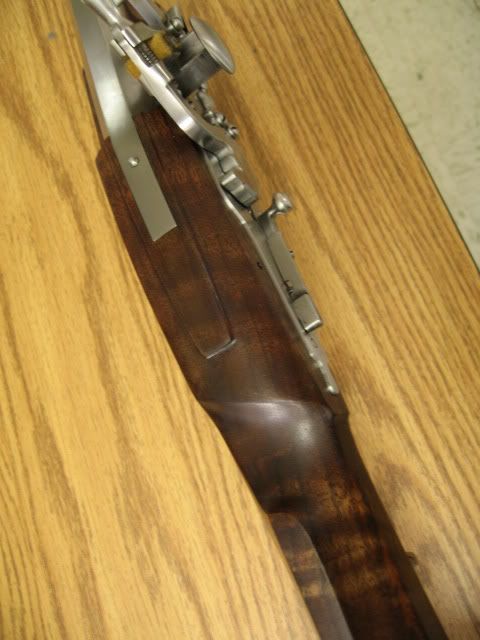
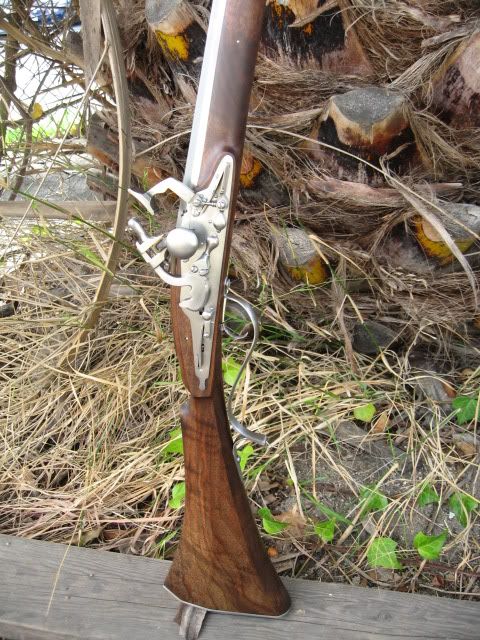
The walnut is a chunk of Claro that is highly figured, and the pictures do not do it justice.

The finish is 2 applications of Permalyn sealer (my fave) and hand rubbed linseed after that. I didn't want any gloss, just that dull sheen.

The walnut was not as heavy as I like it, but I didn't inspect the blank personally before the purchase......it was easy to work though!

The stock is slender and looks almost half and half, the stock rear of the lock is the old faceted style, and everything forward looks 18th century- This is correct however.
 
005.jpg


006-1.jpg


The caliber is 75, and I am going to use it as a Fowler.

Ramrod diameter is 5/16, it looks better with a "skinny" rod, 3/8" looks out of place, plus the old ones I copied had skinny rods.

The stock is very comfortable, and my pull length is 14 inches- I started testing fit at 15.5" and just kept hacking until it fit.

The trigger has a high pivot (you can see the pin) and the trigger pull is shockingly good.

Anyway, thanks for looking-
 
007-1.jpg


009.jpg


010.jpg


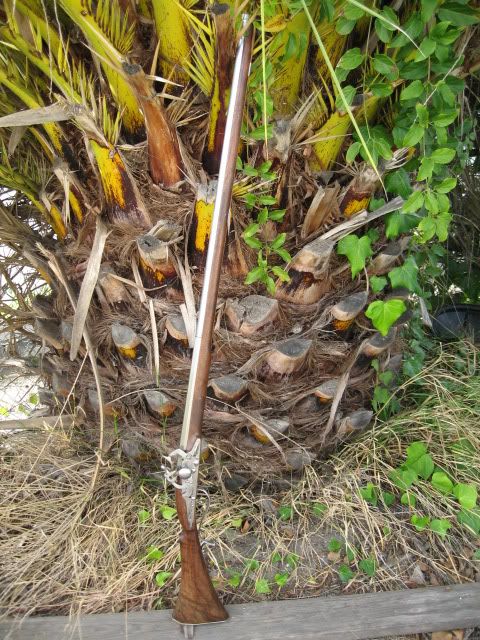
Some full shots. The figure of the Walnut shows a better here.

The lock panel below the lock is narrow, really narrow! This is correct, but I had to be ultra careful when handling the stock for other operations.

The point of balance is the rear part of the forend. The Colerain barrel is an octagon to round, so the arm isn't super light, but it swings quick. I made a steel front sight also, I was undecided on sights, and almost went with a bare barrel (would also be correct)but with the comb and how I shaped it, I am seeing tang and then muzzle once shouldered, so I went with a martial style small front sight......glad I did.
 
Thanks, all-

The castings came from The Rifle Shoppe, and the quality was superb. I might add that the TRS guru (forget the name) was always more than willing to give me guidance on building this arm to historical correctness.

The "tiny" wrist had me quaking in my boots, but I was assured this was correct........glad I listened!

I have some builds I have to wrap up, but I am going to once again go TRS and build something else very soon.

Besides a Matchlock, this might be as far back as I want to go right now.............you Wheelock builders are heroes. :grin:
 
Wonderful!

Beautiful!

I keep going back to the pile of as-cast parts and thinking OH MY GOSH.

Very nice work.
 
Back
Top