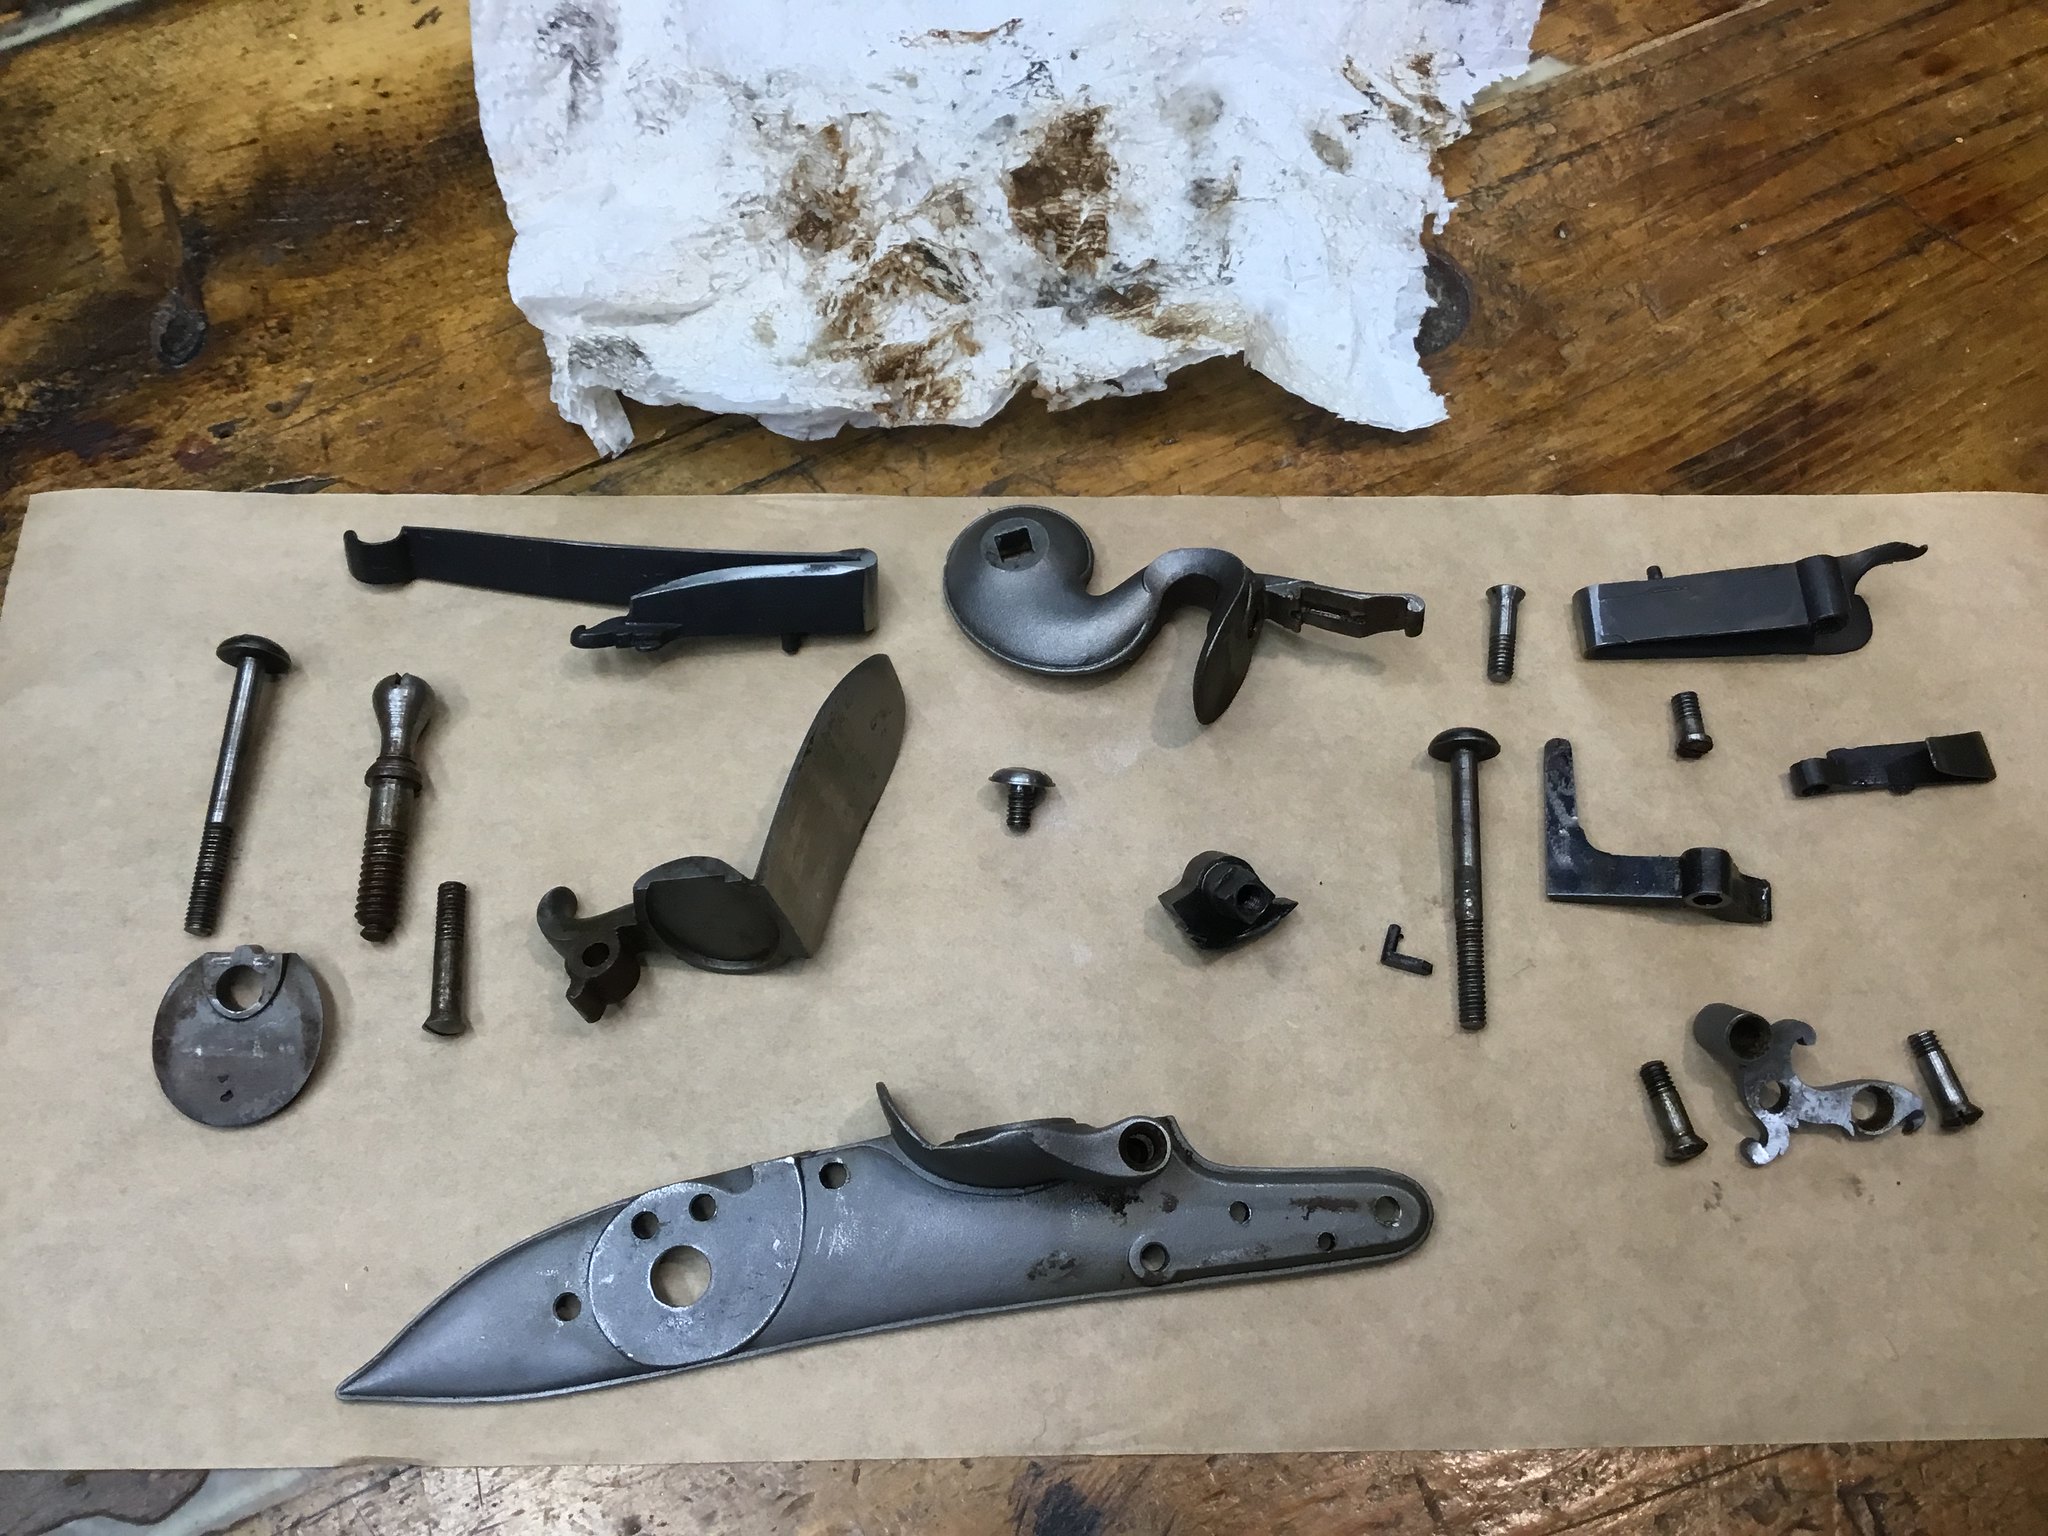
When preparing and putting a finish on a Kibler lockset, should you completely disassemble it or can you do a good job with it left assembled?
-
Friends, our 2nd Amendment rights are always under attack and the NRA has been a constant for decades in helping fight that fight.
We have partnered with the NRA to offer you a discount on membership and Muzzleloading Forum gets a small percentage too of each membership, so you are supporting both the NRA and us.
Use this link to sign up please; https://membership.nra.org/recruiters/join/XR045103
You are using an out of date browser. It may not display this or other websites correctly.
You should upgrade or use an alternative browser.
You should upgrade or use an alternative browser.
finishing a Kibler lockset
- Thread starter mc1960
- Start date

Help Support Muzzleloading Forum:
This site may earn a commission from merchant affiliate
links, including eBay, Amazon, and others.
- Joined
- Jan 12, 2005
- Messages
- 1,237
- Reaction score
- 1,655
No, it must be disassembled. The only parts that need finishing, are the plate, **** and top jaw, and back of the frizzen.
I use masking tape on the back of the plate, **** and frizzen to keep those areas clean.
I use masking tape on the back of the plate, **** and frizzen to keep those areas clean.
Phil Coffins
69 Cal.
This is all the farther I take them apart for finish, other folks do less.
 IMG_0488 by Oliver Sudden, on Flickr
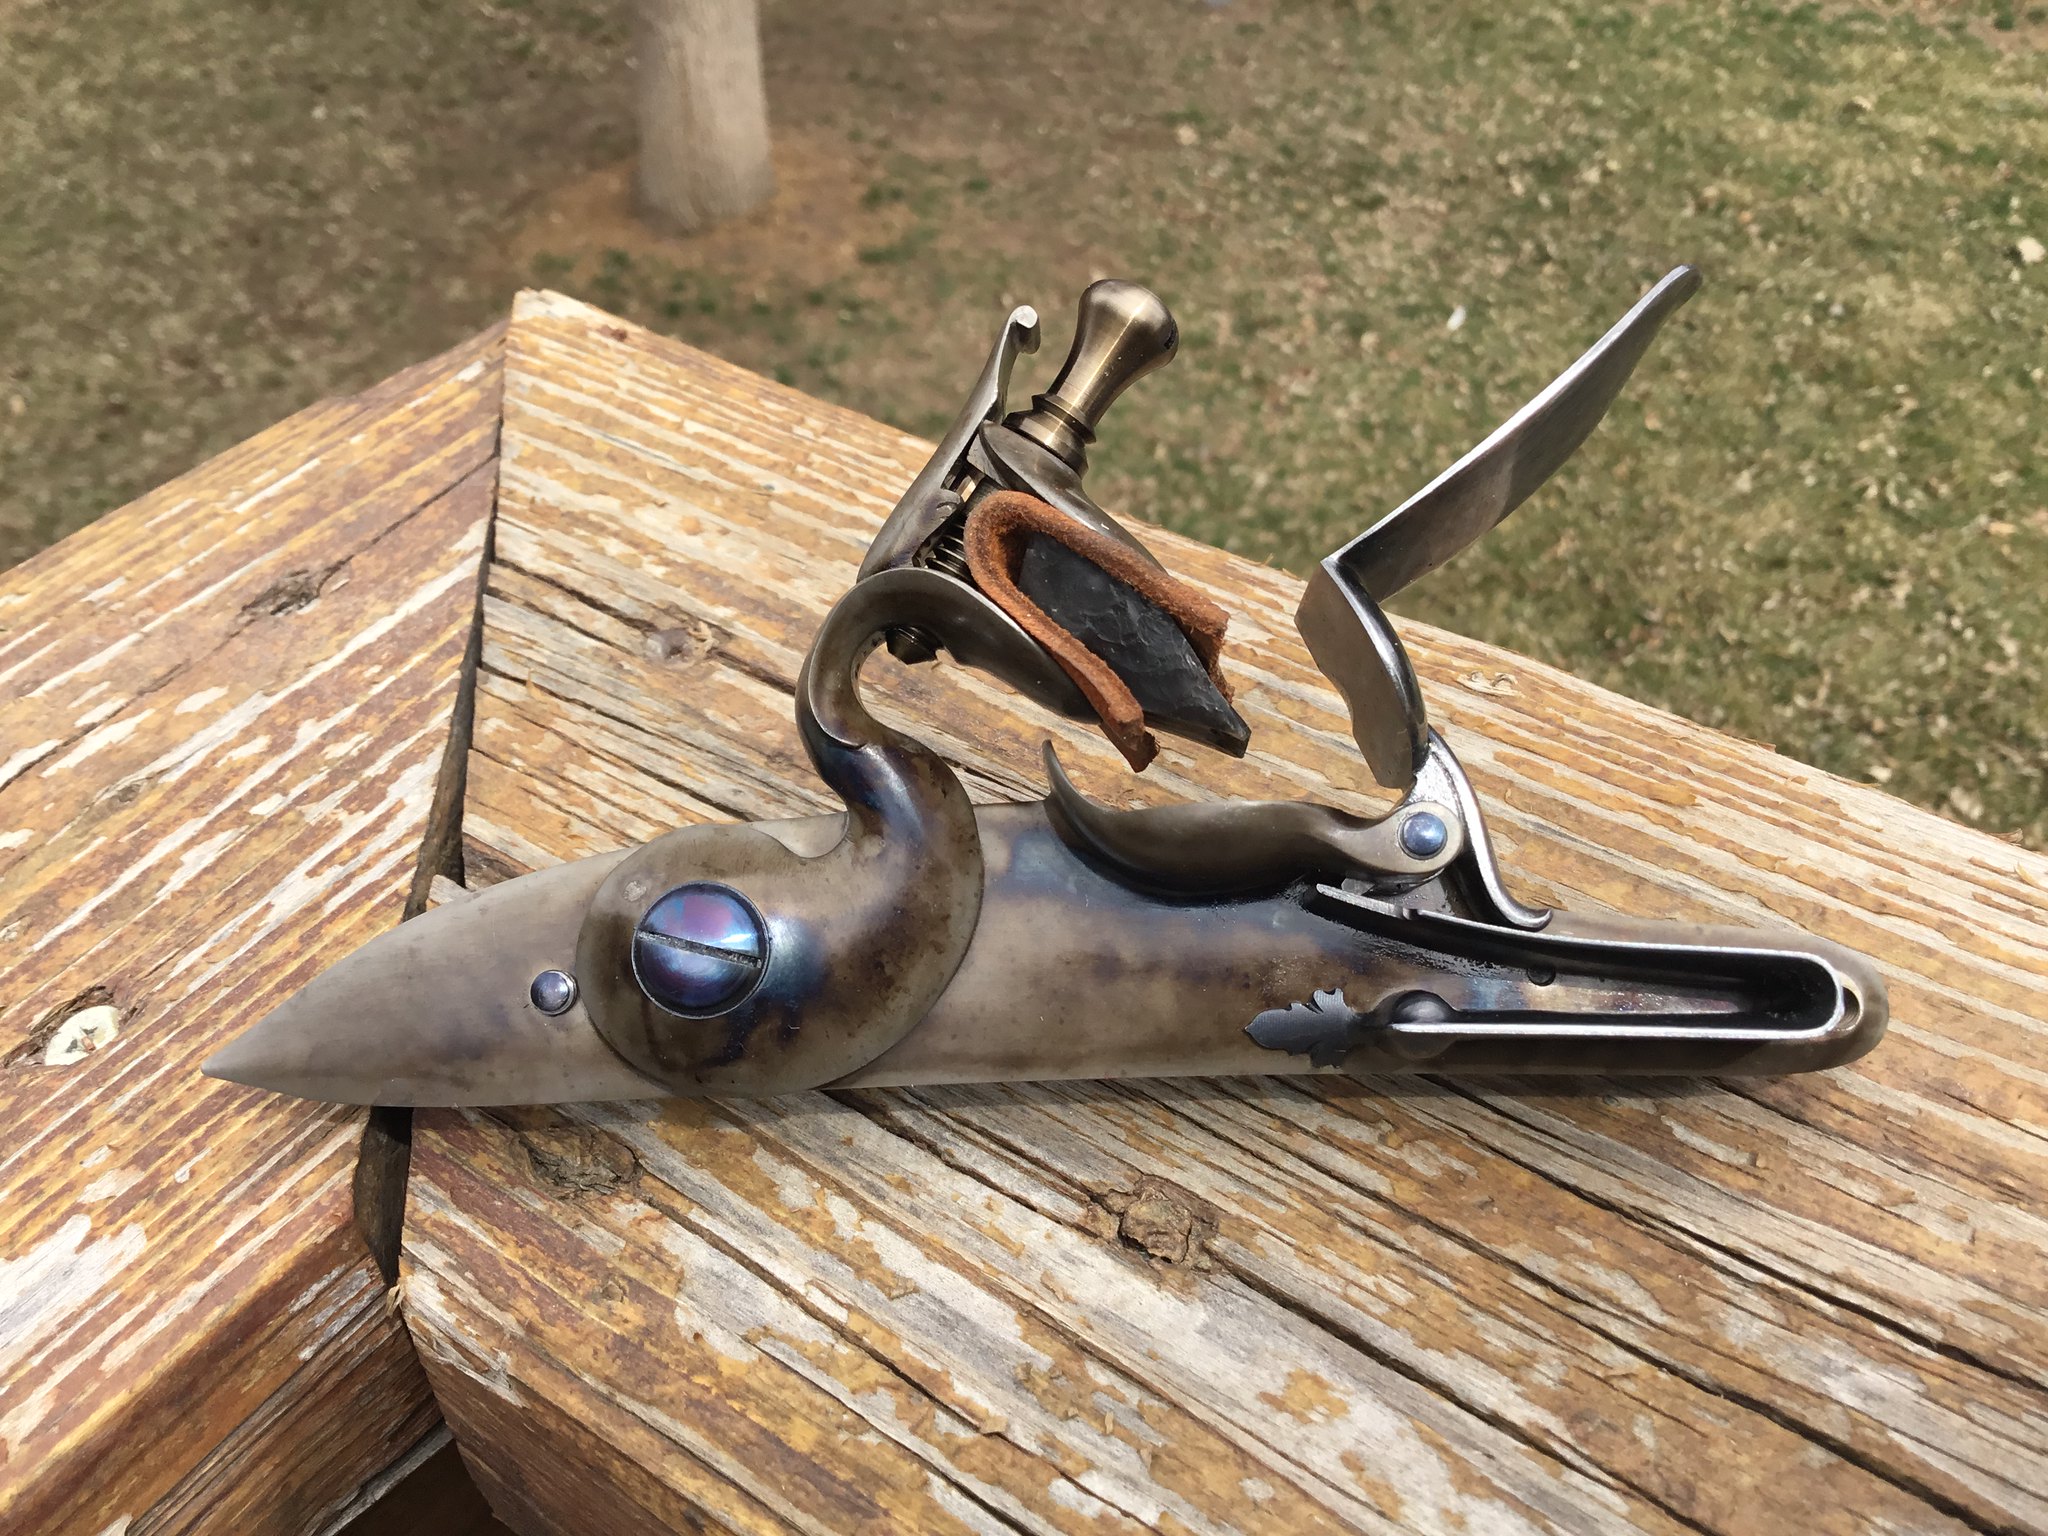
They come out well if you do the work.
 AA0149F3-4E50-45BB-8CAC-B4D4D9909E96 by Oliver Sudden, on Flickr
 IMG_0488 by Oliver Sudden, on Flickr
They come out well if you do the work.
 AA0149F3-4E50-45BB-8CAC-B4D4D9909E96 by Oliver Sudden, on Flickr
Phil, did you dip the parts in a solution and rub them back, what solution did you use?
Very nicely done Phil -- how did you get that lock case harden color?This is all the farther I take them apart for finish, other folks do less.
IMG_0488 by Oliver Sudden, on Flickr
They come out well if you do the work.
AA0149F3-4E50-45BB-8CAC-B4D4D9909E96 by Oliver Sudden, on Flickr
Phil Coffins
69 Cal.
That one is real case coloring, the part is packed in a mixture of wood and bone charcoal then heated to 1375 degrees then quenched in water. Many more steps besides but that’s the general idea.Phil, did you dip the parts in a solution and rub them back, what solution did you use?
Phil, is there any literature available on this process that you know of? Would love to find out more about the process.
user 34300
54 Cal.
- Joined
- Nov 25, 2019
- Messages
- 1,743
- Reaction score
- 2,124
For specific questions on Kibler products contact Kibler.
IF you do not have a mainspring vice do not attempt to disassemble the lock.
Any polishing must be done with stones or abrasive paper backed with a file or wood block. Never use a polishing wheel, Dremil, or unbacked sand paper.
Finishing has lots of options. Cold blue, heat blue, case colors, rust brown, rust blue, or just polished. All of them can look good.
IF a guy has limited tools and skills I would leave the lock as you bought it. IT comes with a fine bead blasted finish. IT look good already. With time and use it will acquire a patina and look nicer.
Thanks, I have watched all of his videos at least once, but didn't know if you had to take it all of the way apart for a decent finish.
Phil Coffins
69 Cal.
I’m sure there is, I’d start by googling “ charcoal color case hardening.”Phil, is there any literature available on this process that you know of? Would love to find out more about the process.
You can get other color patterns by varying the details of the process.
 IMG_1287 by Oliver Sudden, on Flickr
I am sure you are doing this right so you can put the hardening back in the steel. How hot does steel need to not warp?That one is real case coloring, the part is packed in a mixture of wood and bone charcoal then heated to 1375 degrees then quenched in water. Many more steps besides but that’s the general idea.
I would never even think about doing this though it really does give fantastic color!
https://www.turnbullrestoration.com/restoration-services/color-case-hardening/I’m sure there is, I’d start by googling “ charcoal color case hardening.”
You can get other color patterns by varying the details of the process.
IMG_1287 by Oliver Sudden, on Flickr
user 34300
54 Cal.
- Joined
- Nov 25, 2019
- Messages
- 1,743
- Reaction score
- 2,124
Real color case hardening is beyond the skills and tools for the vast majority of hobbyists. IF you like the look you can fake it. I did the attached lock with heat colors. I heated the parts to straw with a propane torch. Then I then played a fine tip oxy-acetylene torch on the steel to create colors. With very little practice you can get something that looks sort of like color case hardening. One more option. If it goes bad polish it off.
Attachments
- Joined
- Feb 20, 2013
- Messages
- 665
- Reaction score
- 937
To paraphrase a Master Builder on another forum:Any polishing must be done with stones or abrasive paper backed with a file or wood block. Never use a polishing wheel, Dremil, or unbacked sand paper.
“Sometimes late at night when alone in my shop I use sandpaper with only my fingers for backing”
When preparing and putting a finish on a Kibler lockset, should you completely disassemble it or can you do a good job with it left assembled?
Yes. You don’t want browning or blueing to affect the internals.
After I took the lock apart for my first build, I had to find a reference to put it back together as to what screw went where, I was a bit lost.
Lock disassembly is a required skill for gun building, you might as well learn to get ahead of the game and above all, buy a mainspring vise.
Lock disassembly is a required skill for gun building, you might as well learn to get ahead of the game and above all, buy a mainspring vise.
If you lack the equipment to do it yourself, @FlinterNick is your man. I've sent two locks(Traditions and Chambers) to be cleaned up and tuned to him and couldn't be happier. He does great work and gets them sent out quickly. Traditions lock is faster and more reliable, Chambers is beautiful and sparks like a racecar sliding on its roof even with a flint nearing the end of its life.


Not true. I did learn as a kid not to use channel locks.IF you do not have a mainspring vice do not attempt to disassemble the lock.
- Joined
- Jan 17, 2010
- Messages
- 42
- Reaction score
- 20
To paraphrase a Master Builder on another forum:
“Sometimes late at night when alone in my shop I use sandpaper with only my fingers for backing”
You make mention of polishing stones.I am looking for ones like what Kibler uses in his you tube tutorials. can't find any anywhere. Any idea where I can pick some up?Real color case hardening is beyond the skills and tools for the vast majority of hobbyists. IF you like the look you can fake it. I did the attached lock with heat colors. I heated the parts to straw with a propane torch. Then I then played a fine tip oxy-acetylene torch on the steel to create colors. With very little practice you can get something that looks sort of like color case hardening. One more option. If it goes bad polish it off.
Similar threads
- Replies
- 9
- Views
- 943
- Replies
- 59
- Views
- 4K


