• Friends, our 2nd Amendment rights are always under attack and the NRA has been a constant for decades in helping fight that fight.

    We have partnered with the NRA to offer you a discount on membership and Muzzleloading Forum gets a small percentage too of each membership, so you are supporting both the NRA and us.

    Use this link to sign up please; https://membership.nra.org/recruiters/join/XR045103

Finishing lock parts

Muzzleloading Forum

Help Support Muzzleloading Forum:

This site may earn a commission from merchant affiliate links, including eBay, Amazon, and others.

serenget

32 Cal.
Joined
Aug 10, 2012
Messages
7
Reaction score
0
Hi all,
I'm new to building flintlocks.
I'm building a Chambers Penn Fowler with a round faced English lock.
And I'm going about certain tasks backwards as I'm waiting for tools to inlet the barrel etc.
So I've polished up my lock, and most probably made some mistakes as I go.
I've read several of the key instruction books, and the Ravenshear manuals. But there still seems to be a lack of info regarding the detailed finishing of lock parts for final browning and/or antiquing.
Clearly, for example, there are parts of the lock that don't need fine polishing. And I've probably gone too far. Can someone please give me some detailed input on what parts, and what parts of parts, should one polish up. And what elements can be left with file marks etc. Clearly, although I've never seen any antique guns, some pictures I have seen of early locks do show elements that are not polished, perhaps for practical reasons, e.g. the inside jaws of the cock, and the area of the lock plate under the frizzen screw. But should I polish up the underside frizzen where it joins the top of the pan for example?
What should I try to achieve to approximate an authentic (although workable) reproduction?
It seems obvious to me now that a one size fits all policy with regard to polishing locks to a fine shining finish is incorrect.
There is even confusion in the manuals about what grade of emery paper is acceptable for final polishing. What did the old gun-smiths use to polish out their locks? What grade of paper would correspond to brick dust?
And now to some problems. My Chambers lock fits back together quite well. The frizzen seems secure enough although there is very slight lateral play, probably, but not necessarily, because I polished off some of the rough casting (although 'rough' is relative I suppose because the Chambers casting is pretty fine) on the frizzen itself where the frizzen screw passes through the part, and similarly on the lock plate in this area. Is this a problem I should worry about? Can I fix this by any accessible method?
Also I can't remember if I could see light between the pan and frizzen on the unfinished assembled lock viewing from the barrel side of the lock through the pan. I can now. It's somewhat difficult to see because of the raised lip of the pan, but clearly I worry that I've scraped a little too much away from the surrounding areas of the pan. And perhaps I have exaggerated a problem which was inherent with the lock casting.
Again, is this a problem I should worry about? What might I do about it?
Are there any detailed articles about this sort of fine finishing that I should know about?
Thanks in advance.
Matt.
 
Over on the other ML site that the builders frequent there is a great tutorial on lock polishing.

That being said....why are you polishing a Chambers' lock before browning or antiquing? The bead-blasted finish on Chambers' locks lends itself well to these finishes. All you should have had to do was remove any casting lines that are sometimes left on the hammer.

In order to brown or antique you are encouraging rust. You polish metal to resist rust. Lock external surfaces on ML are generally only polished if they are going to be left bright. The chemicals used to brown metal need to have a rougher surface to bite into...simular to what was on it when you got it.

If browning or aging is the avenue you want to take then sand it to rough up the surface with 120 grit or so being careful not to remove any sharp edges.

The fizzen should fit tight down on the pan. The only place you should see a gap of any kind would be at the center of where it mates to the barrel.

Lateral play in the frizzen? Did you mess with the bolt holes? If not then you may have take too much off the lateral surfaces of the frizzen where it fits in between the lock plate extention and the bridal or too much off the frizzen itself. If either is the case the surfaces could be squared and shims could be installed...but this is not ideal.

You sure picked a tough one to polish for your first though. I don't like dealing with the moulded edge on that lock and it's tough to polish and keep it from getting messed up. E would use the Colonial Virgina on an American gun to avoid it....same plate shape and size but without the moulding.

I don't know what else to tell you at this point. I also hope you haven't gone too far.

J.D.
 
If your going to brown the lock polishing isn't required but it does not hurt either...I am just learning too and here is a picture of my first attempt, polished down to 800 grit, please disregard my clunky fat lock panels it is my first attempt... :grin:

DSC00124.jpg
 
Well, it hurts if you don't know what you're doing and you get hit in the wallet to pay to have a lock repaired. But I guess that's how we learn.

My time is too valuable too spend that much time polishing a lock just to turn around and rust it.

To each their own, I guess. Enjoy, J.D.
 
When I polished that lock I just took minimal material of the surface of the exposed area's. I think there is a difference in polishing and reshaping/grinding but since you seem to be more experienced I bow out to your expertise :hatsoff:
 
Generally polishing is the removal of all surface inperfections leaving a bright shiny surface as on a Brown Bess lock.

If this is not what you are referring to as polishing I think we only differ in our use of the term.

I agree sanding the lock plate down some isn't a bad thing, especially if there are surface imperfections. Not all Chambers locks have a desirable surface as shipped but most are OK to brown after any mould lines are removed. I hate seeing mould lines as original locks were forged and had none.

Removing metal from interface areas, like in the pivot area of the frizzen discussed above, should always be approached with caution for obvious reasons.

The metal finish on your rifle appears to be very good, by the way.

Enjoy, J.D.
 
Thanks for your posts.
It's good to know that one can rust a chamber's lock virtually straight out of the box.
But I think I haven't explained exactly what kind of finish I want.
Here's a quote from Chapter 22 of Brockway - Recreating the D B Shotgun: " Before any bluing or browning can be done, the metal parts first must be polished. It is axiomatic that the quality of the blued or browned finish is dependent upon how well the metal was polished before the finish was applied. "
He suggests obtaining a bright finish, and then browning rusting in stages (up to 6 times) to achieve a finish within the metal, and to have some control over the process.
But what if someone wants a bright steel lock as a finished product?
What would have come out of the gunmakers workshop in the 1700's?
Clearly then, some polishing of chambers locks is appropriate, and obtaining a bright finish requires some metal removal. And regardless of the final finish, this process clearly has the potential to introduce problems.
I've not gone mad with my work, but thanks for your thoughts on the potential problems JD.
But does anyone have answers to my specific questions re finishing the various parts of the individual components making up a lock?
Not that I want to be traitorous, but what is the alternative site where I can find the article that JD mentions?
Thanks again.
Matt.
 
mja said:
Brockway - " Before any bluing or browning can be done, the metal parts first must be polished. It is axiomatic that the quality of the blued or browned finish is dependent upon how well the metal was polished before the finish was applied. "
Great book. Are you building a high end early double shotgun? They were usually built in European shops to different standards that the commonly produced American arm.
But what if someone wants a bright steel lock as a finished product?
Then they polish with files and different grits until its bright being very careful.
What would have come out of the gunmakers workshop in the 1700's?
Depends on the maker and what he is making and, often who it was for.
Clearly then, some polishing of chambers locks is appropriate, and obtaining a bright finish requires some metal removal. And regardless of the final finish, this process clearly has the potential to introduce problems.
Sure, but just enough to even surfaces...not bright. Yes and yes.
But does anyone have answers to my specific questions re finishing the various parts of the individual components making up a lock?
Sorry, didn't see where you asked about how to refinish any specific part. I thought I answered your concerns above. What else have you got?

To expand on Brockway above, when going for a transparent finish like a modern, hi-luster blue that is done in a tank, with chemicals under controled conditions, then metal underneath needs to be polished smooth. If you are going to rust blue or brown you don't need it bright. Now if you are going the look of a Brown Bess lock that was once bright and now has seen the ravages of time then, by all means, go bright then antique it.

Maybe a picture or link to what you are going for would be helpful to us in determining how you should procede.

Enjoy, J.D.
 
Thanks JD.
I guess I was looking for more detailed input on what parts of each lock component I should polish and what parts could be left rough. And what grits of sandpaper marks / file markings are suitable to retain in areas like under the frizzen, and on its face, and under the jaws of the cock. That sort of thing.
If you had to choose a grit of emery paper to correspond with brick dust (which I understand was used to polish up barrels), then what grade would approximate it?
How would the early gunsmiths have finished lock parts without emery paper??
I'm going to try to find a picture of a lock that will go someway to showing the sort of final finish I'm looking for.
I've been reading up and having a good time so thanks for your input on that.
 
A Chambers' Lock is usually very usable as received. Builders will finish them to suit their build but they can be used as is. All the parts that "need" polished would have been polished upon assembly. Other parts can be polished to suit the builder/user like polishing the underside of the frizzen that covers the pan and the pan itself faciltates wiping between shots. You will not polish the frizzend face...it is very hard...in fact polishing any part of the frizzen can be problematic.

Can't help you with brick dust and it would be varying grits in order to work. Wouldn't matter any way because the lock you are working on is steel and the ones the old days were iron....different animals.

Sanding works like this....you use the most agressive grit necessary to remove what you are trying remove. Then you use the next less agressive grit to remove the scratches of the last and so on until you have no scratches.

It is suspected that the early 'smiths did most of their material removal with files. After filing, if the original 'smiths used dust they would have had to have used varying grits to complete the cycle. Advice on files to get? Get as many sizes and varying shapes and cuts as you can...and good ones made in the U.S.A., Germany, Switzerland, etc. etc. Cheap files are a waste of money and you will be sorry.

Get the pictures of what you are trying to achieve. I will be interested in seeing what you come up with.

Enjoy, J.D.
 
Last edited by a moderator:
Polishing an assembled lock is different than making a lock. If you were making a lock, you could get the toe of the frizzen to a "close but not yet fitting" dimension to fit into the space between the lock face and the pan arm, then polish all until things fit tightly. So you do have to be careful with an assembled lock.

There's polishing of the exterior for finish appearance, and polishing of moving parts for optimal function.

Parts never to polish on an assembled lock: any part of the tumbler axle. Not the square that holds the cock, not the axle that rotates in the lockplate hole, not the axle that rotates in the tumbler hole. Things may seem rough now but if you polish enough to get things rocking, the lock will get rough quickly. Similarly I never polish the sear axle or the bolt it rotates on, the frizzen bolt axle portion or the hole in the frizzen toe. I will poke some toothpaste in there and work the parts a hundred cycles then wash it all off. This won't change dimensions appreciably but can shine things up. And it leaves the lock smelling minty fresh lol.

Surfaces I polish to 400 then use rouge on a flat or shaped stick: the top of the sear arm where the spring rides on it, the end of the sear spring, the toe of the tumbler and the tip on the mainspring that rides on the toe, the teat on the frizzen and the top of the frizzen spring where the frizzen teat rides on it.

Fitting is another story and I will make sure the mainspring does not scrape the plate, the sear arm does not scrape the plate, the frizzen spring does not scrape the plate.

For exterior polishing I am content going to 400 grit then using pumice, oil and a piece of leather to give a softer look.
 
Rich Pierce said:
Polishing an assembled lock is different than making a lock. If you were making a lock, you could get the toe of the frizzen to a "close but not yet fitting" dimension to fit into the space between the lock face and the pan arm, then polish all until things fit tightly. So you do have to be careful with an assembled lock.

There's polishing of the exterior for finish appearance, and polishing of moving parts for optimal function.

Parts never to polish on an assembled lock: any part of the tumbler axle. Not the square that holds the cock, not the axle that rotates in the lockplate hole, not the axle that rotates in the tumbler hole. Things may seem rough now but if you polish enough to get things rocking, the lock will get rough quickly. Similarly I never polish the sear axle or the bolt it rotates on, the frizzen bolt axle portion or the hole in the frizzen toe. I will poke some toothpaste in there and work the parts a hundred cycles then wash it all off. This won't change dimensions appreciably but can shine things up. And it leaves the lock smelling minty fresh lol.

Surfaces I polish to 400 then use rouge on a flat or shaped stick: the top of the sear arm where the spring rides on it, the end of the sear spring, the toe of the tumbler and the tip on the mainspring that rides on the toe, the teat on the frizzen and the top of the frizzen spring where the frizzen teat rides on it.

Fitting is another story and I will make sure the mainspring does not scrape the plate, the sear arm does not scrape the plate, the frizzen spring does not scrape the plate.

For exterior polishing I am content going to 400 grit then using pumice, oil and a piece of leather to give a softer look.

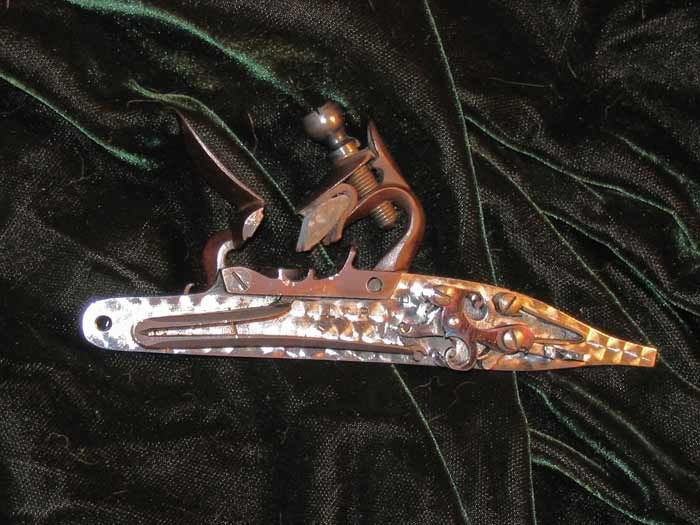
....... then the lock plate, bridle (if equipped), cock, top jaw, and screw are all case hardened......
 
It is my belief that the majority of the locks were polished bright and left that way, after they were case hardened, the case hardening was a given.

The first three are originals, the last one I case hardened and polished bright.

IMG_2220.jpg

IMG_2211.jpg

IMG_2199.jpg

mylock.jpg
 
I clean up and polish all the locks in my guns. The smooth surfaces make it harder for rust to form, and that was the original makers' idea. Then I let them dull down on their own with use. I keep them clean but don't obsess about the shine.

Here's what I work on:
plate - outside, inside, pan
cock - all exterior
frizzen - forward side and pan cover exterior, foot down to the toe

All that takes a while. I do not touch any holes, tumbler, springs, sear, inside cock jaws, frizzen face, swivel surfaces of any moving part.

To do this, I use a small 3 corner file, small Swiss flat machinist file, small diamond files, and emery boards from the local grocery store cosmetic department. A local Nail Shop will have a better selection of grits. Yes, you can go in there. :grin:

Every part doesn't always need all these tools. The files are usually used as draw files, but they don't work on hardened parts. The diamonds and emery boards work on anything. You can go as smooth as you want, all the way to mirror. It just takes more work. A lot more work - and time.

All the other fittings are finished the same way, after rough filing/shaping. Edges are draw filed with a slight angle for inletting.

I hope this might be useful to someone out there.
Just my own method.

John
 
This is just my opinion. It depends on the gun you are building. If you are making a fine gun for a customer all the external parts should have all the casting and parting signs removed and be polished to at least 400 grit. To give them that satin fine finish I brush them with scotch bright in one direction. I don't worry too much about the internals unless it is a real expensive gun. I don't believe in polishing the bottom of your shoes. As for myself A lock is not finished unless it is case hardened. After polishing and engraving I case harden and temper the lock externals. I temper frizzens to 400 degrees for one hour. This lock is not blued but came out of the case hardening process as is. One of my tricks.
lockface-2012.jpg

locktop-2012.jpg

PS. I take the color off of most of my locks and leave them bright abd polished. Mostly because the engraving looks better.
 
Thanks to all for your helpful posts and pictures.
I think that the finish I'm aiming for is best represented by the percussion lock posted by Tom. Although I will want the areas of higher relief to have a slightly brighter appearance.
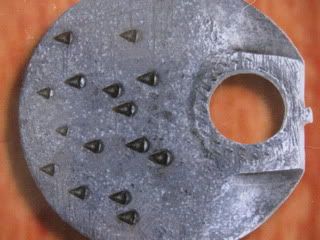
Re Inside of jaws of cock: JD has already posted some material on this subject on another thread. But what exact size and shape of tool should I search for in order to replicate the following teeth?
A round punch won't do it.
d9fec216.jpg
 
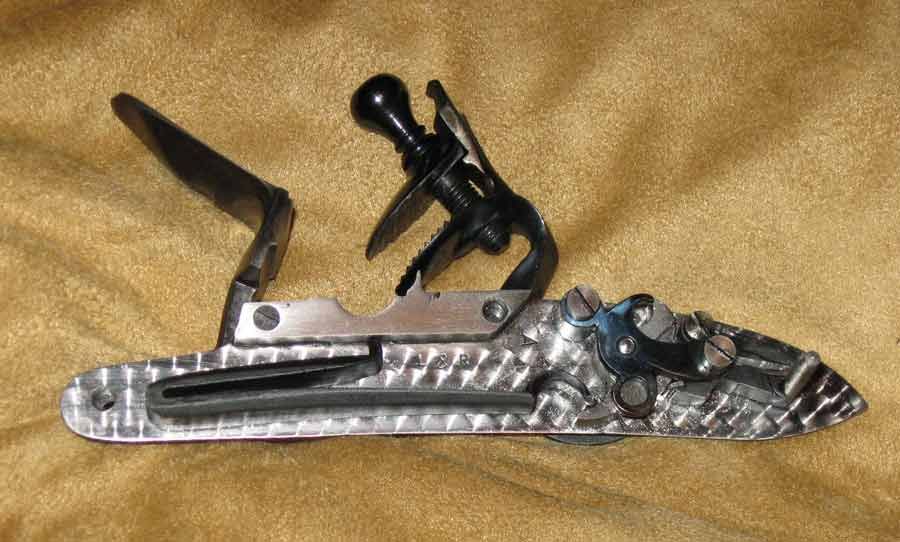
I completely disassemble new locks and after filing off the casting flash/mismatch I sand the exterior of all parts smooth.

I also sand and polish the inside parts.
Occasionally I have even jeweled (or engine turned if you prefer) the lockplate. :)

Locks-100.jpg


lock2-1.jpg


I sometimes heat blue or color heat the bridle as well.

Doing all this doesn't make them work any better but I think it adds just a little something special. :grin:
 
Zonie said:
Doing all this doesn't make them work any better but I think it adds just a little something special. :grin:

Now that's a POLISH!!! Glad you chose the inside of the plate though. :wink:

Enjoy, J.D.
 
A square graver held at an angle too steep for actual engaveing does a great job. Think digging in rather than cutting a line. The first engraveing chisel I ever made is much too heavy and clumsy for it's intended purpose but does great for this job. BTW be careful of those teeth around your knuckles. They bite into skin as well as they do into leather. :grin: These original type teeth out perform those little molded grip lines as found on most comercial locks three to one IMHO.
 
WELCOME TO THE FORUM!
with that said.....light between the pan now...and wasn't before 'polishing'??? :shocked2:

I don't use anything bigger than 400 grit on anything.....I want to get scratches and file marks,etc out of the metal......then brown everything......we want to have a nice color...but fit is much more important to me....so I spend all my elbow grease on the wood inletting......and that takes about ALL my energy! :surrender:
 

Latest posts

Back
Top