• Friends, our 2nd Amendment rights are always under attack and the NRA has been a constant for decades in helping fight that fight.

    We have partnered with the NRA to offer you a discount on membership and Muzzleloading Forum gets a small percentage too of each membership, so you are supporting both the NRA and us.

    Use this link to sign up please; https://membership.nra.org/recruiters/join/XR045103

First Kit Gun

Muzzleloading Forum

Help Support Muzzleloading Forum:

This site may earn a commission from merchant affiliate links, including eBay, Amazon, and others.

adjmclar15

Pilgrim
Joined
Oct 2, 2014
Messages
4
Reaction score
0
I have just purchased a Traditions Kentucky Rifle kit as my first attempt to build / put a muzzleloader together.

I have a couple questions though:

Browning the Barrel: I can get Plum Brown locally and I'm open to suggestions on how to heat the barrel. I've measured my oven and the barrel is about 2 inches to long to be able to close the door on the oven. Would I be better off using the laurel mountain forge barrel brown.

Birchwood Casey Colonial Brown: I'm having trouble locating this product but it might have been renamed to "maple". My local shop has a couple bottles. Has anyone used it and can give me an idea about what color the finished stock would take. I plan to use the Tru Oil after completing the initial staining. Any guidance?


When assembling this kit, is there anything I need to know that the instructions might not cover?

Thanks guys / gals
 
I used plum brown on a 32 inch barrel by heating in the oven. Put a rack up as high as possible and put the barrel in with one end sticking out a bit. Occasionally reverse ends on the barrel till its pretty much evely hot.

But, plum brown has given me mixed results and I would suggest going with one of the other cold brown types. More time and effort, but they always look good when done right.
 
mp_clark said:
is there anything I need to know that the instructions might not cover?

Yes.

Only by doing your research, making mistakes, admitting them (to yourself), gaining experience, and trying again will you learn them though.

Not to be flip, but education is always expensive. Not getting one is even more so. :wink:
 
I have always used a propane torch, with a blow torch tip to heat barrels. They don't have to be real hot for plum brown to work. Just keep the torch moving back & forth till a drop of water sizzles, about 275 degrees.
 
mp_clark said:
...

I have a couple questions though:

Browning the Barrel: I can get Plum Brown locally and I'm open to suggestions on how to heat the barrel. I've measured my oven and the barrel is about 2 inches to long to be able to close the door on the oven. Would I be better off using the laurel mountain forge barrel brown.

Birchwood Casey Colonial Brown: I'm having trouble locating this product but it might have been renamed to "maple". My local shop has a couple bottles. Has anyone used it and can give me an idea about what color the finished stock would take. I plan to use the Tru Oil after completing the initial staining. Any guidance?


When assembling this kit, is there anything I need to know that the instructions might not cover?

Thanks guys / gals

As you know, Birchwood Casey Plum Brown is heat activated.
What you might not know is it gives off some very nasty fumes when it is applied to the 285 degree F metal of the barrel.

Although they removed the mercury from it, it still doesn't smell like anything you would want to stink your house up with.
That's why when I was using it on my builds I always did it outside, using a propane torch to heat the barrel.

It is very difficult to get a smooth even coat so it always took me at least 3 total brownings to eliminate the light areas.

If you have a room in the house that can be made to have a high relative humidity I strongly suggest you use Laurel Mountain's browning solution.
Not only does it not stink up the house but it does an excellent job of browning steel.
Yes, it takes several coats to get an even colored surface but applying it is much easier than the Birchwood Casey Plum Brown.

I haven't seen any Birchwood Casey Colonial Brown stain for years. In fact, I bought the last bottle I've ever seen, at a gun show about 4 years ago and it was old when I bought it.

The Birchwood Casey Walnut is an excellent stain and more importantly, it works on the Beech wood stock your kit is made from. (That can't be said for any of the oil based stains I've ever seen.)
 
I agree with "Zonie" you should use Laurel Mtn.Forge Browning solution.I used all their products when I built my custom longrifle. Browning ,stain,sealers, and finish turned out very good. Just make sure you do browning in humid weather. Good luck with your project.
 
I would just leave it in the white, in about 2 or 3 years it will have a very nice patina. Just rub it down with a dirty cleaning patch that has some oil on it after a day at the range or after hunting, works pretty good :thumbsup: . Its what I will do for my next 2 rifles. Btw, is it O.k. too have 2 guns (1 rifle, one Fowler) in the works at the same time? . :idunno: .
 
I will also suggest Laurel Mountain Forge Brown.I was tossed about which way to go with turning my blued barrel on a CVA Frontier to brown and it did a fantastic job,it takes some time and a few applications but the results were well worth the effort! Bill.
 
Also,I didn't have to create a humid atmosphere as the directions suggested(I live in Missouri,It's a little humid around here.)I just left it on a little longer. Bill.
 
Thanks for the help guys. I've made progress and have all the furniture, barrel, and stock fitted together nicely.

I've completed the sanding processing starting with 80 and working up to 330 for a very nice and smooth surface. Last night I applied and good coat of BC Sealer / Filler.

Also, started to polish / sand the barrel.

After work today, I plan on starting the browning process. Kind of nervous, but it will be just fine.

Also, need to sand the sealer / filler smooth. If needed I'll apply 1 or 2 more coats and sand with 330 grit between coats. I hope to get the first coat of stain applied too. If not no big deal tomorrow is just another day. I'm going with the Rustic Walnut stain by BC and not the Colonial Brown. (Heck for all I know they are the same thing)

Finishing the wood doesn't bother me. I mainly use BC products on the recurves and longbows I make.

Also, picked up a bottle of Brass Black by BC. Think I'm wanting the aged brass look and not the polished. Might still be on the fence with this one though. I'll have to wait and see how the stock and barrel turn out first.
 
Don't be surprised if your BC stains don't do anything.

For a stain to work, it has to penetrate the wood fibers. A Sealer does just that. It seals off the wood fibers to protect them from things like water and stains.

If the stains don't work, back up and start over.

You will have to sand the stock down to the point that all of the Sealer is removed.
I recommend using at least a 120 grit sandpaper. Maybe even courser.

After your sure the sealer is gone, then you can resand the surfaces but do not go to a paper that is finer than a 220 grit. Do not use your 320 or 330 grit paper.

After the surfaces have been smoothed out with the 220 grit paper you should "whisker" the surface.
This raises the fine wood grains that want to stand up when they get wet.

To do this, apply a light coating of water and let it dry. After it is dry, rub your hand from aft to forward and forward to aft on the stock.
One direction will be smooth feeling and the other will be scratchy. Remember the scratchy direction.

Now, using a new piece of 220 grit sandpaper, lightly sand the wood, stroking the paper only in the scratchy direction. Do this lightly. You only want to sand off the whiskers that are standing up without removing any real wood from the surface.

After whiskering, apply your stains until they get to the color you want. Remember, the surface looks much lighter when it's dry. It's only when its wet that you will see the real color and darkness the staining has done.

Once your staining reaches the darkness and color you want, THEN, you can apply the sealer if you want it. (I don't use sealers because the oil finish I apply does that job without clouding up the appearance of the wood.
Sealer also prevents the finishing oils to penetrate into the wood so, if the wood is later scratched there won't be any oil in the wood to protect it. Yes, I know there is some debate on this but that's my opinion. :)

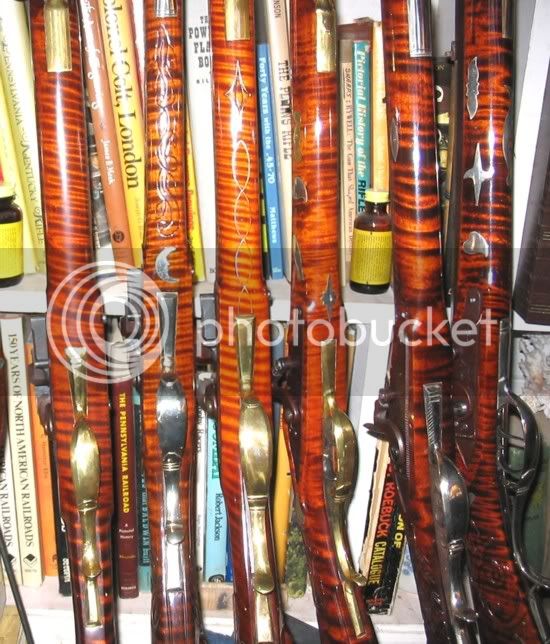
Just so you know I'm not pulling your leg, all of these guns were stained with alcohol based stains like your using. :)

 
To many stains just deposit fine grains of pigment on the surface..

A dye or chemical treatment that changes the color of the wood itself produce much better results.

Many years ago, one of the guys at tidewater muzzle loaders did a lot of experimenting with dyes and treatments. One really nice ebony look was achieved with several coats of India ink. But the birch pistol stock he turned neon pink with mercurochrome was a little nontraditional
 
yes the sealer / filler stopped the stain. After sanding to wood and smooth again, it seemed to work well as a pore filler. (Have to remember this, I've been using super glue as a pore filler on the bows and this sealer filler seemed to work better then the glue method at least with this birch)(will have to see how it does on something like Walnut or Wenge)

Used a couple coats of the rustic walnut stain(which had a noticeable red coloration and then used a couple coats of Dark Walnut Stain over it. My only complaint is the two piece stock came with the forend naturally lighter. I put a couple extra coats of stain on it, but it is still just a touch lighter. Oh Well, need to remember this in the future for two piece stocks.

I have a couple coats of Tru Oil on it now and it is turning out very smooth.

The barrel is brown. Completed the process 3 times with Plum Brown, and have a uniform mahogany color too it.

Question: That evening and yesterday, I've been using a cotton cloth and oil to rub (very lite rubbing)the finish. I'm still getting a touch of brown on the cotton rag. Is this normal, or will it stopping "bleeding brown" over time. I don't see any additional rust build up. I rinsed in cold water then completely dried the barrel between the treatments and after the 3rd treatment.

Lastly, all the brass (except the ends of the ramrod) are black. Used BC Brass Black with what appears to be great results. I polished the brass before hand, and now it is solid black.

So the plan is to put 3 more coats of tru oil over this weekend. Let it set to cure, and hit the stock and brass with wax next weekend.

Reassemble and hit the range week after next. Looking forward to using it second week of December for muzzleloader deer season which just happens to be rifle season for bear also. :grin:
 
Don't worry about the small bit of browning that's rubbing off. A cotton rag won't damage the barrel.

Have fun with your gun and good luck in the hunt. :)
 
Hit those brass parts with some 0000 steel wool. It will polish off the high areas while leaving the lower places dark. Really gives a good mellow look to the brass.
 
Just my two cents here but, since you spent the money GO SLOW, TAKE YOUR TIME! I ahve done a couple of the traditions kits. You will most likely find that 2 pieces may not fit together as stated....or a screw doesnt line up with the hole properly...it happens . However if you go slow, take your time and think it through....you should end up with a very nice first BP rifle. FYI: if yours is anything likie mine, the damn thing should be a great shooter. Good Luck and show us picks!
 

Latest posts

Back
Top