• Friends, our 2nd Amendment rights are always under attack and the NRA has been a constant for decades in helping fight that fight.

    We have partnered with the NRA to offer you a discount on membership and Muzzleloading Forum gets a small percentage too of each membership, so you are supporting both the NRA and us.

    Use this link to sign up please; https://membership.nra.org/recruiters/join/XR045103

First Knife

Muzzleloading Forum

Help Support Muzzleloading Forum:

This site may earn a commission from merchant affiliate links, including eBay, Amazon, and others.

OK2Smoke

32 Cal.
Joined
Jun 11, 2011
Messages
40
Reaction score
0
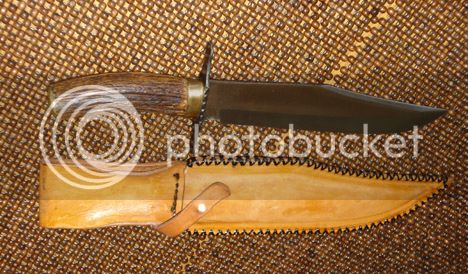
I see so many beautiful creations here I hesitate to show my first knife, but I really enjoyed the process.

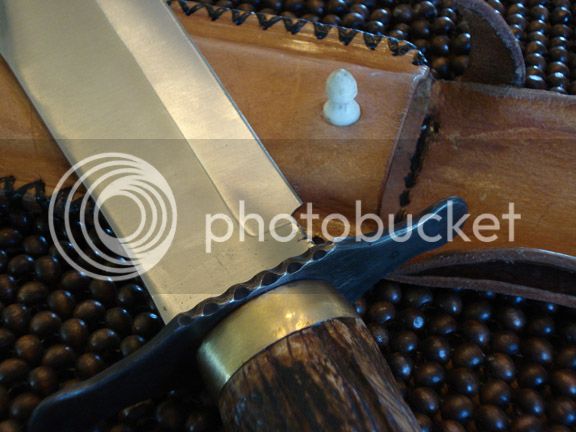
The blade was gifted to me by a friend. The guard was a strip of steel in my shop. The brass piece between the grip and the blade was fashioned from a brass 'nut' off of a propane regulator and an Elk donated a piece of his antler for the grip. The 'finial' for the strap is deer antler. The scabbard is pretty plain.

OAL is 15" and the blade is 9-3/4".


Thanks for letting me share...

--John R.
 
I think you did an excellent job, a really good job at fitting everything together. Keep making knives. Around Houston is Texas Knifemaker's Supply and the reason I buy from them (air-quenchable steel) is they will heat treat a blade for around $5-7 depending on the size, etc. The steel has to be air-quenchable. Buy yourself some bar steel and start making some blades. You can actually file them out if you don't have a grinder.
On the antler finial- hope it holds up. You can buy decorative caps used on lamps at most hardware stores and I've used them in such instances to good effect.
Since this is a PC group- what I often do is find a photo of something I want to copy and then use a photo copy machine to blow the photo up to full size and then use that as a pattern.
You have a talent with leather, IMHO the sheath for the knife is like the frame for the painting- equally important.
 
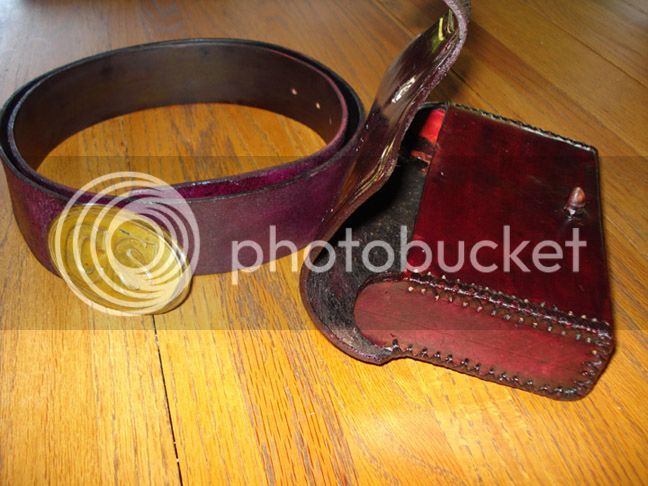
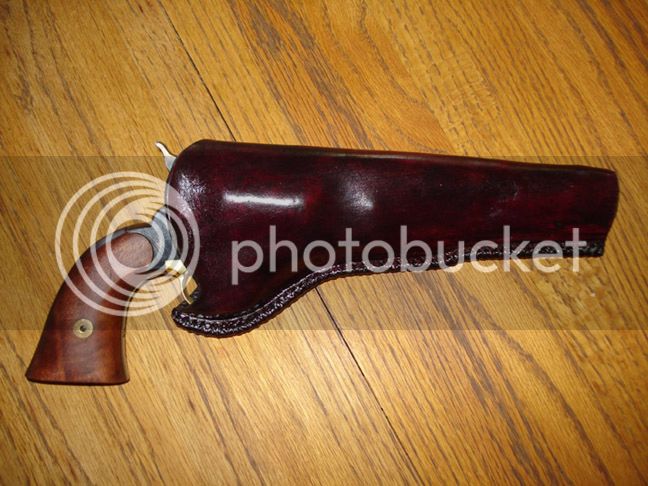
Thanks Crockett, I got the Vegetable tanned leather from a supplier here in Texas, and it was so easy to work with I copied a cartrige pouch and holster for my 1858 Remi while I was still inspired. :rotf:


Thanks again for the comments, --John R.
 
Very nice! I like it, the holster and cartridge pouch, too!

:hatsoff:

Silex
 
You are doing very good leather work. On some of the original holsters they had a lining. I think a few had a chocolate brown exterior and red suede type lining. This is actually pretty easy to do, the only thing is the lining takes up space so you need the outside leather a little larger. Use rubber cement to attach the liner to the leather. I've also seen sort of a russet color leather with a yellow mustard colored liner of suede. I say "suede"- and that's what I use but the original might have been something else- I'm not sure.
The other thing is to stamp the exterior. Hickok had a "fishscale" stamped holster. This was a repeating pattern sort of like today's basket weave. I could not find any fishscale stamps so I bought a Tandy Leather "muleshoe"- it looked pretty much the same. Later on I bought some round mild steel bar and made my own fishscale stamp.
If you lightly scribe a couple of lines on the dampened leather and stamp along them- you can get a very good job without any experience. Maybe practice first on some scrap pieces. The stamping can squash out and expand the leather so I start in the middle and then when I get to the perimeter I remeasure what I am stamping against the size I need and make a final size adjustment at that point.
When you burnish the ends- the evidence of a liner disappears.
Once again- your leather work is very good. Keep going.
 
Thanks much for the suggestions...I'll probably try some stamping on some of my next projects.

I want to do another knife and try to make the blade this time. Plenty of folks here to help with the grinding and heat treating.

--John R.
 

Latest posts

Back
Top