For beginners: Installing barrel lugs.

Muzzleloading Forum

Help Support Muzzleloading Forum:

This site may earn a commission from merchant affiliate links, including eBay, Amazon, and others.

mikemeteor

45 Cal.
Joined
Nov 16, 2008
Messages
660
Reaction score
3
If you are a gunbuilding veteran, you can stop reading right here, because the rest of this will be trivial and bore you to death :snore: .

I'm posting these pics for beginners, like me, because (short of having an experienced builder looking over your shoulder) I find looking at as many pictures as possible to be most helpful.

Installed my lugs on my southern mountain build yesterday, and it was a lot smoother than my first efforts. Probably did 'em all in 2-1/2 hours.

I think it was Birddog who said he does 'em all in less than a half-hour !
I spent at least that long beseeching the Big Gunbuilder In The Sky to please help me not ruin the barrel I was about to carve into..... :shocked2:


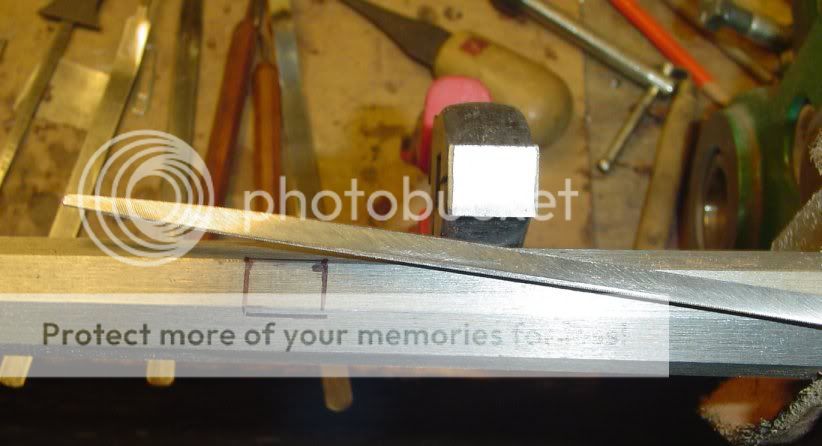
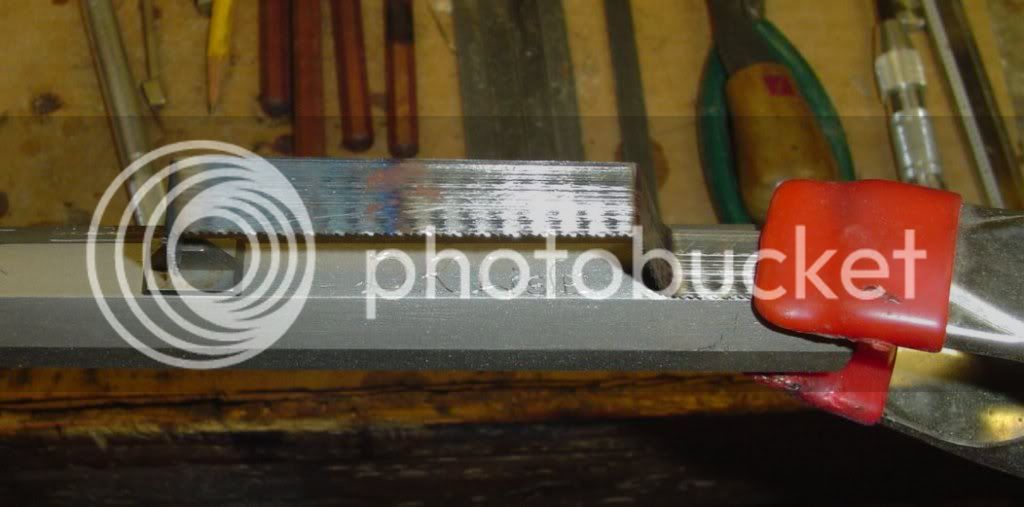
Anyway, fellow newbies, here's a picture series of how I did it.

Lug4cut.jpg
Lug4file.jpg


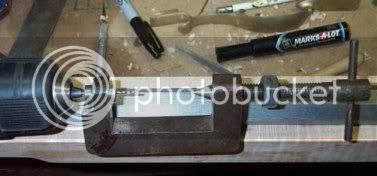
Lug4install.jpg
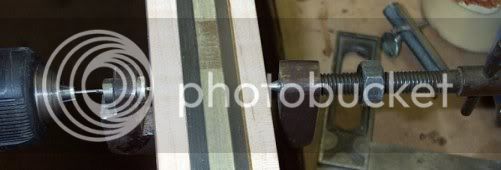
Lug4install_b.jpg


Lug1b.jpg


Things (that seem obvious)that I realized after 1st build and used on 2nd:

1) don't waste time worrying about your hacksaw cuts being exact same depth - undercut them all and file to final depth.

2) if you're used to woodworking (like I was) fight the urge to create a "big, strong" dovetail mortise - the overhang really only needs to be hardly noticeable.

3) keep the fit (length) tight - I had to persuade my lugs in with the punch and firm hammer raps.
Put the punch on the trailing edge of the base - NOT the vertical tab - the tab will bend. :redface:

4) In these shallow slots, seemed like there was a tendency for the lug to want to ride up and out, every third rap was straight down on the leading edge of the lug base.

5) Used a flat-faced punch to stake in the four corners, filed it up smooth, and they're tight and good to go.

/mm
 
Nice photo's TY for sharing.
I'm no pro but I'll ad that a triangle Taper file dosen't work well. They'r made too sharpen saw's and chain saw blades.
I got what's called a Three Square Flat file an took the teeth off one side with a belt sander. works much better.
And you said it, typical beginner mistake is to go way too deep,,I know :redface: .
I did it to a GM barrel for a fixed rear sight,,I don't show that one off too much :redface:
 
Thanks for that post my friend. That one is saved and printed for my notebook.

Jac S.Muell
 
I've only had to do one underlug dovetail so far. It was for the breech side underlug on a fowler barrel. Octagon to round. I did mine the same way you did and it was alot easier than I ever thought i would be :grin: I to kinda stressed myself out before I started on it. My wife came in and asked what I was doing. She said I was just sitting there staring at the barrel for about 30 mins before I started :rotf: You know how it goes. PREPLANNING :grin: I found that when I did mine it took 8 strokes of a good sharp new hacksaw blade to get the desired depth for my underlugs. I would have to guess it would take a couple more for the sights, depending on the thicknesss of the base. I'm sure you've posted it earlier but what are you in the process of building? My build will have to wait for after christmas, unfortunately.
 
Necchi: "And you said it, typical beginner mistake is to go way too deep,,I know".

Not to mention one saw blade too wide...I know..
:nono:
 
Just a few pointers:

Hacksaw blade 24 tpi. Cuts smoother & easier to control.

Draw a line or tape at the bottom where you want the cut to stop, and stop there.

SuperSlim 3 corner file. Take to belt sander & sand off the teeth on one side. I don't to it to make a safe side, I do it because I want the sharp angle. At the corner where the dovetail will go, file with safe on angle of dovetail, then turn it & file other angle & you get a sharper angle than the normal file will cut. (Put this file away & use it Only for dovetails, it will last for Years)

Put the underlug in a pair of lineman pliers & slightly round the bottom edge that goes into the dovetail. Reason ? You can file a slot as sharp as the dovetail is cut. So.. you round it just a tad & it will go into the angle you filed & not ride up out of the slot.

Make sure you have the dovetail you are working on Close to the vice jaws, especially on a thin walled barrel.

Dsc09658.jpg


:thumbsup:

Oh, yes, almost forgot...... Always lay out your Dovetails & RR pipes with the barrel on the stock so you KNOW they are not going to interfere with each other. It is a problem when you have a RR pipe & a underlug in the same spot.

:shocked2:
 
Birddog6 said:
Just a few pointers:

SuperSlim 3 corner file.That's what the call it,,Thank You

You can file a slot as sharp as the dovetail is cut. So.. you round it just a tad & it will go into the angle you filed & not ride up out of the slot.

Ahh! good tip, I had to learn that too, I didin't round the corners. I got it in there but it was a struggle, again Thanks Birddog
 
thats fine on an octogan barrel but how one attach a lug on a round barrel
like a fowler tyle oct to round
 
buzz said:
thats fine on an octogan barrel but how one attach a lug on a round barrel
like a fowler tyle oct to round

Soldering it is what is most talked about. :thumbsup:
 
buzz said:
thats fine on an octogan barrel but how one attach a lug on a round barrel
like a fowler tyle oct to round

Back at the breech where it has flats you dovetail the first one on a flat, on the round part you soft solder them on & same way on the front sight if you are going to use one.

Been several recent threads on this where I posted photos & tips on soldering them, how to make the lug holder out of an old hacksaw blade, etc.

Example: Hold the lug on the barrel to solder such as this. (Take the rubber tips off the clamp)

Dsc09309.jpg


Dsc09211.jpg


Dsc09212.jpg


Dsc09213.jpg


:thumbsup:
 
Great pics - thanks for sharing. You make it look easy.

I have to say that cutting dovetails and pinning the barrel are the two operations that worry me the most as I get ready to start my project (Chambers Early Lancaster - the barrel and stock should be here this week and then its off we go!!!!).

Any hints on how to make sure your drill engages the underlug in exactly the right spot? When my parts arrived, I was dismayed to see how tiny the lugs were - not much of a target for your drill if you are coming through wood!!! I would imagine its very easy to stuff it up. Greatful for any advice.

Robbo
 
This is a homemade gismo I made years ago. You can buy one similar at Cain's Outdoors for about $40.

I inlet the underlugs into the barrel channel, at each place a lug is, mark a line on each side of the barrel channel at the top of the stock so you know on each side of the stock as to where the center of the lug will be. Put a square on that & make a line across the stock 90 deg. going towards the RR channel.

Now take a depth gauge & put the base at the top of the barrel inlet on the stock & drop the slide down into the barrel channel to the bottom of the center flat on where each lug will be & lock the depth gage. Take the gauge out & lay it on the outside of the stock at the center line for the lug & mark the depth of the barrel inlet. You will want to drill right under that mark.(Remember you are drilling the lug that is Under the barrel, so you will drill right under the bottom flat)

I drill mine 1/2 way thru on each side & then make them meet in the middle. Sometimes they hit dead on & sometimes off a tad but not much & I can work it to the other hole.

Dcp_4560.jpg


Dcp_4558.jpg


And ya do the Lockbolts & the tang to triggerplate holes in a drill press with a drill center such as this.

Dcp_4645.jpg


DrillingTang.jpg


CheckingDrillpoint.jpg
 
I drill my lug pins with the aid of a fence attached to my drill press. Without the barrel in the stock, I line up the lug with the drill bit and line up witness marks on the barrel and the fence:

drillingpins.jpg


I then put the barrel in the stock, line up the marks, and drill all the way through the stock:

drillingpins2.jpg


I use a 1/16" drill bit and have never missed.
 
I use Bioprof's method - because I learned it from him !
But you also can't go wrong following Birddog's advice.


As per Bioprof, I use the witness marks, plus I use tape to mark the exact location of the lug. Check twice, drill once.
If you have a swamped barrel, remember to reposition and clamp the fence for each lug - the depth changes for each lug.

DrillingLugsbarrellset-up2.jpg


DrillingLugsStockset-up2.jpg


I just got done doing all mine today.
All were pretty darn near dead center.
If I can do it, Robbo , you can do it ! :thumbsup:

DrillingLugsResult.jpg
 
Thanks guys. Like most things in life, its easy once you know how :grin: :grin:

You guys are amazing .... :bow: :thumbsup:

Robbo
 
I always use slotted lugs, thus no need to drill the hole in the lug. I just drill thru the slot & then check & then take a halfround diamond file & open it a tad if I need to relieve it any.

I will mention, that a 1/16" drill bit deflects Easy. No REAL Easy.. :grin: Thus drilling thru too much material & you may not come out where ya want it to. Now of a plain forestock that doesn't matter much. However, if you cut in molding on the forestock it looks much cleaner if all the holes are in the same alignment, rather than up & down & all over on the forestock. :wink:

As far as the fence goes, I have done it that way & it is easy to do that way on a square forestock. A shaped one was harder for me than doing it with the lil drilling jig. May be just me tho. :idunno:
 
Any tips on doing it without a vise or press? Or do I need to invest in more tools/borrow a friend's?
 
Back
Top