Would a wire wheel on a drill press be a good start? I use them to polish barrels up before bluing. This isn't the same, of course, but it may be something to try.
-
Friends, our 2nd Amendment rights are always under attack and the NRA has been a constant for decades in helping fight that fight.
We have partnered with the NRA to offer you a discount on membership and Muzzleloading Forum gets a small percentage too of each membership, so you are supporting both the NRA and us.
Use this link to sign up please; https://membership.nra.org/recruiters/join/XR045103
You are using an out of date browser. It may not display this or other websites correctly.
You should upgrade or use an alternative browser.
You should upgrade or use an alternative browser.
How to polish this sideplate
- Thread starter longcruise
- Start date

Help Support Muzzleloading Forum:
This site may earn a commission from merchant affiliate
links, including eBay, Amazon, and others.
longcruise
70 Cal.
I think it would be too brutal. I use for example buffing wheels on trigger guards and butt plates with good results but if there is fine detail in the brass it tends to mute it out a lot.Would a wire wheel on a drill press be a good start? I use them to polish barrels up before bluing. This isn't the same, of course, but it may be something to try.
Chambers brass is the real McCoy. Not hard like most of the stuff out there.
- Joined
- Nov 26, 2005
- Messages
- 5,223
- Reaction score
- 10,882
Hi,
I've made, sculpted, polished, and engraved many of these kind of side plates.
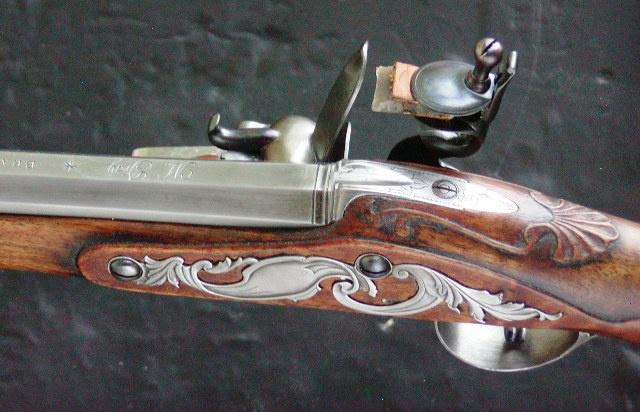
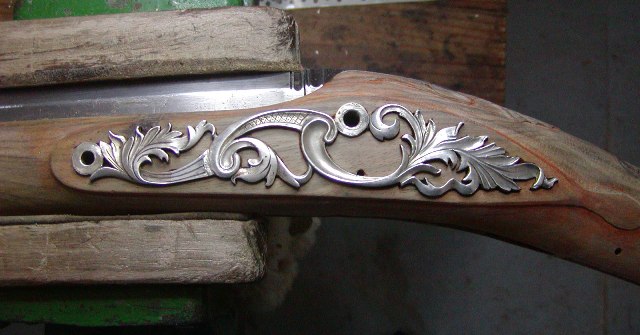
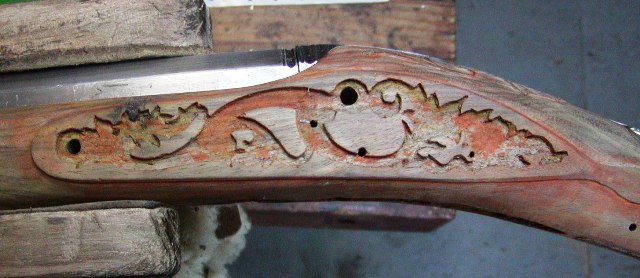
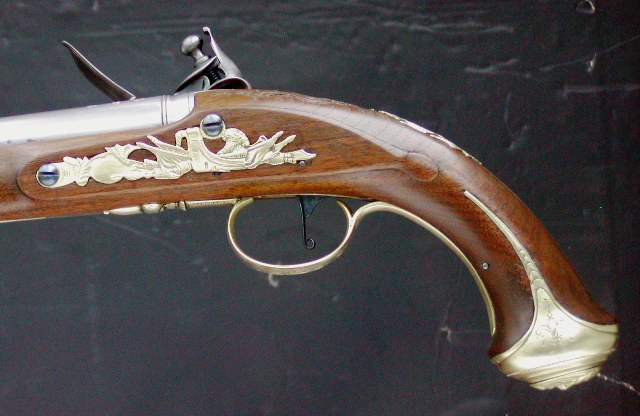
First, clean up all the edges with needle files. A half round file will be your most valuable shape. If you have a jeweler's saw, use it to get into the tight spots along the edges. Then the plate needs the surface casting texture removed. File that down with small needle files, and sanding sticks. Sanding sticks have a spring loaded mechanism that holds a thin sanding belt. You can get them from most wood working suppliers. Then you will need some polishing stones, like the Gessweins that James mentioned lubricated with lamp oil. Also of value are hardwood sticks shaped into pencil points that can be dipped in lamp oil and rottenstone, and then rubbed on the metal to polish it. Once the textured surface is smoothed, you can really polish it with 3-M bristle discs in a Dremel tool. The discs are readily available at online jewelry suppliers. Unfortunately, you may lose some of the sharpness of the edges of the design during that process. They get sanded down. The only good way to recover those sharp features is to engrave them after polishing. You have to remember that these kinds of side plates were made by specialist with training you don't have.
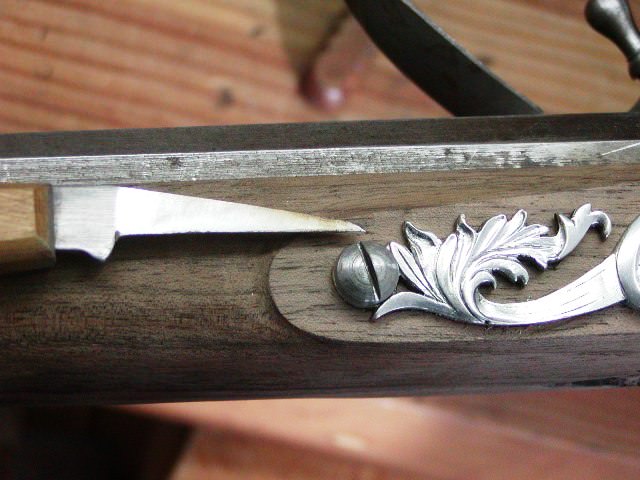
To be honest, these plates give me no heartburn anymore when inletting them. I fabricated this scribing and stabbing in knife, which makes the job easier.
These micro chisels are also invaluable for stabbing in the outline
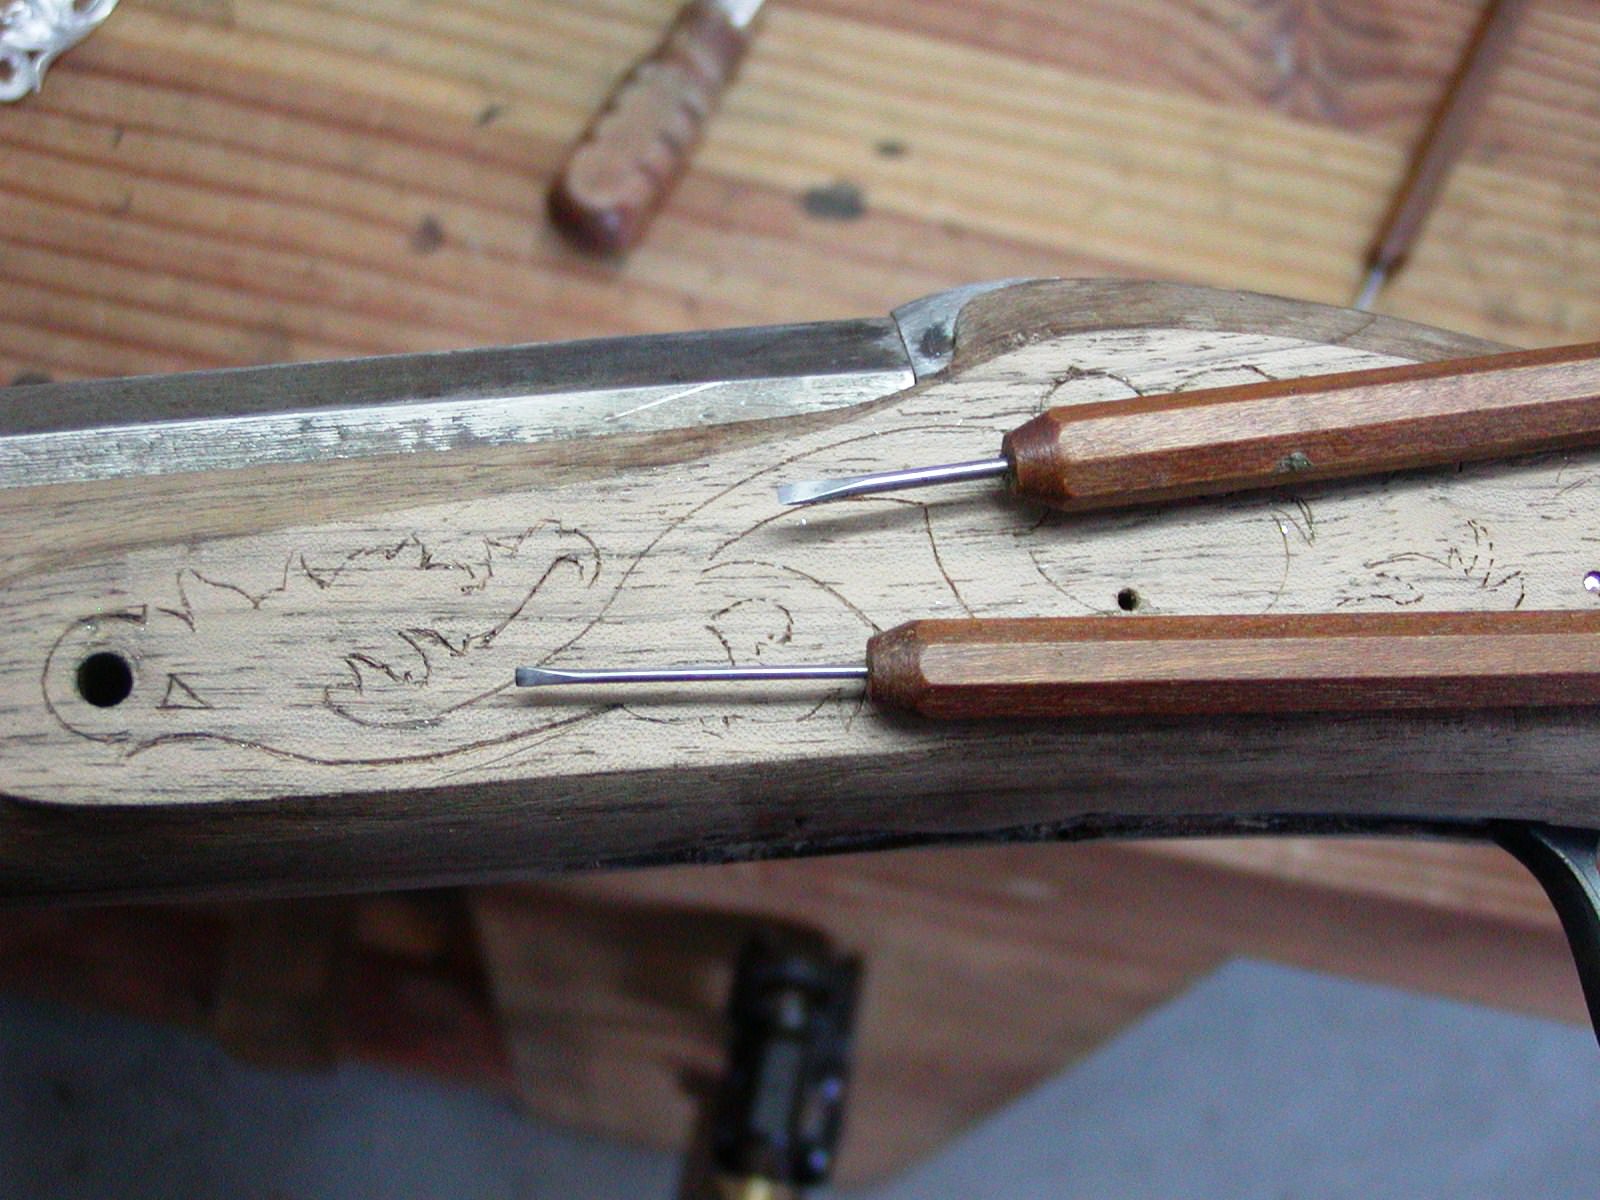
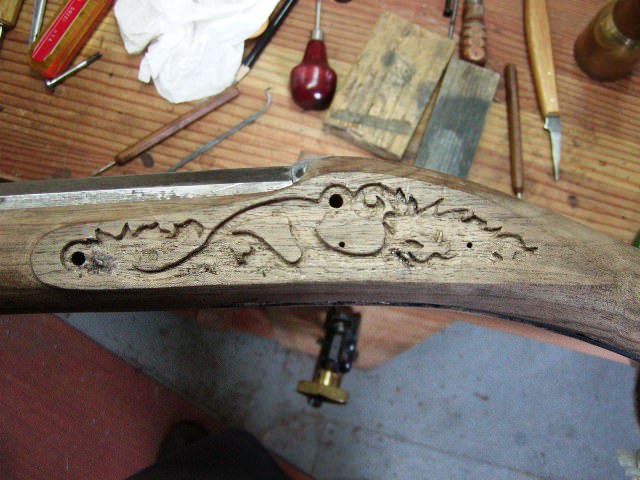
Just go slow and make sure your chisels are razor sharp. In addition, the mortises for these side plates was very shallow. So don't cut deeply.
Good luck.
dave
I've made, sculpted, polished, and engraved many of these kind of side plates.


First, clean up all the edges with needle files. A half round file will be your most valuable shape. If you have a jeweler's saw, use it to get into the tight spots along the edges. Then the plate needs the surface casting texture removed. File that down with small needle files, and sanding sticks. Sanding sticks have a spring loaded mechanism that holds a thin sanding belt. You can get them from most wood working suppliers. Then you will need some polishing stones, like the Gessweins that James mentioned lubricated with lamp oil. Also of value are hardwood sticks shaped into pencil points that can be dipped in lamp oil and rottenstone, and then rubbed on the metal to polish it. Once the textured surface is smoothed, you can really polish it with 3-M bristle discs in a Dremel tool. The discs are readily available at online jewelry suppliers. Unfortunately, you may lose some of the sharpness of the edges of the design during that process. They get sanded down. The only good way to recover those sharp features is to engrave them after polishing. You have to remember that these kinds of side plates were made by specialist with training you don't have.
To be honest, these plates give me no heartburn anymore when inletting them. I fabricated this scribing and stabbing in knife, which makes the job easier.

These micro chisels are also invaluable for stabbing in the outline


Just go slow and make sure your chisels are razor sharp. In addition, the mortises for these side plates was very shallow. So don't cut deeply.
Good luck.
dave
- Joined
- Jul 20, 2012
- Messages
- 55
- Reaction score
- 64
THANK YOU! very good information
I typically use a fine wire brush on a wheel after I have finished sanding and stoning the lock and had excellent results. Brownells sells a nice brush for doing barrels and other. You end up with a nice matt finish ready for polishing if you decide to go that way. I just leave as is. I asked Master Jack Brooks if he would engrave a lock for me. He told me I would save a lot of money if I did the finishing. For my Kibler Wood Runner. After I was done I decided to forgo the engraving it looked so nice. I spent a ton of time on it. The prism takes forever because of the heat treat but I just kept at it (nothing else to do lol). Good luck with itWould a wire wheel on a drill press be a good start? I use them to polish barrels up before bluing. This isn't the same, of course, but it may be something to try.
Fifty years ago I worked in a machine shop polishing molds after school with stones and Karosene. Watching one of Jim Kimbler videos I found out about Congress Stones. I bought a bunch of soft polishing stones. They are located in Coonecticut if not mistaken and they are on line. Highly recommend! Affordable to!
longcruise
70 Cal.
Lots of good advice here. I'm going to adopt and adapt to the things that I'm best able to do. I think I have everything I need to make the micro chisels.
- Joined
- Jan 24, 2005
- Messages
- 3,263
- Reaction score
- 6,607
Speaking of Dremel type tools, my youngest son gave me a battery powered one and it is a revelation, much more positive control.This is one instance where the dreaded Dremel tool would be the solution. They make small barrel shaped felt tips that would be ideal for working the contours. The deeper crevices should be left as cast so the anchor profile would be darker, highlighting the brighter high spots. Tedious jewelry polishing, but it’s not a huge piece. It would look great if inlet to a depth that left the shiny floral scrollwork slightly proud of the flat wood.
Last edited:
Good tip, hadn't thought of using hot glue to hold stuff down.If it's flat you can heat glue or epoxy it to something flat to hold it while you work on it. A little heat will turn it loose when you're finished.
- Joined
- Nov 26, 2005
- Messages
- 5,223
- Reaction score
- 10,882
Hi,
With that side plate, you don't have to glue it to a block of wood, just use 2 wood screws in the lock bolt holes.
dave
With that side plate, you don't have to glue it to a block of wood, just use 2 wood screws in the lock bolt holes.
dave
Stones will be your best friend. I like those from Congress Tools. The soft, super soft and y-oil work well for me. 1/8" square will be best. You can shape these easily with a coarse piece of abrasive paper, a belts sander etc.
Jim
Jim
Congress Stones do a great job, several grits available.
Sometimes you can use die sinkers chisels to clean up the details on the face of a casting - very fine jeweler's rasps can be used. They are like fine files in funny shapes at the ends.
Sometimes you can use die sinkers chisels to clean up the details on the face of a casting - very fine jeweler's rasps can be used. They are like fine files in funny shapes at the ends.
I'm not much of a gunmaker, but what I've done in the past to polish wood and metal for other projects is glue emery paper to sticks. start with something about the size of a paint stick or thicker, cut it so the bottom is shaped like a hockey stick, give it a blast of 3m 77, cut strips of various grits emery paper and give it a squirt of 3m 77 and stick them together. I need to look into the rottenstone and the polishing stones that others mentioned, I've never used them
Ditt44
40 Cal
Dremel: IF you use one, lowest speed setting to start. The smaller the piece, the slower the Dremel should turn. A little of the polishing compound goes a very very long way so take it all slow and under-dose if anything.
Sam squanch
69 Cal.
- Joined
- Oct 9, 2019
- Messages
- 3,171
- Reaction score
- 4,533
Mr Dave- can you please describe your homemade scribing and stabbing in knife? Thank you.
Careful with the rotary tools such as a Dremel. They tend to remove material indiscriminately and result in features being rounded etc.
Jim
Jim
- Joined
- Sep 3, 2021
- Messages
- 564
- Reaction score
- 1,038
There are a lot of ways. By hand, the slower the better.
- Joined
- Nov 26, 2005
- Messages
- 5,223
- Reaction score
- 10,882
Hi Sam,Mr Dave- can you please describe your homemade scribing and stabbing in knife? Thank you.
Sure my friend. It was originally a flat chip carving knife. I ground the back away to create the tapered blade. Then I shaped the tip as you see it. Since that photo, I made the tip a little less skewed so that it stabs in better. However, I still kept some skew, which creates the point useful for scribing and cutting in tight corners. I can use the knife to scribe the outline of an inlay as well as use it for stabbing in the edges. It is incredibly useful for stabbing in tight corners on complicated inlays. Here are some examples where the knife is so valuable.
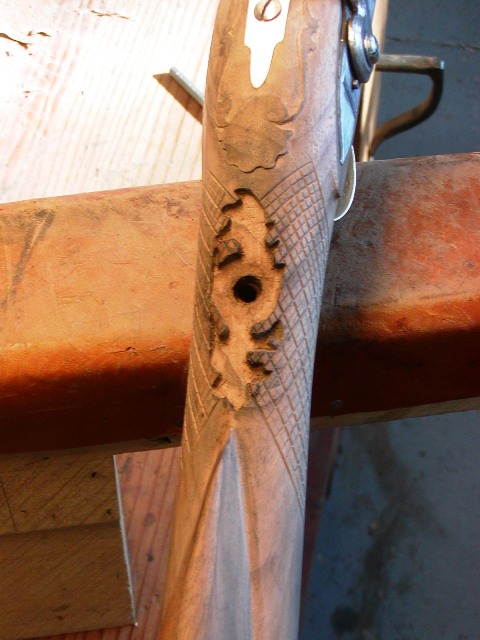
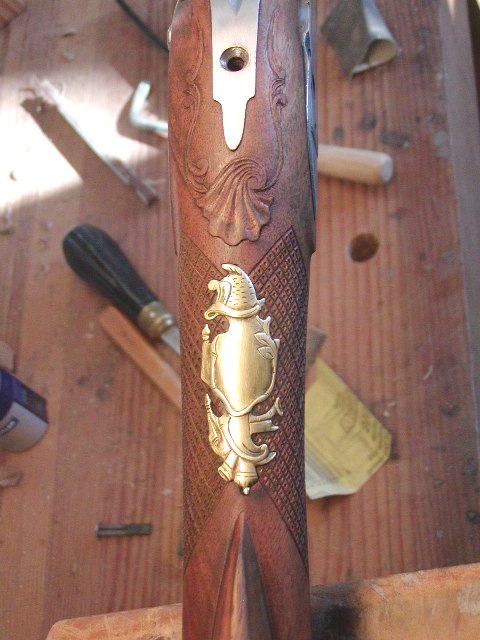
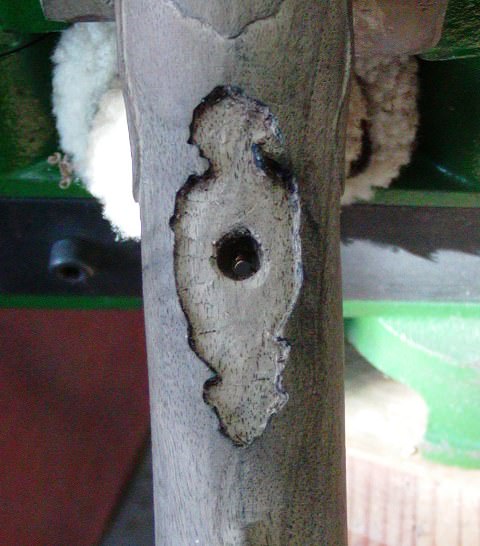
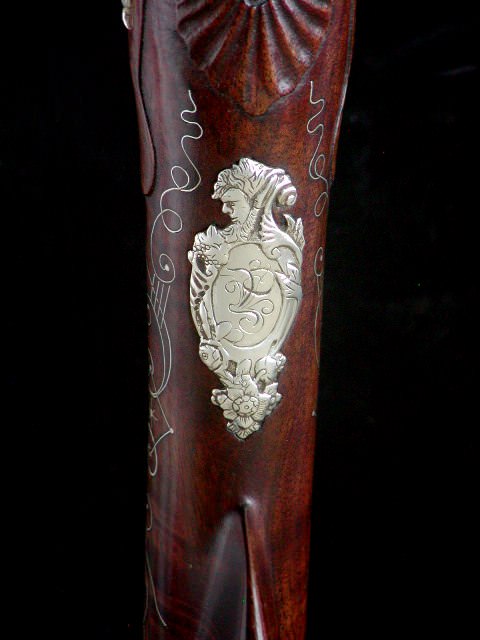
The knife blade is thin so you cannot abuse it with force. Keep it razor sharp and be gentle and it works.
dave
- Joined
- Nov 26, 2005
- Messages
- 5,223
- Reaction score
- 10,882
Hi Guys,
Dremels are great tools if you are careful and spend a little time practicing. For polishing side plates, I use needle files, sanding sticks, stones, and pencil sticks with rottenstone abrasive. Nonetheless, a Dremel with 3-M bristle burrs (also called radial abrasive discs) is invaluable for final polishing and it does not round over edges if using the finer grits. A major problem with cast inlays such as the one we are discussing, the edges of the details are already a little rounded over by the casting process. To look like high quality work from the 18th century, you always have to sharpen the lines and edges by engraving. For trade gun quality, you can forgo that.
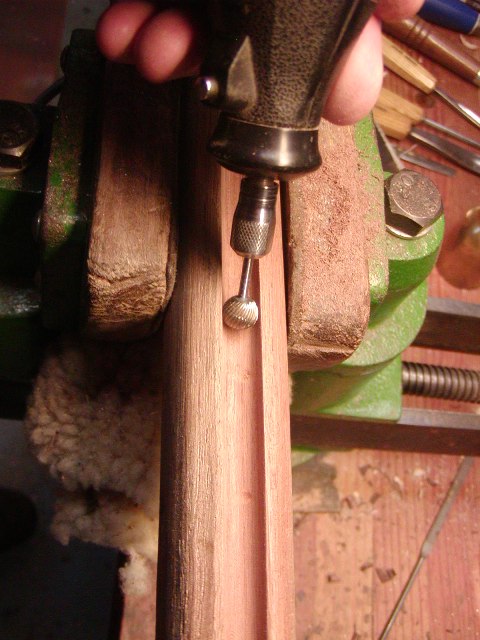
About using a Dremel. I use one on every project. For certain tasks they are the best. I get a kick out of folks writing "a Dremel has no place" or "Dremel destroyer". Anyway, here is a little story. I am building a British Elliot light dragoon carbine from the Rifle Shoppe, and the pre-carved stock has a ramrod groove way too shallow for the gun. It had to be deepened a lot. So I take out my Dremel with a round router bit the right size, lay it in the channel and cut away. The photo below shows me doing this on a different gun that needed the groove enlarged. Just lay the bit in the channel and move it along with no side to side pressure at all.
It helps to have a little skill and brass "cajones", which I possess. I love my Dremel.
dave
Dremels are great tools if you are careful and spend a little time practicing. For polishing side plates, I use needle files, sanding sticks, stones, and pencil sticks with rottenstone abrasive. Nonetheless, a Dremel with 3-M bristle burrs (also called radial abrasive discs) is invaluable for final polishing and it does not round over edges if using the finer grits. A major problem with cast inlays such as the one we are discussing, the edges of the details are already a little rounded over by the casting process. To look like high quality work from the 18th century, you always have to sharpen the lines and edges by engraving. For trade gun quality, you can forgo that.
About using a Dremel. I use one on every project. For certain tasks they are the best. I get a kick out of folks writing "a Dremel has no place" or "Dremel destroyer". Anyway, here is a little story. I am building a British Elliot light dragoon carbine from the Rifle Shoppe, and the pre-carved stock has a ramrod groove way too shallow for the gun. It had to be deepened a lot. So I take out my Dremel with a round router bit the right size, lay it in the channel and cut away. The photo below shows me doing this on a different gun that needed the groove enlarged. Just lay the bit in the channel and move it along with no side to side pressure at all.

It helps to have a little skill and brass "cajones", which I possess. I love my Dremel.
dave
Sam squanch
69 Cal.
- Joined
- Oct 9, 2019
- Messages
- 3,171
- Reaction score
- 4,533
I got a brand new Dremel for my birthday!
Similar threads
- Replies
- 7
- Views
- 561
Latest posts
-
-
-
-
FOR SALE Kuchenreuter Caplock pistol ...more More new pics and info
- Latest: No second place
-
-
-
-


