• Friends, our 2nd Amendment rights are always under attack and the NRA has been a constant for decades in helping fight that fight.

    We have partnered with the NRA to offer you a discount on membership and Muzzleloading Forum gets a small percentage too of each membership, so you are supporting both the NRA and us.

    Use this link to sign up please; https://membership.nra.org/recruiters/join/XR045103

Hudson Bay Trade Knife Drawing

Muzzleloading Forum

Help Support Muzzleloading Forum:

This site may earn a commission from merchant affiliate links, including eBay, Amazon, and others.

44-henry

45 Cal.
Joined
Jan 15, 2005
Messages
1,084
Reaction score
144
Hello,
I am attempting to make a reproduction Hudson Bay Trade knife for a friend of mine. I found a couple of sketches on-line, but they didn't seem to follow the photos of originals that I found. I am guessing that there were different companies that made these which could explain the variances.

In any event I decided to use some images of a couple different Jukes Coulson trade knifes for reference and modeled them in CAD to create a drawing to use for reference, but I am still not sure that I have it. I have attached what I have right now and would welcome any comments you might have.

Overall length on this one is about 13.5 inches and it is about 1/4 inch thick at the spine. One source says that the bolsters and washers are 1/16 inch thick brass. I could see that for the washers, but the bolsters on some photographs look to be thicker, perhaps 1/8 inch. The pins on some photos look to be brass, but on others they look to be iron. The other area of question is the ricasso above the bolster. On some photos it looks to be non-existent on the left side, but there on the right. Seems like an odd configuration to me, but it is difficult to tell in the ones that I have seen online. Handles appear to be horn, but they could also be walnut or some other darker wood. In any event, have a look.
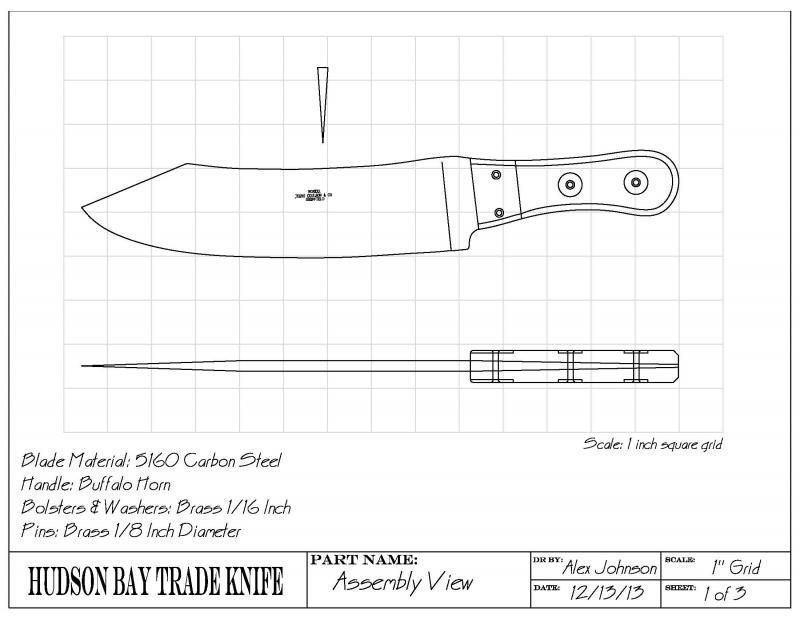
HUDSONBAYTRADEKNIFEDRAWINGFINALVERSION.jpg
 
there were several maker's of this type knife and thus variations. For patterns of Fur Trade knives such as this get a copy of he MOFT "Fur Trade Cutlery" Sketchbook - it has original patterns
 
My wife took an order for one a while back and we used an old drawing. if Im not mistaken the measurements were 14" long, 1 7/8" wide blade 8 7/8" long. 1/4" thick. We used 5160. made the washers from 1" brass round bar and the bolsters from brass flatbar.
 
Your CAD drawing looks pretty good. I have studied these "camp knives" a bit and have made several, one from an original blade using horn scales that came from Africa. It is very difficult to find bison or other horn scales wide enough for these knives. I use ebony instead. The brass washers are usually from 5/8" up to 7/8" in diameter and from what I've been able to see they used steel pins, not brass that I have ever seen.

It's one thing to draw these knives, quite another to be able to do the grinding etc. correctly. Particularly the compound grind on the handle and then get the deep roccoco even on both sides. Good luck, have fun.
 
Thank you for the reply. Can you say what thickness the bolsters have been on the ones you have studied/built? I found some buffalo horn scales that should fit but wonder how often other materials were used on these knives.

As for the building, never done one before so it should be interesting.
 
There is only one in the book mentioned. It has brass pins which appear to be about 3/16" across the heads. The washers and front plates are 1/16" brass, and 3/4" dia. washers. The tang is tapered as your drawings shows, but the dark horn grip panels are not. They are uniform and about 5/16" thick. The blade has no ricasso, and is probably just blended into the flat grind or the blade may be tapered cross wise as well as length wise. They show no cross section. The blade appears to be about 3/8" thick at the grip with a distal taper coming to a convex point in top view. They show no angle or swage in the clip point. This knife is a Sheffield, NON XLL JUKES COULSON & CO. It is listed as mid 19th c.
 
We made our bolsters about 1/4" thick and the washers 1" because that's what the person wanted..
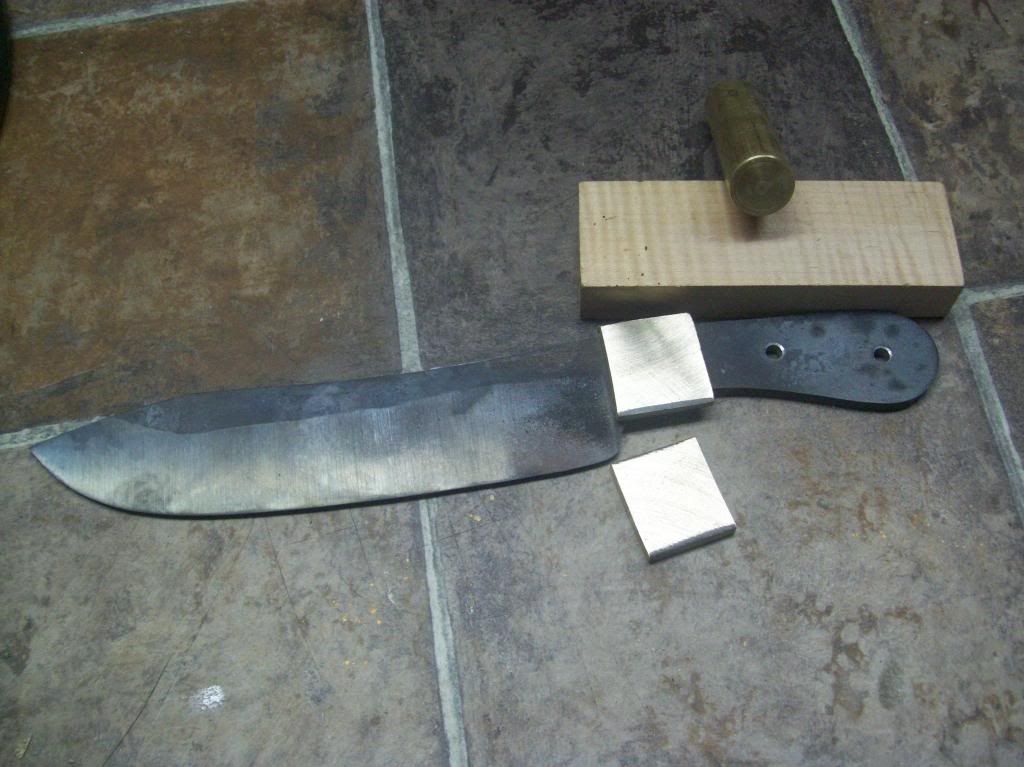
The bay knife drawing we were supplied with also had a tapered tang like this old knife we made years ago..
100_5116.jpg
 
When I first started to research this style of knife, which hasn't been for long, I noticed that the drawings that were available varied considerably in many details. That is why I elected to work off of photographs and build a drawing from those. Unfortunately it is rare to find someone who photographs these knives from all angles/ends to allow a good study of the style.

This evening I found a couple more pictures of Jukes & Coulson knives that sold on Ebay and they seem to be originals (can't see the logic in forging them for what they were selling for) and in this instance the sellers took several very good photographs of each. One has a definite tapered tang and handle scales much as Wick described, the others tang looks to be full thickness all the way through. The one with the straight tang did look to be considerably newer and the blade markings were different from the others I have seen. My guess is that the same company made some production changes throughout the 50 or so years they were in production.

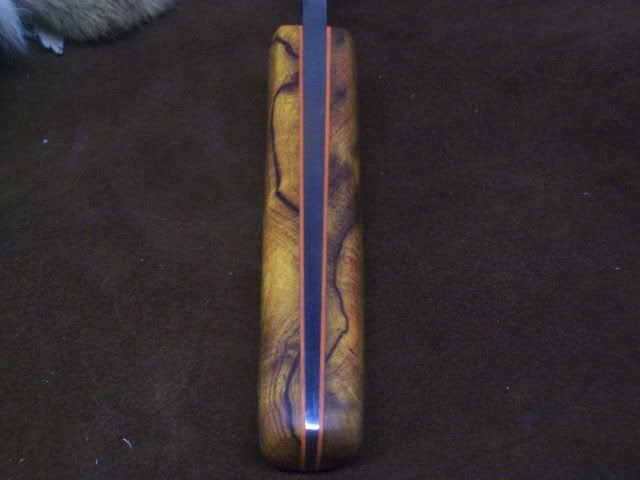
I would say that from the examples I have seen the bolsters are much closer to 1/16" thick than to the 1/8" and the washers (based on a couple photos I found where they were missing) look to have been about 1/16" or less in thickness. The pins on both knives definitely look like they are brass. Handles on each look to be buffalo horn with a very slight rounded top edge, perhaps a 1/8" radius.

Both knives seem to have roughly the same ricasso as I have in my drawing above. I have seen some others that did not seem to have this feature, but I don't think they were the same brand so again, probably was a lot of variance.

In all instances it looks to be a very well made and well thought out knife, and, as was mentioned earlier, not an overly simple design to pull off effectively.
 
Yep - you have discovered the fact that the buffalo knives as well as other trade knives seldom matched exactly even those from the same maker who at times made more than one model of the same type....
 
I think I have most of the bugs worked out in my drawing so I decided to go ahead and cut out a blank and have a go at this project. Since I have never built one of these before it should be interesting, but I figured I would take some photos along the way for your entertainment.

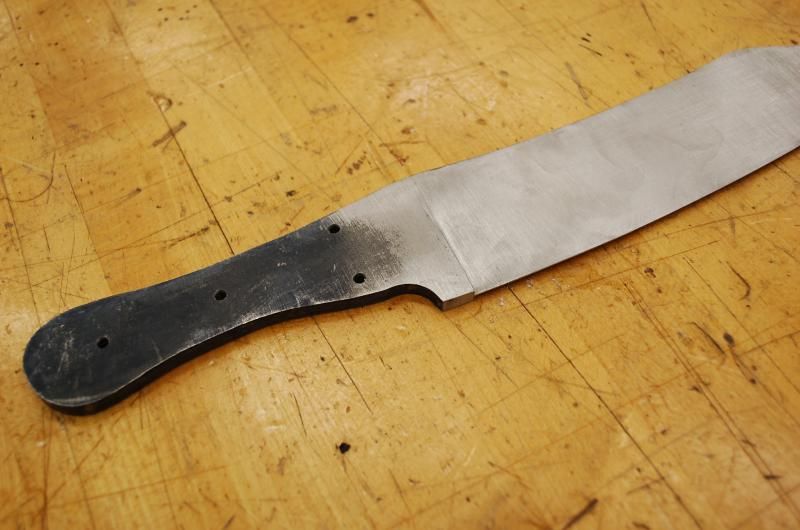
Being essentially a lazy sort of person I opted out of forging the blank and simply bandsawed it out of 1/4" 5160 plate that I have had around for awhile. I plan on using my milling machine to help with milling the blade flats so I added an extension on the end to mount the blank to an angle table. I didn't have anyone to photograph the step when I bandsawed the blank, but the remainder of the steps should be better documented.

hudsonbayblank.jpg
 
Keep us up to speed on this knife. I, for one, want to make the same knife. Did some research a couple years ago and then drifted away from it.

I'm curious about the other details like your choice of wood for the handles and the type of pins. GW
 
This one is a prototype, hopefully there won't be too many problems along the way. I posted a drawing of the knife on another thread, but since that time have been making some revisions. When I get everything where it needs to be I will post here.

Buffalo horn and brass pins seems to be the standard for this style of knife, but I am sure there were other variations used at times, just have not seen them yet in my research. I have buffalo horn on order, but I may use Rosewood or Ebony on this one since I have a lot of it on hand.
 
Finally got some time to do a bit more work on the knife and thought I would share some of the steps that I am taking.

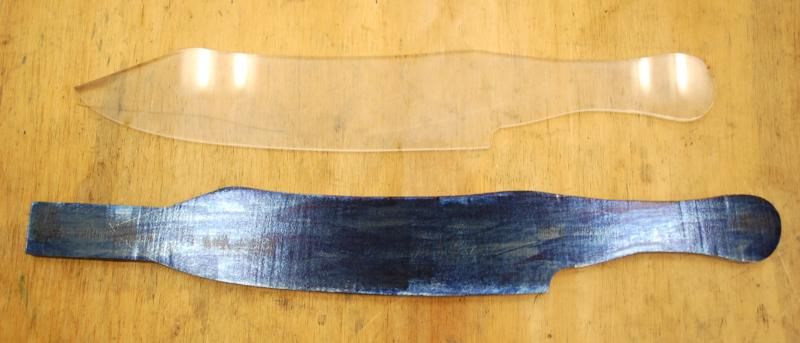
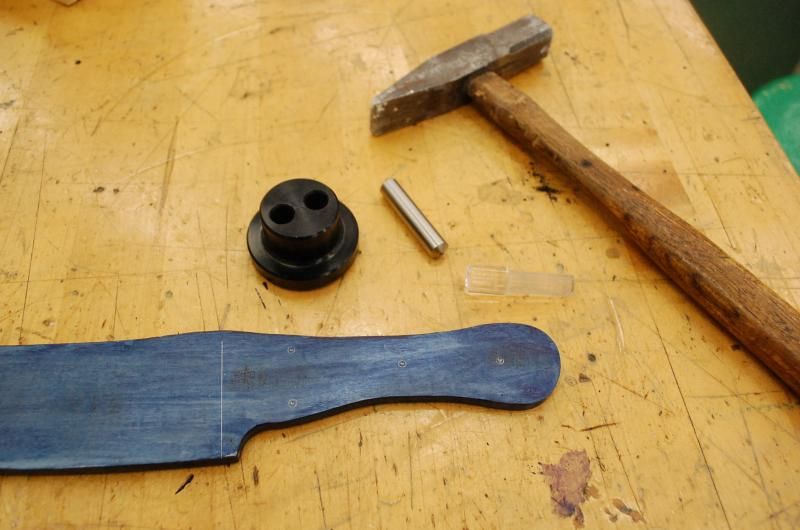
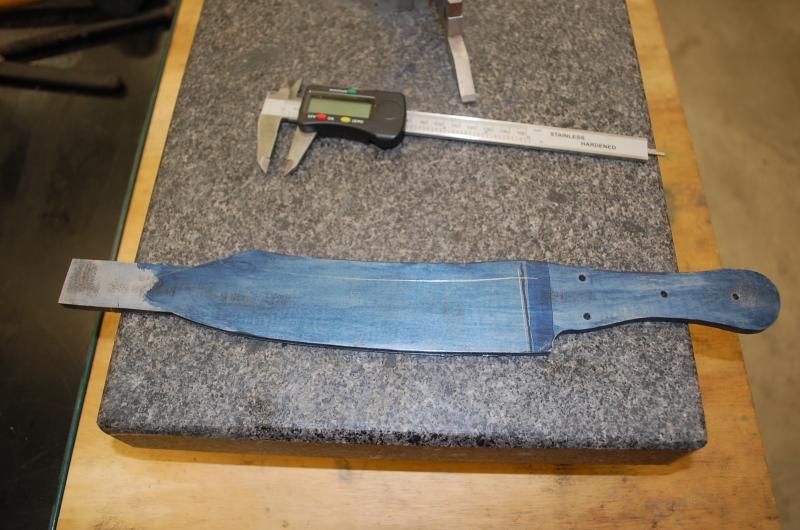
I created a plastic template that I used to layout the guidelines that will be needed for subsequent operations.

hudsonbaylayout.jpg


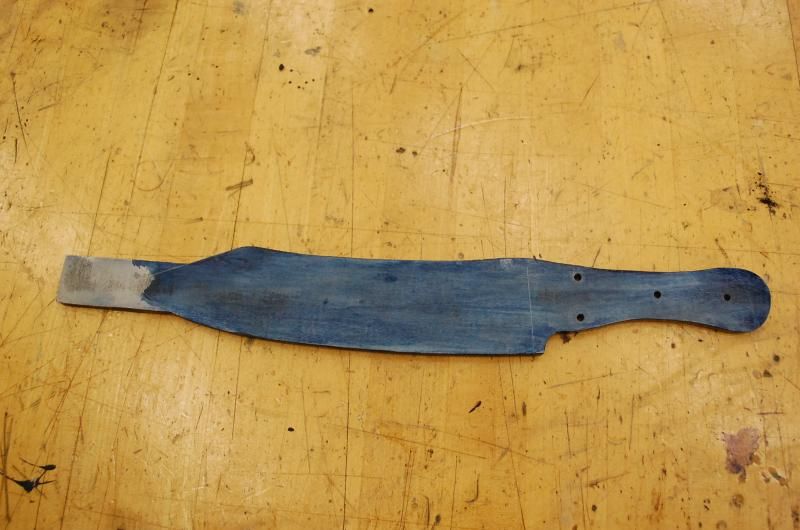
I plan on tapering the tang and figured it would be more difficult to drill the holes accurately after this was done so the locations for the two handle pins and bolster pins were marked and centerpunched.

hudsonbaypunch.jpg


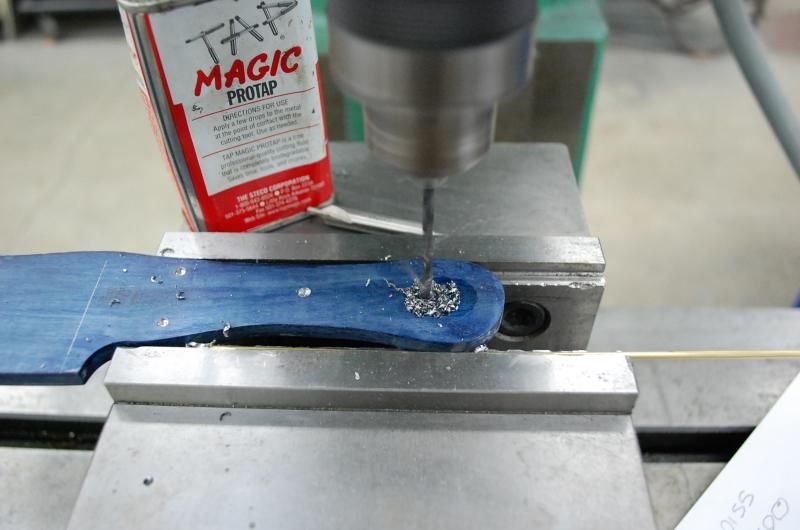
The holes were spotted on the mill with a center drill.

hudsonbaycenterdrill.jpghttp:


And drilled with a 1/8" bit.

hudsonbaydrill.jpg


hudsonbayfinishdrilling.jpg


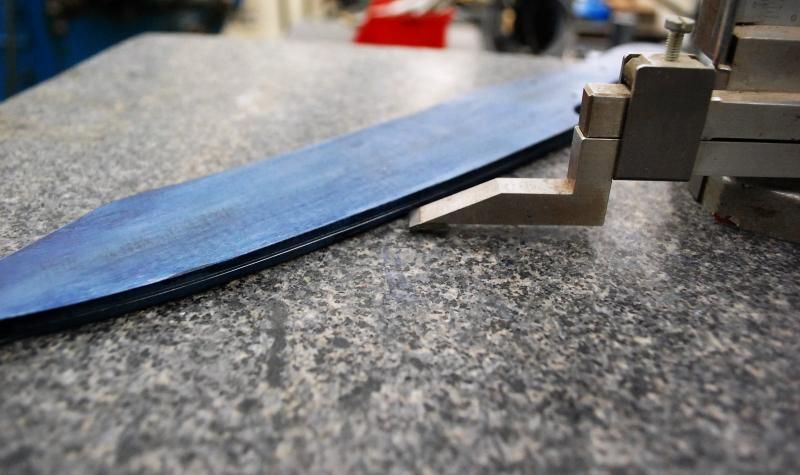
I wanted to establish a centerline on the knife edge to work towards, when I am finished I want to have a flat on the edge about .015 wide, this will be removed in final finishing after heat treatment. I used a surface plate and height gauge to do this, same thing could be done easily with a hand caliper or other means.

hudsonbaylayoutline.jpg


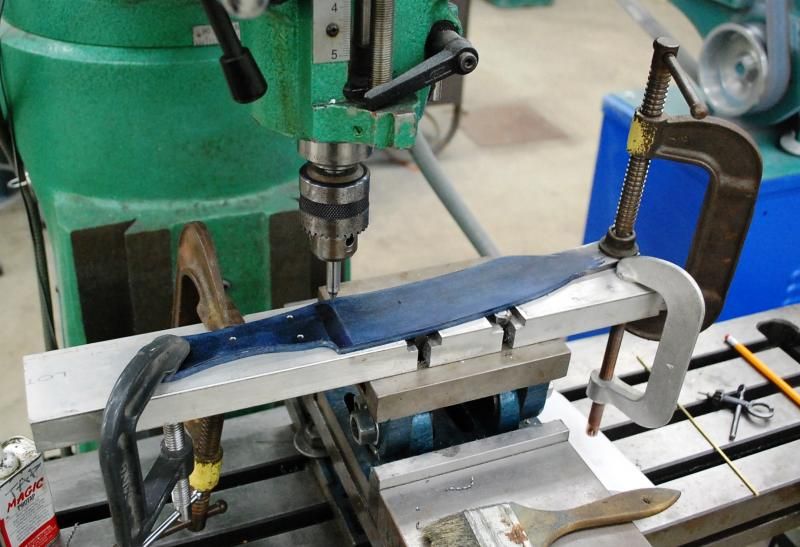
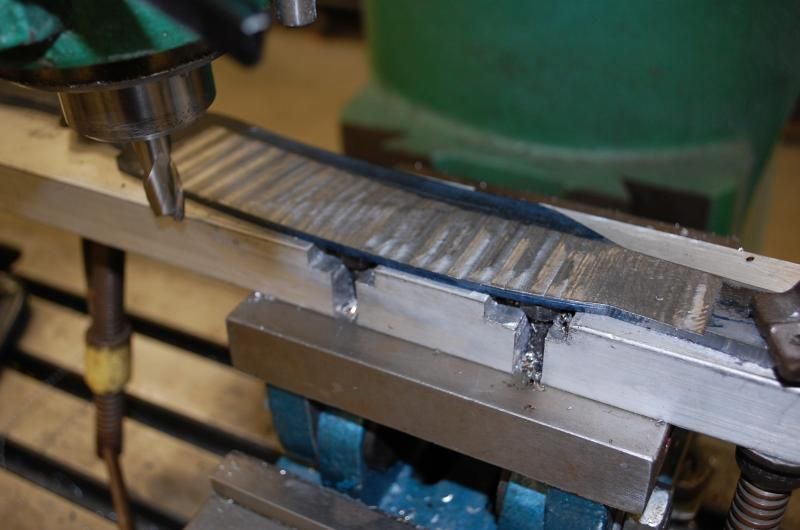
The last step that did today was to set the blank up on an angle table on my mill. The angle table will allow me to mill in the flat taper on the blade evenly on both sides. This could be done on the grinder, but on a project of this size I opted to go the route of milling. There will still be plenty of hand work to refine the blade shape and put in the distal taper which is not easy to setup on a machine.

hudsonbayfixturecloseup.jpg


Here I have the blade clamped in position with just c-clamps, before I start milling I may add a pin though one of the handle holes to prevent movement during the milling.
 
All sounds good, but be sure you run at least a one hour stress relief heat before doing the hardening. 1200°/1250°. Air cool. That will help prevent warp in the quench.
 
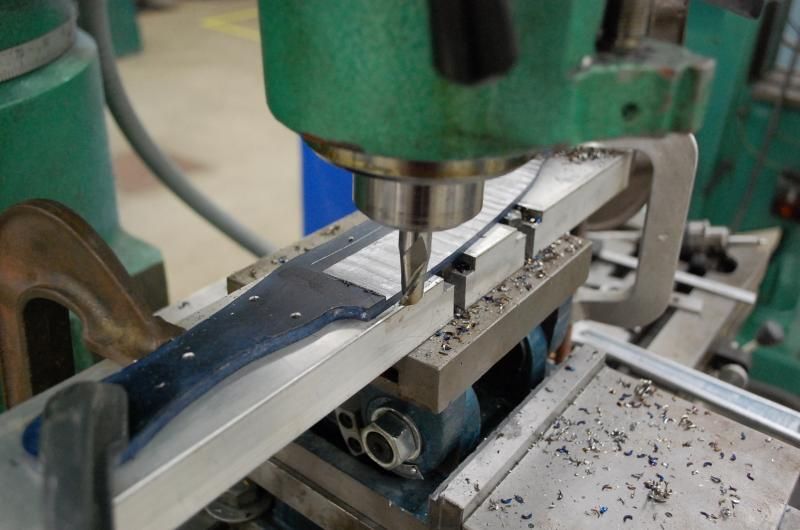
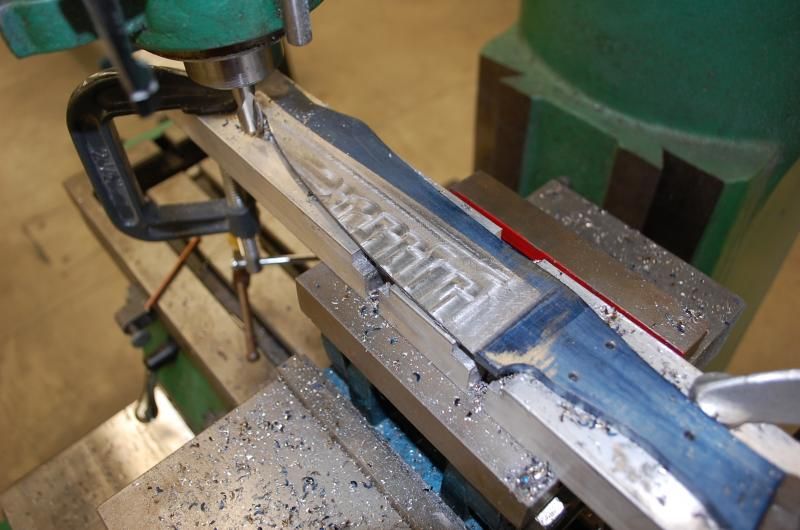
I spent a bit more time working on it this morning. I started by aligning the ricasso edge up with the table travel on the angle plate and started the milling operation. The next shots show the progression of this operation.

millingtheflats.jpg


millingtheflats2.jpg


I was working to the depth of the guidelines that I scribed yesterday along the edge.

millingtheflats3.jpg


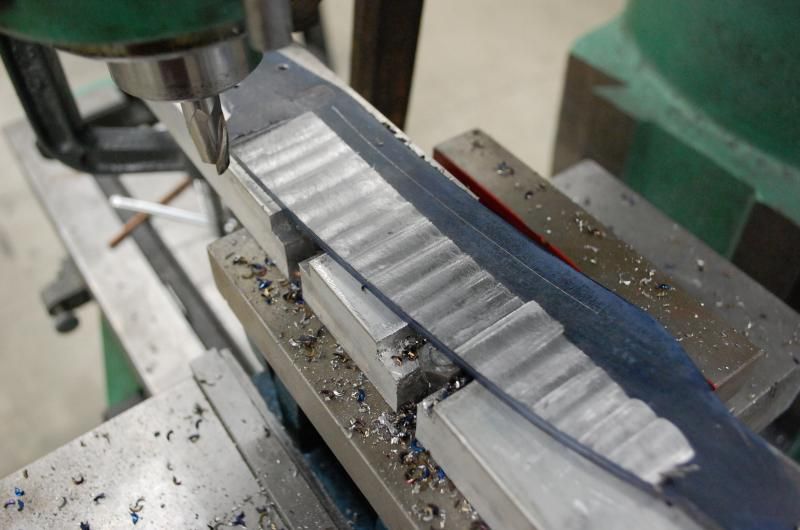
Since the blade is curved it had to be adjusted on the angle table a few times to machine the entire surface.

millingtheflats4.jpg


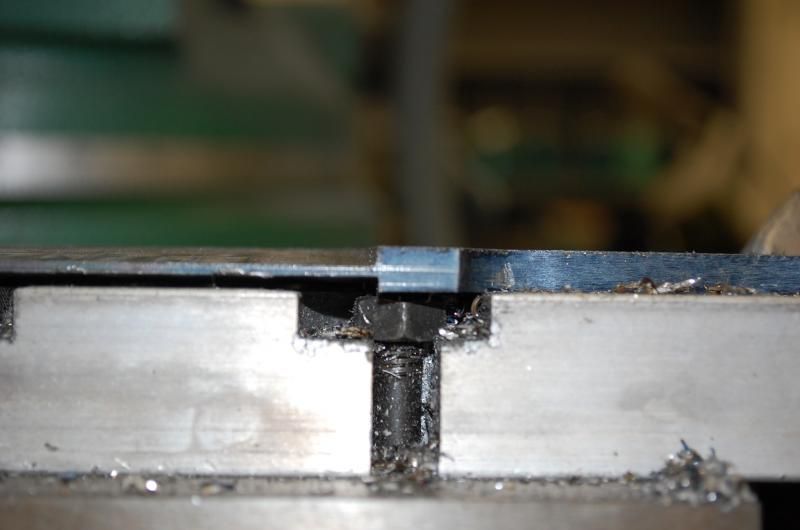
When the first side was done I used a caliper to record the setting on the first face where the taper ended near the spine and than transferred this measurement to the opposite side.

referencelinescribedonoppositeside.jpg


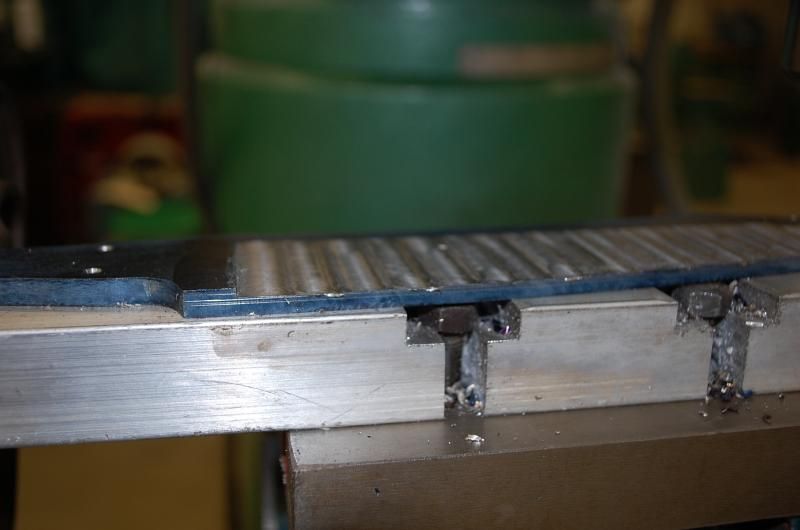
I proceeded to machine the opposite side to the same depth as the first, making sure that the edge of the ricasso lined up to the opposite face.

millingoppositeside.jpg


ricasso.jpg


I was off a bit in the above shot, but milled a bit more to even everything up. This will be further refined in grinding/filing operations.

The advantage to milling the flats is that it is a relatively easy way to remove a lot of excess material and this way allows me to keep both sides symmetrical. The downside is that a manual mill can not easily cut a three dimensional surface and areas like the tip will need to be blended into the sides by hand. Machine tool are useful, but they don't do all the work and there is still plenty of work that needs to be done by hand following the machine operations.

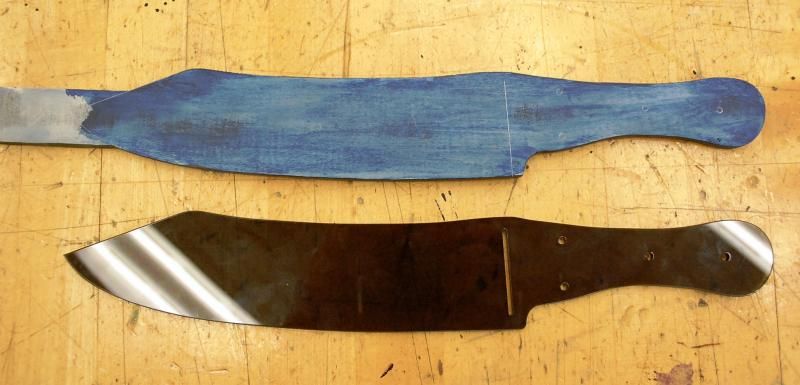
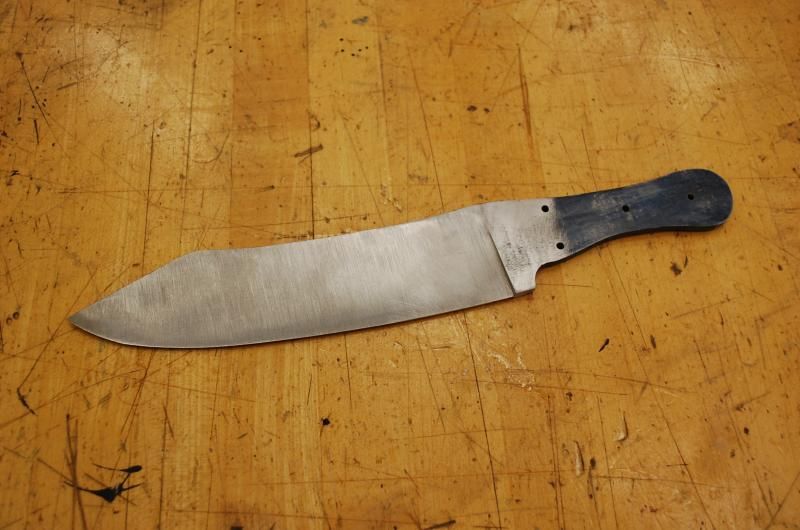
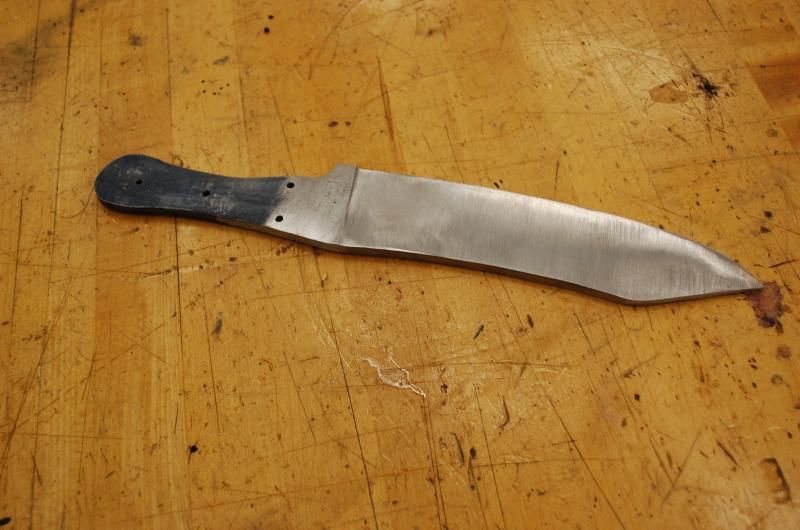
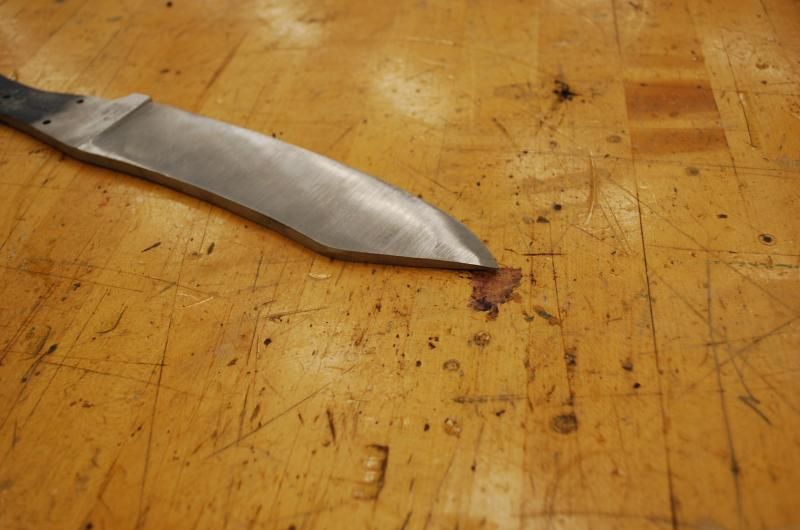
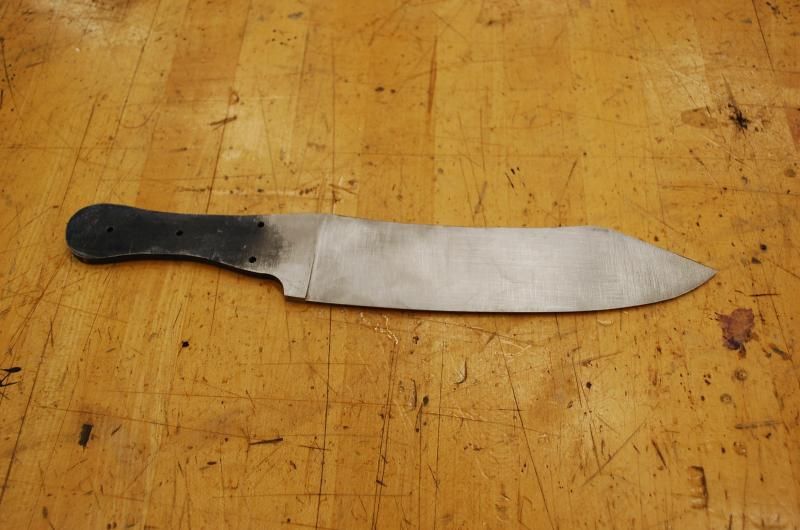
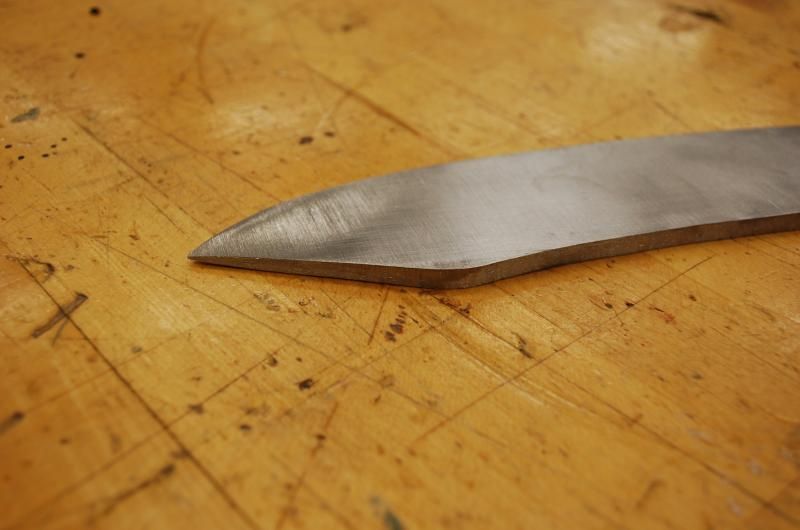
Following the milling I cut off the tip on the bandsaw (sorry no photos) and than proceeded to grind the flats and blend in the tip. At this stage it is rough ground, I will do more work at a later point to create a smooth taper from the ricasso to the tip. I was not able to take photos while I was doing this operation. But here are a few shots of the rough ground blade. It is starting to look like a knife.

roughground.jpg


roughground2.jpg


roughground3.jpg


roughground4.jpg


roughground5.jpg


roughground6.jpg


I am not totally satisfied with the ricasso region yet, how these were originally shaped in this area is still not entirely clear in my mind from the photos I have seen. If someone has some advice I would greatly appreciate it.

In any event the next step will be to grind the taper on the tang which hopefully I will be able to work on this weekend.
 
I don't recall seeing plunge lines on them. May have been, but I just don't recall. I would think maybe on late period versions, but I am no expert on those knives. I believe the originals would be a slight convex grind also. Most choping blades even today are a convex cross section rather than a dead flat V grind.
 
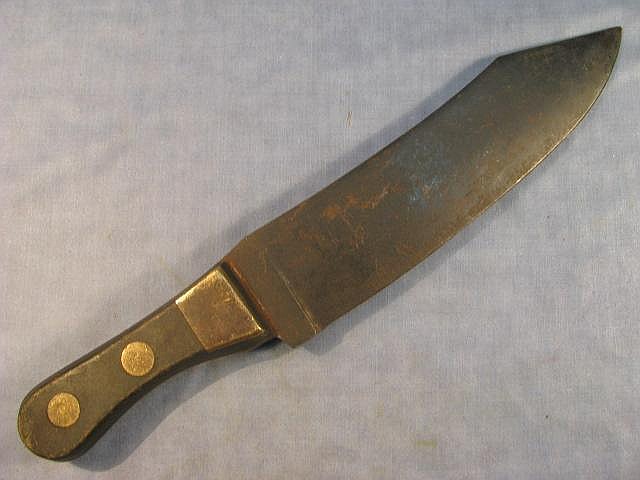
I found some photos that seem to show that feature in them, but, as you mentioned, it may be a late detail. The photo below shows it clearly:

H1162-L11282233.jpg


As I was grinding the sides I was making it more convex than flat (there was enough extra material to do that following the milling), but probably not as much as might have been on the originals. I plan on making a second and that one I might leave just straight convex throughout.
 

Latest posts

Back
Top