• Friends, our 2nd Amendment rights are always under attack and the NRA has been a constant for decades in helping fight that fight.

    We have partnered with the NRA to offer you a discount on membership and Muzzleloading Forum gets a small percentage too of each membership, so you are supporting both the NRA and us.

    Use this link to sign up please; https://membership.nra.org/recruiters/join/XR045103

I messed up a barrel.

Muzzleloading Forum

Help Support Muzzleloading Forum:

This site may earn a commission from merchant affiliate links, including eBay, Amazon, and others.

Gus Chiggins

36 Cl.
Joined
May 4, 2019
Messages
52
Reaction score
4
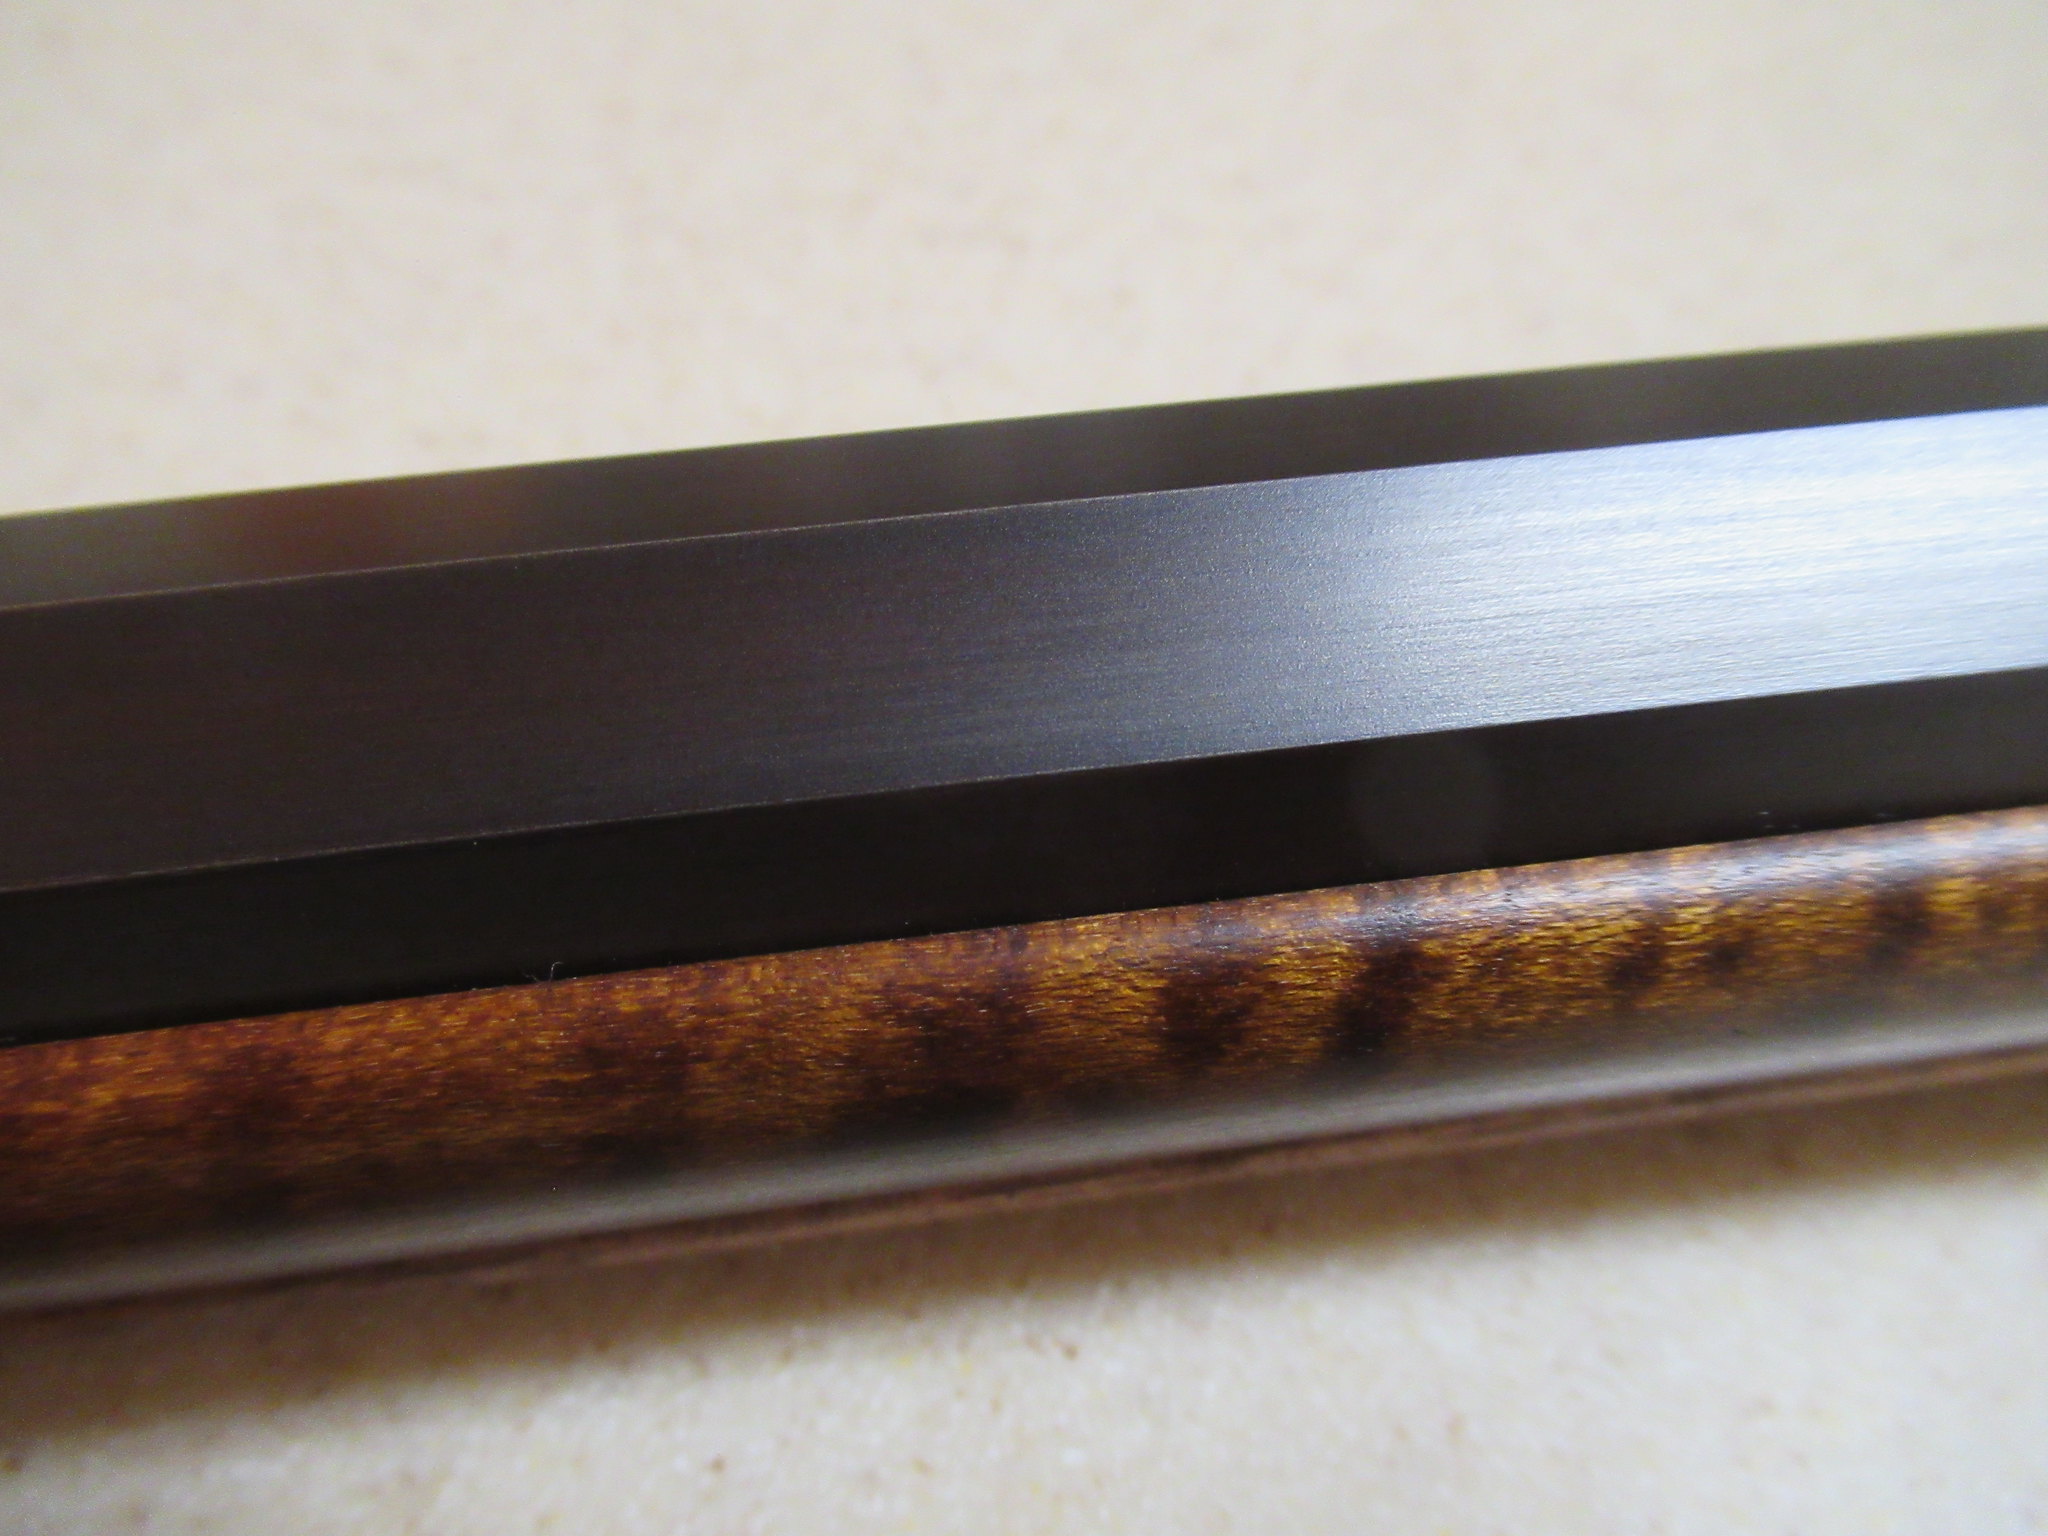
Finished my Crockett last year. Shot it once. Took it out today because I'm bored and actually working on an old Hawken kit.. When I *finished* the barrel w/ lmf it wasnt smooth, and didn't look at all like a blueing as far as texture, which I now know it should. What I got from the process is what appears upon close examination as a trillion tiny pits on the surface. As I recall, I followed the directions closely and stopped when I got the desired color. The finish is not smooth, soft and pillowy like I wanted, but again this is my first so expectations were skewed. So, I sanded it w/ 0000 sw, which didn't do much, then 2000 sp, which did a little, then 400 sp, which really flattened it out... SOS-can I save this barrel? I'm not worried about work, I have lots of time on my hands. Will post pics if needed. Thanks.
 

Attachments

  • 20200414_201113.jpg
    20200414_201113.jpg
    40.3 KB
I like it. But.........You can always draw file the barrel back to new metal and begin again. Nothing is beyond repair.
Thanks you two. I originally kind of liked it.. it seems durable enough, and obviously it has stopped rusting. Can I get some perspective/ suggestions?
 
I had one in similar shape I got from a pawn shop. It was solid red but thankfully even and pitting was just as even and very shallow. Went over it with oil soaked plumbers emory cloth. Once I got a good shine I added lapping compound to the worn cloth. Degreased it and wiped it with clean white cloth till no color showed. Used perma blue on it and it came out nice for perma.

Yours doesn't look bad. Flat finish is different but it looks even. I like it.
 
To get a very fine browned finish there are some tricks that Dave Person posted as I recall when he was building a high end English gun. Hopefully he will chime in. If remembering correctly he started with a finely polished barrel, the LMF was diluted quite a bit and incubation times were short and carding was carefully done. It took a number of coats to even see it start to “take”.

I control humidity and sweating times to control the end result. Very high humidity and long sweats gives coarse grain.
That makes a lot of sense. When I did mine I cranked up the humidity and sweat times because after the first couple of applications I didn't notice hardly any finish. After the 0000 and oil (earlier today)it was pretty smooth yet still with visible tiny, shallow "pits", which maybe more accurately "course grained". Yea, that sounds better.
 
I might should add, I only used the sand paper and sw on the under barrel, under where the barrel rib attaches. For obvious reasons.
 
I agree with you, I don't care for the pitted finish. So it's just my taste that goes for a smoother finish. The way I did this barrel was to draw file the machine marks off then 220 grit followed by 320 grit sand paper. Browning with Wahkon Bay tru brown cut 50/50 with distilled water. This is a cold browning process and every 12 hours I steel wooled the rust off and reapplied. After 6 applications the barrel was washed with hot water and wet steel wool then 6 more coats 12 hours apart before rinsing with boiling water. Then coated with machine oil allowed it to cure for two days before lightly rubbing with OOOO steel wool.
IMG_0543 by Oliver Sudden, on Flickr
That IS a beautiful finish. My application times were much shorter, they probably averaged 4-5 hours. It was a while ago so cant remember exactly but definitely not 12. Also, I carded with hot water every application, and used an old pair of blue Jean's for carding. The jeans visibly removed plenty of rust, but could they have been too soft a material as to allow the first few app's to develop pits? Could it have been that I finished with 400 paper instead of 320? That doesnt make sense intuitively, I figured 400 would give better shine, but idk. Lastly the room I hung my barrel wasnt just humid, but steamy. Could that have led to the material being overly aggressive on the metal?
 
i ended up with almost the same finish with lm on my lyman great plains rifle but that was what i was going for . i also carded with old blue jeans . i would laeve it and just shoot it. looks good to me.
 
You didn't ruin a barrel. You only ruin a barrel when you kill it's ability to shoot well. Anyway I do like your rough look and if it was mine I'd be happy with it.
 
I also browned the bottom metal on the trigger assembly(and other pieces too)w/the same exact method, after filing and polishing, which actually came out how I imagined it should. Pics of that on request.
 
I also browned the bottom metal on the trigger assembly(and other pieces too)w/the same exact method, after filing and polishing, which actually came out how I imagined it should. Pics of that on request.

Post them. I’m browning a screw barrel project and will be doing a rifle in the next few weeks using LMF.

-Jake
 
Back
Top