Thank you Dave for a very informative trip through the process of finishing a Kibler!Hi,
Thank you all for looking and commenting. I appreciate them very much. I want to mention a few points that may help those who choose to build these kits. Make sure you remember to file the pin holes in the barrel lugs into oval slots to allow the stock to move with humidity. Case in point, when I fitted the forward pin a few days ago, the stock had moved so much from a change in humidity that the hole no longer lined up. All the other holes were OK but I still filed them into short slots. The forward lug needed a pretty long oval slot to pass the pin. Make sure you sand the ramrod enough that it does not jam with humidity. The same goes for the patch box lid. If I had left the precise fit that came with the kit, it would long ago have been swelled in place by humidity. File a little extra space in the hole in the breech plug for the rear lock bolt. Make sure the bolt fits through it and rattles a bit in the hole. Having learned this the hard way, a precise fit of that bolt through the plug bolster could result in it acting like a jack hammer against the stock during recoil. A little slop in the hole will prevent that. If you decide to alter the stock as I did, keep in mind that Jim's well and precisely engineered kit is a system such that if you change one thing you are bound to find you need to change several other connected things. I urge folks just starting out to build the gun as Jim designed it with respect to the architecture. By all means add cosmetic flourishes all you want but leave the basic architecture alone unless you know what you are doing. With respect to embellishments, I strongly urge you to do some, even simple ones. In my opinion, the basic stock desperately needs moldings along the ramrod channel, lower butt stock moldings, the end of the cheek piece reduced in size and shaped a bit with perhaps a decorative line or two, some decoration on the patch box lid, and lock and side panel moldings. Just those simple features will enhance the rifle a lot particularly if you choose very monochrome wood like black walnut and cherry. Finally, the finished rifle with its 43.25" 54 caliber barrel weighs 8lbs 12oz. My Star of Bethlehem rifle with its big 41" D weight 62 caliber barrel weighs 9lbs but is better balanced and the weight is barely noticed. This 54 caliber Kibler is a bit muzzle heavy for me and I suspect the 58 caliber version would be quite a bit better balanced. Regardless, the kit was a lot of fun and is an awesome achievement by Kibler & Company.
dave
You are using an out of date browser. It may not display this or other websites correctly.
You should upgrade or use an alternative browser.
You should upgrade or use an alternative browser.
Kibler kit assembly and carving
- Thread starter dave_person
- Start date

Help Support Muzzleloading Forum:
This site may earn a commission from merchant affiliate
links, including eBay, Amazon, and others.
I read through this I was about to buy the kit. I am 79 with absolutely no expeirence . After reading throught this I realize I could never be satisfied with anything I could manage to assemble. Beautiful work. Thanks for sharing.
Lol, no real craftsman is ever satisfied with what they make. I made something for my wife out of leather for her birthday in a couple weeks. I'm on the third iteration of the first one I made. I like the first two but I'm really knocking this third one out of the park! Kibler kits are just fantastic even if you just slap em together. Anything you do to them after that just makes them better. I'm thinking with 79 years under your belt, you've learned a few things youngsters like myself (63) won't know for a while. I say, do it! Even if you leave it to a grandkid, even if you just assemble it they'll have a great jumping off point if they want to make it fancy but if nothing else, they'll have a gun grandpa built! That's worth the price of admission right there.I read through this I was about to buy the kit. I am 79 with absolutely no expeirence . After reading throught this I realize I could never be satisfied with anything I could manage to assemble. Beautiful work. Thanks for sharing.
This is the original 1862 Bridesberg I restored with just that in mind.
Neil

Nice looking rifle there, Cap. And a most interesting range. The first time I've seen "anti-muzzle blast baffles". Kind of wish there were more ranges doing that. Many of the suppository rifles have way more than their fair share of that.
Nice looking rifle there, Cap. And a most interesting range. The first time I've seen "anti-muzzle blast baffles". Kind of wish there were more ranges doing that. Many of the suppository rifles have way more than their fair share of that.
Was trying to fire a 1916 unmentionable and my blunderbuss about 6 months ago, and a guy with a very short barreled Russian device was blasting away and and it felt like I was being flicked in the eyeball by the concussion of it every time he shot. Would LOVE some sort of baffle in the range near my house. I honestly had put my rifle down to sit there quietly with a smile until he expended all his ammunition and went home. We all love to take our time in this hobby, I can easily outwait your supply of ammo.
- Joined
- Nov 26, 2005
- Messages
- 5,248
- Reaction score
- 11,029
Hi Miles,I read through this I was about to buy the kit. I am 79 with absolutely no expeirence . After reading throught this I realize I could never be satisfied with anything I could manage to assemble. Beautiful work. Thanks for sharing.
For gosh sake don't let my thread discourage you from building a Kibler. They are incredible kits that do not require a lot of space, tools, and skills to produce a very fine rifle. Jim and Katherine are producing the finest designed, engineered, and thought out muzzle loading kits ever made and building one without the embellishments I show is still producing a very fine gun in all aspects particularly form and function. I embellished the kit as I did because the owner asked me too not because it is required to make a fine gun. Build Jim and Katherine's kit. You won't be disappointed.
dave
To add to Dave's above point, Jim Kibler has photos on his site that includes a lot of "plain" rifles without any embellishments that are frankly beautiful to look at just by being assembled with a basic finish.
Southern Mountain Rifle Kit Gun Photo Gallery
https://www.jimkibler.net/customer-kit-gun-gallery---colonial.html
Southern Mountain Rifle Kit Gun Photo Gallery
https://www.jimkibler.net/customer-kit-gun-gallery---colonial.html
Nice looking rifle there, Cap. And a most interesting range. The first time I've seen "anti-muzzle blast baffles". Kind of wish there were more ranges doing that. Many of the suppository rifles have way more than their fair share of that.
Yeah that's Elkridge state run range in Maryland. They just spent a ton of money on the place like two years ago. They really did a nice job on it. It's great during the week but the weekends bring the AR guys from Baltimore peppering 12X12 targets at 25 ' .I can out shoot most of them with a 150 year old gun and if they want to go distance? I have a very nice Pedersoli Kentucky Flint in .45 that make very nice groups out to 100 yards.


Celticstoneman
40 Cal
Capnball, Very nice looking gun! I also agree with your comments.Lol, no real craftsman is ever satisfied with what they make. I made something for my wife out of leather for her birthday in a couple weeks. I'm on the third iteration of the first one I made. I like the first two but I'm really knocking this third one out of the park! Kibler kits are just fantastic even if you just slap em together. Anything you do to them after that just makes them better. I'm thinking with 79 years under your belt, you've learned a few things youngsters like myself (63) won't know for a while. I say, do it! Even if you leave it to a grandkid, even if you just assemble it they'll have a great jumping off point if they want to make it fancy but if nothing else, they'll have a gun grandpa built! That's worth the price of admission right there.
This is the original 1862 Bridesberg I restored with just that in mind.
NeilView attachment 95470
John
Celticstoneman
40 Cal
Osseon, I just checked out the link you provided for us. Wow! I'm sitting here between drooling and cryingTo add to Dave's above point, Jim Kibler has photos on his site that includes a lot of "plain" rifles without any embellishments that are frankly beautiful to look at just by being assembled with a basic finish.
Southern Mountain Rifle Kit Gun Photo Gallery
https://www.jimkibler.net/customer-kit-gun-gallery---colonial.html
I've had a couple Pedersoli .45's. First one I got, I went to our clay pit and set up my target at 100 yards, then from the prone, fired 3 rounds. When I went to check the target, you could join all three holes with a dime. Group was 1/2" left at 9:00 - decided I was NOT going to move the sights at all! The other Pedersoli .45s were all just as accurate. 75 gr FFG, .015 patch on a .440 Hornady cast ball. And I have another recent addition sitting in the gun rack now, waiting for me to go fire it.Yeah that's Elkridge state run range in Maryland. They just spent a ton of money on the place like two years ago. They really did a nice job on it. It's great during the week but the weekends bring the AR guys from Baltimore peppering 12X12 targets at 25 ' .I can out shoot most of them with a 150 year old gun and if they want to go distance? I have a very nice Pedersoli Kentucky Flint in .45 that make very nice groups out to 100 yards.
View attachment 95508View attachment 95508View attachment 95511
Also built one of their "Bounty" pistols - the one with the 16" barrel - fantastic accuracy with that .45 barrel also. I think it has 12 lands and grooves.
I've got to move back to Northern VA so I can try out that range! Only been away from there since 1962!
I've had a couple Pedersoli .45's. First one I got, I went to our clay pit and set up my target at 100 yards, then from the prone, fired 3 rounds. When I went to check the target, you could join all three holes with a dime. Group was 1/2" left at 9:00 - decided I was NOT going to move the sights at all! The other Pedersoli .45s were all just as accurate. 75 gr FFG, .015 patch on a .440 Hornady cast ball. And I have another recent addition sitting in the gun rack now, waiting for me to go fire it.
Also built one of their "Bounty" pistols - the one with the 16" barrel - fantastic accuracy with that .45 barrel also. I think it has 12 lands and grooves.
I've got to move back to Northern VA so I can try out that range! Only been away from there since 1962!


I had a kid and his girlfriend (maybe 18) marveling at the accuracy of the gun at that range. They were shooting a couple nondescript sporting rifles. Neither of them could shoot at all. So I gave them a lesson and let them shoot the flintlock. They both hit the paper at 50 yards. Next thing I know they have their own targets moved down to the 50 yard mark and are plinking away with their own guns then they came back for some sight adjustment suggestions. It's great tow watch young brains absorb information.
Dear Miles,
I am 77 and have just completed my Kibler colonial kit. While I cannot do the carvings and embellishments that others do, I still end up with a beautiful and extremely functional rifle. Jim's videos on YouTube can show you how to get through the building step by step. It's not difficult and a little patience pays off.
With the Kibler you have all the best parts and an end product you can enjoy without having to fix all the problems encountered with many others. I say, go for it!
A beautiful piece of work!Hi,
Bone black, OhhhhK. First let me mention that the finish on the rifle is Sutherland-Welles polymerized tung oil medium gloss. I used all kinds of finishes on my guns over 40 years but I prefer polymerized tung oil over all else. The key emphasis is on "polymerized". This is not raw tung oil or Minwax and Formby's tung oil finishes. This is tung oil heat treated to speed up drying and mixed with some solvents. I buy it directly from SW who are in Vermont. On a warm day, it is dry to the touch in 4 hours and ready for the next coat in 12-24 hours depending on heat and humidity. That said, like any finish, if the humidity is high or the temp drops below 65 degrees, it may take a while to dry. I can mimic virtually all vintage finishes with it depending on my objectives and it is has superior weather resistance to anything containing linseed oil, which includes Tru-Oil.
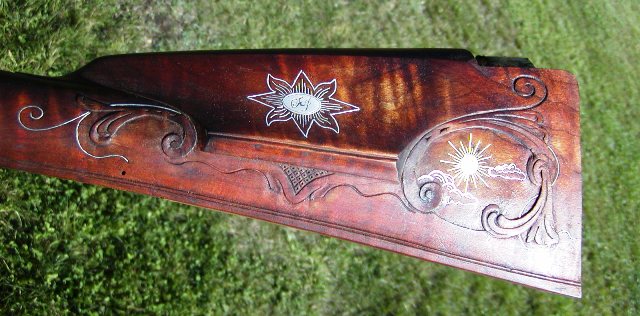
I am no expert on shading gun stocks with bone black. Jim Kibler is and is an artist with it. I am still learning my way and use it tentatively. The idea is to add a black shadow effect that mimics age. I do like the effect but to what extent I simply am not sure. I would never do it unless I also will age the brass, lock, and barrel. But what do I mean by age? I really don't know. Is a little aging like being a little pregnant? You are either pregnant or you are not. Anyway, I do like the look of the bone black and hopefully use it effectively on this gun. You can decide that when I post the final images of the completed gun. I will be tarnishing the brass, lock and barrel to look consistent with the stock. To use bone black on a stock and then polish the brass bright and shiny is not a good idea.
So here is the raw material.
The stock has 2 coats of tung oil thinned 50% with mineral spirits as a sealer. Those coats dried thoroughly in the sun and then I began to add the bone black.
I use bone black pigment supplied by Jim Kibler and a small amount of tung oil finish. I pour a little bone black in one jar lid and a very small quantity of tung oil finish in another.
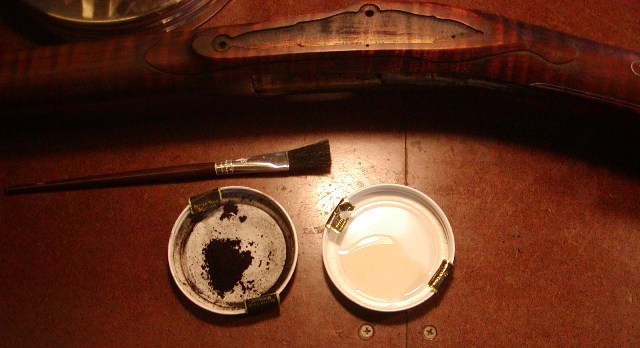
I use a good quality brush, dampen it with oil and dip it into the bone black. The trick is not to create a black paste in the brush but a fairly dry pigment that brushes on not like paint but more like damp sand. It should create wispy streaks of black not a coating.
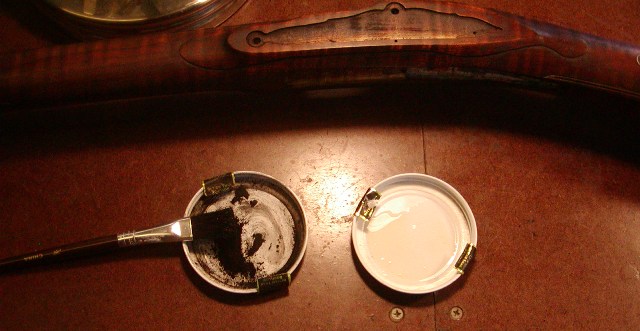
I then work the pigment into areas that make the carving pop but also where grime and finish might build up and not get wiped away.
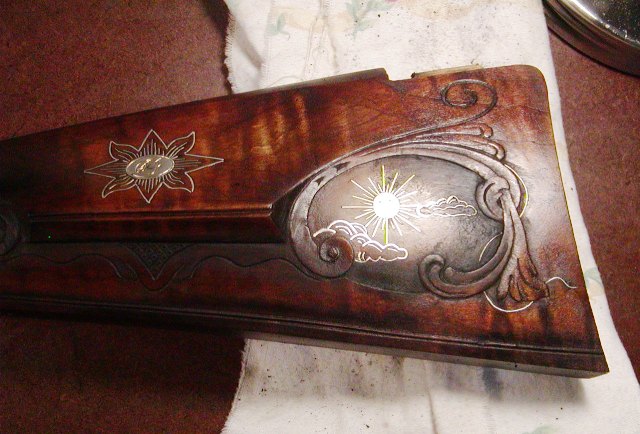
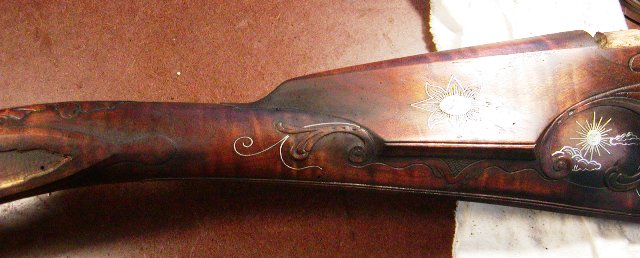
Here I am using it to create a halo around the sun.
Here to highlight carving around the lock.
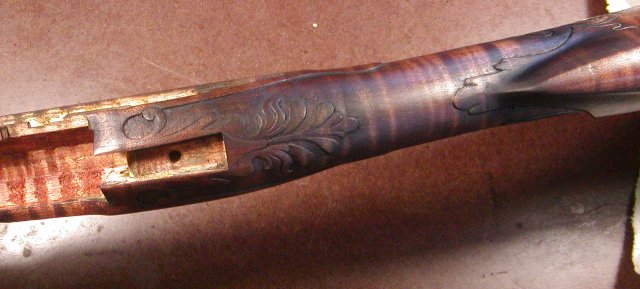
And highlight carving on the other side.
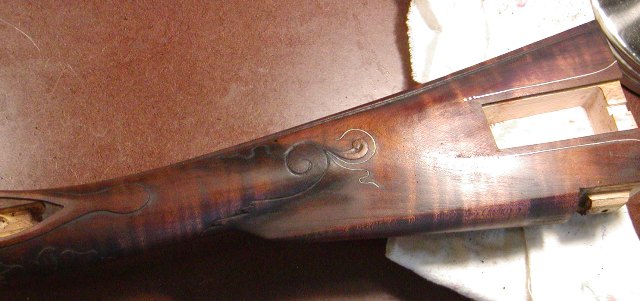
Then I wipe off the excess with a paper towel where I don't want it and here is the result.
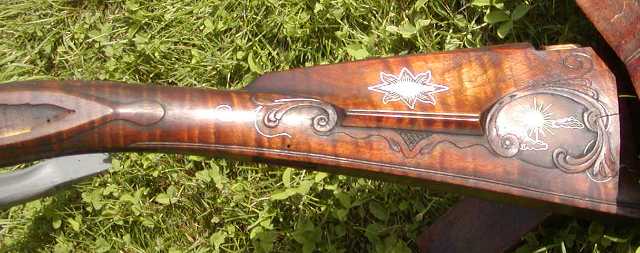
Now that is not the end because the next coat of finish after the black glazing has dried will wipe away some of the black and feather it a bit. You have to be careful that you don't wipe it all off before it is locked in place by successive coats of finish.
dave
S.Kenton
58 Cal.
Dave that truly is masterful!! I’ve read this whole thread twice and just can’t get passed what you’ve done with that rifle, everything from the carving to the clouds and sun… your attention to detail is amazing, you’ve taken this kibler to a few new levels ..absolutely stunning!!!!!!
Birddog1911
40 Cal
- Joined
- Sep 8, 2021
- Messages
- 434
- Reaction score
- 500
Newcomer here, and I just have to say, Dave, you're an absolute artist. I've thoroughly enjoyed reading this. If I win the powerball, I'm looking you up!
Dave, such marvelous work. I aspire
- Joined
- Nov 26, 2005
- Messages
- 5,248
- Reaction score
- 11,029
Hi,
Thank you guys and you are welcome. The purpose of the thread was to help and inspire folks building their Kibler kits. It gives you ideas and sometimes that is the most important thing.
dave
Thank you guys and you are welcome. The purpose of the thread was to help and inspire folks building their Kibler kits. It gives you ideas and sometimes that is the most important thing.
dave
Nice work you have my voteHi,
A forum member asked me if I would assemble and decorate a Kibler colonial rifle kit. I agreed to do it because, although I am familiar with the kits and examined them closely, I've never built one. So I decided to take on the project. The Kibler kit is phenomenal. Jim and Katherine anticipated every need and designed the kit so it could be built on a kitchen table by someone with very few tools and skills. You have to work really hard to ruin one of these kits. Anyway, so I got the kit late Saturday and opened the box Sunday morning. I then got to work on it at 7:30AM on Monday and almost finished the entire assembly by 5:00 PM. All that remains for assembly is pinning the nose cap, installing the sights, and fitting the ramrod. The time required included 2 walks of my dog Willow, a 45 minute phone conversation with the client, some play time with Willow, lunch, a short nap after lunch, and a grocery run. I don't think it took me more than 4.5 total hours of gun work to assemble the gun with the most time consuming task making and fitting the brass plate on the end of the patch box. I have not fitted the trigger guard and won't until all detailing of the stock architecture is done. However, it would only take me 15 minutes or so to fit it. Here is the rifle.
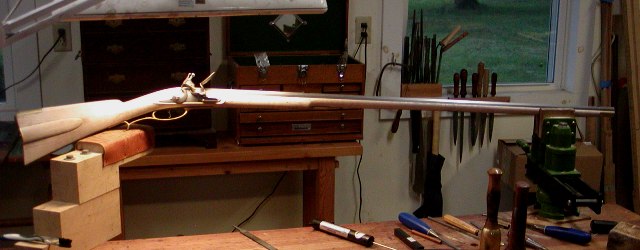
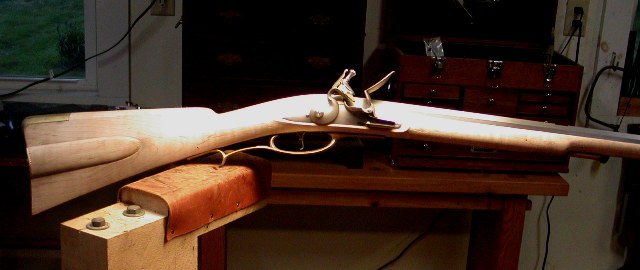
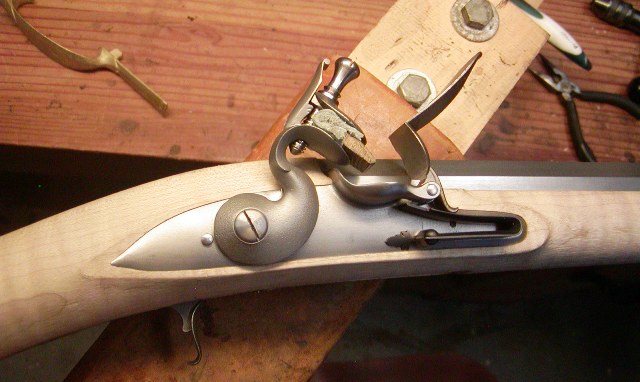
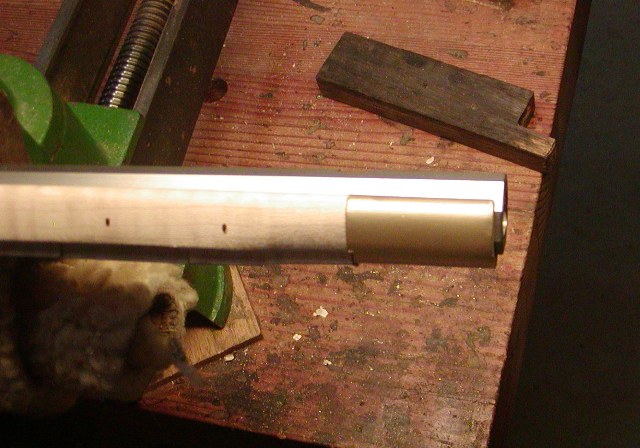
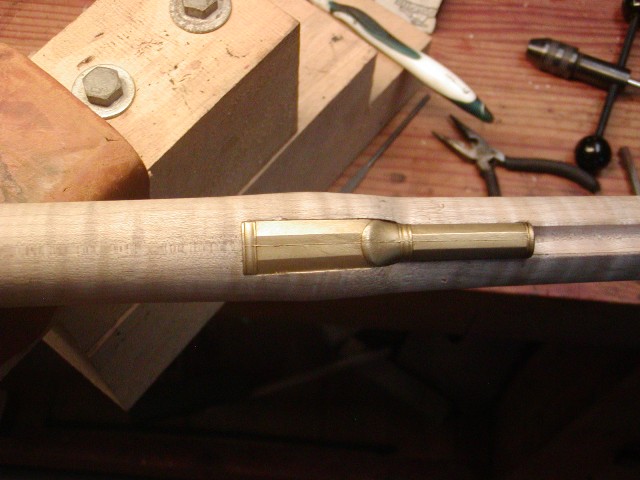
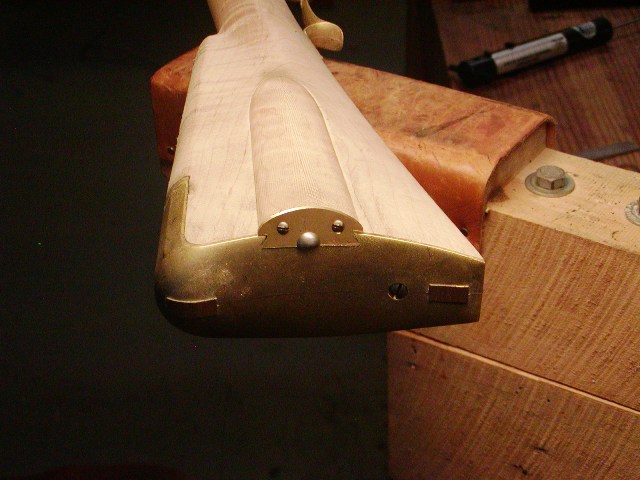
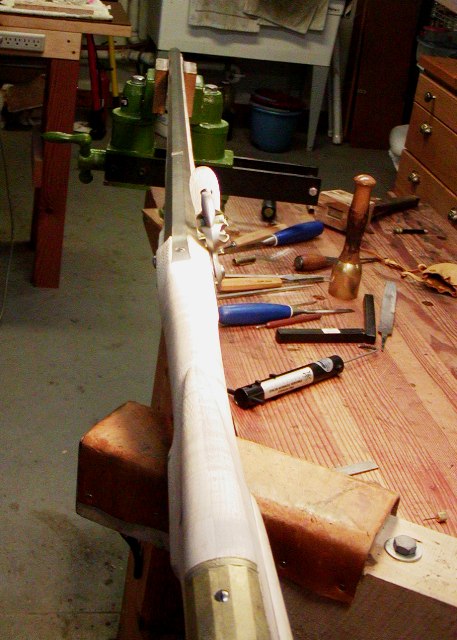
So the next step is how do I turn this common and mass produced canvas into my own signature piece. I can only do so much because the architecture is fixed by Kibler. Let's see what happens.
dave
Similar threads
- Replies
- 18
- Views
- 2K
- Replies
- 52
- Views
- 4K


