• Friends, our 2nd Amendment rights are always under attack and the NRA has been a constant for decades in helping fight that fight.

    We have partnered with the NRA to offer you a discount on membership and Muzzleloading Forum gets a small percentage too of each membership, so you are supporting both the NRA and us.

    Use this link to sign up please; https://membership.nra.org/recruiters/join/XR045103

Kibler kit assembly and carving

Muzzleloading Forum

Help Support Muzzleloading Forum:

This site may earn a commission from merchant affiliate links, including eBay, Amazon, and others.
Dave, you need to publish a book about your building, I think it would do well. Lots of good info from a master builder.

Honestly I'm sure he has enough material on this forum to make an illustrated guide to long rifle building.

Dave keep up the excellent work! Every change has me inspired and wondering if I should try and build a kit in the future when I get a workspace setup.
 
Hi and thanks everyone,
I really am flattered and that is the truth. Very nice job, PathfinderNC!! The carving does lower that "mogul" (I like that term for it) nicely. The same will happen on this gun, which is why I stopped taking any more off until the base of the carving is cut.

Simon, you could definitely do one of these kits even in a fairly small work space. The only caveat is that both Jim Kibler's kits are long guns so swinging them about while you work in a small space could be inconvenient, and stains and finishes could be smelly and messy working in a small space. However, with some care and planning anyone should be able to build one of these in an apartment or condo. Kibler & Co really thought about everything on these from the design of the guns to the drilling kit they provide with it. They are truly the class acts in the market of choices and that by a mile. I installed the sights but I am going to supply you with a second set that are taller and will fit the dovetails. The rear sight is nice but it is low and you might benefit from a taller rear sight.

dave
 
Thanks Jim! Sometimes I just wonder. Can I do this? Am I in over my head? Keeps me up at night. ;)

dave

As good as this progress looks, if you’re up at night, you might as well be working on this rifle! It really does look great. I’m serious about this. Keep it up.
 
Hi,
So I am working on the gun and thinking, "I am on vacation", only having to do what I want, like carving. Kibler & Co. took care of the grunt work. Then I get to the patch box lid and the brass end cap. The kit supplied a piece of sheet brass! What!! I have to make it? Are you kidding Mister Kibler cookie man? I was beginning to pretend I was a Millennial here, ya know! Now you expect me to actually make something? "Sheeesh!" as Jean Shepard used to say, :rolleyes:

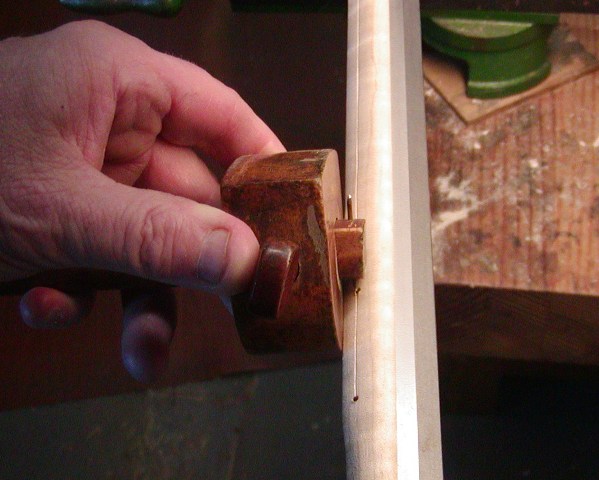
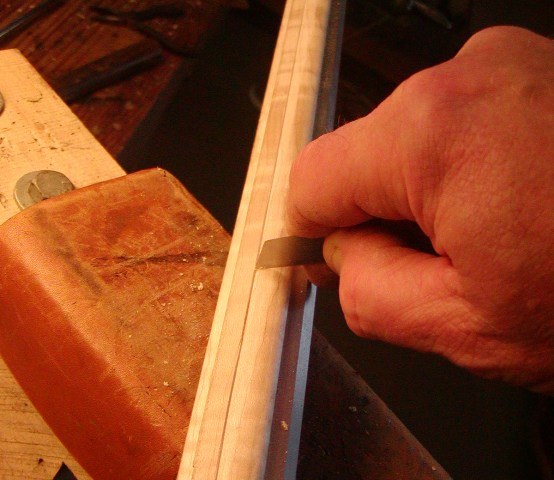
Well I stirred myself from my fiercely defended lethargy and got some work done today. I started adding details to the stock. The fore stock needs little finishing other than sanding so I cut the fore stock moldings along the ramrod channel. With Kibler's machined stock, this was easy! Some folks use jigs to do this but I am much more low tech. I use an old marking gauge that was my great, great, grandfather's and mark the distance from the edge of the ramrod channel to the thimble pin holes. I want the edge of the molding to be lined up with those holes. Then I use the gauge to incise a deep line marking the edge of the molding.
lPKNTfe.jpg

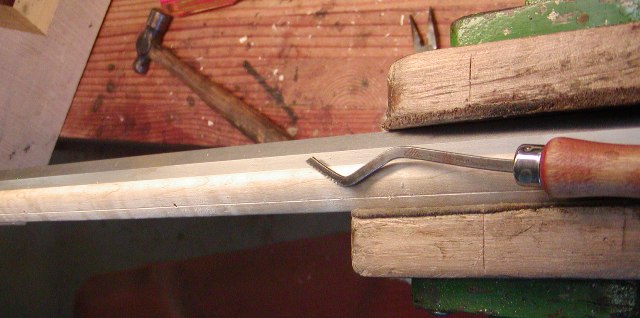
I cut that line using an English checkering tool with long axis.
MSbrhrZ.jpg

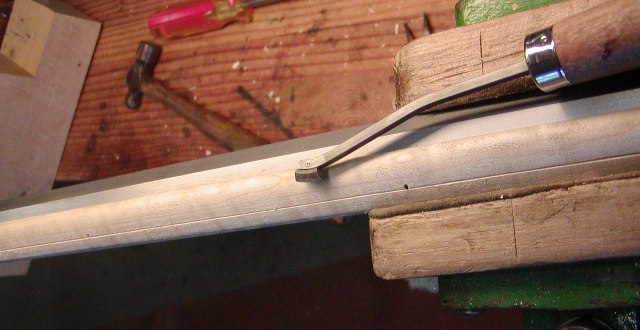
Then I deepen the cut with a 60 degree Gunline checkering tool.
M2UH5zT.jpg

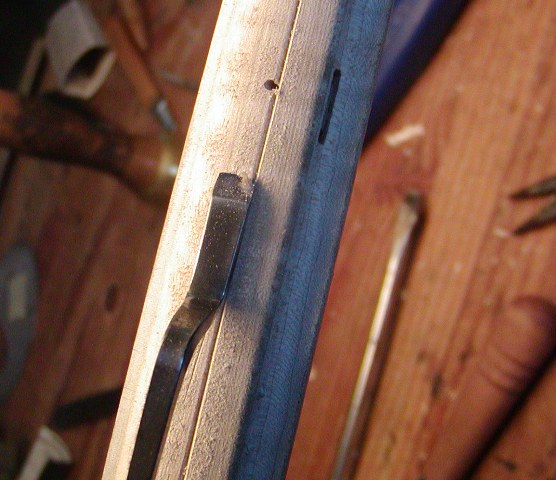
Next, I peel away the background to form a raised edge to the molding using a scary sharp dog leg chisel.
GP8IY5X.jpg

I clean up the edge and level the ground using a bottoming file.
WQKuJPA.jpg

Then I scrape off the tool marks with a 3-edged chip carving knife.
i9wfEax.jpg

dave
Great tutorial for me.since I wasn't building my first one at my house, I had to make fo with tools brought. I didn't think of final carving when I packed for the class. I managed this line and other basic carves with a pair of compasses, a pocket knife, and the small files. I can see where my hand wandered.
 
Well Jim Kibler is coming out with a new design, some rumors of a Fowler. If he ever came out with a Hawken I would jump on it. Maybe in a few years :)
 
Hi PathfinderNC,
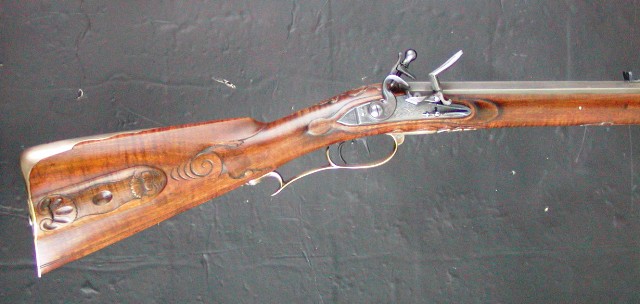
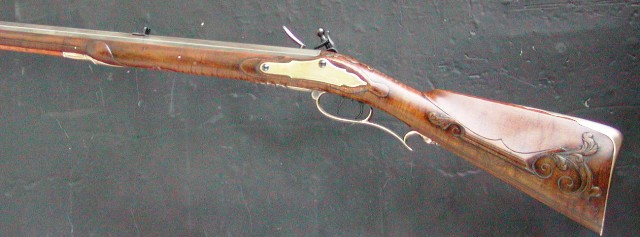
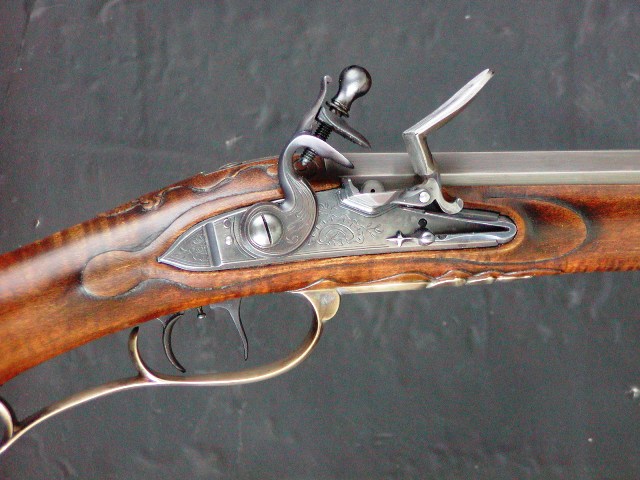
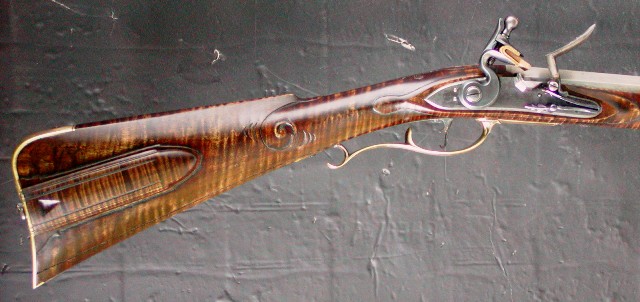
Here is a good example illustrating architecture at the wrist. It is my version of the Edward Marshall rifle and is as close to a "bench copy" of the original rifle as I could make.
48BvIrd.jpg

x6160IU.jpg

0vDnuIx.jpg

This is a big, full throated gun but note that the barrel tang bends down just behind the breech. It doesn't extend very far back before arching downward. Then notice the top of the wrist is fairly straight angling down to the comb. That really knocks off the "mogul" and gives it a really graceful pleasing shape surrounding the lock. It is a feature usually found on British guns as well.
Here is another example.
ZfCMaLk.jpg

Again notice the fairly straight top to the wrist angling down shortly behind the breech.
Now imagine what the wrist would look like if the barrel tangs on both of these rifles was a little straighter such that the ends stuck up 1/16-1/8" higher than they do. A mogul would form.
dave
 
Last edited:
Hi Tanker,
That is why I post these threads to help folks learn those skills and knowledge. That is why I urge you to read every detail in my written descriptions. Go and search the site for the threads I've posted on building this and that, and read them carefully. Don't just skim the photos. In all of them I share tricks and tips I've learned over decades of muzzleloading gun building. There is a wealth of information in those posts and all you have to do is read them.

dave
Thank you for showing that way that you do the line molding on the stock, I did mine free hand and had to go over it numerous times before I was happy with it. Keep posting your ways of doing things of that nature, very helpful!
 
Hi PathfinderNC,
Here is a good example illustrating architecture at the wrist. It is my version of the Edward Marshall rifle and is as close to a "bench copy" of the original rifle as I could make.
48BvIrd.jpg

x6160IU.jpg

0vDnuIx.jpg

This is a big, full throated gun but note that the barrel tang bends down just behind the breech. It doesn't extend very far back before arching downward. Then notice the top of the wrist is fairly straight angling down to the comb. That really knocks off the "mogul" and gives it a really graceful pleasing shape surrounding the lock. It is a feature usually found on British guns as well.
Here is another example.
ZfCMaLk.jpg

Again notice the fairly straight top to the wrist angling down shortly behind the breech.
Now imagine what the wrist would look like if the barrel tangs on both of these rifles was a little straighter such that the ends stuck up 1/16-1/8" higher than they do. A mogul would form.
dave
Those are excellent examples of how I might go about thinning the wrist on my next Colonial. I did not even think about dropping. the tang angle a bit downward but it seems to really give more graceful lines. I think I got the idea of the heavy molding around the tang from some pictures of some early German rifles, though I can’t remember of any specifically. And the Brown Bess has a somewhat similar feature of that tang molding I guess. I like that mogul because it gives material to embellish with some carving, and by a hand such as yours it really becomes a lovely highlight of that area.
 
Those are excellent examples of how I might go about thinning the wrist on my next Colonial. I did not even think about dropping. the tang angle a bit downward but it seems to really give more graceful lines. I think I got the idea of the heavy molding around the tang from some pictures of some early German rifles, though I can’t remember of any specifically. And the Brown Bess has a somewhat similar feature of that tang molding I guess. I like that mogul because it gives material to embellish with some carving, and by a hand such as yours it really becomes a lovely highlight of that area.
Something I just thought about though- will bending the tang downward realign the tang bolt direction? If so you might need to adjust the through hole to the trigger plate, which also might be even more complicated because that hole is already aimed and threaded? I would be in way over my skill-set!
 
Hi Jim,
Flintandsteel was not offensive in the least. He and I are good friends and know each other from Dixon's.

PathfinderNC, bending the tang did not affect how the tang bolt fit. Remember, I am not bending much and some of the reshaping results from filing the end of the tang down a little. This stuff is subtle but at key points on a gun stock, subtle changes yield large results.

dave
 
Hi PathfinderNC,
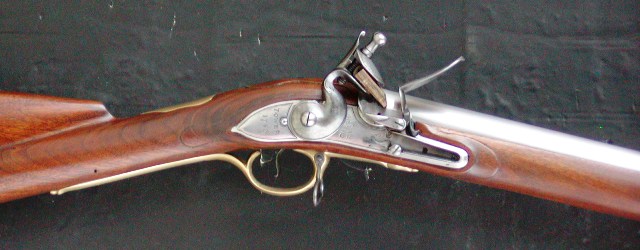
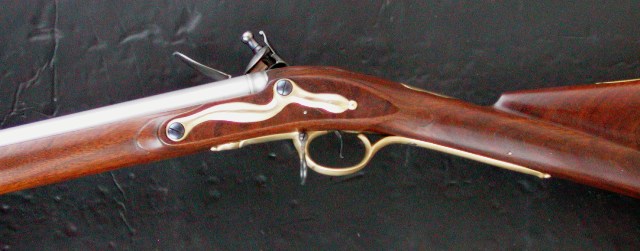
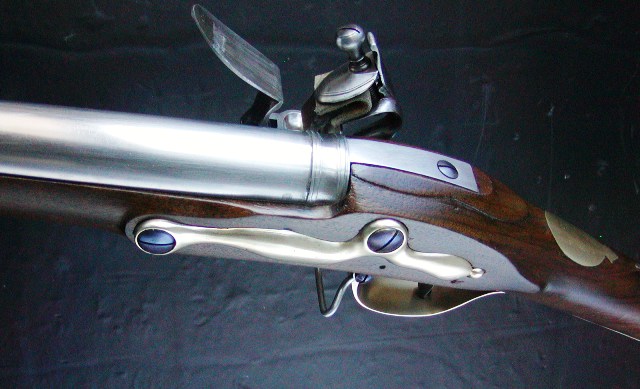
The Brown Bess is one of my specialties and keep in mind that apron has fairly low relief. Don't use Pedersoli or Japanese Besses as models. Here are historically correct examples including a carbine. The last photos show what I do to Pedersoli Besses to make them more historically consistent. I posted a thread on this website showing how I do this.
https://www.muzzleloadingforum.com/threads/new-reworking-a-pedersoli-brown-bess.107405/
JgsTGJr.jpg

TyOLtrW.jpg

ygg7TA8.jpg

4c0Z98H.jpg

f6H7ih2.jpg

MKPHkFI.jpg


dave
 
HI Dave
Your work is inspirational if also daunting to attempt to emulate.
May I ask. How do you get the carving to look alive?
I am still practising and as much as I can do a crude scroll it looks applied and flat. I was thinking of sanding the edges softly but am also reluctant to do so.
Looking at yours they seem to be rolled slightly, are they or is this an illusion?
 
Hi,
So I am working on the gun and thinking, "I am on vacation", only having to do what I want, like carving. Kibler & Co. took care of the grunt work. Then I get to the patch box lid and the brass end cap. The kit supplied a piece of sheet brass! What!! I have to make it? Are you kidding Mister Kibler cookie man? I was beginning to pretend I was a Millennial here, ya know! Now you expect me to actually make something? "Sheeesh!" as Jean Shepard used to say, :rolleyes:

Well I stirred myself from my fiercely defended lethargy and got some work done today. I started adding details to the stock. The fore stock needs little finishing other than sanding so I cut the fore stock moldings along the ramrod channel. With Kibler's machined stock, this was easy! Some folks use jigs to do this but I am much more low tech. I use an old marking gauge that was my great, great, grandfather's and mark the distance from the edge of the ramrod channel to the thimble pin holes. I want the edge of the molding to be lined up with those holes. Then I use the gauge to incise a deep line marking the edge of the molding.
lPKNTfe.jpg

I cut that line using an English checkering tool with long axis.
MSbrhrZ.jpg

Then I deepen the cut with a 60 degree Gunline checkering tool.
M2UH5zT.jpg

Next, I peel away the background to form a raised edge to the molding using a scary sharp dog leg chisel.
GP8IY5X.jpg

I clean up the edge and level the ground using a bottoming file.
WQKuJPA.jpg

Then I scrape off the tool marks with a 3-edged chip carving knife.
i9wfEax.jpg

I used those tools to shape the terminus of the molding at the muzzle end.
0mBpGwW.jpg


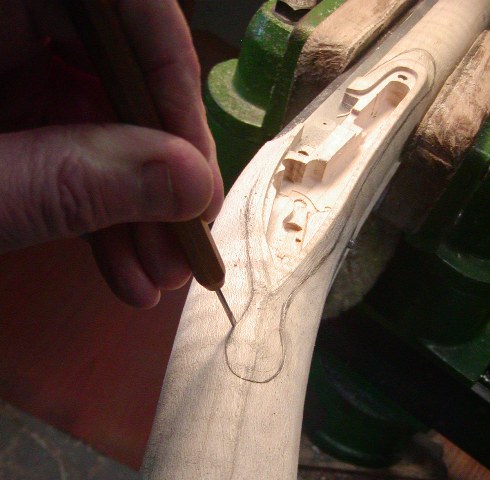
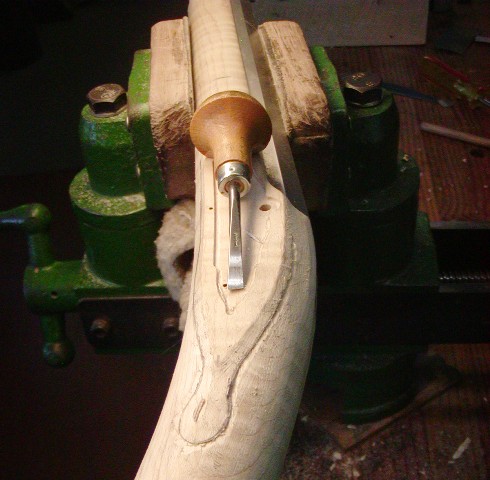
Next I cut the lock and side plate panel moldings. But first, I scraped and sanded the contours of the lock area to clean up the shape and machine marks. For those of you intending to make a gun from a rough stock, the level of shaping and smoothing exhibited by a Kibler kit is the point of shaping at which you should even consider starting to cut any moldings. I sketch the design on the stock. In this case I decided the "apron and beaver tail" should be long to match the long, narrow shape of the lock and side plate. I also made the tail and apron large because the wrist of the gun is large. I've seen some photos of Kibler Colonial rifle kits with thin, tiny beaver tails that are so obscure they remind me of "Where's Waldo" given the thick wrist of the Kibler rifle.

I draw the design, and then use my stabbing in chisel to outline it.
iDvqIX4.jpg

Then I back cut the edge with a small flat skew palm chisel.
tGkNADy.jpg

Now I want everyone to understand that my choice of tools is affected by my disability in my hands. I suffered severe frostbite several times during my mountain rescue days and have neurologic damage in my fingers. I rely on palm and micro chisels where others use full length tools just as well. My hands are extremely strong allowing me to use palm chisels effectively but they may not work on hard maple as well for others.
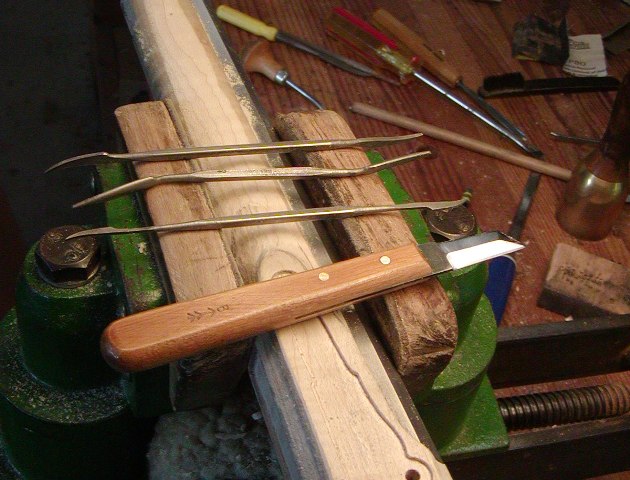
I clean up the cuts with a variety of tools including my chip carving knife and riffler files.
hkjJF7f.jpg

Here is where I am. I'll clean up the molding later as I finish the gun.
wWJUzph.jpg


dave
Beautiful Dave, you just stick with me, I'll get you through this, lol
Neil
 
Beautiful Dave, you just stick with me, I'll get you through this, lol
Neil

Hi Dave, was there a purpose for the tang Carving and relief carvings ? I had recently done a Track Bess and left a good amount of wood on it, it almost seems like the large raised beaver tail is done purposely to support the high barrel tang and dimensions.
 
Hi Lawrence,
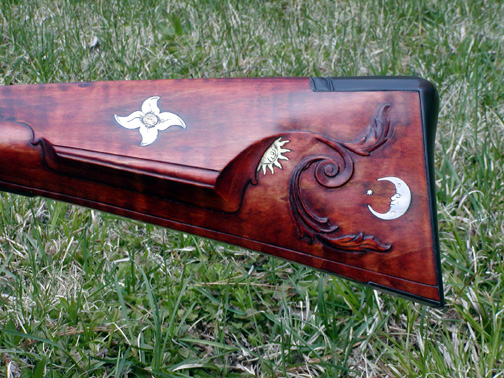
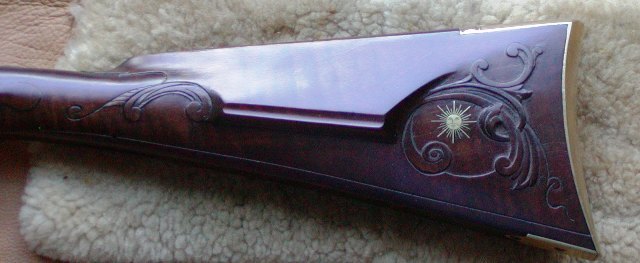
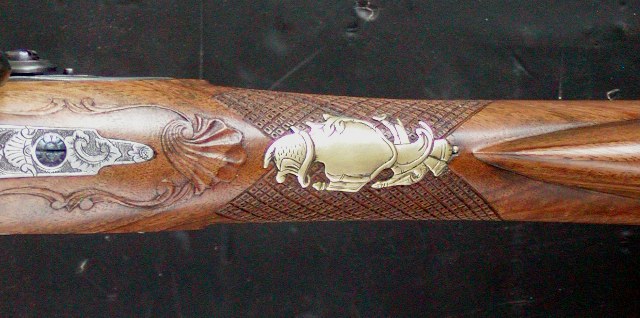
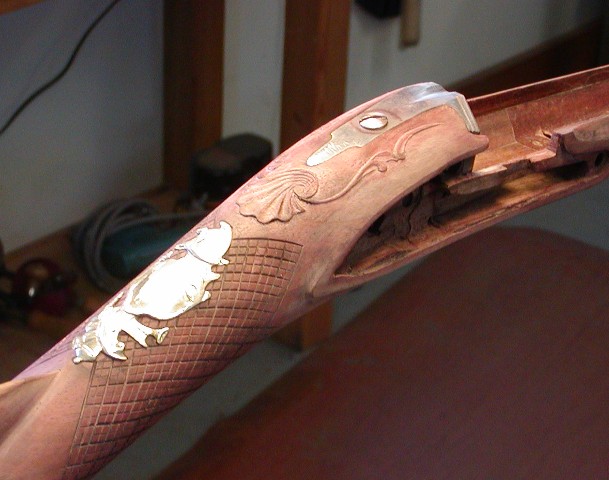
My answer to your question is a little complicated because it all depends on my objectives. The Edward Marshall rifle above was meant to look a little used and worn. Some of the edges of the carving that look rough or rolled can be attributed to the bone black glazing in the corners used to create the look of wear and accumulated "gunk". Same the the other rifle I showed. On those guns I did allow the carving to be rubbed back a little during the finishing process so it looks a little worn. However, on the 3 guns below, the top two of which are contemporary designed guns, I wanted clean, crisp carving with sharp edges.
Ni07lE1.jpg

7aA4KsN.jpg

MjhOD0I.jpg

9n11eOV.jpg


The bone black glazing effect is very striking and makes any corner or edge really pop. I am still feeling my way using it. Jim Kibler is a master of the technique. For a slightly worn look, sanding edges slightly or rubbing them back with maroon or gray Scotch Bright pads during the finish process works very nicely to give a mellow but bold appearance. On the bottom 3 guns, I highlight the edges in 2 ways. I stab in my carved outlines but after the carving is done I often use a tiny "V" chisel to incise the edges just a little and in specific places. For example, where I want the carving to appear to have depth and mass, I may incise the bottom of the edge quite strongly but not where I want the carving to seem light, shallow, and fragile. The other thing that I do, and it shows on the bottom photo of the rococo shell carving, is I take a 1/8" wide gouge with very shallow sweep, turn it over and punch a cut into the edge of the shell where it is raised. That undercuts the carving just a tiny bit, which darkens when stain and finish are applied. It really makes the shape feel 3-dimensional.

dave
 
Last edited:
Jim,
Dave knows I was just pokin fun at him!
I think it’s funny that others are being so encouraging at his ”first attempts “.
By the way, how about a tutorial on period wrist checkering? I’m currently getting together the parts for a Kuntz rifle.

Love ya Dave!
 

Latest posts

Back
Top