


Josh Smith
45 Cal.
- Joined
- Sep 24, 2010
- Messages
- 907
- Reaction score
- 0
Hello,
A while back a question was asked about lighting camp.
I responded with a comment about oil lamps.
Here is what I'm talking about:
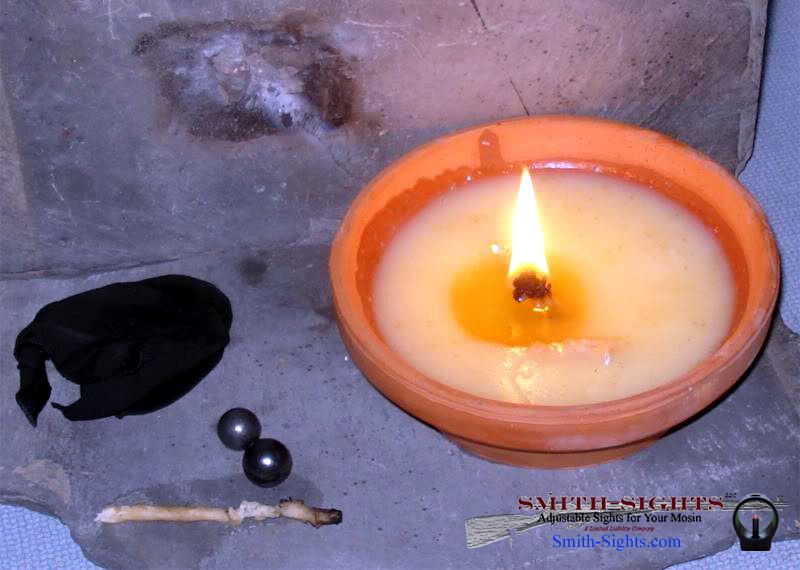
The earliest lamps were made using natural fibers and flammable fats. More of a candle than a lamp, it nevertheless worked, and worked well.

Here it is in the dark.
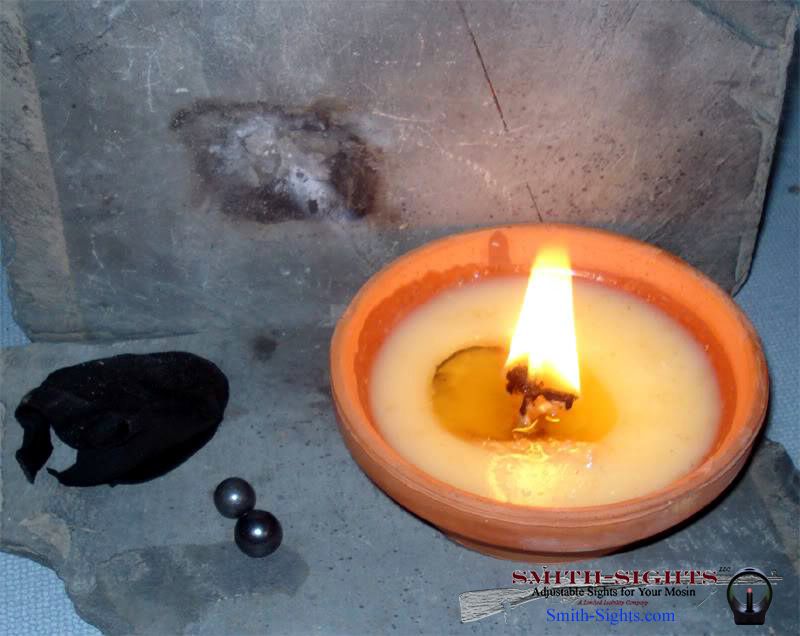
Need more light? Here's an extra wick thrown in.
The nice thing about these is that they tend to burn cool - I actually spilled some on myself when I was cleaning up, and it was just warm.
If I had done this correctly, I would have gone out, found clay, formed it, fired it (maybe, depending upon the period), and killed a bear to fill it. I would also have found hemp or another tough plant, braided it, let it dry, then treated it.
As was, I happened to have this ceramic - can't swear as to if it's clay - flower pot thingy out in the garage near my casting stuff. Don't remember where I got it or why. I do know it was there though, so I used it.
I had a coffee can next to the stove inside. It held the drainin's of all sorts of cooking: bacon, beef, chicken, hell, I dunno what all.
It was scooped out, melted, and poured into the clay vessel.
The wick really is the hardest part, and it's not all that hard. You look on the internet and you'll find all sorts of complex ways to treat the wick material. Not necessary at all.
Take a piece of thick weave cotton cloth, preferably uncolored and washed twice. Cut a long strip - twice as long as you want the wick to be - about 1/8" wide. Knot the ends.
Put the material in "just melted" beeswax. Don't get the stuff too hot. Put the wick material into the wax and let it set in there for a few minutes.
When you pull out the wick, pinch it between your fingers to wring out the extra wax. This is why I said not to get it too hot!")
Now you need to twist it. I made a long piece to I just chucked one end into a drill. If you're feeling frisky, you can do this by hand.
Spin the wick tight. Start bringing one end toward the other - the middle will want to twist together. This is what you want. (Remember I said make the wick twice as long as you'll want it? This is why).
Firm up that twist, wipe any excess wax off, and sink it into the (hopefully) still-soft fat. (If it's not still soft, just warm it up some).
Light it and see how it works.
I prefer to keep extra wick material around for transferring flame. I use small versions of this lamp (made from cap containers) to start camp fires.
If you can't risk a camp fire for whatever reason, throw a few more wicks into the lamp and use it to cook.
And, very importantly, as you cook bacon or whatnot, pour the grease into the side of your lamp.
This thing should last for years, and your cavemen forefathers will be proud of you.
Oh yeah, forgot: That slate I'm using, if you want it to direct light better, just use a piece of tin, or coat the slate with a thin sheet of lead.
Josh
A while back a question was asked about lighting camp.
I responded with a comment about oil lamps.
Here is what I'm talking about:
The earliest lamps were made using natural fibers and flammable fats. More of a candle than a lamp, it nevertheless worked, and worked well.
Here it is in the dark.
Need more light? Here's an extra wick thrown in.
The nice thing about these is that they tend to burn cool - I actually spilled some on myself when I was cleaning up, and it was just warm.
If I had done this correctly, I would have gone out, found clay, formed it, fired it (maybe, depending upon the period), and killed a bear to fill it. I would also have found hemp or another tough plant, braided it, let it dry, then treated it.
As was, I happened to have this ceramic - can't swear as to if it's clay - flower pot thingy out in the garage near my casting stuff. Don't remember where I got it or why. I do know it was there though, so I used it.
I had a coffee can next to the stove inside. It held the drainin's of all sorts of cooking: bacon, beef, chicken, hell, I dunno what all.
It was scooped out, melted, and poured into the clay vessel.
The wick really is the hardest part, and it's not all that hard. You look on the internet and you'll find all sorts of complex ways to treat the wick material. Not necessary at all.
Take a piece of thick weave cotton cloth, preferably uncolored and washed twice. Cut a long strip - twice as long as you want the wick to be - about 1/8" wide. Knot the ends.
Put the material in "just melted" beeswax. Don't get the stuff too hot. Put the wick material into the wax and let it set in there for a few minutes.
When you pull out the wick, pinch it between your fingers to wring out the extra wax. This is why I said not to get it too hot!
Now you need to twist it. I made a long piece to I just chucked one end into a drill. If you're feeling frisky, you can do this by hand.
Spin the wick tight. Start bringing one end toward the other - the middle will want to twist together. This is what you want. (Remember I said make the wick twice as long as you'll want it? This is why).
Firm up that twist, wipe any excess wax off, and sink it into the (hopefully) still-soft fat. (If it's not still soft, just warm it up some).
Light it and see how it works.
I prefer to keep extra wick material around for transferring flame. I use small versions of this lamp (made from cap containers) to start camp fires.
If you can't risk a camp fire for whatever reason, throw a few more wicks into the lamp and use it to cook.
And, very importantly, as you cook bacon or whatnot, pour the grease into the side of your lamp.
This thing should last for years, and your cavemen forefathers will be proud of you.
Oh yeah, forgot: That slate I'm using, if you want it to direct light better, just use a piece of tin, or coat the slate with a thin sheet of lead.
Josh

