• Friends, our 2nd Amendment rights are always under attack and the NRA has been a constant for decades in helping fight that fight.

    We have partnered with the NRA to offer you a discount on membership and Muzzleloading Forum gets a small percentage too of each membership, so you are supporting both the NRA and us.

    Use this link to sign up please; https://membership.nra.org/recruiters/join/XR045103

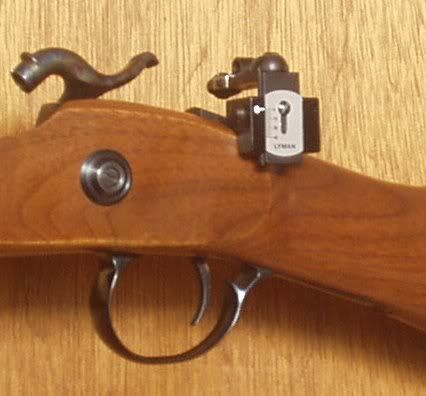
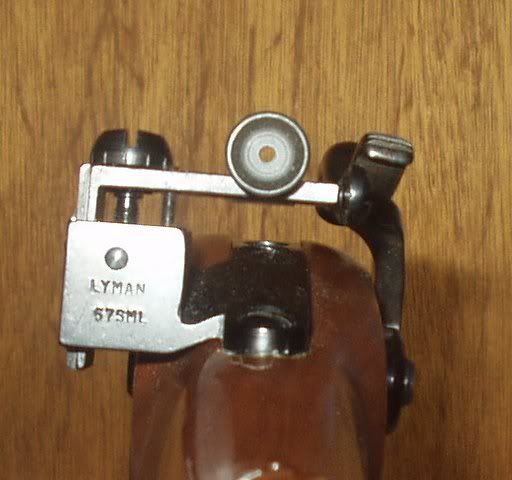
Lyman sight......

Muzzleloading Forum

Help Support Muzzleloading Forum:

This site may earn a commission from merchant affiliate links, including eBay, Amazon, and others.

Bill L.

32 Cal.
Joined
Jan 11, 2008
Messages
9
Reaction score
0
My old eyes are starting to go. I'm having trouble seeing the front sight.
I'm looking at the Lyman 57 GPR peep sight for my Great Plains Rifle. TOW has them in stock but indicates that if the rifle was made before 1997 I'll need to drill and tap a hole. How can I tell if I'll need this modification?
Thanks in advance for any help.
Bill L.
 
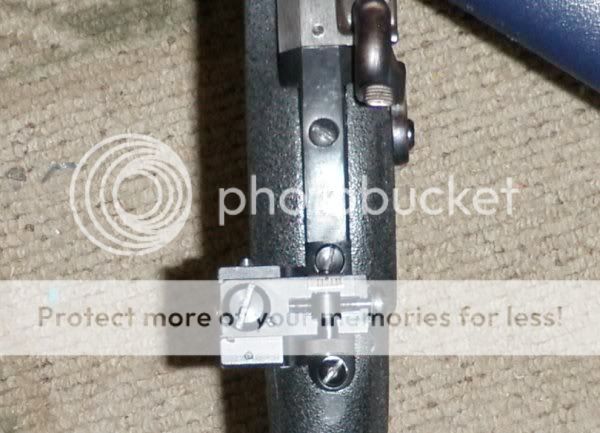
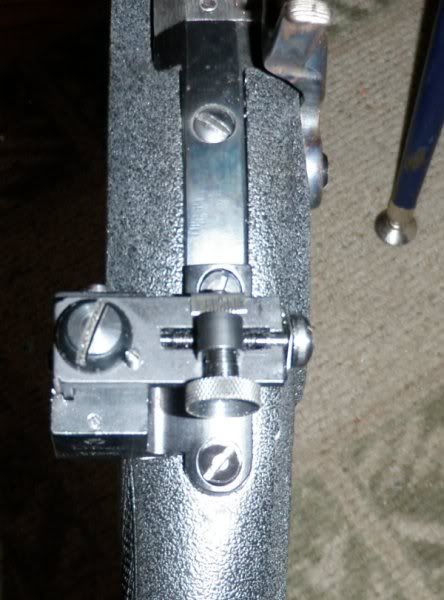
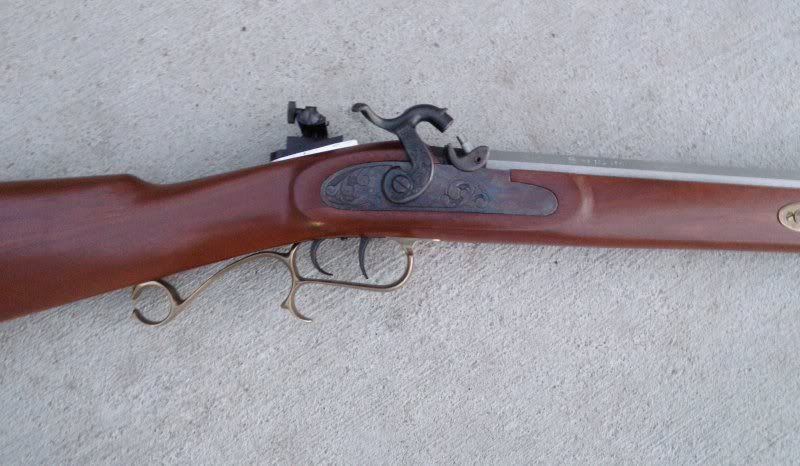
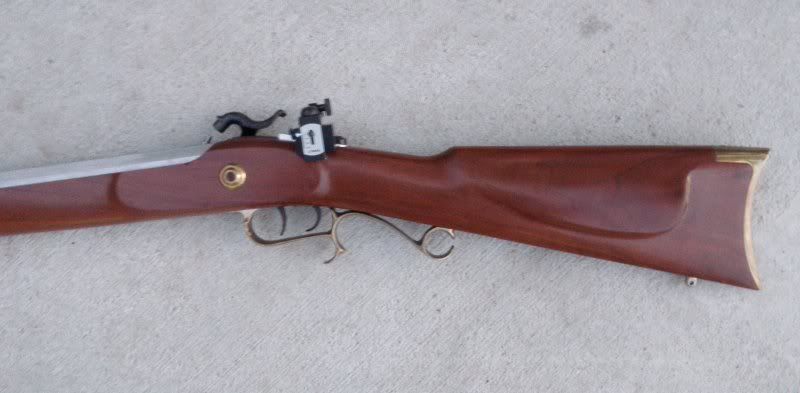
If it does not have a filler screw or tapped hole between the tang bolt and the far rear screw, it will need to be drilled and tapped. IOW, two holes in the tang; needs tapped, three holes in the tang, it's ready to rock.
 
You will like the Lyman rear sight. I have them on two of my rifles. Put the extra appeture in a plastic bag and then in the patch box. Williams ap;petures will also fit the Lyman as well as the TC peep sight. Midway sells them for anyone needed a different appeture.
 
My rifle only has 2 tang screws. :(
Is there any other peep sights that will work without drilling and tapping?
Again, thanks for the help.

Bill L.
 
The cost to have a hole drilled and tapped is around $15. If you ever care to remove the sight just put in a plug screw. I think once you get the sight installed you won't be removing it. Give the sight to the gunsmith when you have him drill & tap it. I have two of the Lyman peep sigts and both of the sights needed to be fited at the wood would not allow them to fit on properly. You want the gunsmith to remove some metal off the underside of the sight rather than remove any wood from the stock. This is a simple task for any good gunsmith as they have the tools for it.
 
Here is a piece from a full write up I did a couple of years ago for building Hot Ron Renegades and Hawkins. SO many guys were wanting to do it them selves that I finally wrote it up. It should give you an idea what it takes. It is not hard to drill and tap the hole. Getting it straight the first time is the only thing I can say to get it right the first time. If you use the masking tape edge for a straight line it works well. If you have any questions feel free to ask. Ron

--------------------------------------------------


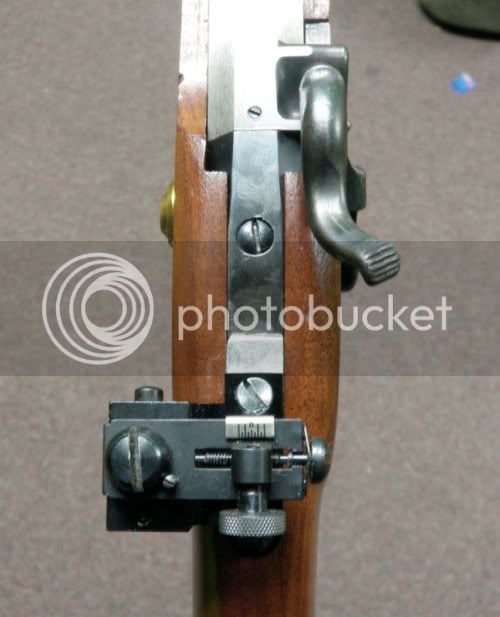
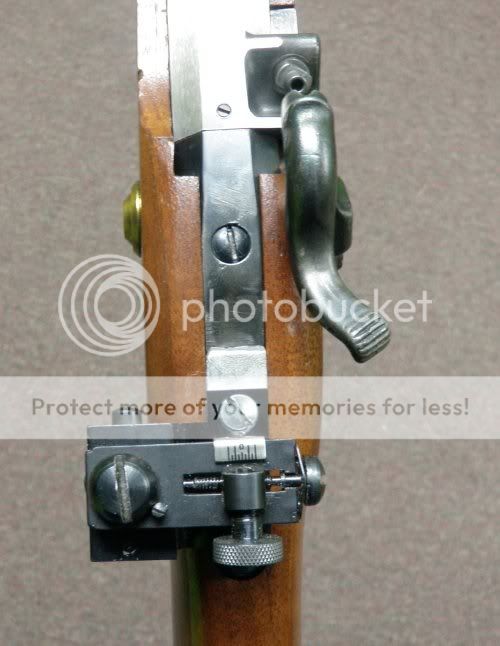
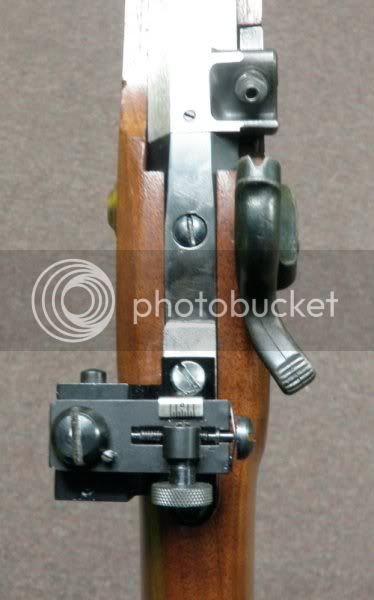
If a guy wants to install a set of Lyman Peep sights bending the thumb part of the hammer is a good idea since it allows for more room to cock the gun.

hammer02.jpg

hammer03.jpg

hammer04.jpg


Now to install the sights. First remove the old sights.

Putting a Lyman 57 SML peep on a TC has two options. One is some of them were already drilled and tapped for the sight, I have seen several. Option #2 is drilling the tang your self. I have done four now and if I can do it anyone can.
What I wanted to do was give you the idiots view of how to install the Lyman 57 SML sight. I took one of the plastic cases I got with one of my Lyman sights and made it a sight installation kit.
It has a # 29 S drill bit, S stands for short in the Brownells catalog.
Also the kit has an 8-32 tap.
And it has a small Tap Wrench.
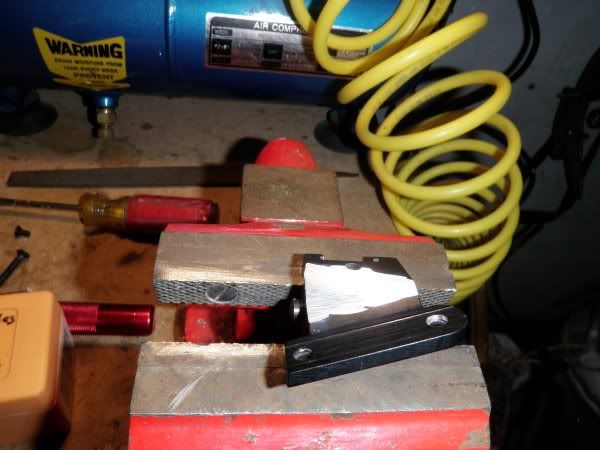
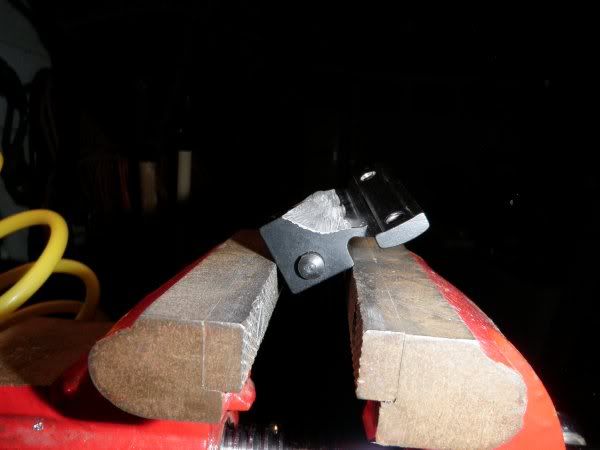
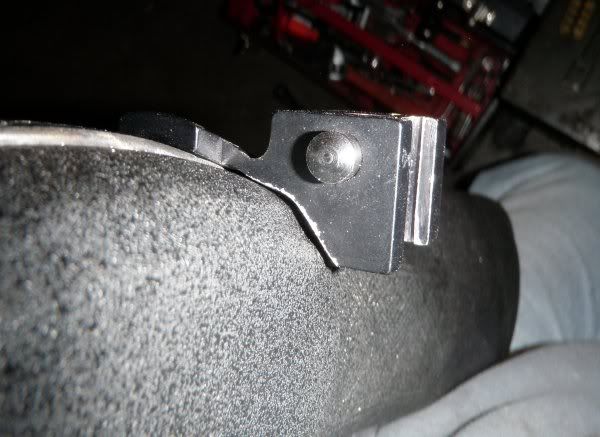
On The TC’s, and the Cabelas Hawken the sight base is too thick where it meets up with the wood next to the tang. I have seen this problem solved two ways. I have seen guys remove the wood and the way I do it. I remove some of the aluminum from the base so it will sit down all the way without touching the wood. I take the slider out of the base and gently sit the base in a vise and tighten it down. I use an Angle grinder to remove the metal. You can also use rat-tail files and bastard files. After I am done taking the metal away it looks like this.
CuttingBase1.jpg

CuttingBase2.jpg

CuttingBase3.jpg


Now to put the base on.
I start out by removing the rear screw and I set the sight base on the tang and then I put the screw back in but not tight. I line the sight up, and use a small punch to go through the front screw hole in the sight base to make a dent in the tang to start the hole to be drilled.
You can also put masking tape on the tang and draw a line through the holes. This will give you your strait line to make sure that the hole is drilled in a strait line with the other two holes in the tang. Then put the base on like I said above and mark the spot to be drilled.
Then I take the tang off the stock and lock the tang into a vise. Make sure you are drilling straight down. Then I use the tap to make the threads. Make sure you have the tap lined up like you just did the drill bit. Start the tap in, go a little ways and back it up. Then go forward again and back it up. Do this several times until the threads are cut. You MUST back up once and a while or you will break the tap. Also make sure you apply lube to help the tap cut.
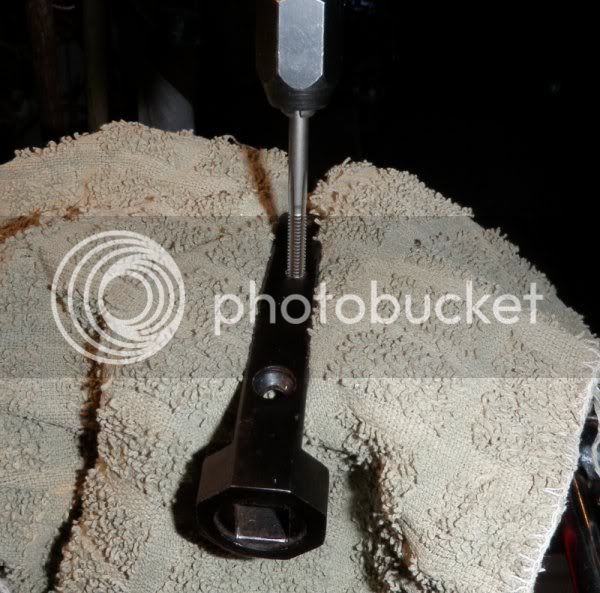
Threading.jpg


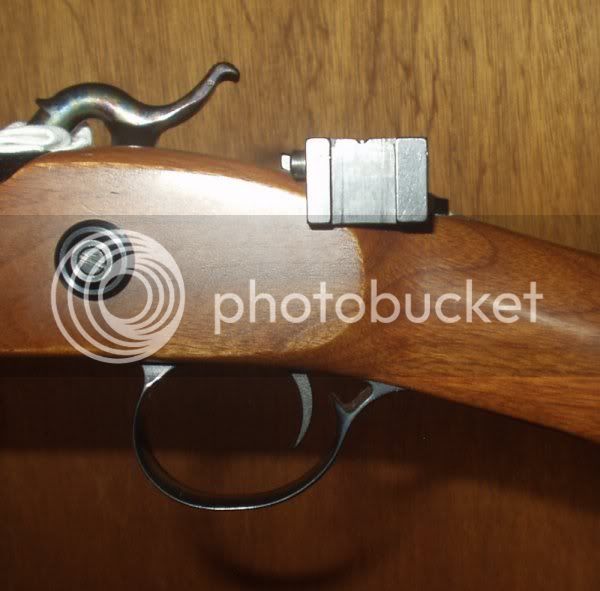
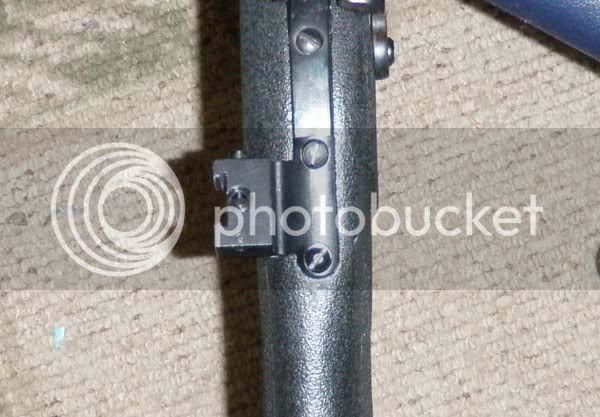
After I thread the screw hole in the tang I install the tang on the stock. I put the rear screw into the sight base, but not tight. Then I use a small shim to raise the front of the sight base. I used galvanized metal that was .0035 “ thick and a little narrower than the sight base. I didn’t like the way the sight tended to “lean forward” on the tang. After the shim the sight to me tends to move more vertical. After I got the shim under the screw I lined the hole, added lock tight to the screw and installed the 8-32 screw to the front of the sight base. Here is what the sight base looks like installed.

Stock6.jpg


basefinished3.jpg


A picture with the slider installed. Notice I added white paint to the 0 to make it stand out. Also I took the scale off the slider and used a drill bit to increase the length to give me a little more range.

Rearsight2.jpg


Sorry about this picture being a little cockeyed.
Rearsight.jpg


basefinished2.jpg


basefinished1.jpg


OK, What happens if I screw up and drill the hole in the wrong place?
Well several things can happen.
1”” If the hole is drilled left or right of the centerline the windage will not move at the right angle.
2”” if the hole is not drilled with the right amount of distance between the holes it will not sit down right. Even to the point of not being able to install with this hole.

If you drill in the wrong place DON’T WORRY!!!! Anything can be fixed.
First if you have a welder weld the hole closed. If you don’t have a welder most towns have a place that can do this. After it is closed smooth down the weld with a grinder and a file. Round two. Really watch what you are doing on round two. Check everything several times and drill again. After the hole is drilled in the right place and the metal is filed or grinded down. Apply cold blue to cover up the repair.
I have messed up plenty of times. In the end it is not that hard to install these sights.. Make sure to check everything and don’t get in a rush. I know I have probably forgotten something. If you are going to try this for your self and have any questions feel free to ask. These last pictures are my latest rifle. I used a spacer under this sight to give me some extra yardage. Ron


Hawken1.jpg


Hawken4.jpg


Hawken3.jpg
 
Use "cutting oil", sold where you buy taps, to lubricate the tap during turning. Not just any oil will work as well. The purpose of back turning the tap is to break free the new chips, in smaller pieces, so they flow sideways into the flutes of the tap, for removal. Turn 1/4 turn, then back up 1/8 turn, then go another 1/4, back 1/8, etc. Put a drop of oil on the tap after each backturn, so that the forward cutting teeth on the tap, which are doing all the work, are well lubricated, and those flutes get a little extra oil to flush those HOT chips down and out. Put some newspaper on the floor to catch the chips, and the dripping oil.

As with so many things, You Can't Use TOO MUCH Oil!

Yes, you can make longer turns with a tap, but you are working those cutting edges more, and risking breaking a tap when you do that. The smaller turns, and backturns, break off the chips of steel into smaller pieces, which then move more easily sideways into the flutes. Working those cutting edges more is how taps get dull( what good is a dull tap???) and dull taps are taps that can more easily break!

For people I train who are new to using a Tap, I have them look at those teeth on a brand new Tap with a magnifying lens. When they finish the project, I ask them to brush and clean out the threads of the tap, and then look at that edge again with a magnifying glass. If they have abused a tap with improper use, or not enough oil, it shows. :shocked2: :( :hmm: :thumbsup:

Ron: I do like your using shims to raise that sight base up, to give you longer range. Not everyone needs that, particularly if they continue to use PRBs. However, you are shooting Paper Patched Conicals, to reach WAY OUT there to kill Mule Deer and Elk in the Mountains of Idaho, and Washington, and that simply makes a lot more sense. I also like the idea of opening ( lengthening) the slot in the scale to give you more range.

In removing that extra metal from the aluminum base, I would be inclined to use a saw to make a series of cuts to remove most of the metal, as I would do in dovetailing a barrel for hangers, or sight bases, and then remove the rest of the metal with files. It can be done Just with files, but its a lot more work! :shocked2: :surrender: :thumbsup: :thumbsup:

Thanks so much for sharing this with the members.
 
I agree using files is hard for the full job I have done it. I use angle grinders now to take off what I want and finish it up with a file. Ron
 
Angle Grinder- Now there's a nice tool. I was thinking merely in terms of Hand tools that have no power to them other than sweat! Aluminum is soft enough that you can saw through it fairly quickly, and parallel saw cuts will remove a lot of the waste material. Following up with rasps, and then half round files gets the work done with the least amount of "sweat". :grin: :v
 
I didn't need to drill and tap a hole in the tang as it was already there. I also didn't need to do anything with the hammer as it was an older style that is straght up rather than the newer king which is angled back. I've had very good luck with the Lyman rear and front sights. I agree removing wood to get the sight to fit is not the correct answer. The removal of some metal from the sight works best.
 
Back
Top