• Friends, our 2nd Amendment rights are always under attack and the NRA has been a constant for decades in helping fight that fight.

    We have partnered with the NRA to offer you a discount on membership and Muzzleloading Forum gets a small percentage too of each membership, so you are supporting both the NRA and us.

    Use this link to sign up please; https://membership.nra.org/recruiters/join/XR045103

Making a fine mid-18th century English rifle

Muzzleloading Forum

Help Support Muzzleloading Forum:

This site may earn a commission from merchant affiliate links, including eBay, Amazon, and others.
Joined
Nov 26, 2005
Messages
5,224
Reaction score
10,884
Hi,
I originally posted this in a thread started by Brokennock but I thought it would be better to continue the saga in a separate thread. I am repeating some of what I already wrote and will be adding a lot of new material soon. The purpose of this thread is not to document another project but to show you how I do some of the hard stuff that nobody else posts such as, intricate wire inlay, intricate inlays, engraving, and wood carving. I am not going to discuss basics. You can get that from other threads and tutorials, books, CDs, and on You Tube if you are careful. I will also eventually post this on the ALR site as well.

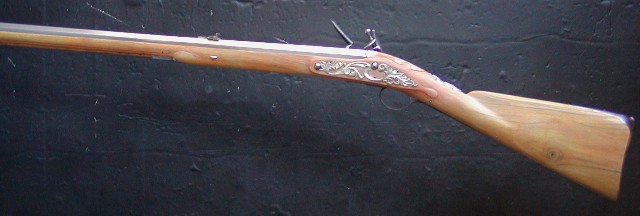
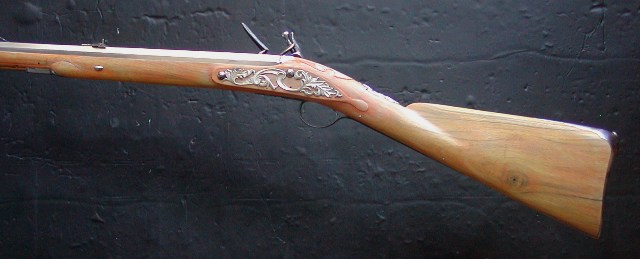
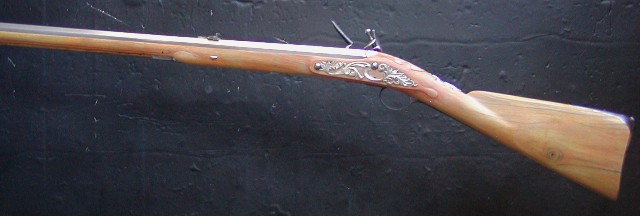
This is a project I wanted to get to for a long time but always something else got in the way. I finally decided to just do it despite my queue of other work. I am restocking a mid-18th century English rifle that I built some years ago and was never happy with (shown below).
ECBBeBi.jpg


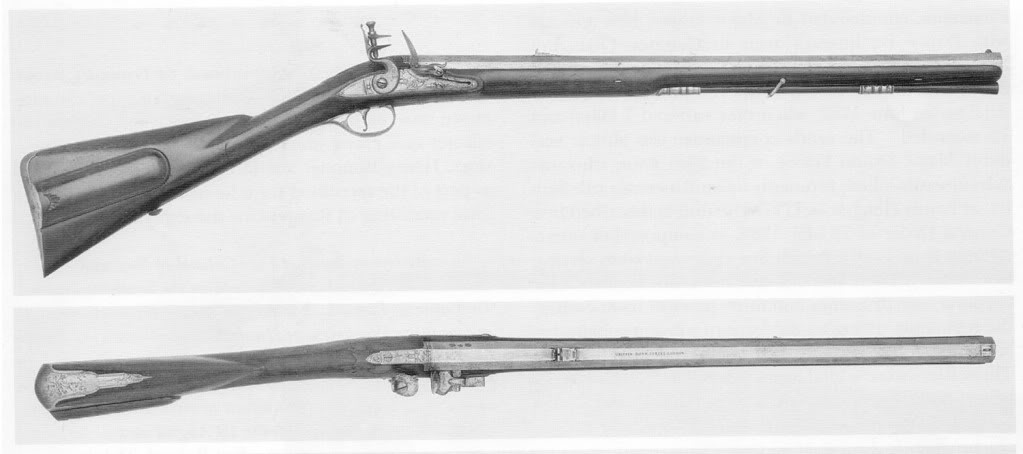
The stock had way too much drop. I copied an original rifle (pictured below)
1c48U57.jpg


thinking it would fit well but after pairing down the stock it was apparent the drop at heel was too much and my cheek could never get a solid position on the stock. I was able to shoot it fairly well but I was disappointed in my choice. I had made a mistake. So, I am restocking it using a different design more closely inspired by the famous Turvey rifle in RCA #1. This gun will be a pleasure to shoot. It is difficult to make these early 18th century English rifles because the British did not make many and there are very few that have survived. In fact, I am aware of more early to mid 18th-century English rifles that are breech loading screw plug deer park rifles than more traditional muzzle loading designs. There are plenty of late 18th and early 19th century English rifles for study but they differ a lot from those made earlier in the century.

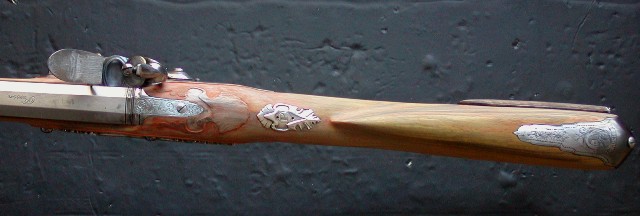
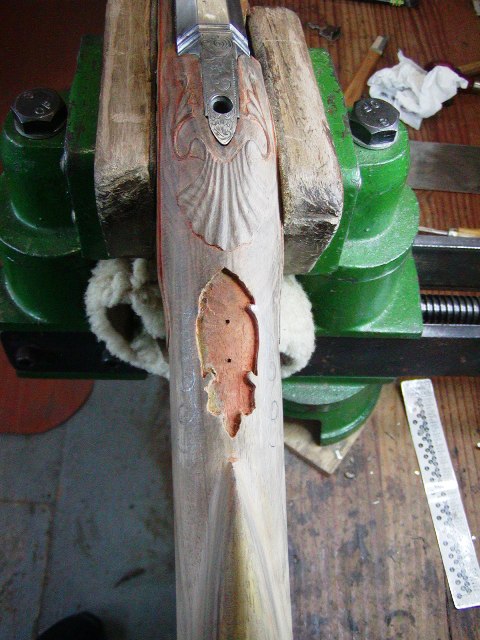
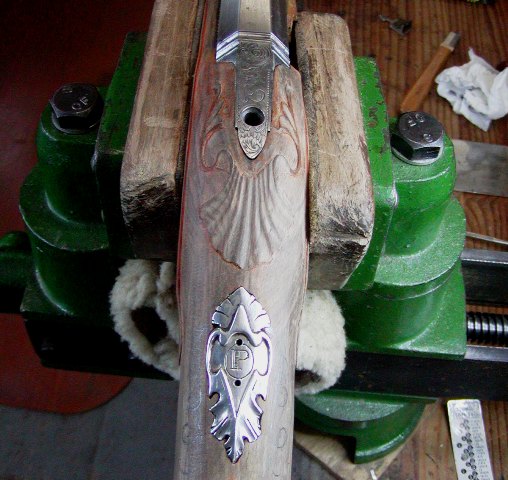
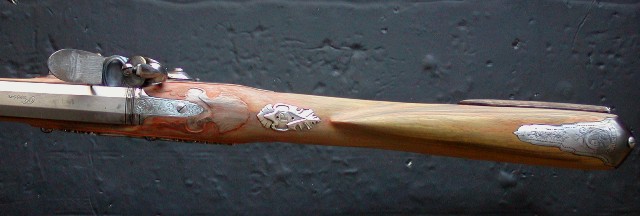
My rifle uses a 31" Rice Jaeger barrel in 62 caliber, a Chambers round-faced English lock, a "Dubbs" longrifle butt plate heavily modified by filing and welding, a modified steel early husk trigger guard from Chambers, steel pipes, and rear folding leaf Jaeger sight. The rifle uses barrel keys and a hook tang and breech modified from one that used to be sold by TOW for 1 1/8" barrels. It required shaping the tang and adding a proper cross pin lug on the bottom of the standing breech to match the originals. Pretty much everything else is hand made. The lock plate was shortened by 1/4" and angled slightly down to the rear to get the wrist architecture right. I wish that Chambers lock was 5 5/8" long rather than 6" because it would be far more versatile. The stock is English walnut that I bought from Dave Rase. It was originally full fowler length and inlet by Dave for a 44" octagon/round fowler barrel. However, it had some problems. After sitting in my shop for a year it developed a horrendous twist and warp as well as a crack in the butt stock. It also had some old powder post beetle holes and a couple of poorly positioned knots. Nonetheless, they were nothing I could not fix so I chose to use it for a short rifle instead, which solved the twist and warp issue and cracks, knots, and beetle holes were either cut away or stabilized, strengthened, and filled with Acra Glas. The yellow and orange colors you see are from water-based stains I use during whiskering that reveal scratches and rough spots more readily. None of the old color will remain when I am ready to stain the stock with alkanet root.

UHbXqwQ.jpg


tsPWh7H.jpg


qMrLpSH.jpg


sJV5E8v.jpg


LxtktDG.jpg


ofHT0ir.jpg


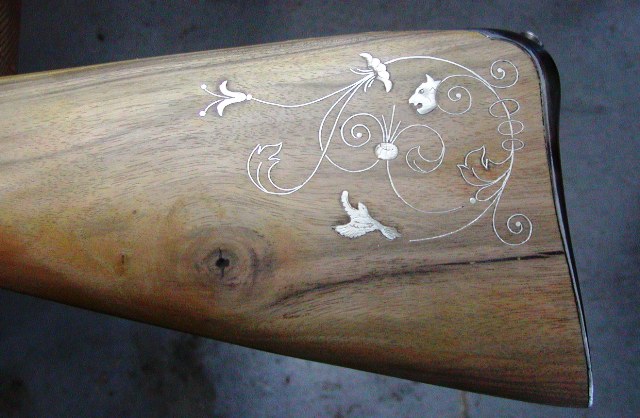
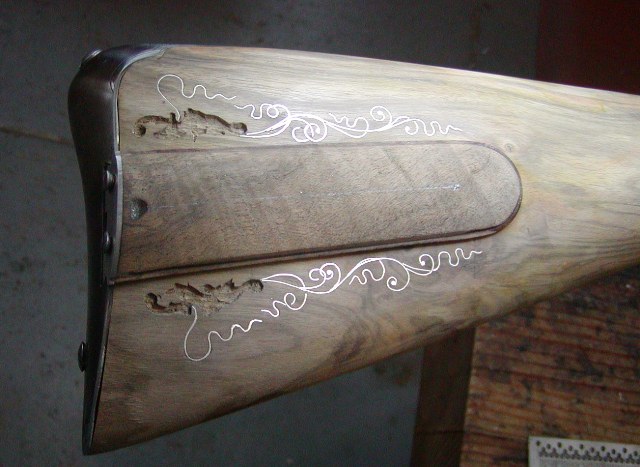
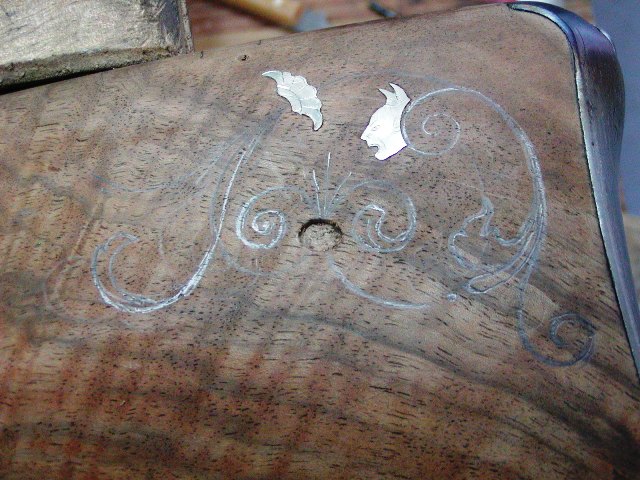
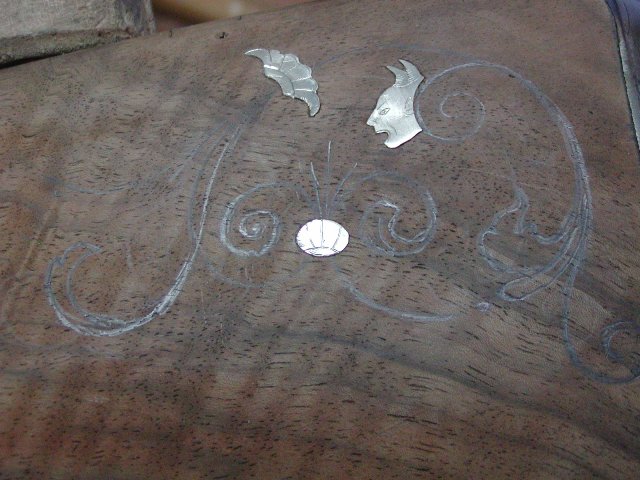
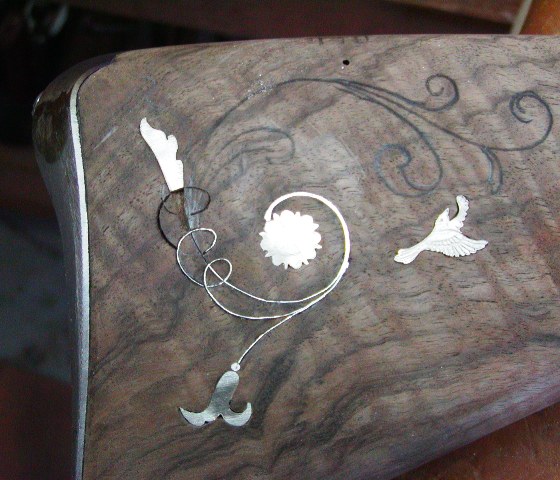
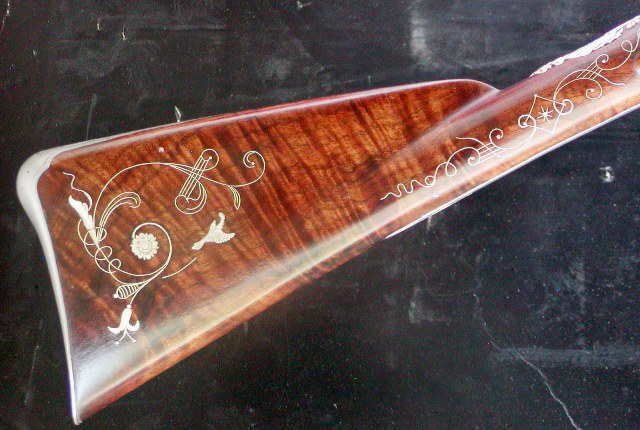
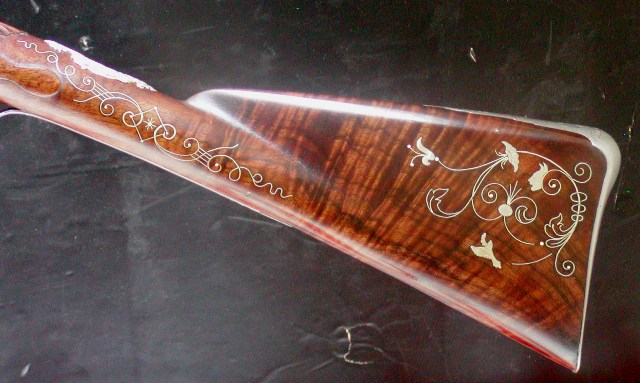
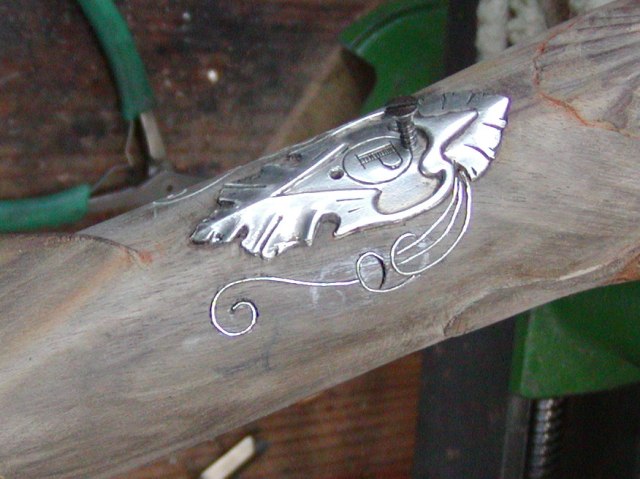
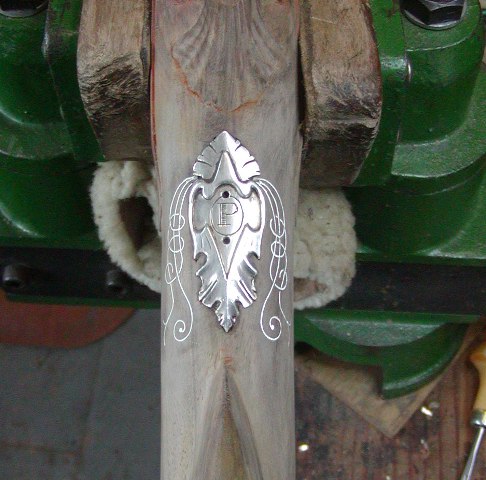
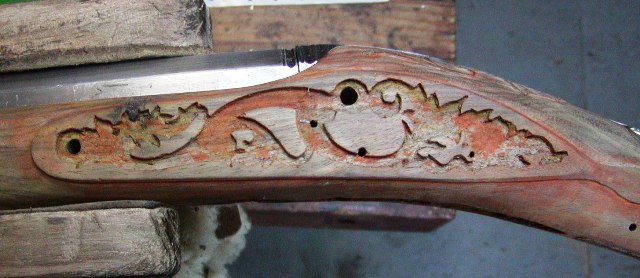
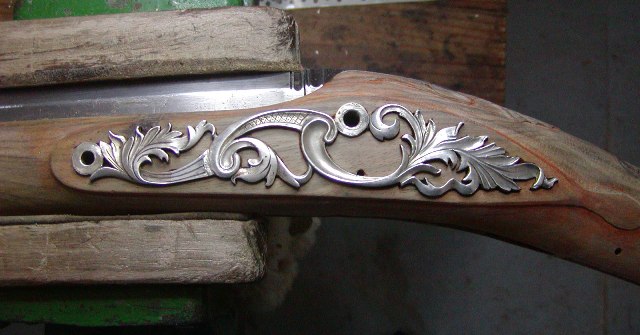
This rifle has some intricate inlays and silver wire work. I will show how those inlays were made and finished.
2vU9XQA.jpg


9x9WyO5.jpg

TOJFD6W.jpg

bb504O5.jpg


Atd0wnV.jpg


5c1NI8h.jpg


Raex9HH.jpg


MxW17UI.jpg


I will show how those intricate inlays were made and inlet and how I did the complex silver wire work. I will also so how I carved the stock. Throughout all I will discuss the historical context and designs.

dave
 
Hi,
I will be posting a lot very quickly. If you want to really learn, read everything. First, I want to briefly discuss the design of the rifle and how it fits in the time line of British gun making. There was not much of a sporting or military rifle culture in Britain throughout the 17th and 18th centuries. Quite a few early breech loading turn off pistols were made that were rifled during the 17th century and there were some "deer park" rifles made for those few who owned or had access to lands where red deer roamed. Nonetheless, production of sporting rifles was very small compared with smooth bored fowling guns. The few rifles made were generally for wealthy customers and very few if any "poor boys" were produced. When British gun makers made rifles, they usually borrowed a lot from the short barreled German jaeger hunting rifles. Indeed, some early 18th century English rifles used barrels imported from Germanic principalities (note I do not write Germany because there was no nation of Germany until the 19th century). A large proportion of those rifles made in England were breech loading using screw plugs that opened the breech either on the bottom or top of the barrel. It is hard to find many surviving muzzle loading rifles made in Britain during the first half of the 18th century. Apparently, the London gun maker William Turvey and his son made a few and some were sent to America. Philip Ludwell Lee of Virginia thought highly of rifles by Turvey (jr) considering them better made and more accurate than local Virginia-made products. I assume the Turvey rifle shown in RCA #1 is a classic example of his family's work and representative of a style described by John N. George in his great book on English guns and rifles. The design is much like the Brown Bess muskets of the time. There is a defined baluster or hand rail wrist and the comb is almost parallel with the bore of barrel. In addition, during the first half of the 18th century, round-faced locks were used on all grades of guns. That is not the case after 1770 when virtually all high quality guns had flat locks. So here is the rifle I am building.
mSTT2VT.jpg

ei39JHf.jpg

y5aITXd.jpg

kiOXlvq.jpg

mSTT2VT.jpg

Note a few details. No cheek piece, tall butt stock that looks a bit like a Brown Bess, a little swell at the rear ramrod pipe like a Bess, a short barrel big at the breech, no muzzle cap, a hook tang and breech with barrel keys, not pins. From now on, I will refer to a hook tang and breech as a standing or "break off" breech. Also note the the lower edge of the stock tapers down slightly from the rear ramrod pipe to the trigger. The stock is widest vertically at the breech and tapers to the comb. A key to the formula is to draw a line along the comb and it should pass right through the tumbler screw for the flint **** and just under the pan. That formula is also true for Brown Bess muskets. Moreover, the angle of the butt plate is almost perpendicular to the comb line.
2sIiDs4.jpg


That establishes the basic parameters for many early 18th century British rifles to be modified by fiitting the gun to the owner.

dave
 
Hi Folks,
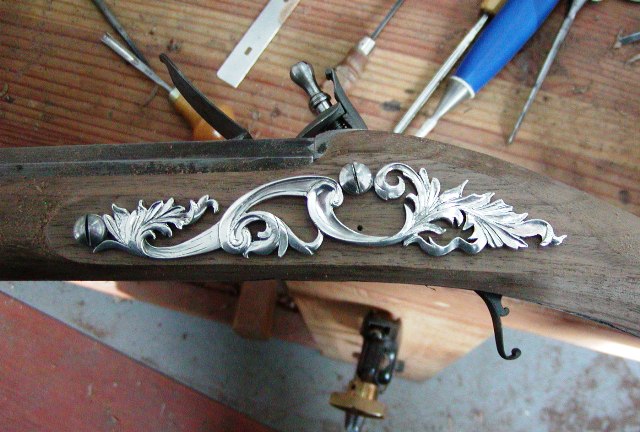
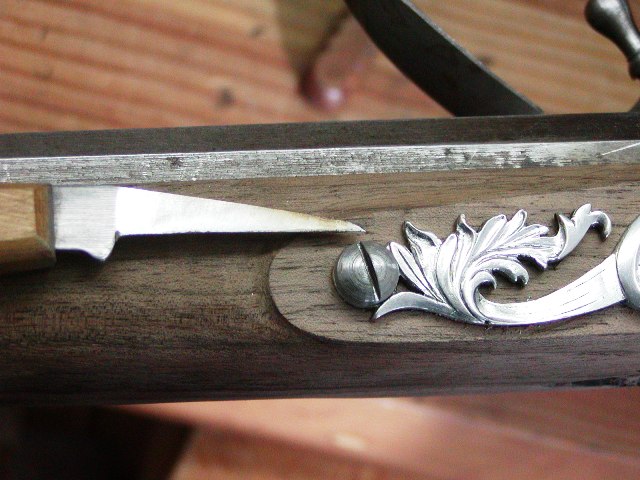
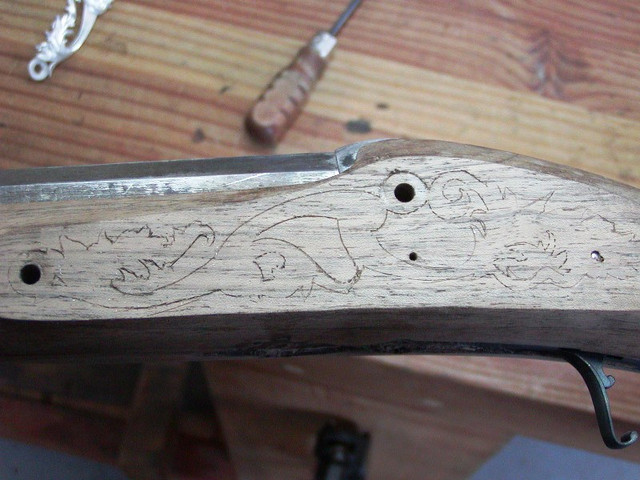
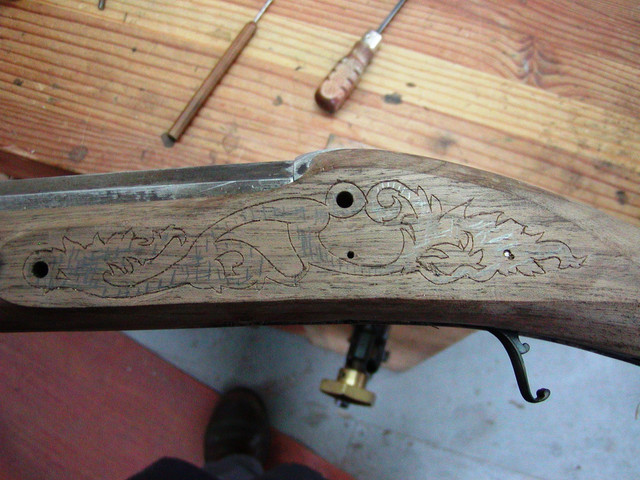
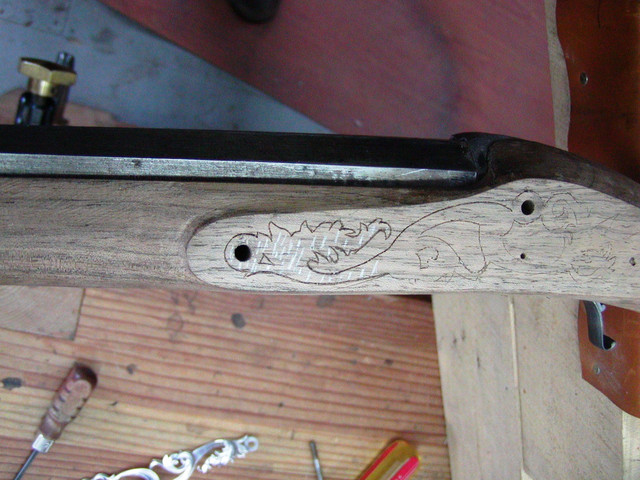
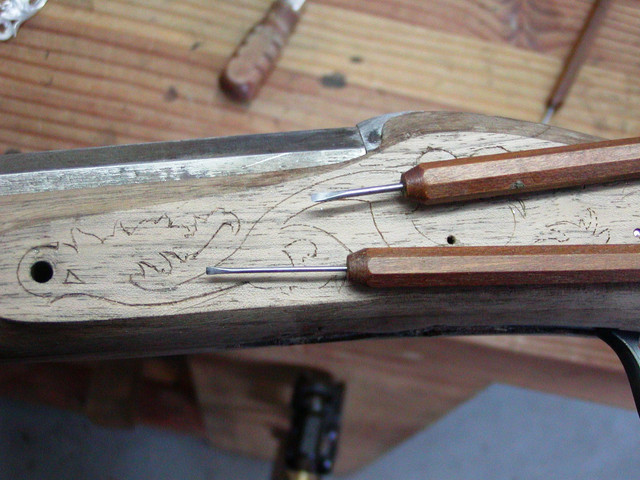
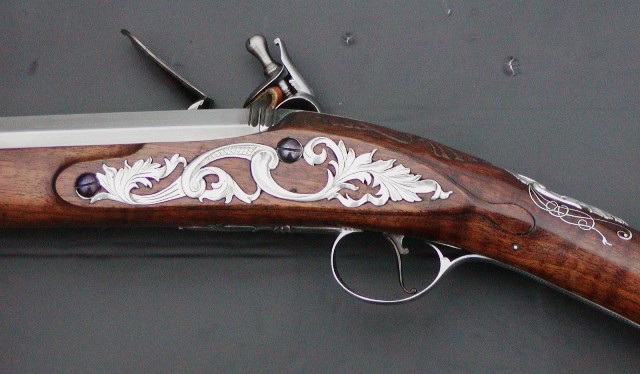
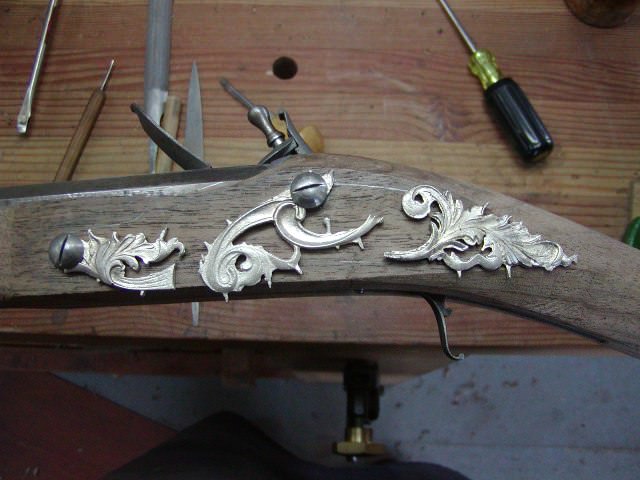
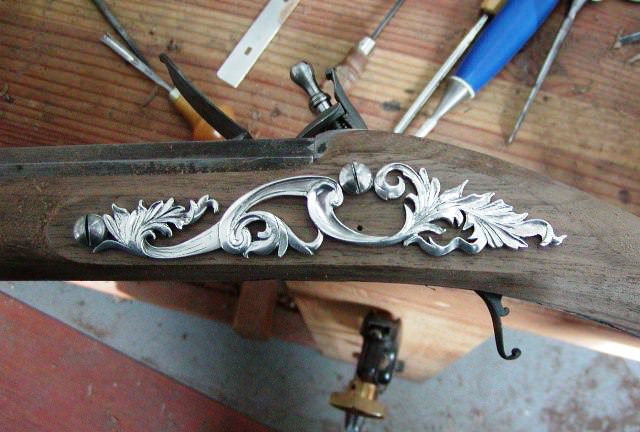
This post shows how I inlet the intricate inlays you see on this rifle. These photos are of the matching fowler I made several years ago but they show the process used on the current gun. Here I inlet what is arguably a most challenging side plate. Possibly, as difficult as any of you will ever encounter. The first step is to accurately outline it on the stock. I have 2 carving knives that I use for that purpose. One is just a skew knife with a sharp point at the end. The other is a chip carving blade that I modified such that it can scribe a line in tight corners and stab in a line where needed.


I outline the shape and then stab in the edges. Notice that I drew pencil lines on the wood to be removed. I find that invaluable on complex inlets and it prevents tears when you remove the wrong wood.


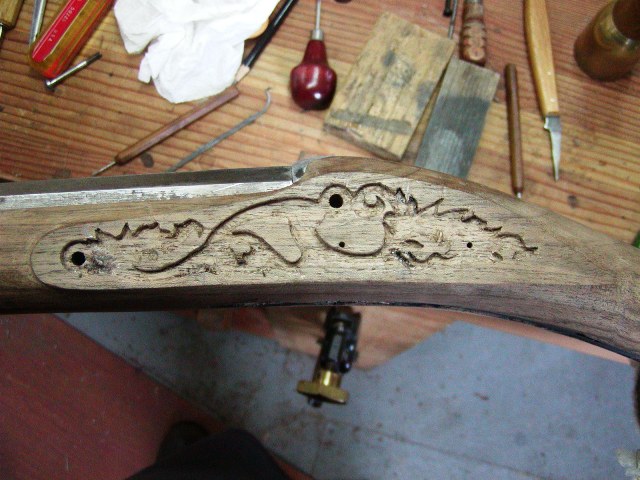
Then using micro chisels, I stab in the outline more deeply.


Then using small and micro chisels,


I clear away the wood in the mortise. In really tight corners just take your tiny chisel and mash it into the wood to be removed until it is pulp that can be scraped out.


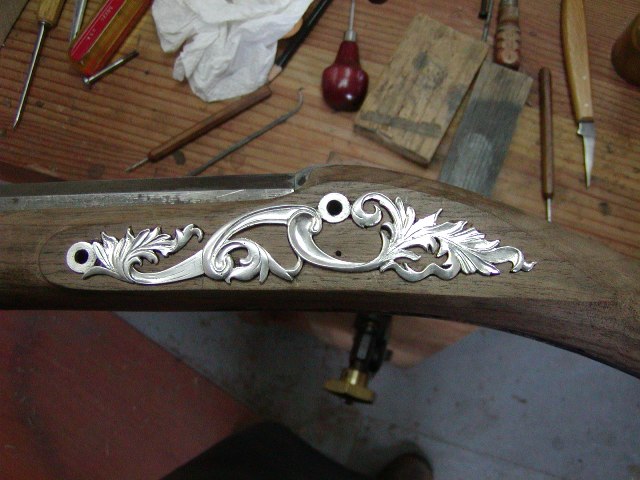
These delicate inlays cannot be tapped in with a mallet. They must just require finger pressure to install in the mortise.


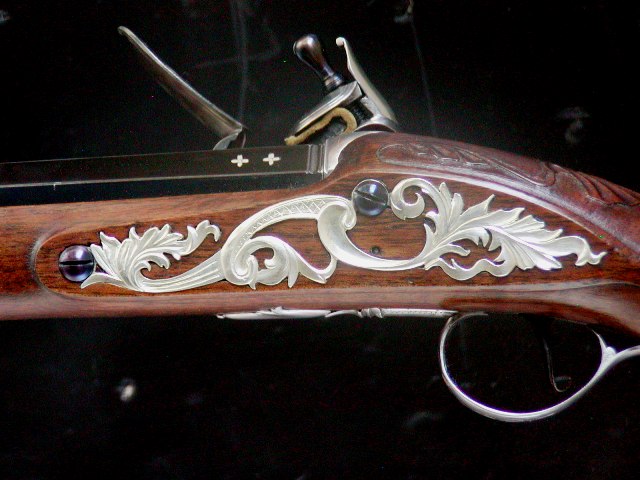
And there you go.


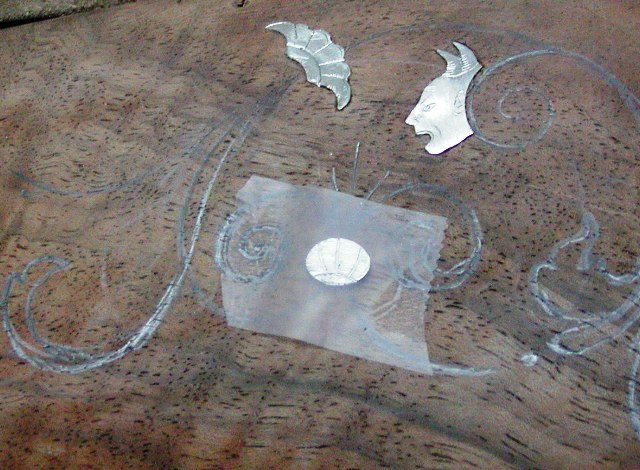
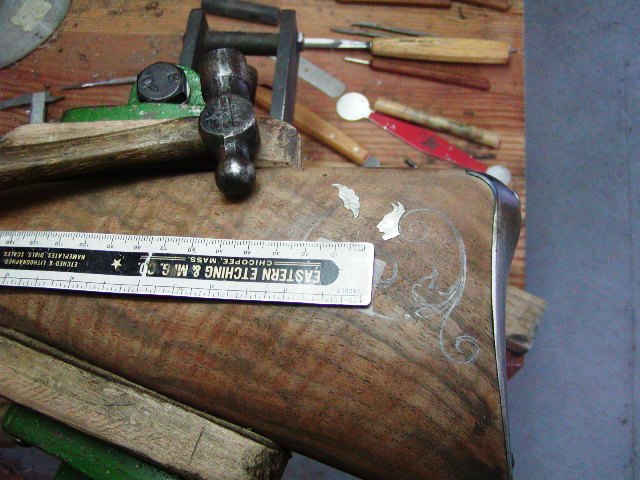
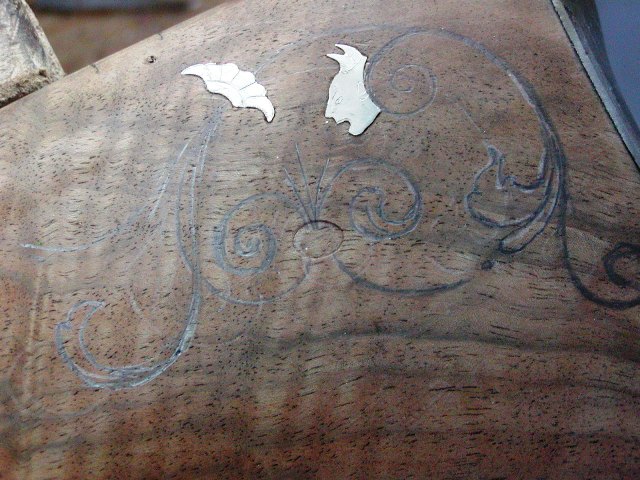
Very small and complicated inlays can also be a challenge just marking tracing their outlines on the wood. Here is a trick I learned from David Price that makes that task easy. Use Scotch tape to hold the inlay on the wood and then place a flexible metal ruler over it. Give the ruler a good smack and the inlay will be marked on the stock. Then use tiny chisels to cut the mortise.


A couple more tricks I learned. Stab in the edges of inlay mortises and really be firm when two edges are converging into a point. I make absolutely sure that I stab that point firmly. If you do that, when you back cut to remove the wood in the mortise you won't have to try and dig into the pointed area to remove the wood. It will pop out in front of your chisel. Secondly, don't obsess overly about small gaps. They will almost always disappear when you stain and finish the stock. Finally, you have to be very careful about installing delicate inlays and then removing them while making the gun. I do not push them home in the mortise until final installation. I just press them firmly with fingers so they still mark tight spots in the mortise edges but not any harder. I clean the edges with my stabbing chisels as best I can. Sometimes I final sand and scrape the stock with the inlay removed, then stain and put on a couple of coats of finish. Then I position the inlay in the mortise and squeeze it all the way home using one of my leather padded pattern maker's vises. After that, the inlay is never removed again and I complete the finish with the inlays in place making sure any finish that slops on to the inlay is wiped off completely before drying. However, for really small inlays that are just glued in place, I sand the stock and then epoxy the inlay in place after I've engraved it and before I apply any stain or finish. I clean up any excess glue and then carefully work around the inlays for any final scraping and sanding. A small skew chisel is very useful scraping wood around those inlays.

dave
 
I've pondered the extreme drop in some English guns. A friend has an original Bailles of London fowler, that you can barely make chin contact with the stock. Definitely made for "heads up" shooting.
 
Hi Folks,
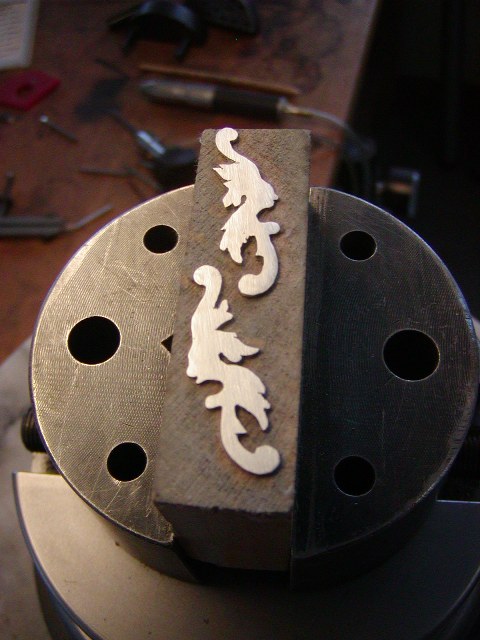
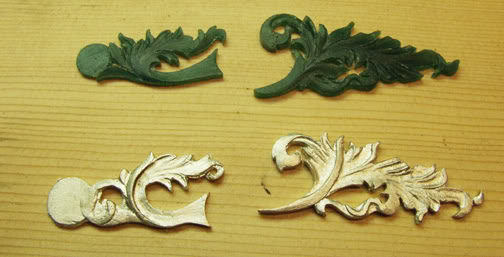
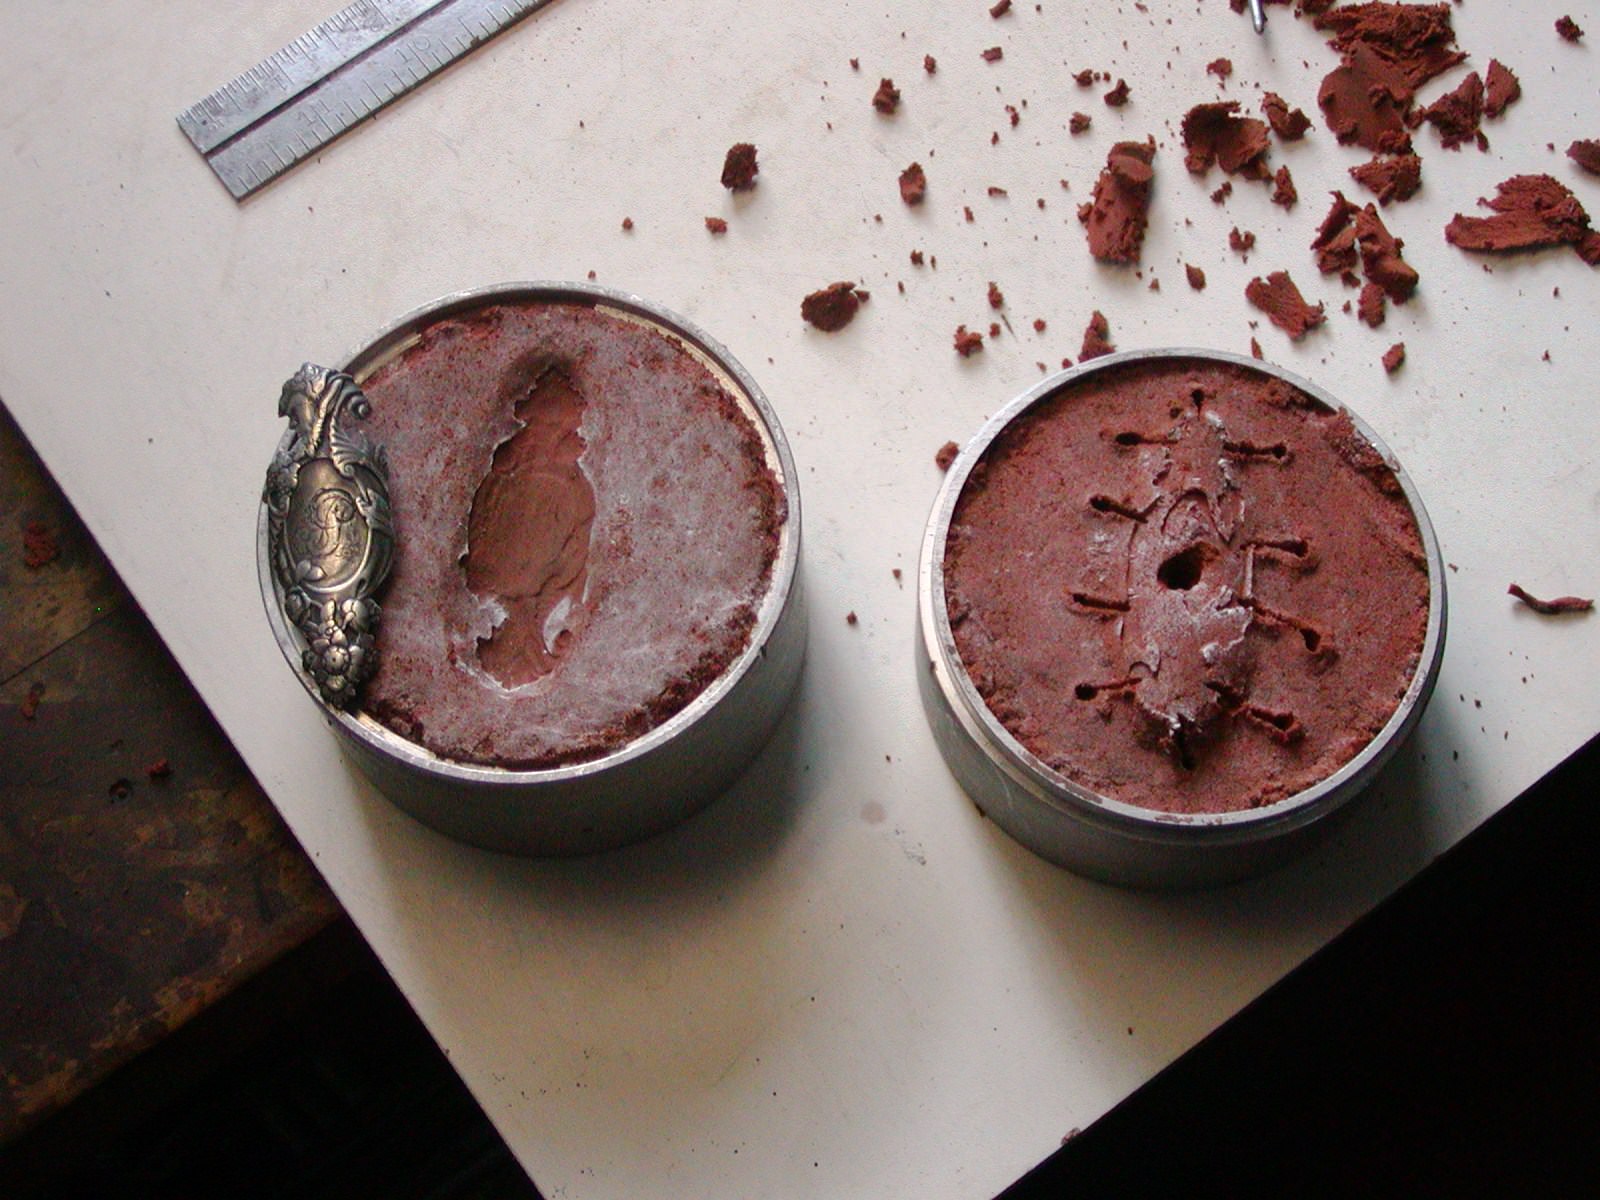
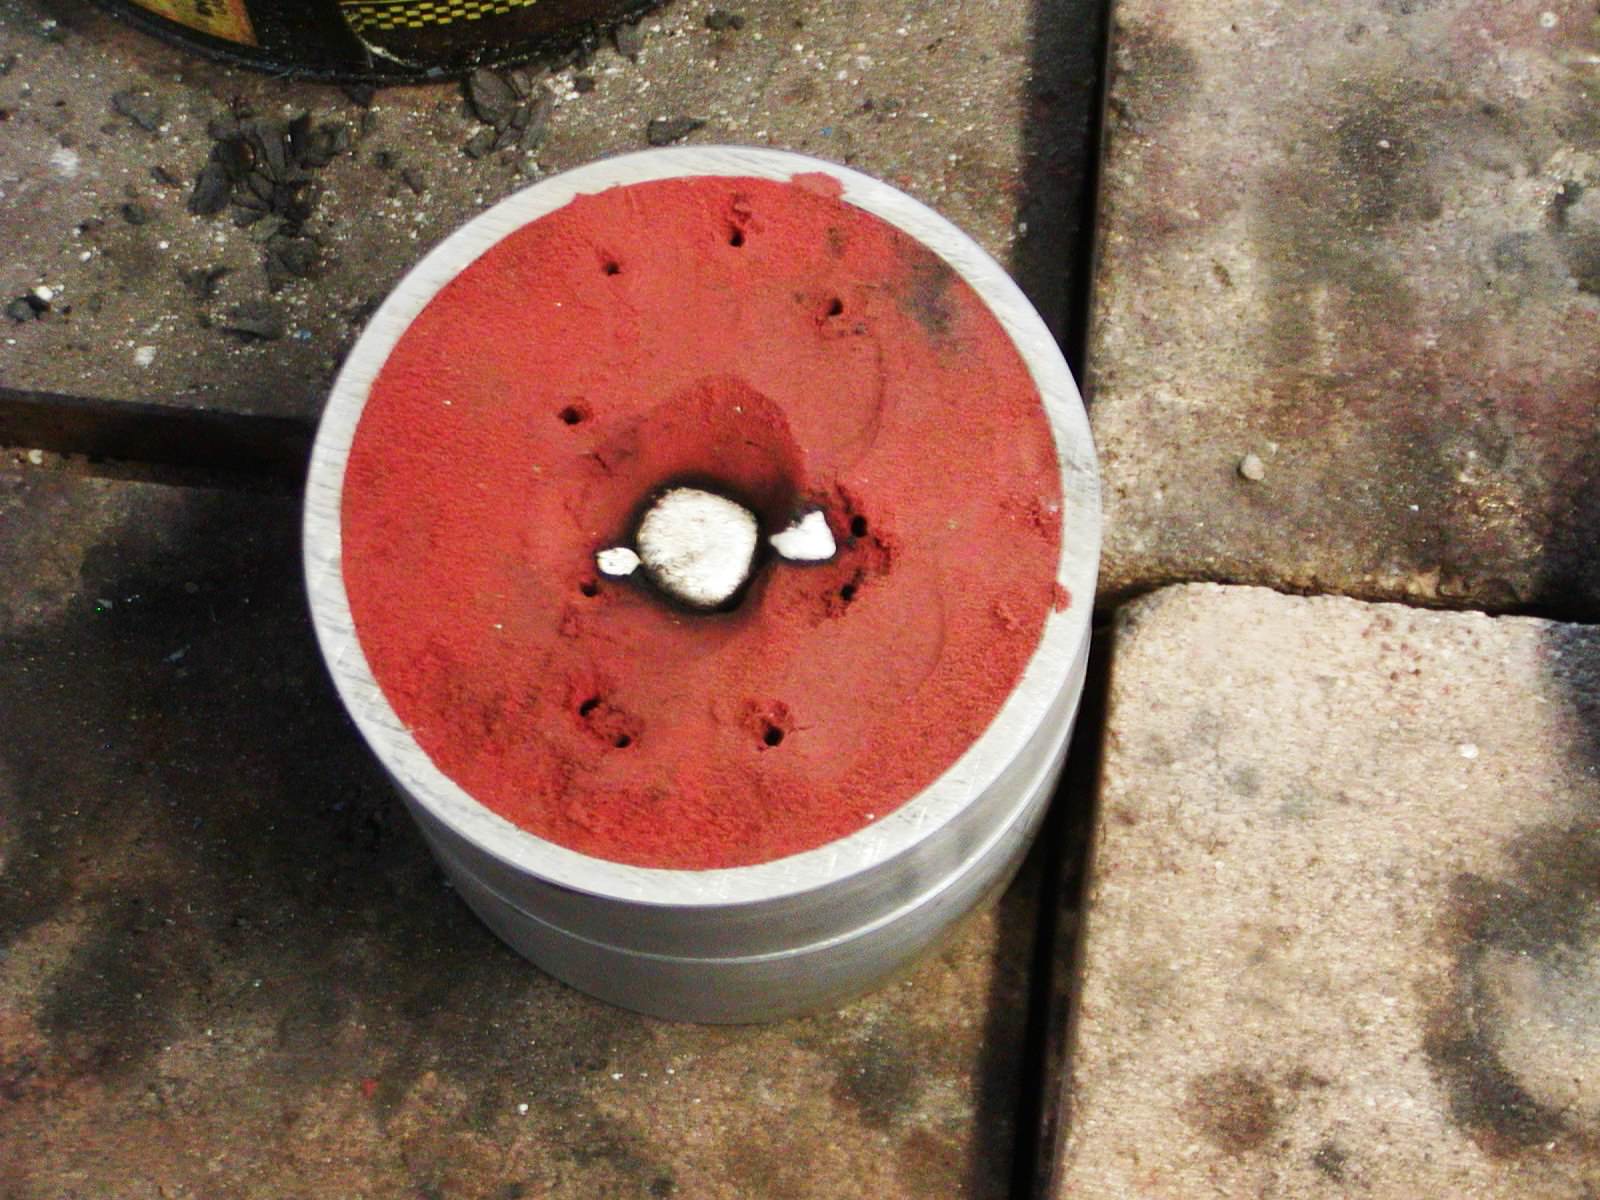
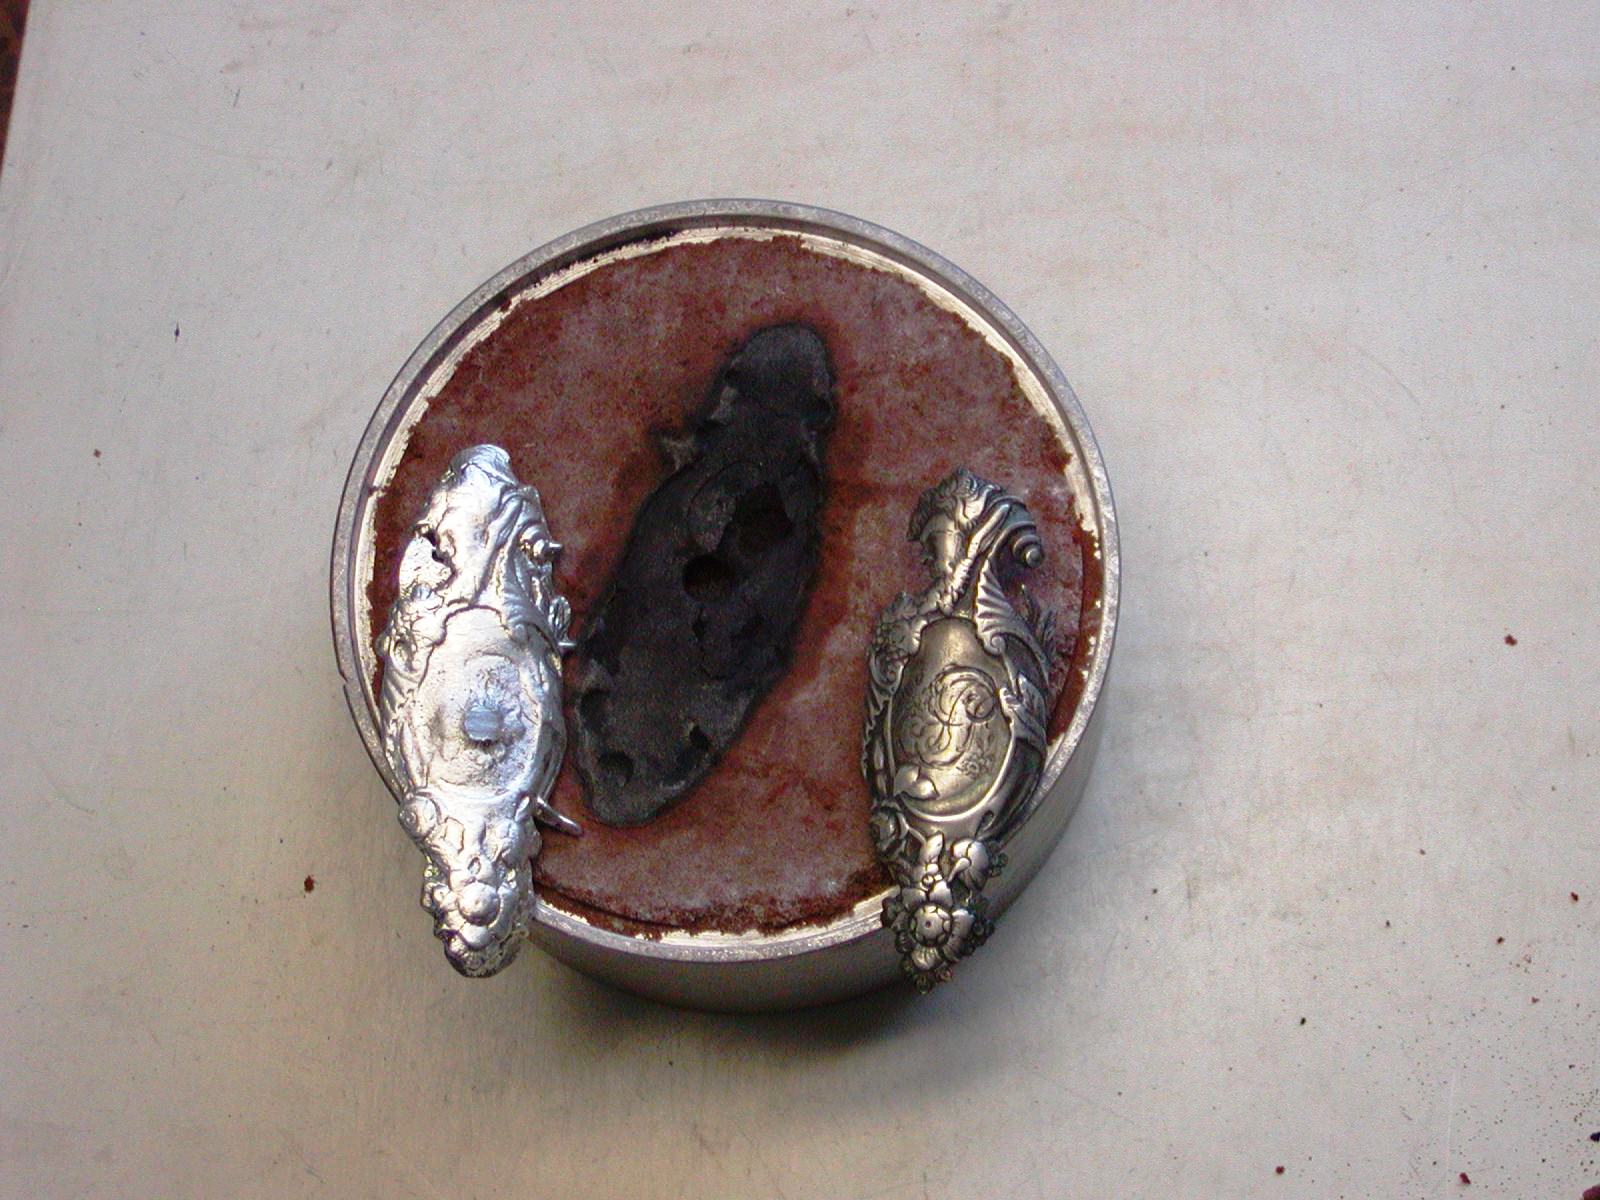
You are all very welcome. In this post I show how the cast inlays were made. The designs on this rifle are a mix of French Baroque transitioning a little into rococo. The time period would be 1730-1745 or so and the rococo style during the reign of King Louis IV of France was slow in spreading among English gun makers. Symmetry typifies Baroque whereas rococo revels in asymmetry. The silver side plate was inspired by a steel plate from a fowling gun by James Freeman. The wrist plate is inspired by Henry Delany, another early 18th century English gun maker. I first carved the side plate in green carving wax. I anticipated trouble casting it as one piece so designed it in 3 pieces to be soldered together. I carved the write plate model out of hard maple. Then using the Delft clay casting method (basically sand casting using a fine clay), I created the molds and cast the parts in silver.
SFsxTkR.jpg


Delft clay casting is pretty easy and the results are quite good.
sgUqKti.jpg

zdiboGV.jpg

hr8Sewg.jpg


With pieces out of the molds, I clean up the edges to be soldered and then solder them with low temp silver bearing solder.
PkUbTBU.jpg

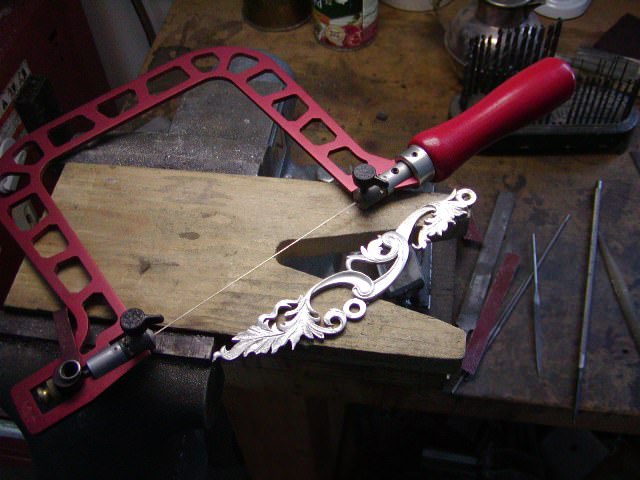
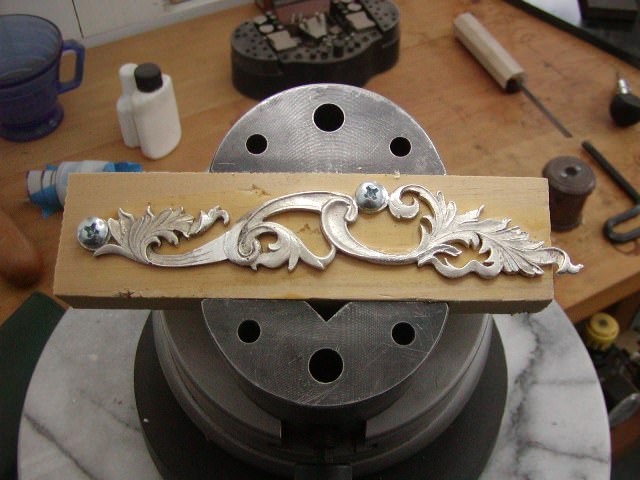
With needle files and jeweler's saw, I clean up the edges and then screw and glue the plate to some wood.
VeFnC3r.jpg


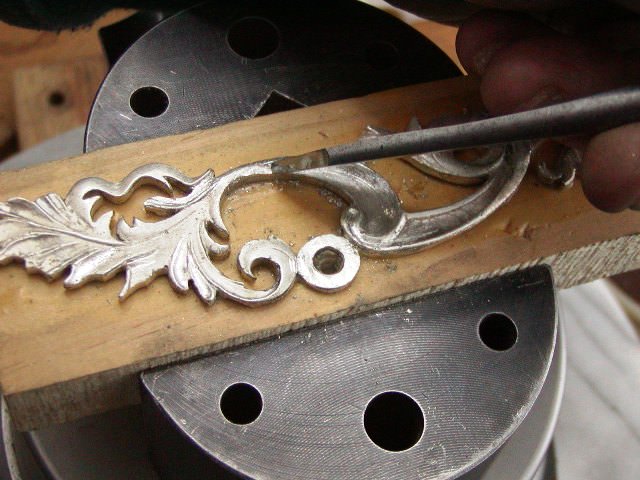
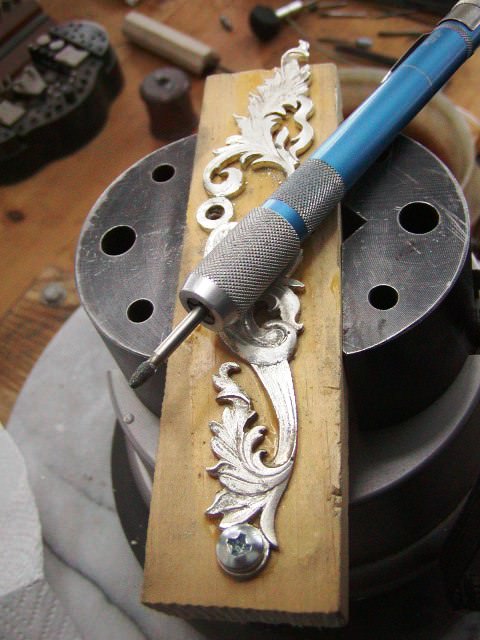
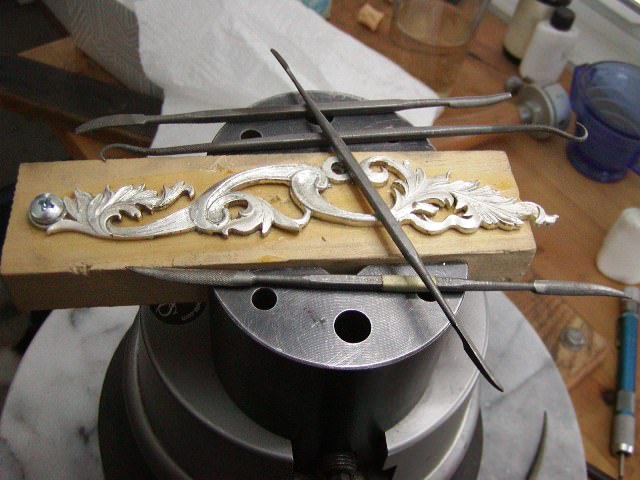
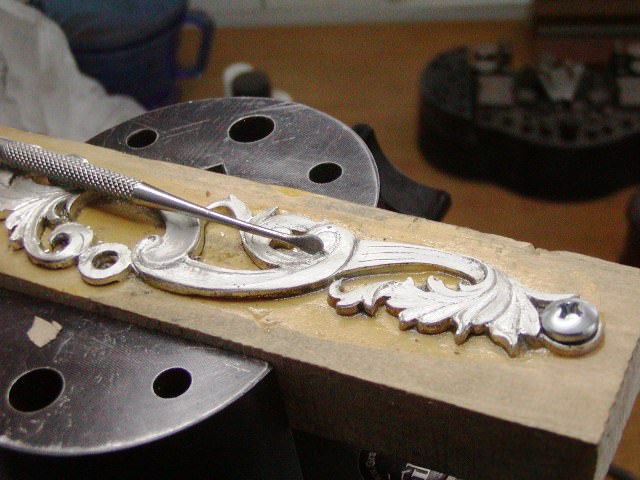
Using die sinker's chisels, gravers, files, round stones, and dental scrapers, I clean up the casting, cut in details and smooth the surfaces.
rUykZPc.jpg

X9VA10Y.jpg

R5E8fGp.jpg

BrBcqZW.jpg

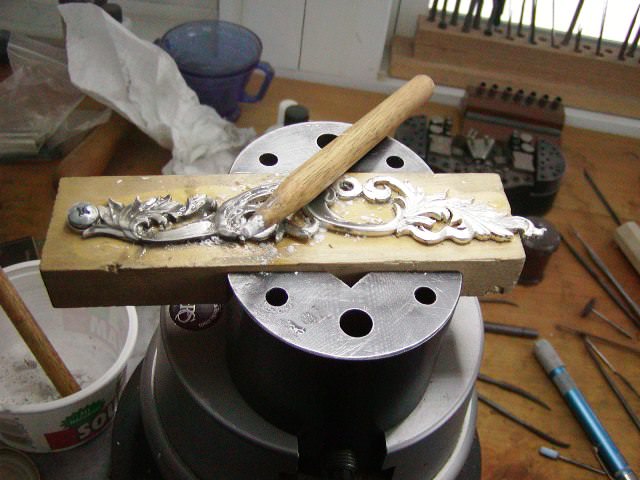
Finally, I polish it with stones dipped in paraffin oil, fine grits of sandpaper, and pencil sticks dipped in paraffin oil then in pumice stone and eventually rottenstone.
Gwmz1pn.jpg


Finally, I add any detail engraving and it is ready for inletting.
OvSMTFp.jpg

The wrist plate is made the same way.
iLtvrnX.jpg


dave
.
 
Hi Gary,
No, it is not a special gift. It is just a great desire to understand how these things were done and an attitude that I can do anything if I put my mind to it and do the work. Kind of a very "conservative" mindset don't you think. With a combination of reading, examining original work, and practice, I've figured out many of these details that were once the secrets of lowly tradesmen. I don't think it requires any more talent than perseverance and understanding through study. So if I have any talent it is I love the process of learning and study, and I never balk at the work. I had some good mentors during my early years but all of this stuff I am describing here, I learned on my own because I just jumped in and did it. No classes, no internet videos, no CDs, and no website forums.

dave
 
Dave, that is a great attitude and gives me hope that I can learn more. Just went out and bought new chisels, gravers, a swivel vise and I am going to start practicing!
 
Hi,
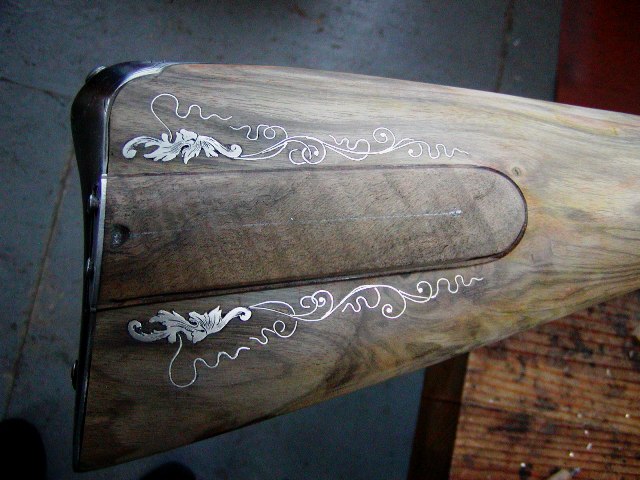
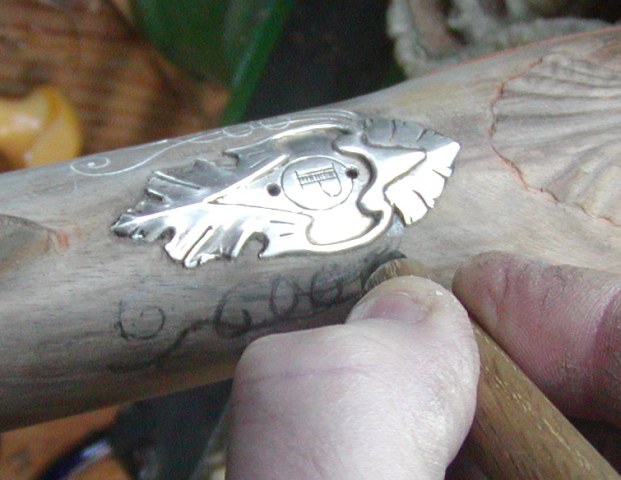
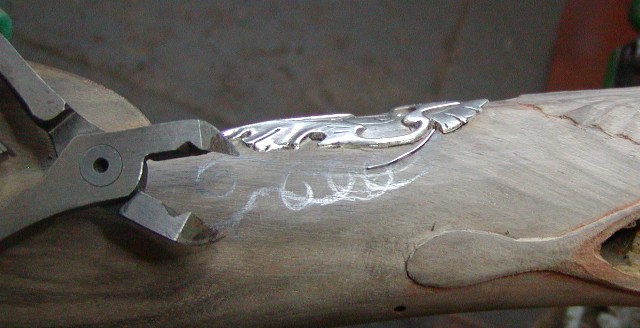
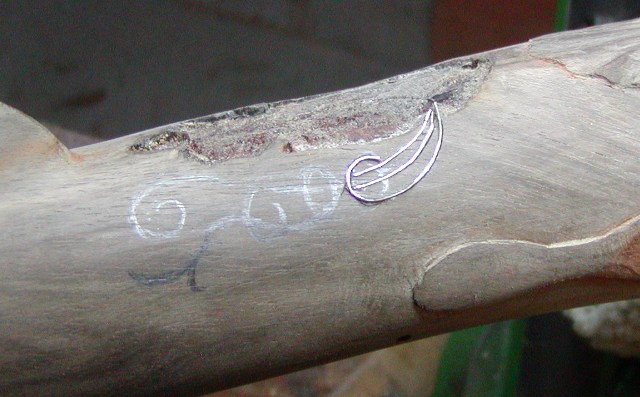
Thanks for looking and commenting folks. I've posted about silver wire inlay before but doing it on the curved surface of the wrist is a bit more of a challenge because the ribbon is curving in 3 dimensions. The first step, as in all wire work, is a good design drawn on the wood.
H2ERF7w.jpg

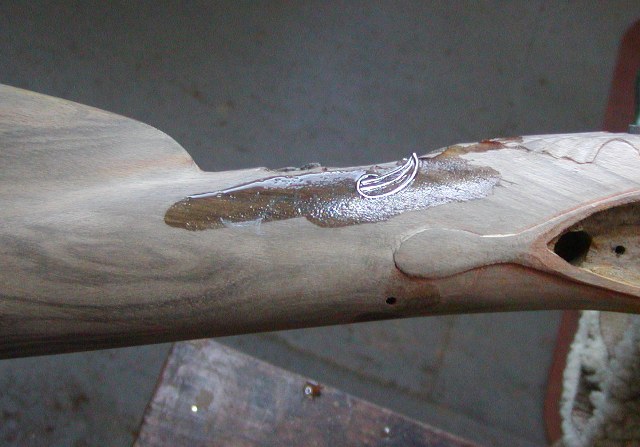
Now in this case, as you will see, I will redraw the design several times as I proceed and I actually refine some of the curves as I go. Not only is this design on a round wrist it is also quite complicated to execute because of the loops and overlaps. You have to strategize how to approach it and keep all the pieces in mind. I first do the 3 initial strands leading to the wrist plate. I use simple tools that are just hacksaw blades with stabbing in chisel points 1/16", 1/8", and 1/4" in width. They are beveled and sharpened on both sides and a cross section of the blade would look like a thin rectangle with the ends rounded. The rounded ends allow me to walk the chisel around curves without creating a jagged stepped curved line. I do not like to use curved chisels because I struggle to place them accurately on the wood. I first walk the chisel down the line rocking it back and forth lightly, which incises a very shallow but smooth line.
3XsFZMt.jpg

iLtvrnX.jpg


It also gives me a chance to change the line a little if needed. Then I go back and cut the depth by tapping the chisel with a hammer.
oB9rU5h.jpg

h8qXFGm.jpg

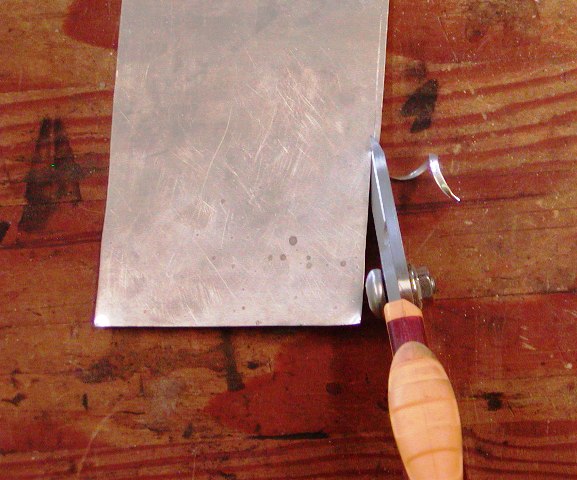
Now I am ready for the wire. Because the ribbon has to curve in 3 dimensions, it has to be dead soft. I am using 0.006" thick sterling silver cut from sheets. I anneal the silver sheet by heating it gently to dull red with a torch and letting air cool. Then I scribe my ribbon about 3/32" wide on the sheet and cut it out with shears.
7Dkq6V1.jpg

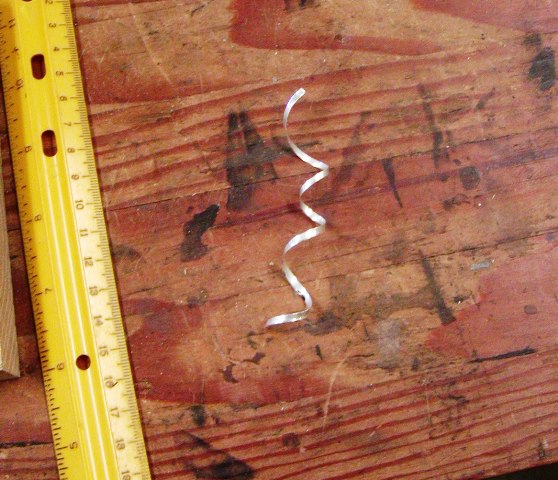
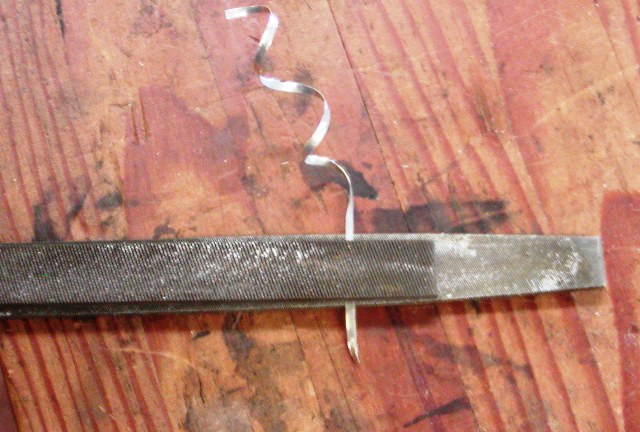
It comes out curled so I draw it between 2 coarse files to straighten and score it.
gt6bVE8.jpg

71Stx2P.jpg

kr3QsTK.jpg


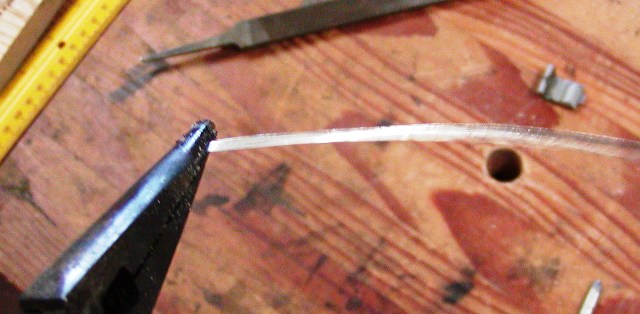
Now it is ready to place in the incised line. It should drop in with finger pressure and then a few light taps from a hammer will set it in place.
7NFSbB2.jpg

This is where the soft wire is critical because if work hardened, you tap one end in and the other rises up because of the curve of the wood. When lines converge always install one strand at a time before cutting the next line for the adjacent strand. That way the installed wire will strengthen the wood and keep it from crumbling away as you incise the next slot.
HZXZVNJ.jpg

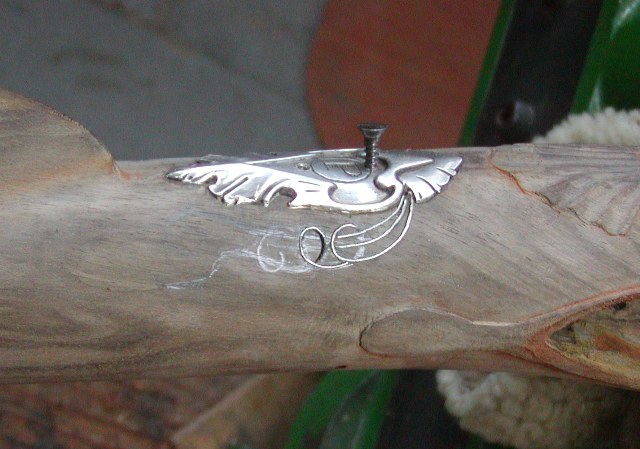
As you can see, the design becomes a bit of a jig saw puzzle. Which wire goes in first and where, etc. I curl ribbon before pressing it into loops using special pliers from a jewelry supply company but wrapping it around a screw driver handle works well. Before going any further, I wet the wood with water to swell it and anchor the installed wire. Normally, on a flatter surface I would do almost all the design before wetting the wood but on a curved surface like the wrist, I periodically want the installed wire to be anchored before moving on so I don't risk it popping out as I work around it with the rest of the wire.
Ji0EezC.jpg

That often means I have to redraw the design on the wood after it dries. After drying, I have a tiny screw driver, on which I ground the end of flat blade into a slight curve. I use that tool to "nudge" the installed wire to smooth curves where needed. After doing that, I use a small fine flat file to file the silver almost flush with the wood. Try to file along the line rather than across it. I leave it a little proud of the wood for now and move on.
t3trDWP.jpg

DLF3mkd.jpg

As you can see, things get a little complicated and you have to keep track of things.
I cut tiny little wedges of silver ribbon to place in the spaces between lines where a loop is going under another line. Good tweezers help a lot. Finally, the work is done, I wet it all down, let dry, file it all flush with the wood, and polish it a little with 400 and 600 grit sandpaper.
MHoz0SB.jpg


dave
 
I just found your tutorial updates and my oh my. I look forward to reading this soon. There is so much to see and learn here. As someone stated above, you could certainly open a museum with your work.
Wondering if you gave any thought to possibly publishing these in a book? Lots more work I bet, but maybe another project for you in the future?
 
Hi Bob and thanks,
I am thinking about it, one that focuses on making British flintlock guns. Something that fills in gaps in other resources like "Gunsmith of Grenville County" or "Recreating the American Longrifle". I have to figure out how to go about it though.

dave
 
Hi Folks,
This post shows how I inlet the intricate inlays you see on this rifle. These photos are of the matching fowler I made several years ago but they show the process used on the current gun. Here I inlet what is arguably a most challenging side plate. Possibly, as difficult as any of you will ever encounter. The first step is to accurately outline it on the stock. I have 2 carving knives that I use for that purpose. One is just a skew knife with a sharp point at the end. The other is a chip carving blade that I modified such that it can scribe a line in tight corners and stab in a line where needed.


I outline the shape and then stab in the edges. Notice that I drew pencil lines on the wood to be removed. I find that invaluable on complex inlets and it prevents tears when you remove the wrong wood.


Then using micro chisels, I stab in the outline more deeply.


Then using small and micro chisels,


I clear away the wood in the mortise. In really tight corners just take your tiny chisel and mash it into the wood to be removed until it is pulp that can be scraped out.


These delicate inlays cannot be tapped in with a mallet. They must just require finger pressure to install in the mortise.


And there you go.


Very small and complicated inlays can also be a challenge just marking tracing their outlines on the wood. Here is a trick I learned from David Price that makes that task easy. Use Scotch tape to hold the inlay on the wood and then place a flexible metal ruler over it. Give the ruler a good smack and the inlay will be marked on the stock. Then use tiny chisels to cut the mortise.


A couple more tricks I learned. Stab in the edges of inlay mortises and really be firm when two edges are converging into a point. I make absolutely sure that I stab that point firmly. If you do that, when you back cut to remove the wood in the mortise you won't have to try and dig into the pointed area to remove the wood. It will pop out in front of your chisel. Secondly, don't obsess overly about small gaps. They will almost always disappear when you stain and finish the stock. Finally, you have to be very careful about installing delicate inlays and then removing them while making the gun. I do not push them home in the mortise until final installation. I just press them firmly with fingers so they still mark tight spots in the mortise edges but not any harder. I clean the edges with my stabbing chisels as best I can. Sometimes I final sand and scrape the stock with the inlay removed, then stain and put on a couple of coats of finish. Then I position the inlay in the mortise and squeeze it all the way home using one of my leather padded pattern maker's vises. After that, the inlay is never removed again and I complete the finish with the inlays in place making sure any finish that slops on to the inlay is wiped off completely before drying. However, for really small inlays that are just glued in place, I sand the stock and then epoxy the inlay in place after I've engraved it and before I apply any stain or finish. I clean up any excess glue and then carefully work around the inlays for any final scraping and sanding. A small skew chisel is very useful scraping wood around those inlays.

dave
OMG. The finished product is nothing short of amazing!
 
Hi Folks,
This post shows how I inlet the intricate inlays you see on this rifle. These photos are of the matching fowler I made several years ago but they show the process used on the current gun. Here I inlet what is arguably a most challenging side plate. Possibly, as difficult as any of you will ever encounter. The first step is to accurately outline it on the stock. I have 2 carving knives that I use for that purpose. One is just a skew knife with a sharp point at the end. The other is a chip carving blade that I modified such that it can scribe a line in tight corners and stab in a line where needed.


I outline the shape and then stab in the edges. Notice that I drew pencil lines on the wood to be removed. I find that invaluable on complex inlets and it prevents tears when you remove the wrong wood.


Then using micro chisels, I stab in the outline more deeply.


Then using small and micro chisels,


I clear away the wood in the mortise. In really tight corners just take your tiny chisel and mash it into the wood to be removed until it is pulp that can be scraped out.


These delicate inlays cannot be tapped in with a mallet. They must just require finger pressure to install in the mortise.


And there you go.


Very small and complicated inlays can also be a challenge just marking tracing their outlines on the wood. Here is a trick I learned from David Price that makes that task easy. Use Scotch tape to hold the inlay on the wood and then place a flexible metal ruler over it. Give the ruler a good smack and the inlay will be marked on the stock. Then use tiny chisels to cut the mortise.


A couple more tricks I learned. Stab in the edges of inlay mortises and really be firm when two edges are converging into a point. I make absolutely sure that I stab that point firmly. If you do that, when you back cut to remove the wood in the mortise you won't have to try and dig into the pointed area to remove the wood. It will pop out in front of your chisel. Secondly, don't obsess overly about small gaps. They will almost always disappear when you stain and finish the stock. Finally, you have to be very careful about installing delicate inlays and then removing them while making the gun. I do not push them home in the mortise until final installation. I just press them firmly with fingers so they still mark tight spots in the mortise edges but not any harder. I clean the edges with my stabbing chisels as best I can. Sometimes I final sand and scrape the stock with the inlay removed, then stain and put on a couple of coats of finish. Then I position the inlay in the mortise and squeeze it all the way home using one of my leather padded pattern maker's vises. After that, the inlay is never removed again and I complete the finish with the inlays in place making sure any finish that slops on to the inlay is wiped off completely before drying. However, for really small inlays that are just glued in place, I sand the stock and then epoxy the inlay in place after I've engraved it and before I apply any stain or finish. I clean up any excess glue and then carefully work around the inlays for any final scraping and sanding. A small skew chisel is very useful scraping wood around those inlays.

dave
Dave, thank you very much for all you do to help us armatures out, your expertise is greatly appreciated. I failed to let you know in previous posts of yours but wanted to correct that this time, thanks again!
 
Back
Top