• Friends, our 2nd Amendment rights are always under attack and the NRA has been a constant for decades in helping fight that fight.

    We have partnered with the NRA to offer you a discount on membership and Muzzleloading Forum gets a small percentage too of each membership, so you are supporting both the NRA and us.

    Use this link to sign up please; https://membership.nra.org/recruiters/join/XR045103

My first Lyman 54 GPR kit... Update #1

Muzzleloading Forum

Help Support Muzzleloading Forum:

This site may earn a commission from merchant affiliate links, including eBay, Amazon, and others.

splinter84

36 Cal.
Joined
Jan 4, 2013
Messages
66
Reaction score
0
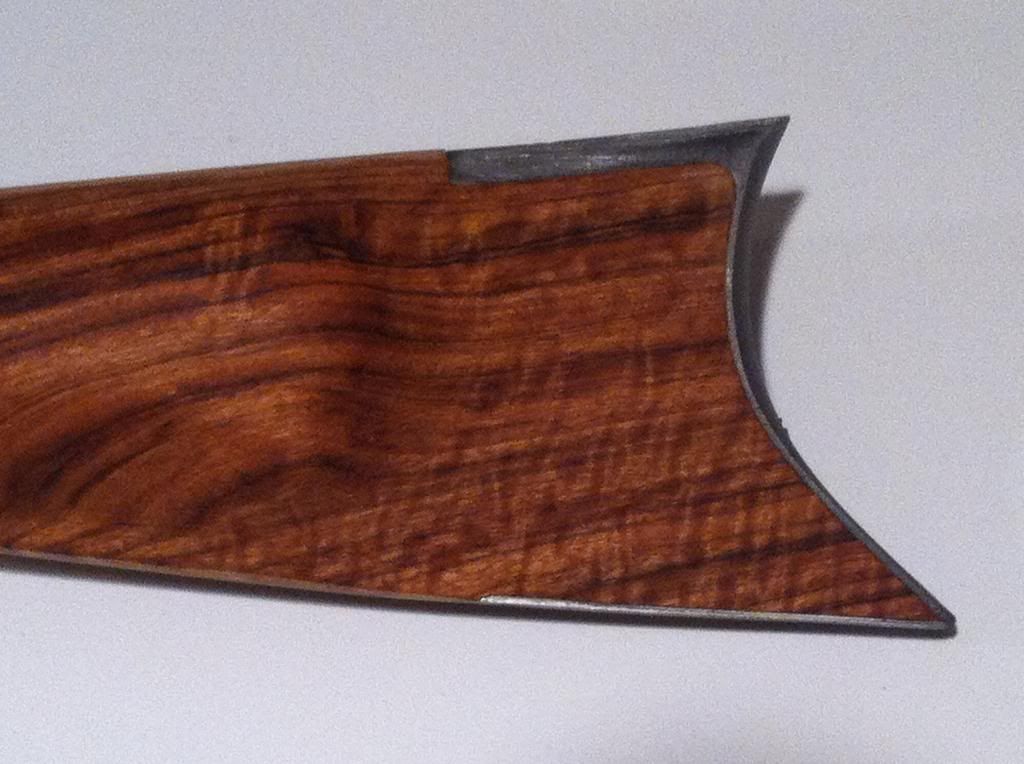
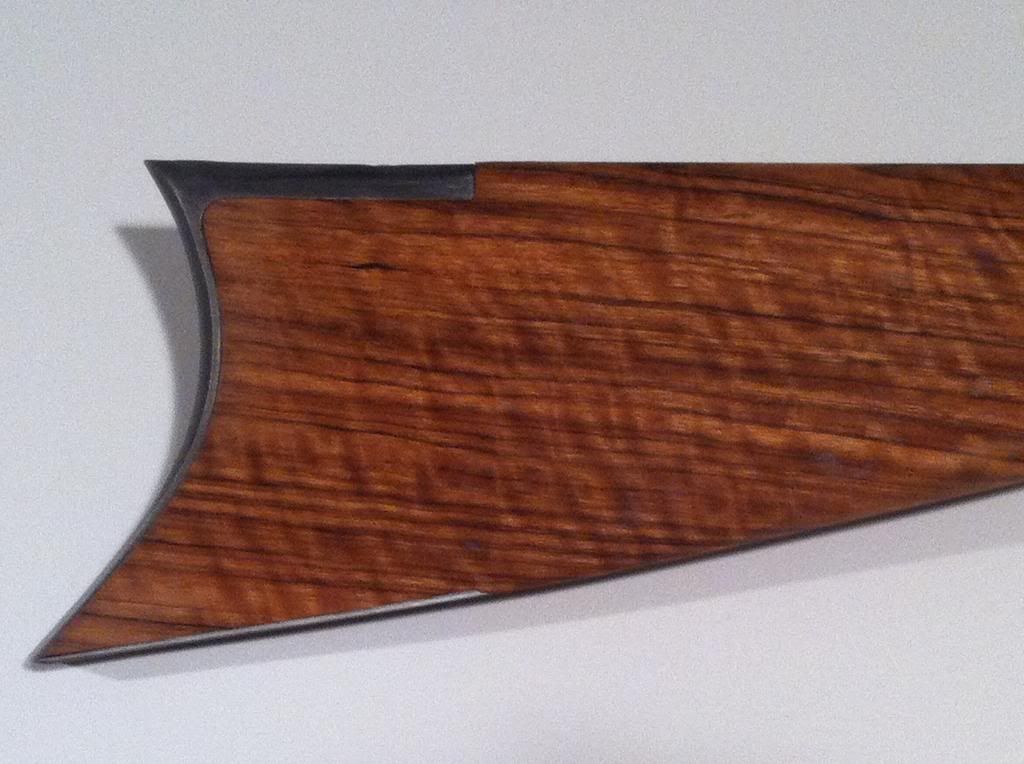
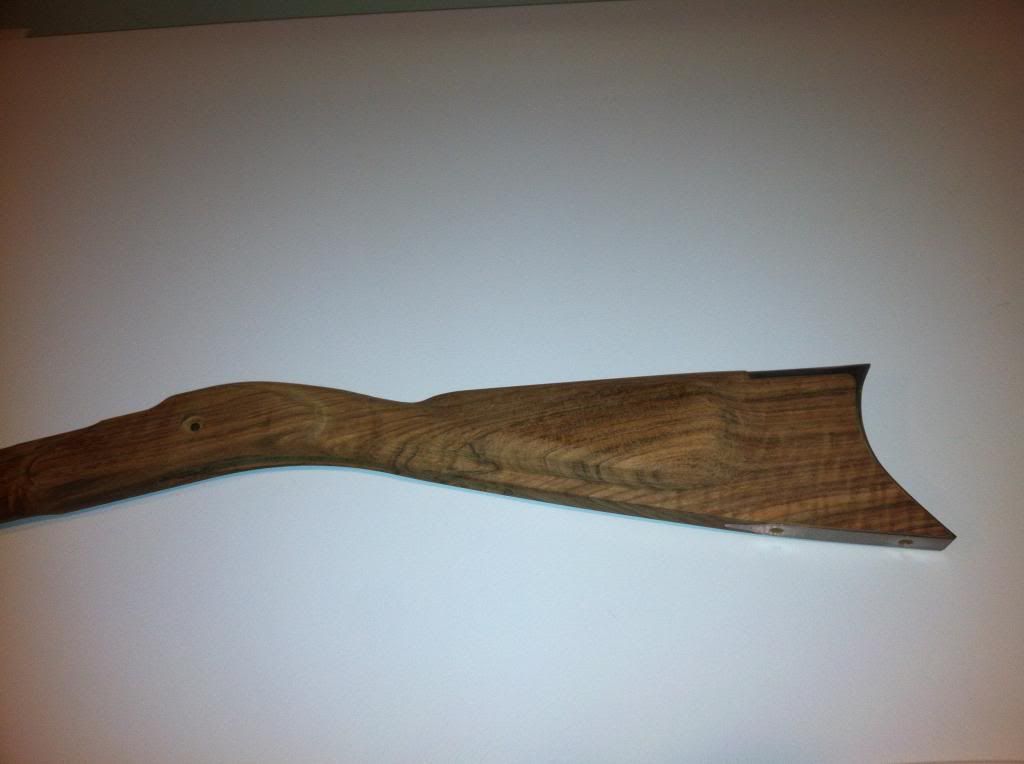
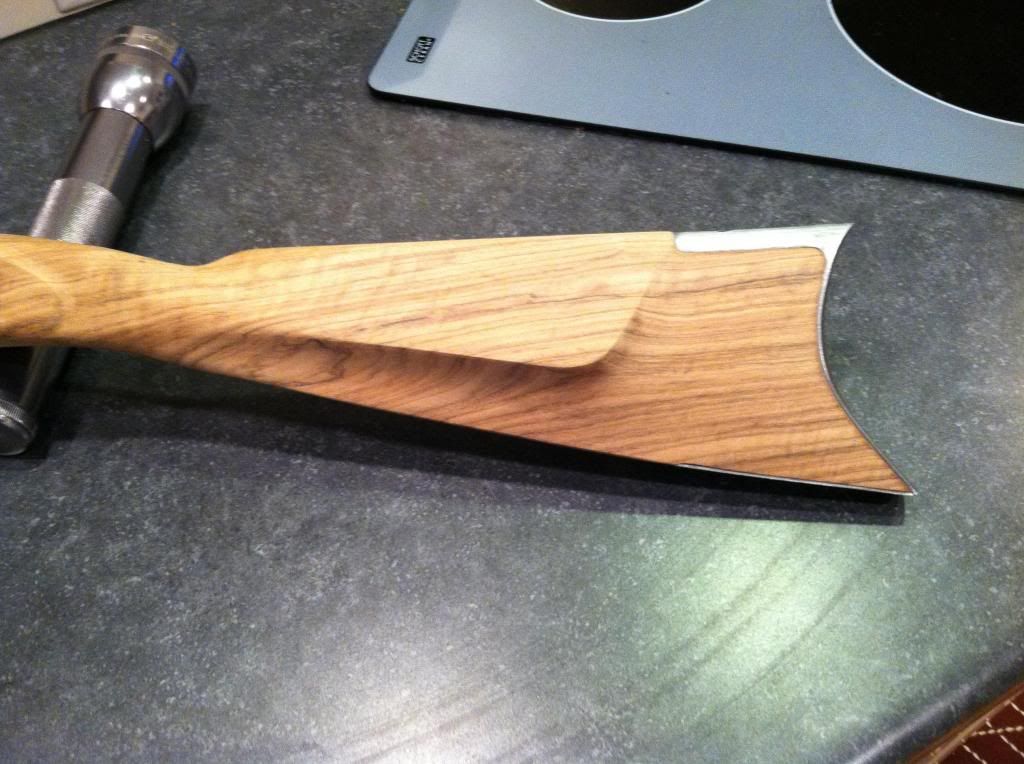
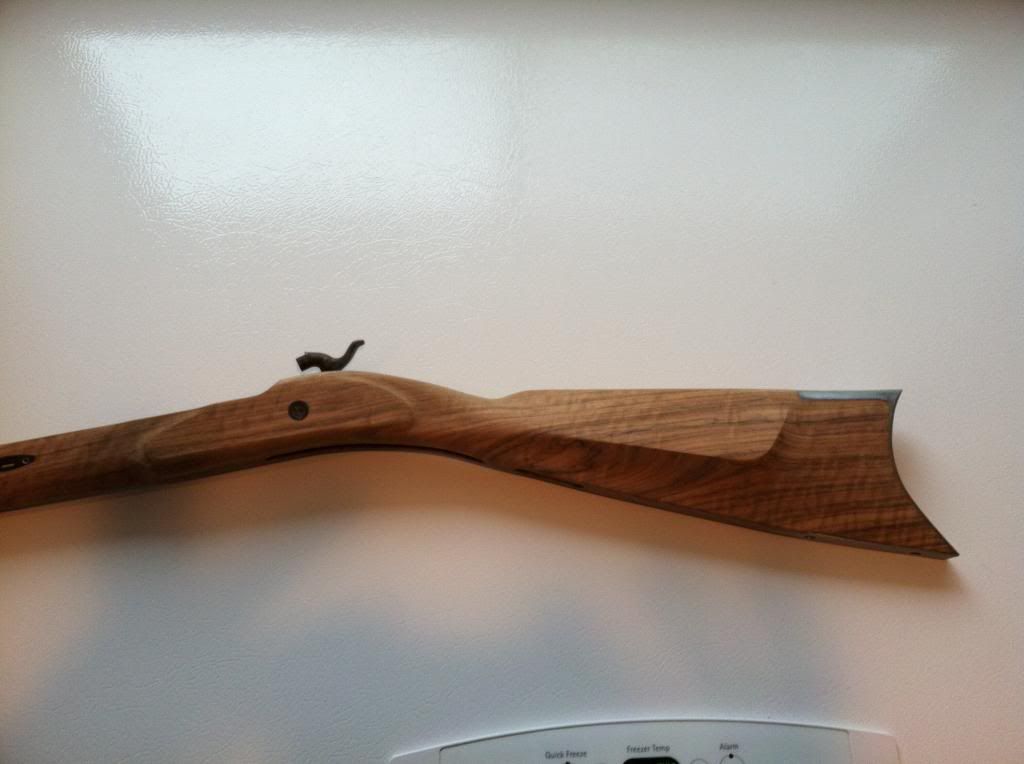
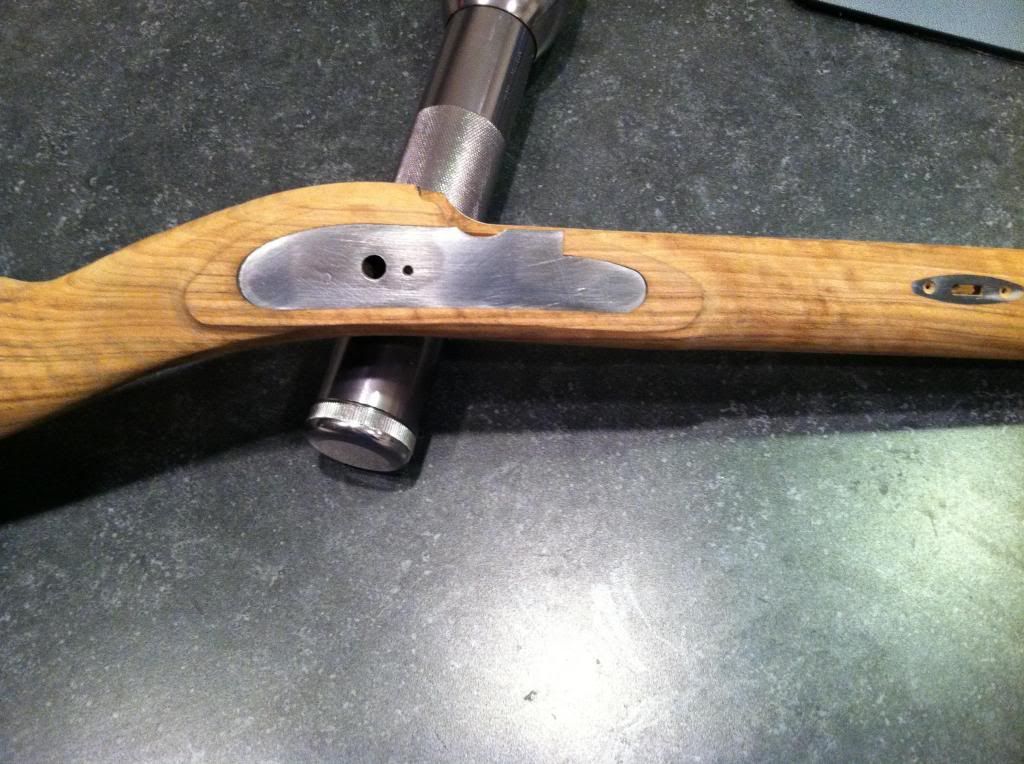
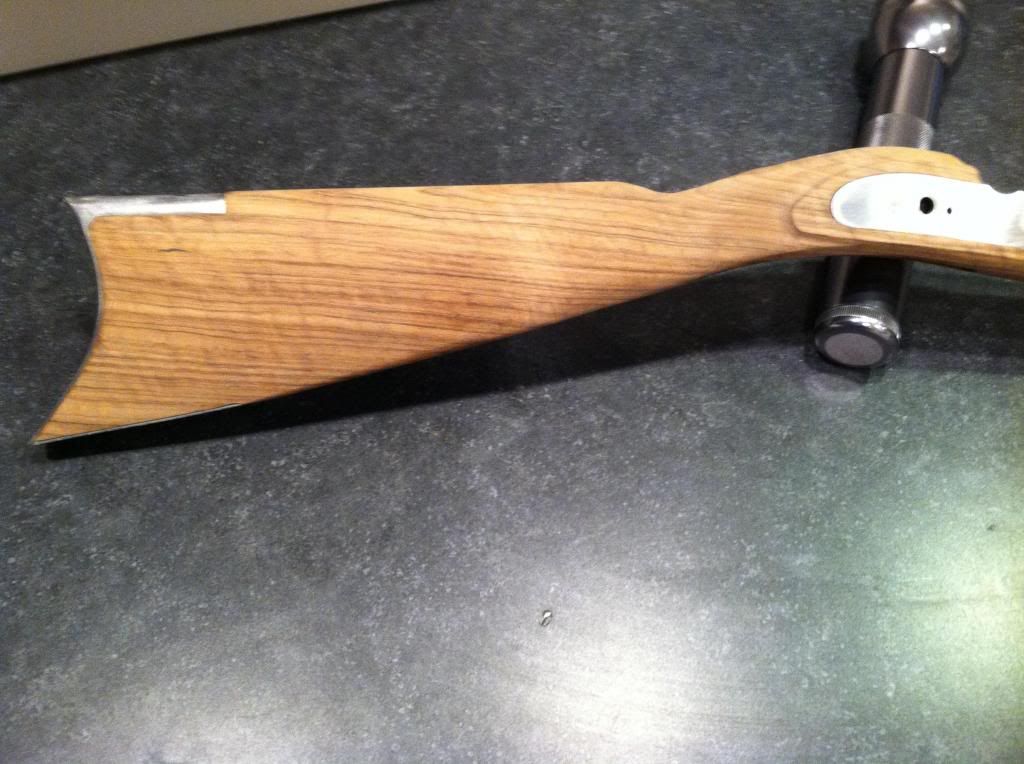
I’m posting another update on my GPR build. I have been working on the buttstock for the most part, and I think I am getting it very close to my final shape. I have some light shaping and final sanding with the 50 grit before I call it good and move further up the stock. My goal on the buttstock was to remove some of the material on the toe and slim the “monte carlo” down some. It seemed bulky out of the box. I am not sure if my lines are “authentic” but that’s OK. I just want a good feel and pleasant look. I haven’t put any time into the grip yet.

The lipstick tip worked well for the buttplate. I can barely slip a piece of typing paper in the seam between the stock and plate. Not sure if I can get it any better than that, but maybe a couple of nights of fine tuning and I will have it. I do have some more work to do on top of the buttstock to meet it up with the butt plate a little better as well.

PS. It looks like I am going to have a long wait to get my replacement tang back from Lyman. I guess they are swamped with orders. I mentioned in my first thread that my tang had a gummed up flat on one side so I sent it back for replacement.

I wanted to share some progress pics to see what you guys think and if I should make any changes or improvements on the shape of the buttstock. I wetted it down a little bit last night to hopefully get better pictures. My iphone camera is a little blurry. I apologize for that.
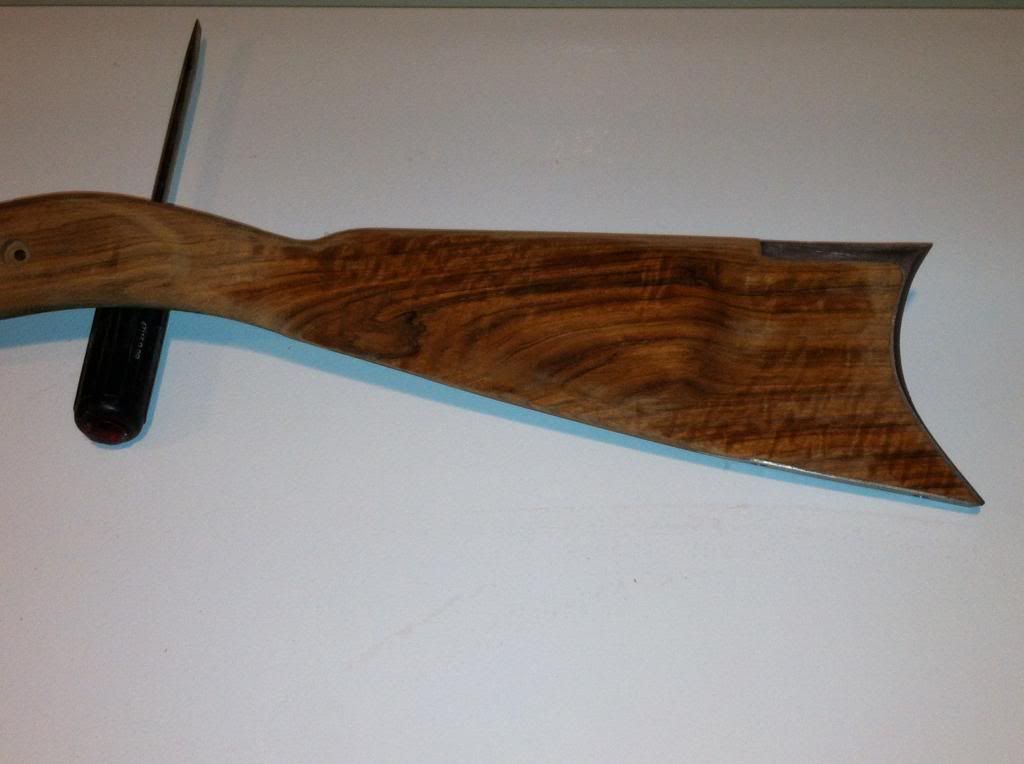
photo4_zpsec549c64.jpg

photo1-1_zps65f0c1ac.jpg

photo5-1_zps1a0c4625.jpg

photo6-1_zps7ce13c5c.jpg
 
Now, it is often hard to judge unfinished wood in pictures, but in the first two photos it appears as though you have rounded over the bottom line of the cheek piece. Not an esthetically pleasing thing to do, nor is it proper. The bottom of the cheek should be defined and a fairly crisp edge. In your photos it looks like more like a swollen area or a lump.

Is this what are you referring to by saying "Monte Carlo"? In your previous post you were referring to "the bottom Monte Carlo" I thought you were talking about the curved bottom or "toe line" and that's why I tried to get you to clarify what you meant. Now it appears that you are talking about the cheek piece.

See, what's confusing me here is nothing Monte Carlo about this stock. In gun speak a Monte Carlo stock is one which the cheek piece/rest rolls up over the top of the gun elvating the top of the comb....the style often associated with Weatherby's rifles....instead of a traditional stock, in which the comb is straight from it's nose to it's heal.

Now, it's your gun build and you can do anything you want with it. But since you asked what we think I hope you can take it as constructive.

That sure is a beautiful piece of wood though! Enjoy, J.D.
 
There's a lot of "fish belly" in the stock too. Is that what you want? Or would you prefer a straighter line?
 
Hey Col.

I know you were posting for the OP and not me....but I find that "fish belly" about the worst feature of the GPR stock....well that and the big "hump" behind the breech. The belly is easier to correct though.

Other than those two things, the GPR kit makes a nice rifle for the money. :thumbsup:

Enjoy, J.D.
 
jdkerstetter said:
Now, it is often hard to judge unfinished wood in pictures, but in the first two photos it appears as though you have rounded over the bottom line of the cheek piece. Not an esthetically pleasing thing to do, nor is it proper. The bottom of the cheek should be defined and a fairly crisp edge. In your photos it looks like more like a swollen area or a lump.

Is this what are you referring to by saying "Monte Carlo"? In your previous post you were referring to "the bottom Monte Carlo" I thought you were talking about the curved bottom or "toe line" and that's why I tried to get you to clarify what you meant. Now it appears that you are talking about the cheek piece.

See, what's confusing me here is nothing Monte Carlo about this stock. In gun speak a Monte Carlo stock is one which the cheek piece/rest rolls up over the top of the gun elvating the top of the comb....the style often associated with Weatherby's rifles....instead of a traditional stock, in which the comb is straight from it's nose to it's heal.

Now, it's your gun build and you can do anything you want with it. But since you asked what we think I hope you can take it as constructive.

That sure is a beautiful piece of wood though! Enjoy, J.D.

Thank you for your advice. No offense taken, just looking for a little help.

Sorry for the confusion. I'll use the term "cheek piece" going further.

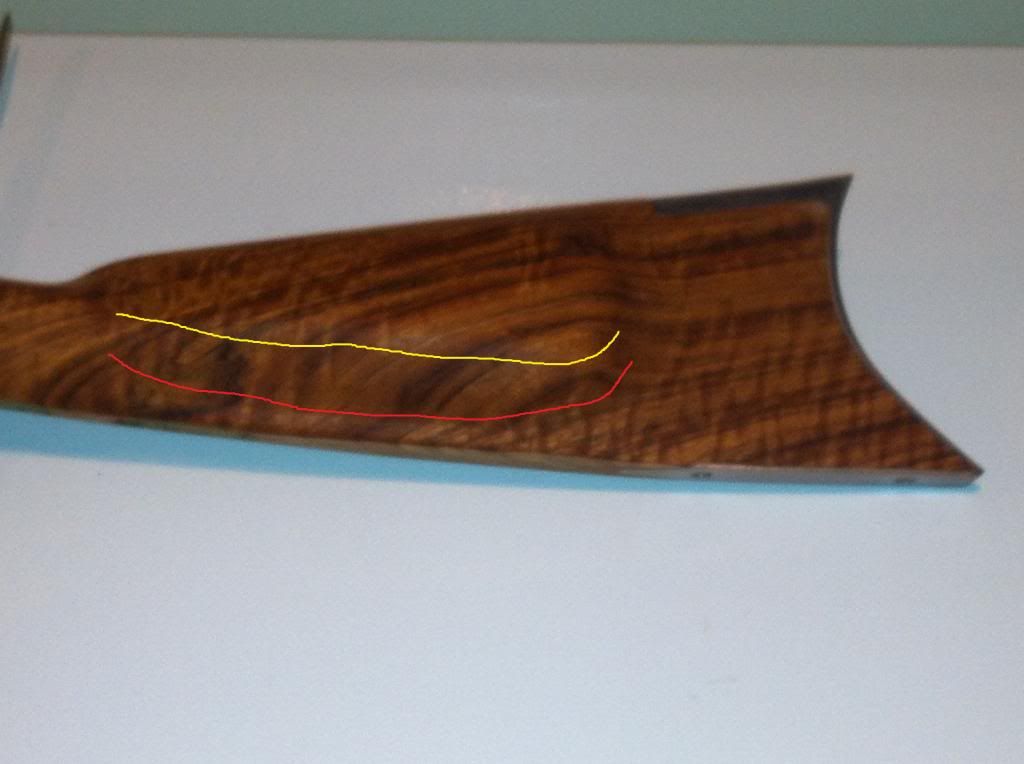
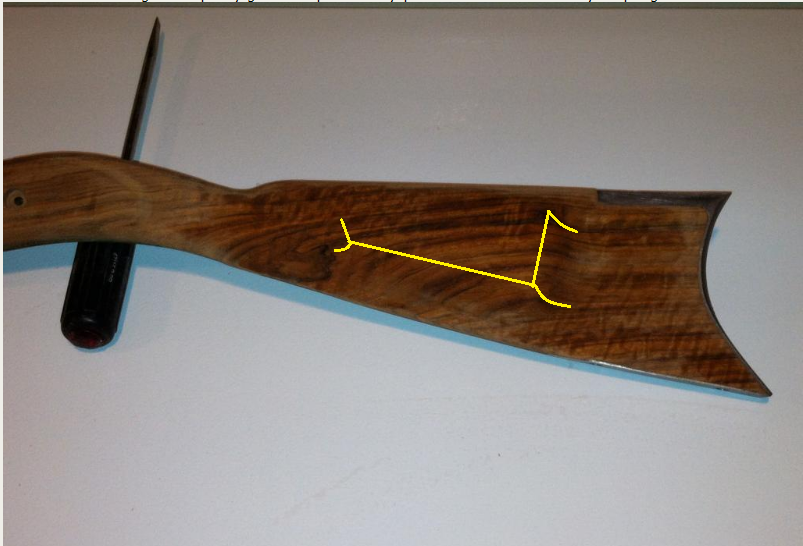
The line your referring to in your last post...would that be the yellow line I have drawn in the pic below or the red line? I think your referring to the yellow line. Just want to be sure. I think I have enough material remaining to correct this problem.

photo-1_zpsdfb723f7.jpg
 
Think of the cheek piece as a panel. The yellow line is the edge of that panel and left sharp. The wood under it falls away, blending in the rest of the stock, or it can return sharply....that's up to you.

Seek out pictures of different plains rifles. There have been several GPR builds shown on this site that you could use as a guide.

Remember, it's hard to get somewhere if you don't know where you're going. If you get there it can only be by accident....and more often than not you're gonna get lost.

Enjoy, J.D.
 
jdkerstetter said:
Think of the cheek piece as a panel. The yellow line is the edge of that panel and left sharp. The wood under it falls away, blending in the rest of the stock, or it can return sharply....that's up to you.

Seek out pictures of different plains rifles. There have been several GPR builds shown on this site that you could use as a guide.

Remember, it's hard to get somewhere if you don't know where you're going. If you get there it can only be by accident....and more often than not you're gonna get lost.

Enjoy, J.D.


Your description makes sense. Thanks for taking the time to reply. I found a few plains rifle options online to help with a cheek piece design. Looking at other rifles, I believe I have plenty of material to fix this.
 
I spent a few hours last night reviewing some images of plains rifles and how the cheek pieces are designed into the rifle. I want to keep my cheek piece design simple and thought that a squared cheek piece might work. Here is what I had in mind.

Untitled_zpsfb6e3efb.png
 
That's asking for trouble in my opinion.

Furthermore, the GPR kinda sorta resembles a later period light Hawken half stock. On that type rifle the beavertail cheekpiece is correct.

It looks like you have rounded it. I think you would be much better off in trying to restore the sharp edges of the cheek instead of cutting in the earlier style.
In cutting in the earlier style your changing a key element of the architecture of the rifle. It takes an experienced hand to pull this off.
 
54ball said:
That's asking for trouble in my opinion.

Furthermore, the GPR kinda sorta resembles a later period light Hawken half stock. On that type rifle the beavertail cheekpiece is correct.

It looks like you have rounded it. I think you would be much better off in trying to restore the sharp edges of the cheek instead of cutting in the earlier style.
In cutting in the earlier style your changing a key element of the architecture of the rifle. It takes an experienced hand to pull this off.

Glad I asked. I was't sure if this would be the way to go or not. I'll take your advise and correct the current shape. I have plenty of material left on the cheek so it shouldn't be a problem. I'll post more pics as I work at to be sure I get it right. Thanks for your help.
 
Let me post some pics of mine before you do.
Now it's a stock factory made gun so consider it a default for reference.
Like JD said you have to have an idea of where you are going.
 
54ball said:
Let me post some pics of mine before you do.
Now it's a stock factory made gun so consider it a default for reference.
Like JD said you have to have an idea of where you are going.

I'd really appreciate it. When I first started on the cheek I wanted to slim it down some, but not knowing any better I rounded over the profile. :slap:
 
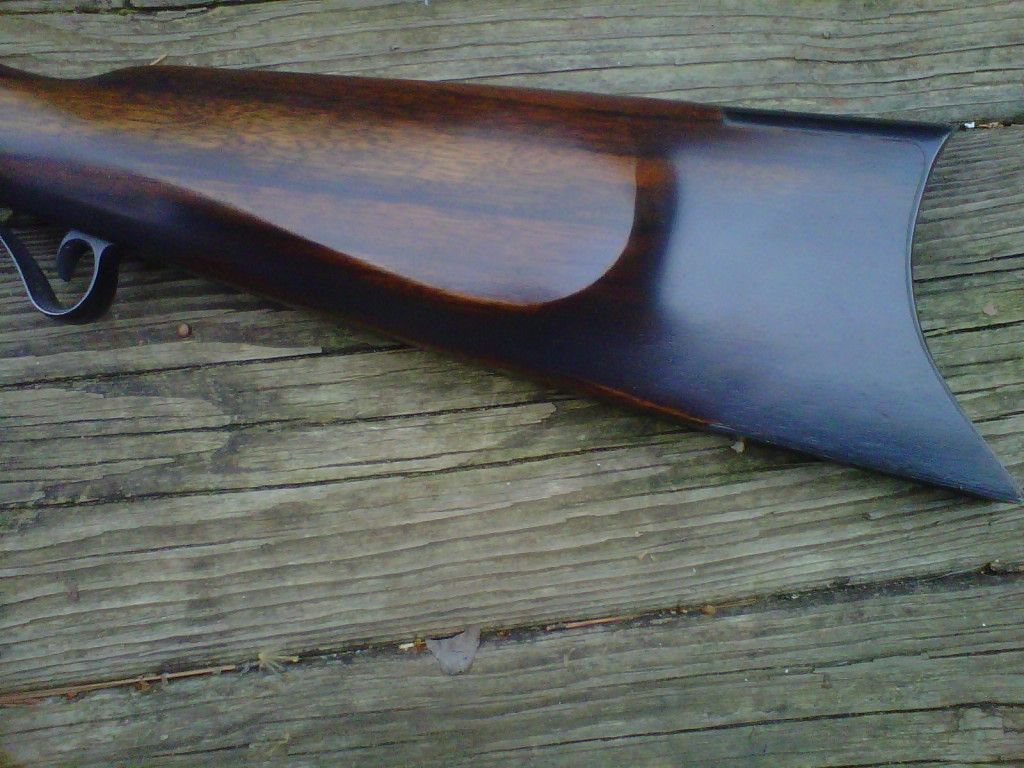
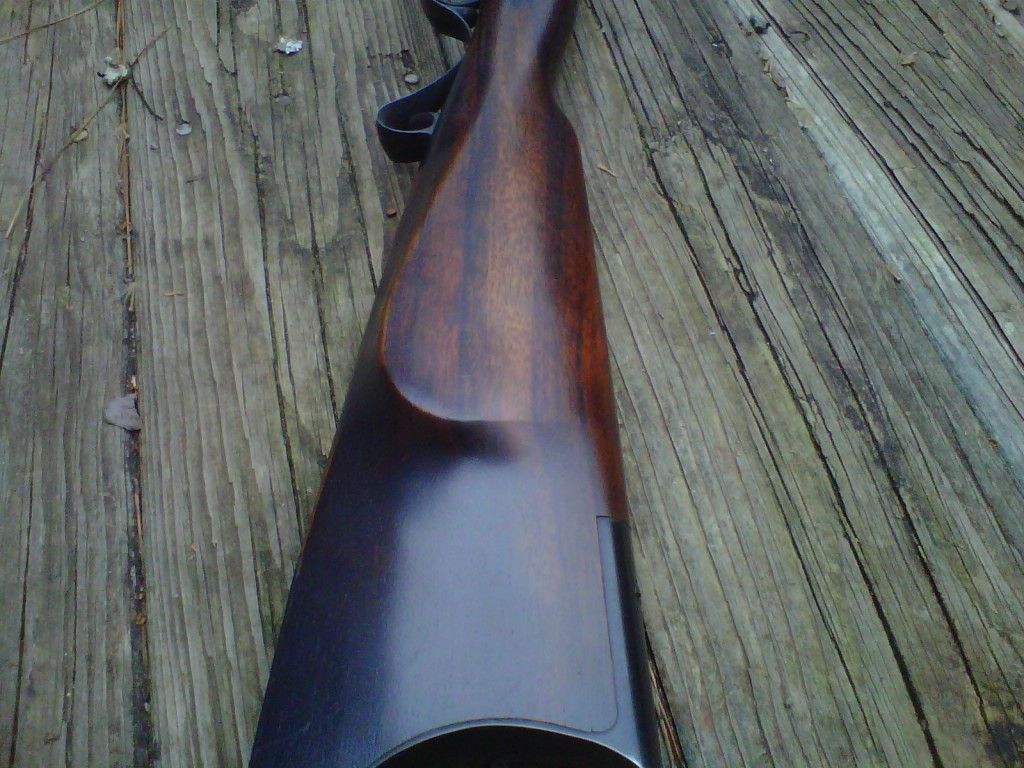
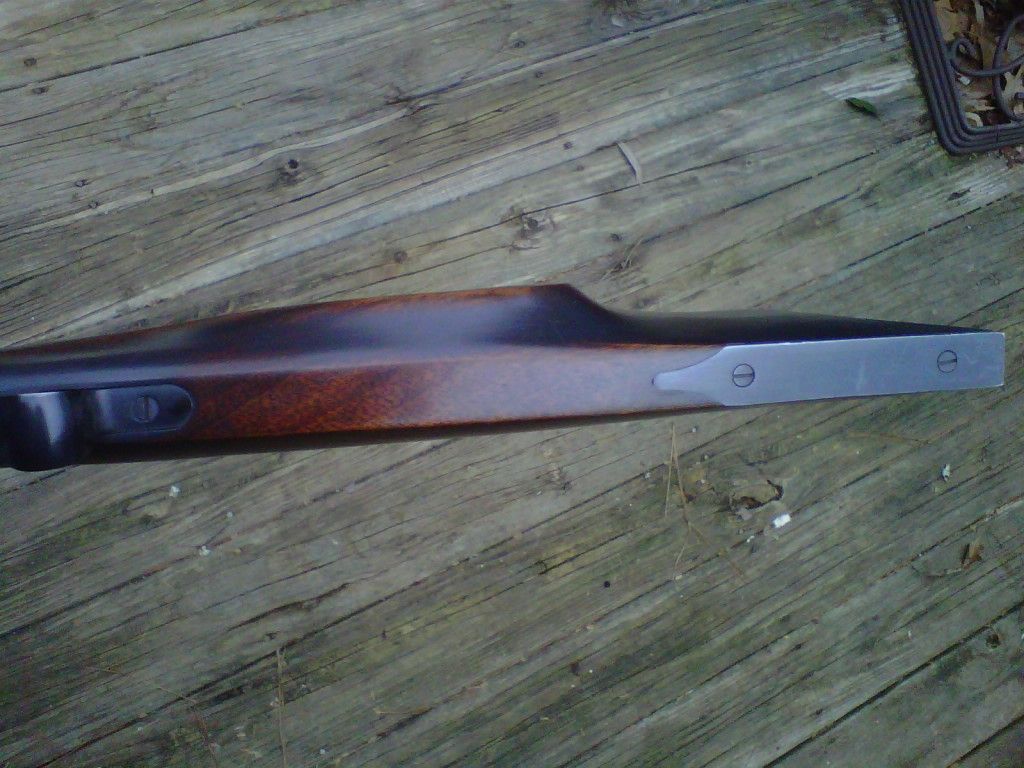
Here you go.
I hope this helps.
SU1HMDA2NDctMjAxMzAyMjgtMTU0MS5qcGc.jpg


SU1HMDA2NDgtMjAxMzAyMjgtMTU0My5qcGc.jpg


SU1HMDA2NDktMjAxMzAyMjgtMTU0NC5qcGc.jpg


SU1HMDA2NTAtMjAxMzAyMjgtMTU0NS5qcGc.jpg


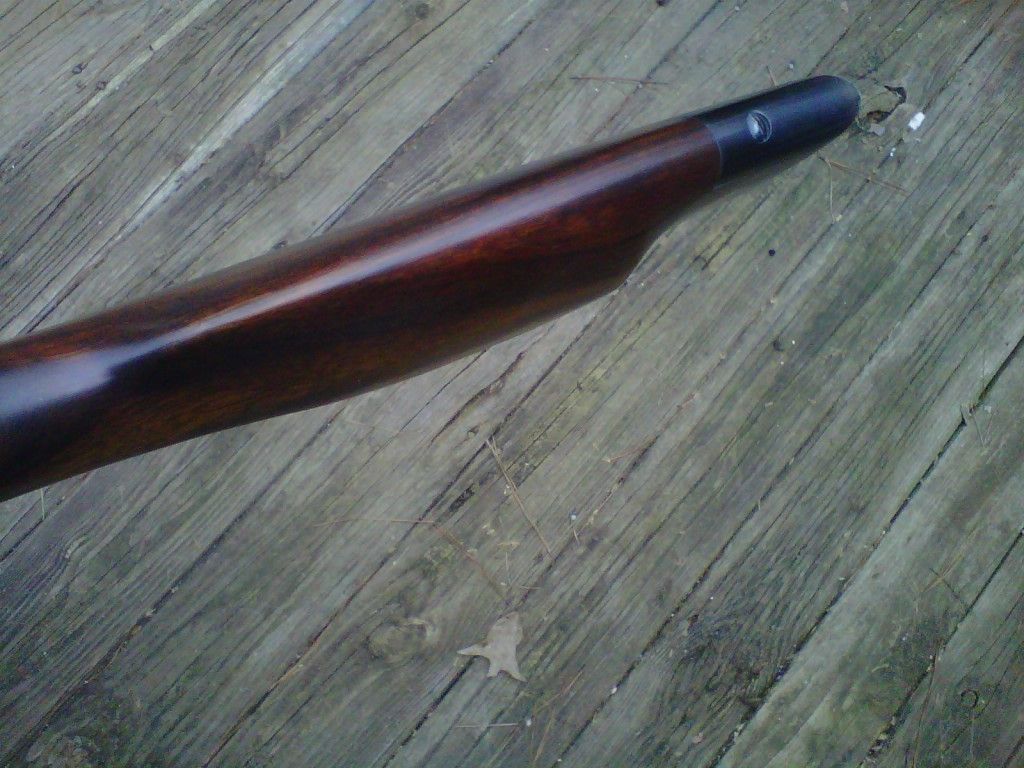
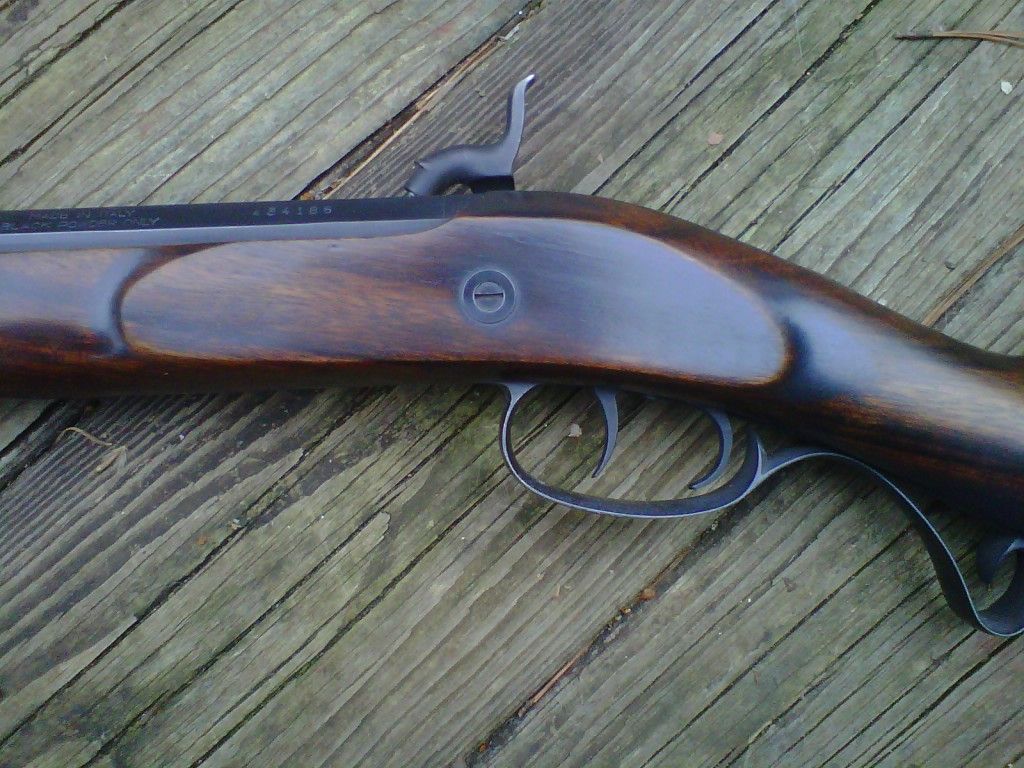
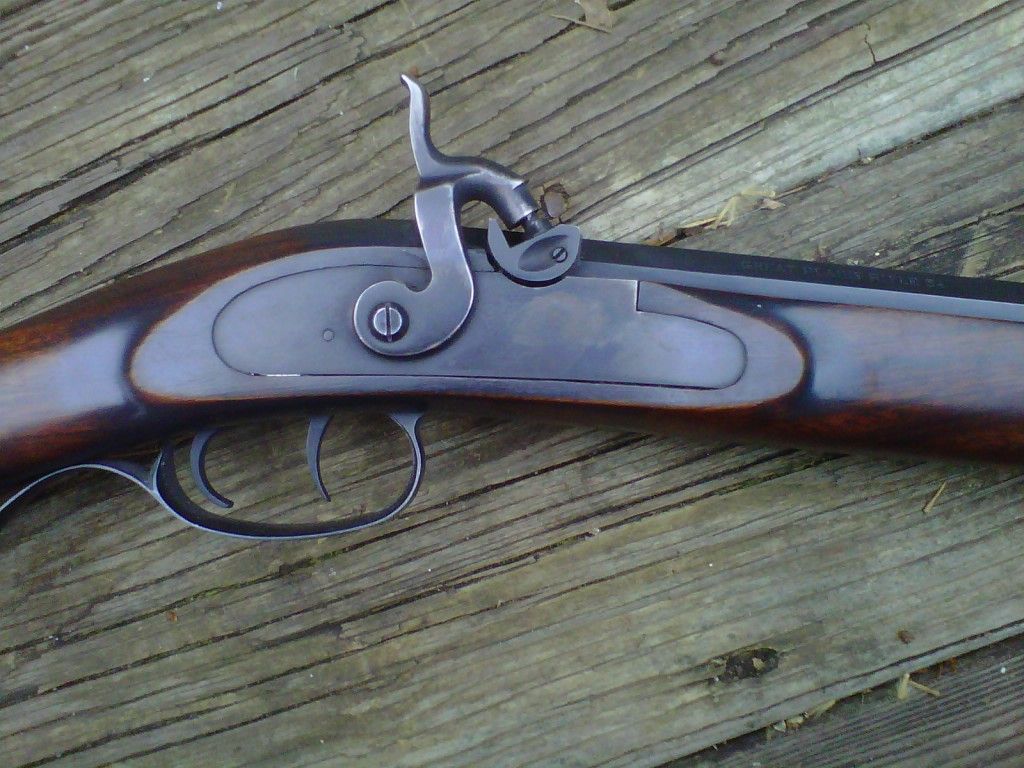
The lock panels, note how crisp they are.

SU1HMDA2NTEtMjAxMzAyMjgtMTU0Ni5qcGc.jpg


SU1HMDA2NTItMjAxMzAyMjgtMTU0Ny5qcGc.jpg
 
Thank you again. This will help a ton! I feel ashamed to have made a major error on my project. Hopefully I have enough material remaining to correct it.
 
Splinter you can make a rifle superior to mine because you are hand finishing it and mine is factory built.
You may not be able to finish the cheek exactly like that factory rifle since you rounded it.

Instead it may be a little smaller than factory but That's OK. It might make it look like original era work.

Look at the pics and your stock and try to visualize it in your head.

Everything should work out fine.

To restore those edges, if you use sand paper it must be backed. You may want to use a file.

Good luck, take your time and if you have trouble or questions please post.
Travis
 
So far as fitting the buttplate, I would recommend that you keep fitting it until there is no gap at all. It is a tedious task that made take you many more hours than you planned but the end product will be more pleasing. The gap on my kit was so large that I had to inlet the buttplate so far into the stock that I had to plug the top screw hole and drill a new one.

I would do that before you finish shaping the butt stock because the final position of the buttplate may change the comb line to some degree. Also you will have to file to fit the toeplate to the butt stock after you finish the inletting the buttplate. None of this is very tough, just time consuming.
 
Hey guys. Thanks again for helping me out with my project. With your input I was able to get a good sense of direction I believe. I put a good 5-6 hours of work into my butt stock this weekend. I am happy with the results. I think I have my final shape done. I backed my sandpaper with a plastic bottle to keep a consistent profile on the cheek plate. She isn’t perfect, but much better than what I had before. I need to follow up with some detailed sanding. This weekend I also disassembled my lock and sanded the lock face and hammer. I wanted the lock face to match the finish of the other metal trim so disassembling was a must. I started sanding the forearm towards the end of the week. I still have some work to do on the butt plate. I took a little break from that part of the gun this weekend.

I ended up sending my entire barrel back to Lyman. A repair tech informed me he was concerned about the new tang (earlier this month I sent in my original due to a machining defect) matching with my existing barrel. He said the flats of the barrel, breech plug, and tang are all done at the same time. Makes sense now. We agreed it was best to ship it all back and replace it. He was very helpful. I look forward to getting my new barrel this week.

Here are a few progress pics of my GPR. Progress is slow but consistent, but I have adapted to my speed and feel like I am taking my time.

My buttplate before starting this weekend.
photo4_zpsec549c64.jpg

6 hours of work later and some sore fingers.
photo4_zps1835b603.jpg

photo3-1_zpsaa072a77.jpg

I have some more work to do on the lock plate. But here are a few pics any way.
photo1-1_zps3de2cc7e.jpg

photo2-2_zpsff7fc00e.jpg
 

Latest posts

Back
Top