• Friends, our 2nd Amendment rights are always under attack and the NRA has been a constant for decades in helping fight that fight.

    We have partnered with the NRA to offer you a discount on membership and Muzzleloading Forum gets a small percentage too of each membership, so you are supporting both the NRA and us.

    Use this link to sign up please; https://membership.nra.org/recruiters/join/XR045103

My first Lyman 54 GPR kit... Update #2

Muzzleloading Forum

Help Support Muzzleloading Forum:

This site may earn a commission from merchant affiliate links, including eBay, Amazon, and others.

splinter84

36 Cal.
Joined
Jan 4, 2013
Messages
66
Reaction score
0
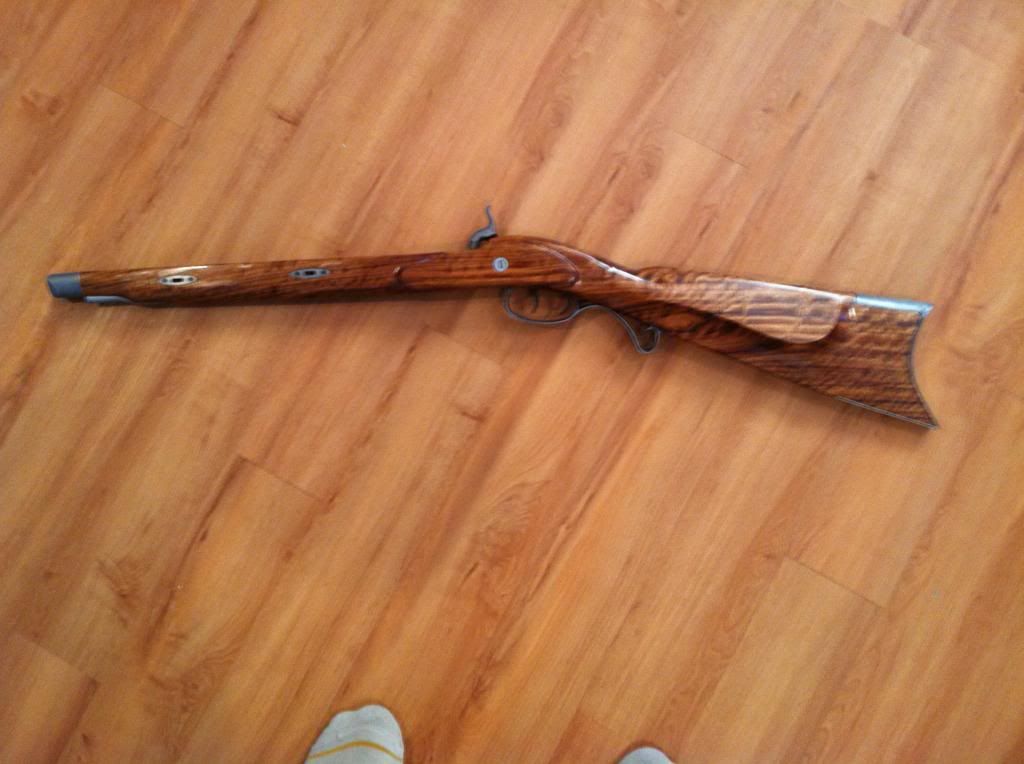
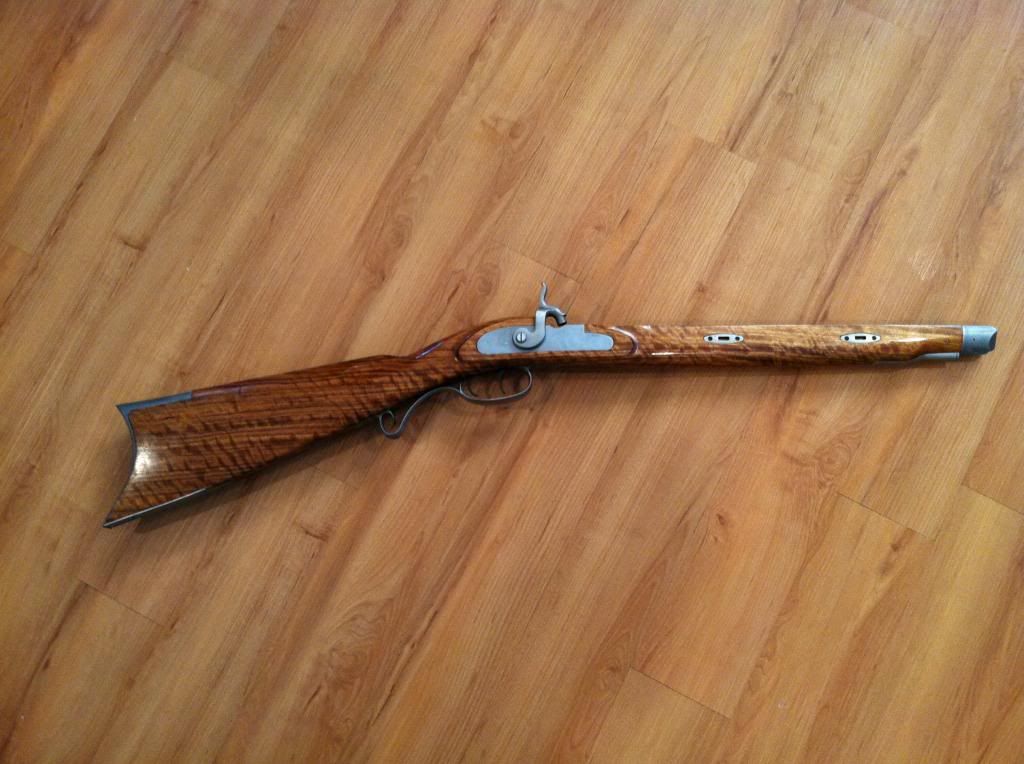
I made some progress on my GPR kit the last 2-3 weeks. I haven’t had much time to post pictures or post my progress. I apologize for that. The pictures below show the finished trim pieces and stock assembled. I had to exchange my barrel due to machine defects. I am still waiting for my new one to arrive, so she isn’t finished quite yet. The metal trim was treated in a vinegar bath for 4 hours and then another bath of transmission oil for a week. I just let the pieces soak in the oil until I needed them for assembly. I am not sure how “rust resistant” the vinegar treatment will be. I guess time will tell.

I decided on Tru-Oil for the stock finish. I wanted something simple that would be easy to maintain and repair but still let the grain show through. I applied 6 coats total allowing a minimum of 3-4 hours of dry time between coats. I also buffed the stock with 0000 steel wool between coats as well. The insides of the stock received two coats of finish. The final outside coat turned out to be extremely shiny. Much more shiny than what it is now. I applied MinWax paste wax with 0000 steel wool. The steel wool seemed to tone the shine down to my liking, but still maintain some shine with the wax. I haven’t decided if I like this shiny look or if I want to dull it a bit more since the rifle will mainly be used for hunting. I have plenty of time to decide on that.

Overall, I would say the build has taken a little longer than expected, but then again this is my first one. The butte plate was the hardest to inlet. I did the best I could. She isn't perfect. Overall, I am please with the turn out and can’t wait to get my barrel and tang back.
This pic shows the last update of the cheek plate I was having trouble shaping. You will see in the following pictures that I was able to correct the straight lines and work a little curve into it. It may not be HC/PC but I was satisfied with my attempt and outcome.I also sanded a little flute on the lock plate side of the stock for a little more comfortable grip. It made an improvement on the feel of the grip,
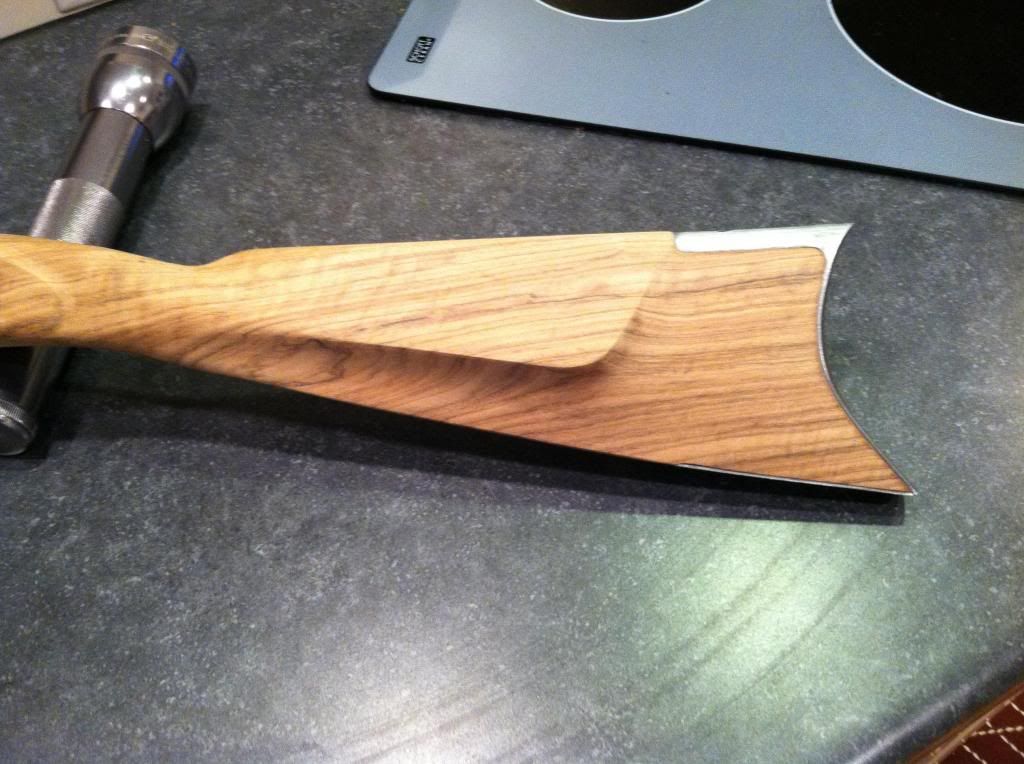
photo4_zps1835b603.jpg

Here are few pictures of the finished stock assembly. No barrel or tang yet. I have plenty of work left. I hope you enjoy them.


Opposite of lock plate
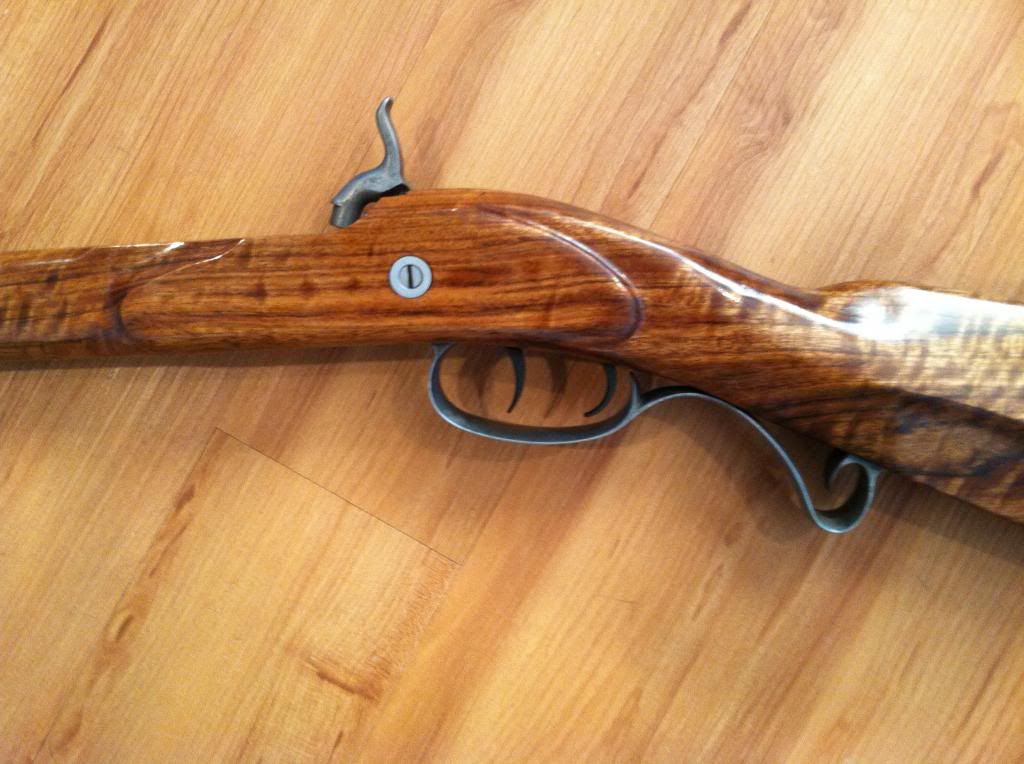
photo1-1_zps305befb1.jpg

Cheek plate side
photo-1_zpsdb1527b5.jpg

Full gun
photo3-1_zps3377dd30.jpg

A little close peak at the lock assembly.
photo2-2_zpsa7fcb989.jpg
[/URL][/img]
 
necchi said:
Yeah that's a real purty stock.
Hope everything fit's well when ya get it, :thumbsup:

Well long story short... I sent in the defective barrel and received a .50 cal barrel by accident. Before I had the .50 cal barrel shipped I assembled the entire gun with that barrel. Everything fit nicely so I ahead and continued with the project. I am still waiting for a .54 barrel.
 
Ah, :wink: That should work then without a hitch.
Sure is nice wood, you don't see too many like that, and you did a nice job keeping it lite colored so the wood show's what it's got.
 
Wow! That's good lookin', Splinter. I really like the grey look on the lock plate. And of course the stock looks good, too.

Where did you get your kit?
 
splinter84 said:
I made some progress on my GPR kit the last 2-3 weeks. I haven’t had much time to post pictures or post my progress. I apologize for that. The pictures below show the finished trim pieces and stock assembled. I had to exchange my barrel due to machine defects. I am still waiting for my new one to arrive, so she isn’t finished quite yet. The metal trim was treated in a vinegar bath for 4 hours and then another bath of transmission oil for a week. I just let the pieces soak in the oil until I needed them for assembly. I am not sure how “rust resistant” the vinegar treatment will be. I guess time will tell.

I decided on Tru-Oil for the stock finish. I wanted something simple that would be easy to maintain and repair but still let the grain show through. I applied 6 coats total allowing a minimum of 3-4 hours of dry time between coats. I also buffed the stock with 0000 steel wool between coats as well. The insides of the stock received two coats of finish. The final outside coat turned out to be extremely shiny. Much more shiny than what it is now. I applied MinWax paste wax with 0000 steel wool. The steel wool seemed to tone the shine down to my liking, but still maintain some shine with the wax. I haven’t decided if I like this shiny look or if I want to dull it a bit more since the rifle will mainly be used for hunting. I have plenty of time to decide on that.

Overall, I would say the build has taken a little longer than expected, but then again this is my first one. The butte plate was the hardest to inlet. I did the best I could. She isn't perfect. Overall, I am please with the turn out and can’t wait to get my barrel and tang back.
This pic shows the last update of the cheek plate I was having trouble shaping. You will see in the following pictures that I was able to correct the straight lines and work a little curve into it. It may not be HC/PC but I was satisfied with my attempt and outcome.I also sanded a little flute on the lock plate side of the stock for a little more comfortable grip. It made an improvement on the feel of the grip,
photo4_zps1835b603.jpg

Here are few pictures of the finished stock assembly. No barrel or tang yet. I have plenty of work left. I hope you enjoy them.


Opposite of lock plate
photo1-1_zps305befb1.jpg

Cheek plate side
photo-1_zpsdb1527b5.jpg

Full gun
photo3-1_zps3377dd30.jpg

A little close peak at the lock assembly.
photo2-2_zpsa7fcb989.jpg
[/URL][/img]


Excellent work! :thumbsup: Try rubbing the stock down with rotten stone to tone down the shine.

Tom
 
rusty said:
That is a real nice chunk of lumber you have there.what kind of finish have you put on the stock

I applied 6 coats of Tru-oil and buffed it with 0000 steel wool between coats.

I wanted to keep the finish simple for my first time assembling a kit.
 
Flatwater said:
Wow! That's good lookin', Splinter. I really like the grey look on the lock plate. And of course the stock looks good, too.

Where did you get your kit?

The kit is a Lyman GPR purchased from Midsouth Shooters Supply.
 
I will look into a rotten stone. Thanks for the tip. I would like to tone the shine down a tad more. I am just not sure what to use. I think the 0000 steel wool toned it down too much for my taste when I buffed between coats.
 
really nice work - i like the way you kept the stock light and let the colors come out ... i also like the grey in the furniture ... a very pretty gun.

:hatsoff:
 
If you tone it down with 000 steel wool and apply a good quality paste wax meant for wood finish it will give it a nice soft glow. Rottenstone will work as well, but most people have steel wool and wax at hand or easily accessible.
Robby
 
Robby said:
If you tone it down with 000 steel wool and apply a good quality paste wax meant for wood finish it will give it a nice soft glow. Rottenstone will work as well, but most people have steel wool and wax at hand or easily accessible.
Robby

I did buff the last coat with some 0000 steel wool and a paste wax by Minwax but I applied it with light pressure. This helped bring the shine down from the last coat. I might go back over it with the wax again and see if it tones it down further.
 
That is nice! I like the simple, clear natural finish on the wood.

How did you decide on the vinegar treatment vs. a rust treatment?

Looking at this makes me want to do a kit, although I would get a flintlock. I already have a percussion GPH in .50, and percussion GPR in .54.
 
onthefarm said:
That is nice! I like the simple, clear natural finish on the wood.

How did you decide on the vinegar treatment vs. a rust treatment?

Looking at this makes me want to do a kit, although I would get a flintlock. I already have a percussion GPH in .50, and percussion GPR in .54.

I looked through the Gun Builders Bench for different looks and finishes on the GPR. I found several rifles finished in this matter and liked the looks. I thought I would give it a try before ordering a blueing or browning solution. I liked the looks and plan to finish the rifle out this way.
 
I like the metal finish as well, plus it sounds dead simple - soak in vinegar, soak in oil. No building humidity tents, carding, etc.

I assume you need to plug the barrel during the vinegar soak or does it matter?
 
joe4702 said:
I like the metal finish as well, plus it sounds dead simple - soak in vinegar, soak in oil. No building humidity tents, carding, etc.

I assume you need to plug the barrel during the vinegar soak or does it matter?
From what I read you want to plug all holes in the barrel before applying the vinegar solution. I am planning to wrap the barrel in strips of old cotton t-shirt vs submerging it.
 

Latest posts

Back
Top