My first matchlock build

Muzzleloading Forum

Help Support Muzzleloading Forum:

This site may earn a commission from merchant affiliate links, including eBay, Amazon, and others.
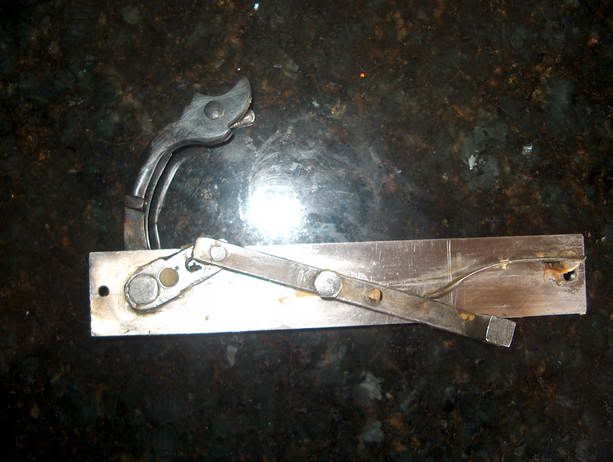
It was salvaged...I'll take the lock out tomorrow PM and post a photo of the backside. :grin:
 
Thanks,I was thinking of some S&W revolver main springs I have laying around for such a project. :winking:
 
Sorry for the delay...here are 2 pics:

HPIM3705.jpg


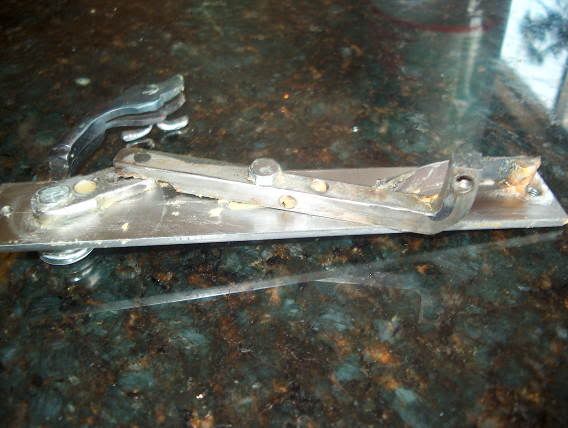
Here is a side angle, and it shows the hole in the sear bar for the trigger bar..

HPIM3707.jpg


The dog is held in place with a pivoting pin..there is a slotted piece fitted on the inside and piened with a hammer in place. The sear bar pivots on 1 bolt, and the trigger screws into it. I threaded a piece of rod into the lock plate, cut a groove, and inserted the piece of spring...THAT'S IT. :v
 
Nice photos and very helpful angle shots.I am sure many forum members will find them useful. :thumbsup:
 
I like your wing nut! It's wonderful!

A trick I found out for slotting inner part is Demmel makes a 1/8 endmill for the dremal tool. I have wasted hours drilling and filling that stupid slot. Now I drill two or three holes and zip it with that little endmill!

Did you make your own spring?

Pat
 
Patrick: The wingnut was made by cutting a screw down the middle and spreading the two sides apart!!

The spring was a scrap of flat spring...

I'll try the end mill next time...It'll save time over the file and drill method!! :v
 
I know we are supposed to say well done and all that and I am impressed by anyone who makes a matchlock. I certainly don't want to rain on anybody's parade but Coehornboy did say it was a first effort that taught him a lot.

I can see big bloopers but it is hardly my place to point them out, so...

...Coehornboy, what did it teach you? :hatsoff:

best regards

Squire Robin
 
LOTS... first of all, it is clearly not a replica of any known gun. I started my planning by using mostly drawings in books, not photo of actual guns (THIS LED TO LOCK PROBLEMS :cursing: ).

Next, in making the stock, I used a CVA kentucky rifle for the general shape...so, the drop in the stock and the shape is not "historically correct", as opposed to a paddle butt or fish tail stock. Also, I used my caplock and flint rifles as comparison when inletting the barrel. When trying to fit the lock, I realized that the barrel and pan should be sitting WAY farther back on the stock.

Now, the lock...ahhhhh...the lock. :cursing: :cursing: :cursing: I struggled with it for a huge period of time, as I had used drawings in books and not actual photos of existing locks. The mechanics of the thing were not right, and it would either bind up or the dog would not "return" without pushing forward on the trigger/ sear bar. Actually, I had originally planned to have a sear bar and no trigger guard, but I could not get it right, and what you see in the photos works.

Also, the brass T/C thimbles, bore diameter, sights, etc, are not correct to any degree, but being "thrifty", it all worked in a pinch. Also, who ever heard of an oak stock?

Now, the following is my opinion only, and I only say this not to further any disagreement but to explain what I can live with: The next matchlock I build will look more authentic. However, I can live with a "functional" lock that contains parts that may be too "blocky" or that use screws, bolts and springs that are not truly authentic. Like all of my cannon projects, I try to make a "representation" of the original using the bench tools and skills that I have. To me, the fun is in the building and shooting.

PS: I thank you for your "genteel-worded" question, and I am not offended by what you are asking. I have great memories of building and shooting my first BP kit at age 14, a CVA Kentucky rifle. Although there are guys out there who would never own one for many reasons, it is accurate, fun to shoot, and will also introduce my boys to the fun of muzzleloading.
 
I forgot...I also learned alot about basic stock making from this project...like drilling and shaping the famrod channel, and cutting and finishing the barrel channel. :v
 
The good Squire is correct...the trigger screws directly into the hole in the sear bar (see the above photo of the lock)... :v
 
Once squire robin pointed that out, many of the photos of the matchlocks that I've been looking at made sense. However, I've also noticed that some matchlocks have what I am used to as far as triggers go. I think I've got that figured out now, to some extent as well.
 
The early triggers were quite a surprise when I first saw them.

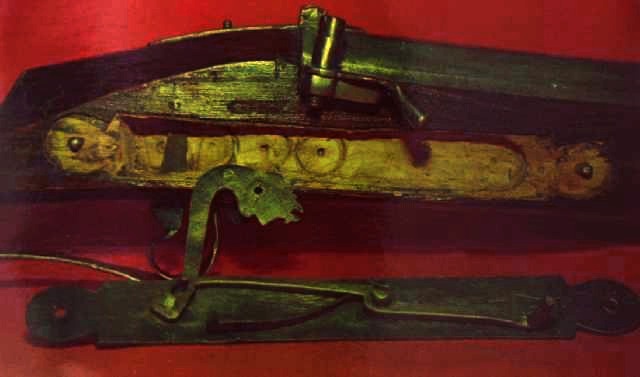
I think most builders chicken out when it comes to the early tricker and design their own along modern lines, only to discover the serpentine won't drop until they make everything rigid and incredibly precise :rotf:

tricker.jpg
 

Latest posts

Back
Top