• Friends, our 2nd Amendment rights are always under attack and the NRA has been a constant for decades in helping fight that fight.

    We have partnered with the NRA to offer you a discount on membership and Muzzleloading Forum gets a small percentage too of each membership, so you are supporting both the NRA and us.

    Use this link to sign up please; https://membership.nra.org/recruiters/join/XR045103

Nails/brads for nickel escutcheon inlay

Muzzleloading Forum

Help Support Muzzleloading Forum:

This site may earn a commission from merchant affiliate links, including eBay, Amazon, and others.

Chowmif16

40 Cal.
Joined
Apr 5, 2012
Messages
273
Reaction score
2
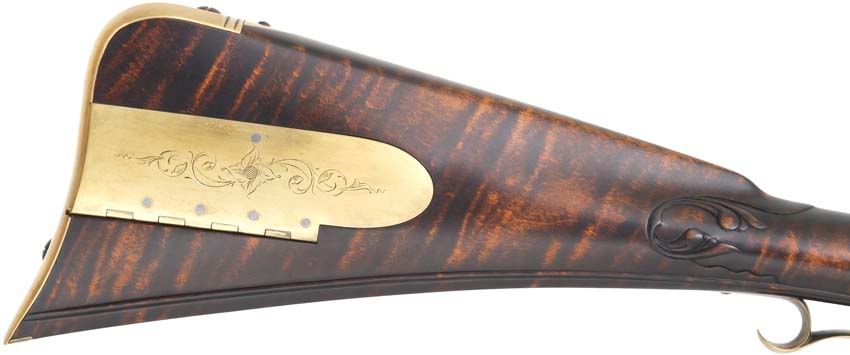
It's almost time to set my nickel escutcheons in on my TOTW Vincent Ohio Rifle. I would like to make nails/brads to anchor them in.

Not being terribly familiar, do I need some nickel silver wire, or what would be the correct wire to make the nails from? Second question, is where do I get it? Looked at TOTW, MBS, Jedediah, etc. No luck.

I plan to use the method in which you drill and countersink the inlay, then peen in the head of the nail. Plan to melt the wire to make the head.

I didn't want to just epoxy it in...
Any help is appreciated.

Cheers,
Chowmi
 
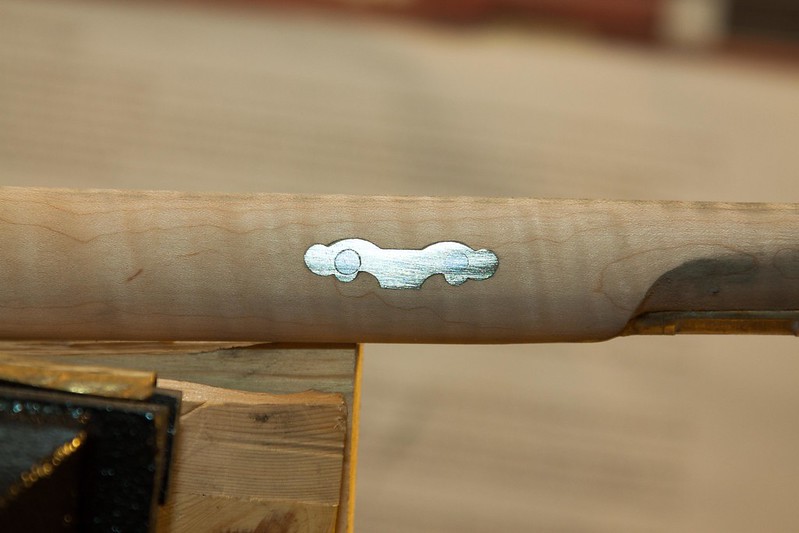
First off, if the edge of the inlay is grooved w/ a slotting file, the epoxy will flow into the groove and lock it in. The inlay now is mechanically held in lieu of just adhesion. I then do use nails to make it "legal".

I've used lengths of steel nails to hold brass and German silver inlays securely and they weren't an "eyesore". Some inlays were held in w/ headless nails....these nails were tapered and the tapered shank was pounded into an undersized hole in both the wood and inlay and the taper held the inlay down. When the inlay was bottomed out, the nail was filed flush. The shank of the nail should have chiseled barbs to prevent the nail from backing out of the wood.

I like steel nails and rivets and as shown below, they don't detract from the aesthetics.....Fred

 
Fred,
great reply, thank you.
I'm not terribly concerned about the nails showing on this build, but would like to learn the skill for future builds.
I am attempting to learn how to build fine rifles, although I must admit, my current efforts show that I have a long way to go.
In other words, this is a learning experience for me and I would like to see if I can do it.
The other part of this is that I'm pretty sure my inlaying job is so poor that I'm afraid epoxy just won't hold it for me. I like the idea of grooving it, as that may help.
Future builds may well require a hidden nickel/silver nail and I would like to practice now.

Thanks again Fred, that is a beautiful rifle and you are certainly correct that the steel nails do not detract. In fact, they add an element and show craftsmanship.

Cheers,
Chowmi
 
I am planning to use 17x7/8 wire brads from the local hardware store. Perhaps not 100% PC, but a small trade as the prospect of making nails out of silver wire sounds arduous to me for a very similar result.

I haven't done it yet on the actual inlay, but I have practiced with perfect results. I drilled a hole with a 1/8" bit through the metal. This left ever the slightest countersink for the head of the wire tack so that when I hammered it in, the head filled the hole. I then filed the head flush with a fine mill file, and it looks just like flehto's....well, almost. :grin:

The question is can I repeat the process on the real inlay? I'll have to be careful that the final hammer blow doesn't dimple the inlay, as the scrap piece that I practiced on was thicker. I may opt for epoxy bedding to help protect against that, although I'm not sure it's required. I'll post a picture once I do, as I expect to get to that in the next few days.
 
probably not applicable here, but I have a jar of really really old steel n-scale model railroading track spikes (what you would use to pin the track to the wood underneath) that I get really good results from when having to tack small inlays (mainly the ones that surround my tennon pins). I use a swiss file to file a small barb near the tip. I would recommend using some titebond 2 and tight fitting wood slivers or brownells acraglas to tighten up loose inlets if they are way off. the glue seams/miss matched stripes/or thin acraglas line is less noticeable/more cosmetically appealing than gaps in my opinion when you miss an inlay pretty bad. I know that is really low rent for a lot of builders here, just my opinion.

I also put a dab of acra or regular two part epoxy behind the inlays surrounding the tennons just as a mounting redundancy

also, I only do this with brass or steel inlays, never messed with silver
 
Onojutta,
thanks for the tip, I'll have a look at them.
For me, while a perfect match to the nickel inlay will not detract from the rifle, it is an exercise in learning a skill and finding the right source of material for future builds.
So, while I appreciate that other methods may work and be entirely historically correct, I am attempting to do my best to make the nails invisible for craftsmanship sake.
Believe me, it might be the only thing on this rifle that looks good!

So, the root question of this post still stands,
Where do I get some wire that will match my nickel inlays so I can create an invisible nail?
Cheers,
Chowmi
 
Not to hijack this thread, but just a general question about inlays... is it appropriate to use just wire nails for an inlay, or is it better to use a screw?

As I mentioned before, I am planning to use two nails for a silver hunter star cheekpiece inlay, as I prefer the "naked" look of just the nails. But in most pictures I see, a single screw is used in the center. I wonder if I should go with the screw to be more authentic...
 
Onojutta said:
As I mentioned before, I am planning to use two nails for a silver hunter star cheekpiece inlay, as I prefer the "naked" look of just the nails. But in most pictures I see, a single screw is used in the center. I wonder if I should go with the screw to be more authentic...

I have seen it both ways. can provide pics if needed. a general rule is that as soon as somebody says "they never did this" there is always an example that disproves them. as long
you stick to things that would be period authentic for the time, you are usually in good shape (ie: no Philips screws)
 
I think using a centered screw or multiple nails for a cheek star is a matter of personal preference or if copying an original, then it would determine what is used. I prefer to remove the cheek star for engraving, but the star has to be removed immediately after applying each coat of finish or the finish can "glue" the star in tightly.

Another consideration is the thickness of the star. I was fortunate that I bought a large sheet of .064 thick sterling silver a few yrs ago and one screw holds down this thick a star nicely. Thinner metal might require multiple nails to hold the "points" of the star down so they don't lift up.

Aesthetically, don't think it matters if a screw head is visible or if the nails are invisible or evident.....Fred


Thanks. Interesting point about the stain. I was planning to pin it down before staining, that way I don't mess up the final stain finish by filing down the pins. Once it's pinned down, I won't so much care if the stain acts as a glue. Perhaps this is an argument for the screw.
 
The stain isn't the problem...it's the finish that can glue the star in. If pins are used, the star pinning should be completed before staining and applying the finish. It would seem that a single screw is the easiest, but many were pinned.

All the other inlays on my LRs are pinned.....Fred
 
The cheek star is only removed for engraving when the LR is fully completed....otherwise it's not removed.....Fred
 
Fred,
thanks for your input, and I eventually decided to go with steel/iron screws for the inlay. Here is a photo after initial filing. I will eventually get it down so you can't see the join.

Unfortunately, I was in too much of a rush, and used the only unfinished screws that I thought I had, which are too big for the inlay.
After doing one side, I found some much smaller screws that would have been perfect.
This gun has been all about lessons learned, and this is another!

IMG_3410 by chowmif16, on Flickr
 
As I mentioned on your other thread, you did a nice job with the wood to metal fit.

The screw on the right is barely visible; if you can work out the screw on the left some more they just might disappear...
 
In order to make brads nails or rivets ( I do this all the time)you get a piece of wire or you can make your wire which ever you prefer. Try Rio Grande jewelry supply https://www.riogrande.com/Search/Nickel-wire
cut of a piece at least 12" long put one end in the vise then use some vise grips on the the other end and give it a pull and a slight twist to straighten and work harden the wire. Now you hold the wire vertical with a pair of lock tweezers or other maybe old pair of needle nose, use a small , tiny oxy acetylene flame melt and ball up the end of the wire and clip it off to desired length. Holding the wire exactly vertical and putting the flame exactly vertical under it is critical, if you do not the balled up parts will lean to one side or the other and the heads of your nails will be unbalanced . Now you get a piece of 1/4" (is good it can be small even 1" square) steel plate and drill a hole just very slightly larger than the wirejust a few thousanths. Set this across the open jaws of your vise put the clipped off pieces into the hole and flatten the balled up end with a hammer. This works for gold , silver ,bronze , brass nickel etc.
 
Last edited by a moderator:
If you want rounded heads on the nails, do you just use a nail set to get the nice rounded shape?
 
Goo,
thanks for that instruction. I did finally get some silver wire, and I will use it on my next build.

I'm such an idiot, I used fairly large headed screws for those inlays, because I didn't think I had any smaller ones. Turns out there were some nice tiny screws included in the parts set with the kit.

Live and learn...
 
I suppose you could, it would be about the same as die striking . There are also "cup burrs" which are available in some 1 to 2 mm diameters from the jewelry supply house which when chucked in a hand piece and flex shaft wil cut a nice round dome shape. Each one of these things would require being carefull to ball up each nail pretty close in size prior to flattening or shaping the head. You could make punch with a pattern in it to make the heads have star shapes or what ever suits you. I also forgot to mention the balling up of the ends of the wire is done upside down that is when you hold the wire vertically the flame comes up from the bottom. This is much less aggravating than doing it the other way and produces consistent suitable results.
 
Back
Top