North Hampton Pouch project by Splinters

Muzzleloading Forum

Help Support Muzzleloading Forum:

This site may earn a commission from merchant affiliate links, including eBay, Amazon, and others.
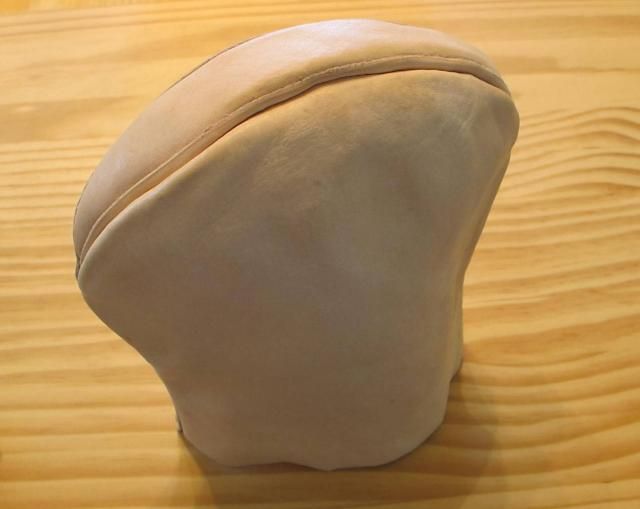
Thanks for that Smo but when you view the next set of photos you may want to amend that.

IMO my wilt work does not even reach the level of fair, but I’ll soldier on from here. Maybe not wetting the 3/8 inch wilt before forming to the panels had a good deal to do with my poor wilt. Anyway, it sure will be before the next pouch is attempted.

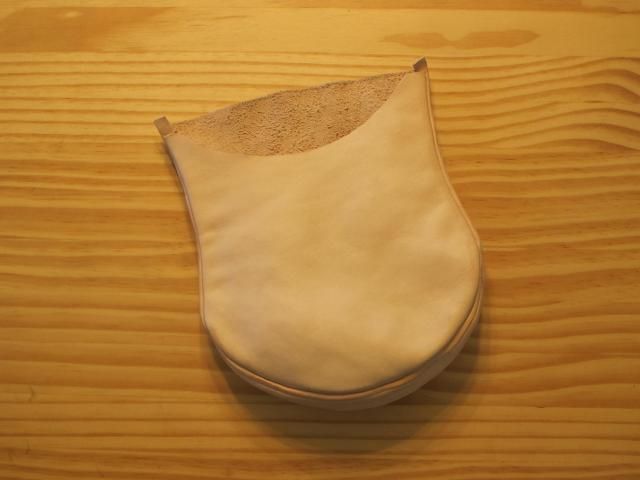
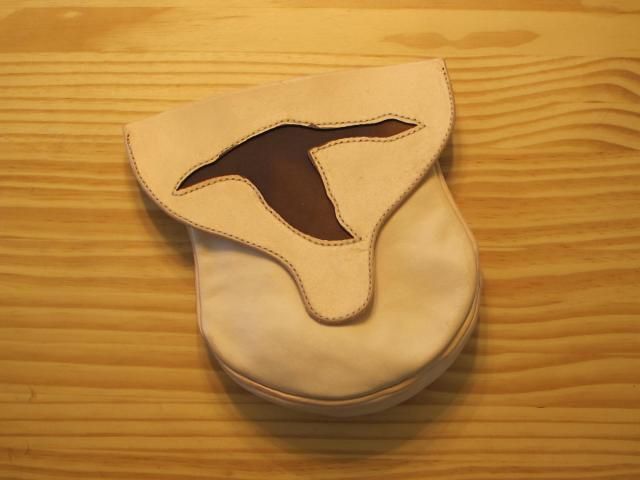
Here are photos of the current work, warts and all...... as I ride off into the sunset with a sack over my head. :(

P.S. All comments are welcome and I do mean all.


Doesn't look warty to me!

On the welt issues, I find the narrower the welt I can manage to use, the better they look in the end. Long welts tend to roll and twist with a will of their own, while short ones tuck in and stay straight and tidy. Might be my taste at work, but it looks like what's going on with yours. Your stitching was plenty neat, so it's down to the way that extra leather behaves sticking out past the seam.
 
I follow along on any bag building project posted on the forum, and there's one maneuver I don't believe I've ever seen described or recommended. Decades ago when I was learning a bit about leather work, pounding the seams was a routine part of the work. On a bag, after I've turned it right side out, and while it's still damp, I set up a broom handle, axe handle, or some such which is rounded on the end, in a vise so it's vertical and I can slide the bag down over it. I place the seam onto the rounded part and whack the daylights out of it with a wooden mallet. Hard. That straightens everything up and smooths things down, takes the waves out of the stitching line If I have sewn it straight in the first place, and generally adds a finished look to the project. Does anyone else do this>

Spence
 
I've been thinking that instead of a 3/8 inch wide welt strip I should try 5/16 or even 1/4 inch. I've been trying to make my stich centers approximately 1/8 of an inch from the edge of the work as T.C. suggests but starting to think 3/16 would be better. I guess 1/4 inch would be to much.

Thanks for critiquing the work. I'm already beginning to get the itch to try again. I may at least start working another pouch section along with this first pouch section.

P.S. Spelling welt wilt must have been influenced by my disappointment in my welt appearance. :haha:
 
Now you're down to the fine tuning, and that can sure make a difference in end results.

One thing I've found, the temper of leather varies a lot depending on the tanning method, thickness, and even spots on individual sides. Really good leather with a firm temper lets you work real close to the edge, while others don't. Kinda the thinner you get, the more you have to watch for "soft" spots that can pull through if you're too close. I vary the distance I work from the edge with the thickness and quality of the leather.

I'm fond of using a Groover rather than a creaser most of the time on seams that won't be reversed because it sets the stitches slightly below the surface for more protection from wear. But that only compounds the issue with some leathers.

As for your next bag, sounds like you're well hooked, and that's great. Sooner rather than later you'll start using your tools, supplies and skills for projects beyond muzzleloading simply because you like the work. I've made camera bags, fishing bags, book bags and even purses using much the same techniques. This book and this book really tipped over the apple cart. There are volumes 2 and 3 to go with that last one, but I've been almost afraid to buy them! :rotf:
 
:hatsoff: Just returned from making an order with Tandy. I have to be careful also when surfing their web site. :wink:
 
Splinters said:
:hatsoff: Just returned from making an order with Tandy. I have to be careful also when surfing their web site. :wink:

You are sooooooo hooked! :rotf:

So how about some cruel and unusual treatment! Consider this site!

And then there's this bad boy!

Want more options in leather? Click here!

And if you want better prices on odds and ends of hardware for future projects, hop on this link!

Gotta keep the brain cells dancing and the economy green! :grin:
 
Splinters I still say you done good :thumbsup: With a little use things will stretch some and those welts will look fine. :thumbsup: Now times awastin' get back to stichin' :rotf: :thumbsup:

BB Thanks for posting those links :thumbsup:
 
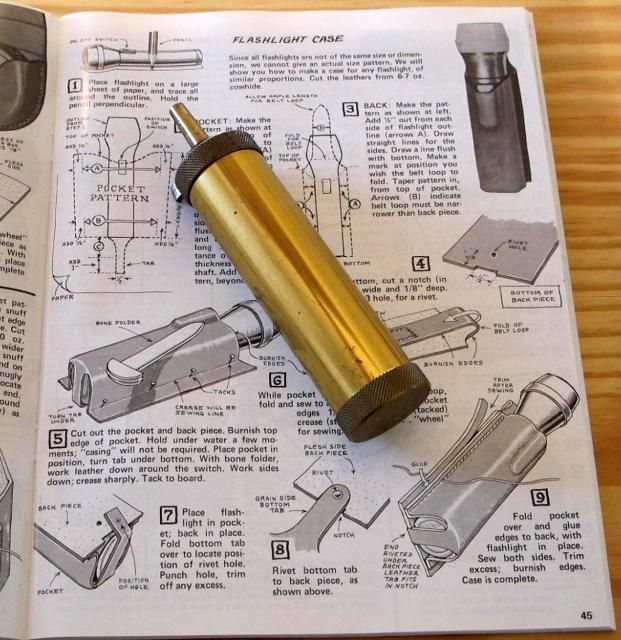
Finally back after my leather work priority was stepped on. :wink: I’ve decided to add the following to the North Hampton pouch project after receiving the two books that BrownBear suggested. Looking at the design for a flashlight case in the Leather Case book it struck me that with a few alterations I could build a belt case for my brass powder flask. So, I’ll start working on this in combination with the pouch.

Thinking about using pure neatsfoot oil or neatsfoot compound for the finish on the flask case. Any thoughts there?

 
Haven't tried the neatsfoot, but if you're attaching it to the bag I'd match the bag in your choice.

Coupla fine points you didn't ask for if you decide to make yours a belt pouch rather than attaching to the bag:

I work a lot with leather lighter than folks generally use for pouches (4-5 oz). While the 4-5 will be fine for this project, I'd avoid 2-3 oz. A couple of weeks back I made a new case for my Leatherman Wave using 2-3, and the belt loop ripped out in about 3 days. Made a replacement using 3-4 oz, and it's going strong with no signs of tear.

I'm only speculating, but I wonder if you might need some kind of "top flap" on your pouch for security in holding in the flask if you put it on your bag strap. I've had knives slide out when mounted on straps, usually when I lean way over or crawl under a log or some such. Might be a liability with your flask.
 
Thanks BrownBear for things to consider. The construction notes mention 6-7 oz. for the case. Tandy had a sale going on 4-5 sq. ft. of Veg Bellies 6 oz. and up so purchased that for the project. The plan is to make the case with a loop to slide my belt through. The idea of a retaining strap over the nozzle of the flask my not be to hard to work out. I will only be using the flask case at the range for targets and silhouettes.

Thanks again for you input. Lots of good pointers in both of the books, stitching and cases. :hatsoff:
 
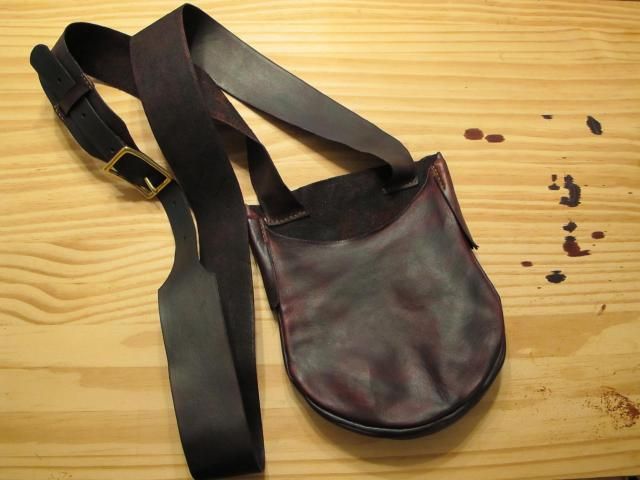
Back to work on the pouch today. Have the two halves of the bag straps ready for edge beveling now. So, that is the next step and I’ll use French Edge Skiving tool for that. Since I do not want to hang a powder horn from small buckles on the strap as this design shows I’m going to leave them off.


Spence10 said:
I follow along on any bag building project posted on the forum, and there's one maneuver I don't believe I've ever seen described or recommended. Decades ago when I was learning a bit about leather work, pounding the seams was a routine part of the work. On a bag, after I've turned it right side out, and while it's still damp, I set up a broom handle, axe handle, or some such which is rounded on the end, in a vise so it's vertical and I can slide the bag down over it. I place the seam onto the rounded part and whack the daylights out of it with a wooden mallet. Hard. That straightens everything up and smooths things down, takes the waves out of the stitching line If I have sewn it straight in the first place, and generally adds a finished look to the project. Does anyone else do this>

Spence


I've done pretty close to that, but I prefer using a rawhide mallet or smooth (unused) rounded end plastic "dead blow" mallet instead of a wood mallet. I found the wood mallet sometimes/often left impressions I didn't want and really made extra work smoothing them out.

Gus
 
More cruel and unusual punishment. Grin. I love the fact they have different awls sized to their pricking irons. Sorry, when my computer crashed, I lost the U.S. Distributor.

http://www.josephdixon.co.uk/products.asp

Gus
 
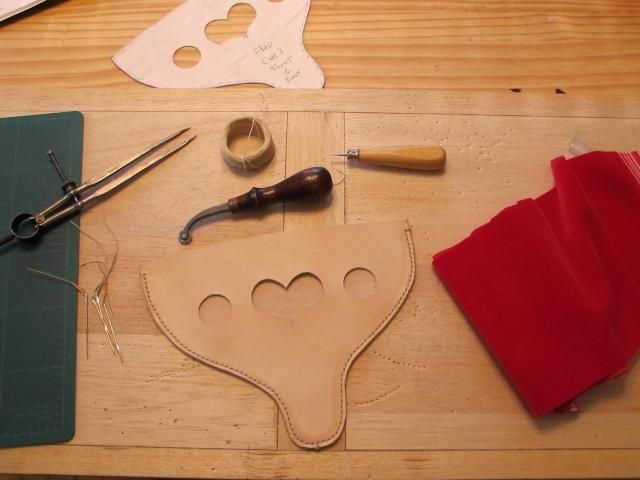
Experienced a miss fire today. As I was flexing the pouch flap the suede insert of the goose began to crack like very old paper. So, I’ll be constructing a new pouch flap but haven’t decided the pattern I will use or the material, if any, at this time.


Decided to start the dye process with Fiebing’s Leather Dye in Dark Brown. Used almost all of a 4 oz. bottle so placed an order for more. Have not rubbed this coat with a soft rag as yet to see what effect that may have.


Back to the leather bench. This has been a good learning process for me.
 
Splinters said:
...Fiebing’s Leather Dye in Dark Brown. Used almost all of a 4 oz. bottle so placed an order for more.

Here's a slick trick that's sure cut down on the amount of Fiebing's for a project while also helping produce more uniform coverage without all the light and dark spots:

Borrow (steal?) a plant mister, the spray bottle used by some to mist water onto their house plants. Use it to mist water onto the bag and lightly dampen it before applying the dye. It's a huge help, made even better when you use one of these or an air brush to apply the dye. I use about 1/4 the amount of dye on a project. The linked Preval lasts a surprising amount of time, so it doesn't cost as much as you think. Sure beats buying an air brush and compressor if all you're doing is dying leather.
 
Very good information to have. Thought I was getting that worn look. :wink:

Thanks.
 
Hey, I decided this BP muzzleloader business is as much about history as the fun shooting BP so decided to stay in tune with T.C. Albert’s North Hampton County pouch original. Yesterday slipped into a fabric shop and purchased some red velvet for the circles and heart design. The more I get into this the more I’m enjoying the history. Have my nose stuck into some back issues of Muzzleloader Magazine and Muzzle Blasts now and will probably be subscribing and joining the NMLRA. Fun! :thumbsup:


Latest posts

Back
Top