• Friends, our 2nd Amendment rights are always under attack and the NRA has been a constant for decades in helping fight that fight.

    We have partnered with the NRA to offer you a discount on membership and Muzzleloading Forum gets a small percentage too of each membership, so you are supporting both the NRA and us.

    Use this link to sign up please; https://membership.nra.org/recruiters/join/XR045103

patch cutter

Muzzleloading Forum

Help Support Muzzleloading Forum:

This site may earn a commission from merchant affiliate links, including eBay, Amazon, and others.
It depends on what size patching you want to use. You should look first a " Keyhole " saws, which are circular metal blades, with teeth cut on the bottom, and an axle in the top of the fixture to fit in your drill chuck. These come in a variety of sizes or diameters.

If you have a drill press, you can also looke at iron water pipe, which comes in much smaller diameters. Thread one end, and fit it with an end cap. Then drill and tap the endcap for a screw which you will then chuck into the drill to spin the pipe. Then while the pipe is spinning, use a half round file to file a cutting edge on the open end of the pipe to cut the patches. You can saw and file a hole in one side of the pipe to help you get the patches out of the pipe. Cut several thicknesses of cloth with each stroke, with a piece of wood under the bottom of the stack of cloth to protect the edge of your cutter when all the cloth is cut. Masonnite seems to work quite well for this purpose, and is cheap enough. Cutting a stack of cloth at least 3/8-1/2" thick seems to be the most efficient way to produce pre-cut, round patches.

Some people simply tear and cut patches square, and they work just fine. Others continue with the old way by cutting the patching at the muzzle with a patch knife from a strip of patching carried tied to the strap of their possible bag. If you are going to lube your patch with anything other than spit, pre-cutting them either square, or round makes sense. If you are using spit for your lube, cutting the patch at the muzzle is really the easiest method to use. You stick the strip in your mouth to soak it with spit, then put it over the muzzle, center the ball, drive it into the muzzle with a short starter, or if your muzzle is coned, push it into the muzzle with your thumb, then cut the patch off, and continue driving the ball and patch down the barrel to the powder charge with your ramrod.

I recommend using alcohol for Lubing your patch if its below freezing, and oil or lube if you are hunting for many hours with a PRB in the gun. Alcohol and spit both dry out too quickly, and while you are not likely to get rust in the barrel under the ball when you use alcohol, you can rust the barrel where the patch meets the lands and grooves or bore of your gun when the spit dries out. i point this out because it should enter into your decision to make your own patches, and what size.
 
paulvallandigham said:
It depends on what size patching you want to use. You should look first a " Keyhole " saws, which are circular metal blades, with teeth cut on the bottom, and an axle in the top of the fixture to fit in your drill chuck. These come in a variety of sizes or diameters.

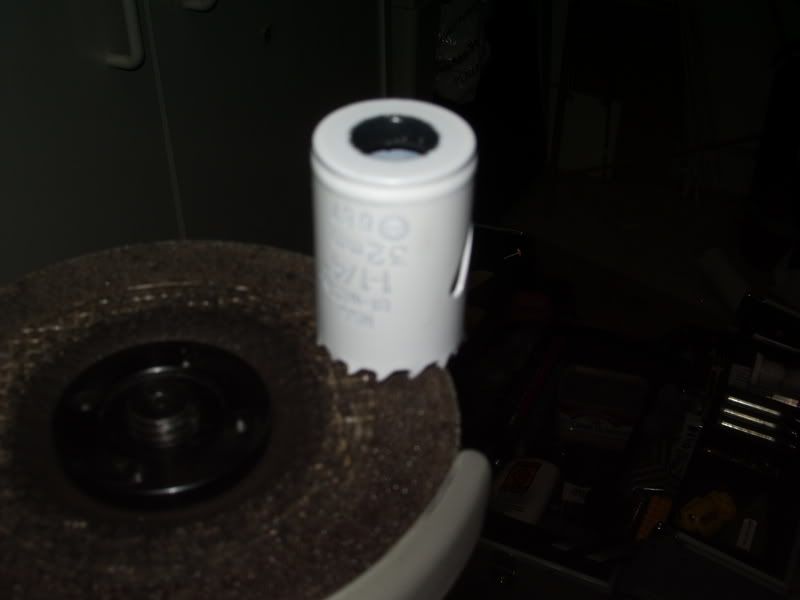
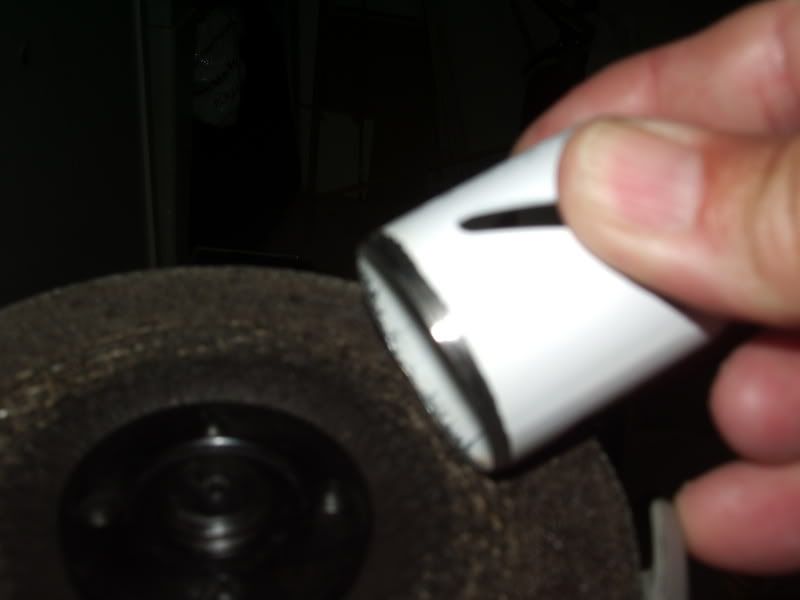
To expand on this a bit more accurately, you actually want a "hole saw" of the proper diameter with the teeth ground off of it to give a sharp smooth cutting edge. When i did mine i simply chucked it in my drill and ran in reverse to my bench grinder til i had a smooth edge, Then chucked it in my drill press & used a fine file then stone to hone it to a sharp edge.

In the past ive also taken the proper diameter thin wall pipe, & sharpened on a bench grinder as a hand punch driven through several layers of material with a hammer.

BTW a "keyhole" saw is a small hand saw with a tapered blade,used for cutting irregular shaped holes in various materials. sorta like a hand powered jig saw can do. :grin:
 
Mongrain Michel said:
would you know where I would be able to buy a patch cutter to go on my dril press...
Unless you're married to the idea of going through all the set up to cut patches from your drill press, there is an easier alternative...square patches.

No difference in any performance characteristics whatsoever and simple to make...buy a "fabric cutter" and cutting mat at the fabric store...the "fabrid cutter" is a wafer thin razor blade in a handle that looks just like a "pizza cutter".

Lay out several layers of cloth on the cutting mat, which has different grid lines on it for ease of use, and as fast as you can push the roller blade the full length of the mat you'll be cutting stacks of strips...then cut the strips into the patches themselves...I've shot round and square patches side x side and had zero difference in them...I'm sure others will attest as well.

The extra double-duty benefit of this approach is that you can also use the cutter & mat to make free cleaning patches out of old T-shirts, flannel PJs, etc
 
Amen to everything said above..
The spit patch might be for some people,but I wouln't recommend it. I found a nice 45 caliber custom rifle and (the owner spit patched) had a rust ring in barrel front of where the powder stays.He was sick when we found it..

Cutting a square patch will use about 99.9% of cloth. Good Luck.. PeashooterJoe..
 
roundball,
Thanks for the great suggestion.I've got a
punch-type patch cutter I think I got from
DGW.It works but only punches out one size.
Using your method I could cut patches for my
.32 to my .54. I'm not worried about the
round/square thing.There was a time or two
where I used square cleaning patches,lubed and used as RB patches.Never any big difference
in this camp.:hmm: Think I'll check Jo-Anns fabric
shop in the morning.Then if they don't have
ticking I'll go next door to Wally World which
I know still has some(although I hear will
discontinue handling it in the near future)
snake-eyes:hatsoff:
 
Square patches for me also. I use a paper cutter at work. Does a great job fast.

I wash my bulk ticking from Wally World only for the reason it takes the lube easier.
 
paulvallandigham said:
It depends on what size patching you want to use. You should look first a " Keyhole " saws, which are circular metal blades, with teeth cut on the bottom, and an axle in the top of the fixture to fit in your drill chuck. These come in a variety of sizes or diameters.

Hi Paul,

I just did it: WOW it works just great and so fast.

I used to make patches with a 1 3/8" arch punch; 7 - 10 mallet blows to make ONE patch.

I tried your suggestion; it was done with a grinder in a few minutes:

IMGP0637.jpg


IMGP0638.jpg


N.B.: I was wearing gloves to rind...

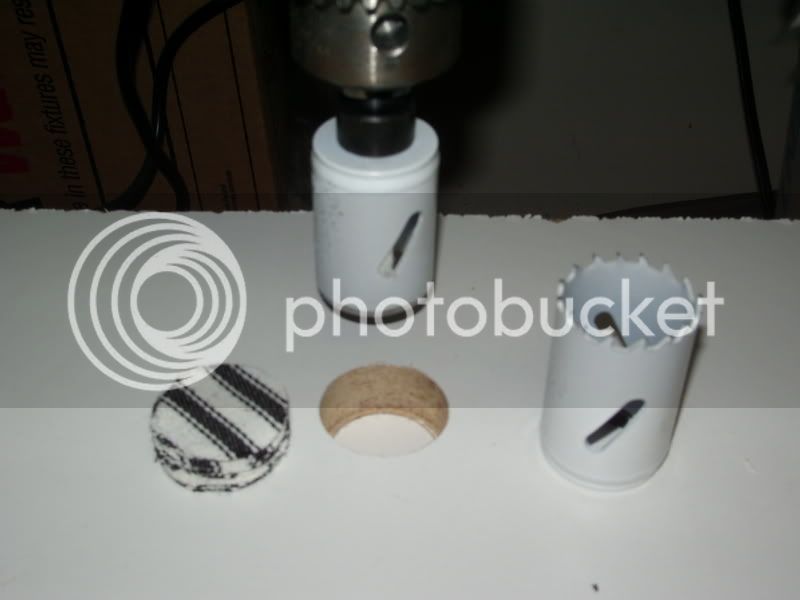
IMGP0636.jpg


15 patches with ONE pass of the drill !!! As many as I want in a few minutes.

Thank you.

GREAT IDEA.

Etienne Brule
 
If you are going to Wally World to get your ticking or anywhere else, take a sample of the thickness you need along with you as pillow ticking comes in several thickness. Or do like some of old farts do and carry a dial caliper in the store with you. I never enter Mary Joes without mine. The old ladies give you a weird look
but as you are a man, you are out of place anyway
so it don't matter!
 
I saw your post on making the hole cutter! I too have made one like you did, turns out the finished patch is too small for my 50. I will have to step up a size or two to get finished patches of the right size!
The cutter was made from one I had burnt the teeth off, so no great loss! :rotf: :rotf:
My biggest problem was holding the material. Did you make some kind of a jig or how are you holding the material? :hmm:
Also if I tried to cut to many layers the cutter tended to burn its way thru, perhaps it was not sharp enough! It was more of a test that anything.
Anyone that uses a cutter like this with a drill press have any ideas on solving the holding problem ? Pic's would be nice!
 
couple of notes on cutting in the drill press.....
you need a razor sharp edge on your former hole saw....ie shaving sharp!
I did mine on a 3/4" rubber pad to cut into.
Keeping the layered pack of material together required me to spread my hand/fingers to hold it down...I have seen some use a piece of wood with a close fitting hole in it to use as a guide. Either way, I feel this is an accident waiting to happen and if in the work place, would be a major OSHA infraction.

I found it best to mount said cutter on a handle. I have two...one is mounted on a billiard ball and the other is on an old metal door knob.
These work well for me, able to easily cut through 12+ layers at a time without having a spinning razor to take off my trigger finger!

SAFETY FIRST!
 
I read and reread this post many times thinking it was an accident waiting to happen aswell(Im a carpenter,30yrs on tools).
Anyhow I had a burned out holesaw and decided to give it a try.
I used a 12" long piece of 1x6 as a backer and folded my cloth so it was all on the board with nothing hanging down over the table on the drill press.Then on the slowest setting I just gently held the cloth so if it did grab it would justpull out of my hand.Long story short it worked great,just pay attention,so if things go wrong,all that happens is you wind your cloth up the drill shaft,with your body parts intact.Mind you I havent had a problem yet.
 
Hi,

Finally, I cut just one layer at a time;

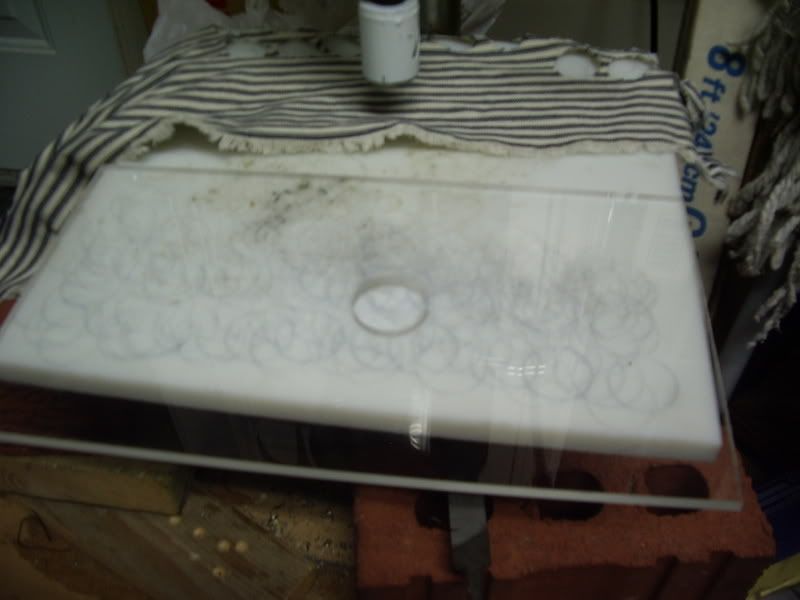
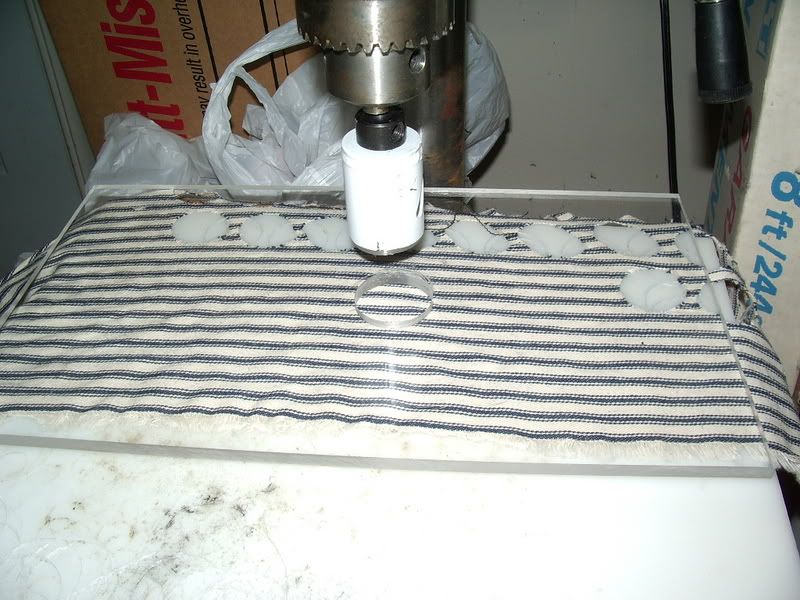
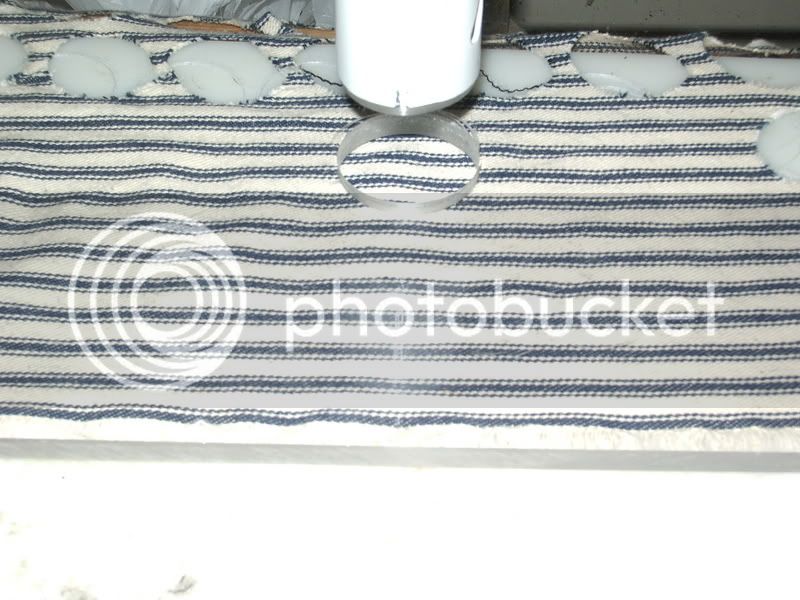
The problem is to hold the cotton; I used a plastic in which I made a hole with the cutter ( before I tool off the teeth).

The cotton is put under the plastic:

patch3.jpg


patch2.jpg


patch1.jpg


Will be very glad to get any positive suggestion.

Etienne Brule
 
I see what you are talking about now, your plastic is plexaglass!
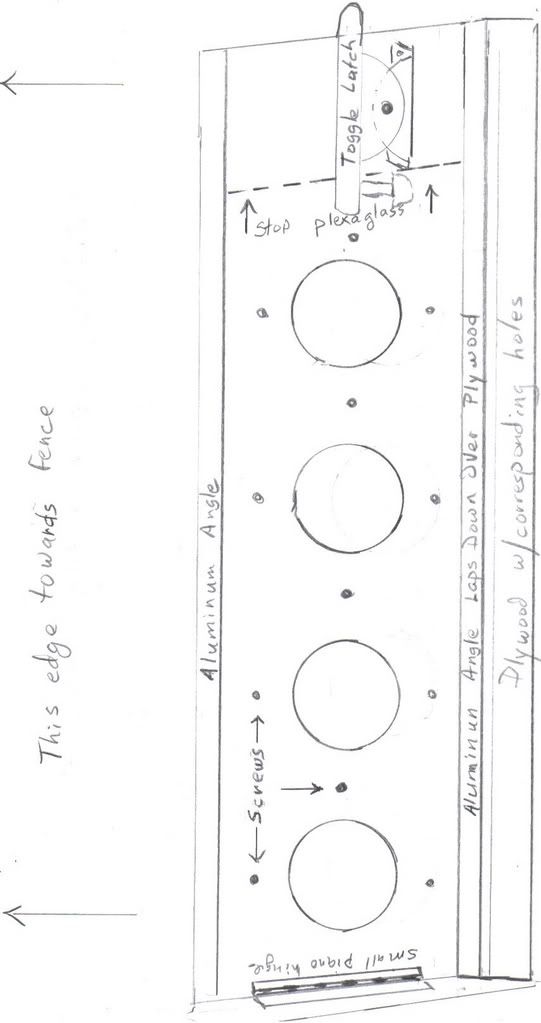
:hmm: Here's a thought after seeing what you have there! In your plexaglass drill a row of holes, leave approx. 1/2" between the row of holes, in the space between the holes drill and thread a sharp pointed screw, that just sticks thru the plexaglass. The screw points will stick into material to stabilize it! The plexaglass will need to be mounted to a piece of plywood with a row of corresponding holes in the plywood. The plexaglass could be fastened to the plywood on on end with a hinge, like a book. On the other end a small toggle clamp. The sides of the plexaglass may have to reinforced with a small aluminum angle iron to keep it from bowing up.
If you have a fence system on your drill press once you got it all set up you could cut several layers of material at one pass then release and reposition cloth and make another run. Even if you don't have a fence or a drill press it would take just a minute to line up by hand!
Well you said you were open to an idea, when I saw what you had there the light bulb lit up!
It would be a litle trouble to sit up but, once you got it made it would make cutting patches real esay.
I am working on a crude diagram of what I am talking about, and will post it shortly!
 
:hmm:
As I promised here is the crude drawing of what I am talking about. I think it will work well. It should allow you do several thickness at a time, by several I am thinking 3 - 5 thicknesses. The clamp in the drawing can be purchased at a Home Improvment store or online at this site.[url] http://www.rockler.com/product.cfm?page=2150&filter=compression holddown clamps.[/url]
Here is the drawing the previous post explains how it would work!
lastscan.jpg

I know the drawing is on it's side,it should rotate 1/4 turn clockwise but, every time I rotate it, the drawing distorts!
Well you asked for a suggestion, :youcrazy: so here it is! :rotf: :rotf:
You would not have to use the clamp I showed, just thought that might be the easiest to allow it to open like a book. The actual piece of plywood could be wider to get spacing from fence to center of holes correct. You would just have to make a cut to allow for aluminum angle to close down into on the back edge. I think that will work!
I am going to try and get one made up this weekend. Got alot to do this weekend, including going to range Sat. morning with my 50. Plan on staying till heat drive me off!
 
Last edited by a moderator:
Hi Etienne, I'm not trying to sound smart butt or anything when I say this, but the simplest solution to patch cutting is to just cut them square with a pair of scissors.

I can't find any difference in accuracy between round, cut at muzzle or cut square.

Personally, I usually cut at the muzzle but when using a loading block just the square ones do fine.
 
Hi 50cal.cliff

Great idea !!

I will like to hear from your experience.

this week-end I leave to install 4 tree-stands for my deer hunting season with BP.

Next week, I will take time to make a youtubeVideo to show the way I use the Plexiglass...

Good to read you.

Etienne Brule
 

Latest posts

Back
Top