• Friends, our 2nd Amendment rights are always under attack and the NRA has been a constant for decades in helping fight that fight.

    We have partnered with the NRA to offer you a discount on membership and Muzzleloading Forum gets a small percentage too of each membership, so you are supporting both the NRA and us.

    Use this link to sign up please; https://membership.nra.org/recruiters/join/XR045103

Premade shot cups/cartridges, how to.

Muzzleloading Forum

Help Support Muzzleloading Forum:

This site may earn a commission from merchant affiliate links, including eBay, Amazon, and others.
Status
Not open for further replies.

Brokennock

Cannon
Joined
May 15, 2011
Messages
7,999
Reaction score
11,135
Location
North Central Connecticut
Okay, I've been thinking about posting this for quite some time. And, with the new forum software allowing us to basically take and post pictures directly, now seems a good time. But, I'm not sure if this belongs here in "Smoothbore" or in the "Hunting" section, or maybe in Craftsman," anyway, I'm sure it will get moved to the appropriate place,,,,, trash maybe?

We will be using paper from brown paper shopping bags, thin cotton string (like kite string), masking tape (optional), wood templates quickly made of craft maple once dimensions are determined. I am making these for a 20 gauge smoothbore. I have 2 templates for the shot cups, one for 1oz loads and 1 for 1 1/4oz loads, so your sizes may vary but process is the same.

Here goes,
20190213_210525.jpg

So here you see the basic components. I've made maple templates of craft maple from Lowes. There was a lot of trial and error in getting the correct dimensions to wind up with 2 layers of paper around the shot, 1 layer of paper for the twisted end, and just enough paper past the shot to fold it closed like a coin roll.
20190213_211708.jpg
20190213_211638.jpg
20190213_211611.jpg

These should show the dimensions for the 1oz shot load template. The last one is a crucial measurement as it determines the volume of the shotcup.

You probably noticed 2 dowels in the 1st photo. The big one is the more necessary. It is the mandrel the shot up will be formed around. For those with a lathe, just turn down a radwood dowel to a diameter that will just barely enter the bore with 2 wraps of the paper around it. I don't have a lathe so needed to find a material I could work with (doesn't have to be wood) and was close to the size I need already. Lucked out when I found these
20190213_212606.jpg
At Hobby Lobby for $2.99

To be continued....
 

Attachments

  • 20190213_202549.jpg
    20190213_202549.jpg
    90.7 KB
  • 20190213_202505.jpg
    20190213_202505.jpg
    80.7 KB
Thanks! A video would be really neat to see exactly how your rolling them. Now have to go get wood.
 
To keep moving....
The smaller dowel isn't completely necessary but I use it to pre roll and pre stress the paper which seems to result in less tearing of the paper. You may be able to see a thin slit down into it lengthwise with a model makers saw.
Used thusly
20190213_213432.jpg
Edge of paper in saw cut, wrap paper around dowel in both directions.
20190213_213520.jpg repeat with this edge in thin dowel.

Note: I am having to alter how I lay this out as I go as some pictures are "too big for the server" or something to that effect.

Next up, forming the cup...
 
As you see in the 1st picture in the 1st post, I have precut several papers using my template. The big square template is used to reduce the paper bags to easier to store pieces that are closer to the finished dimensions.
I would recommend cutting some pieces of string for tying the twisted ends closed in advance, and, starting an overhand knot on each piece before forming your cup.
20190213_215548.jpg
Notice we are rolling this shorter "tab" on our blank will be to the inside of the roll/tube and the section that will only reach around the dowel once is toward the end of the mandrel.
20190213_213650.jpg
So we now have a short section of tube double thick around the mandrel and the longer end is about to create a single wrap. We want to slide this down the mandrel so the double thick portion is just to the end of the mandrel and the single thickness overhangs.
20190213_204537.jpg
Wrap it closed and
20190213_213725.jpg
Twist it shut.
Tip: counter intuitively, twist away from the open edge of the paper. You can see the edge of the paper here facing left, as the paper was wrapped clockwise as seen in the previous picture, twist counter clockwise, I seem to find continuing the twist clockwise caused the paper to slide and try to open. But do what works for you.
Now, take one of your precut pieces of thread, that hopefully you started an overhand knot on, and drop that loop created by the started knot around the twisted end and pull it tight around the twist
20190213_213747.jpg
20190213_213813.jpg
Try to tie this as close to the shoulder/body of the cup as possible.
Turn it so the overhand knot is opposite from you20190213_213839.jpg
And tie a square knot opposite the overhand knot. Trim your ends based on desired use (more on this when we're done)
Here we are....20190213_213911.jpg
Next up, charging and finishing......
 
Fill your cup, I'm using 1oz #5 shot, the cup shouldn't be full to the edge
20190213_213939.jpg
You need to have just enough to fold...20190213_214010.jpgthe edges closed like a coin wrapper
20190213_214042.jpg
You now have some options or decisions to make. As these are my 1oz squirrel and small game loads, I'm going to keep these closed for storage and transport with a small piece of tape.....
20190213_203638.jpg 20190213_203643.jpg
20190213_222605.jpg
You could potentially use wax or any number of things to hold this closed. A lot can depend on the paper used, you may not need anything to hold this closed, and intended use.

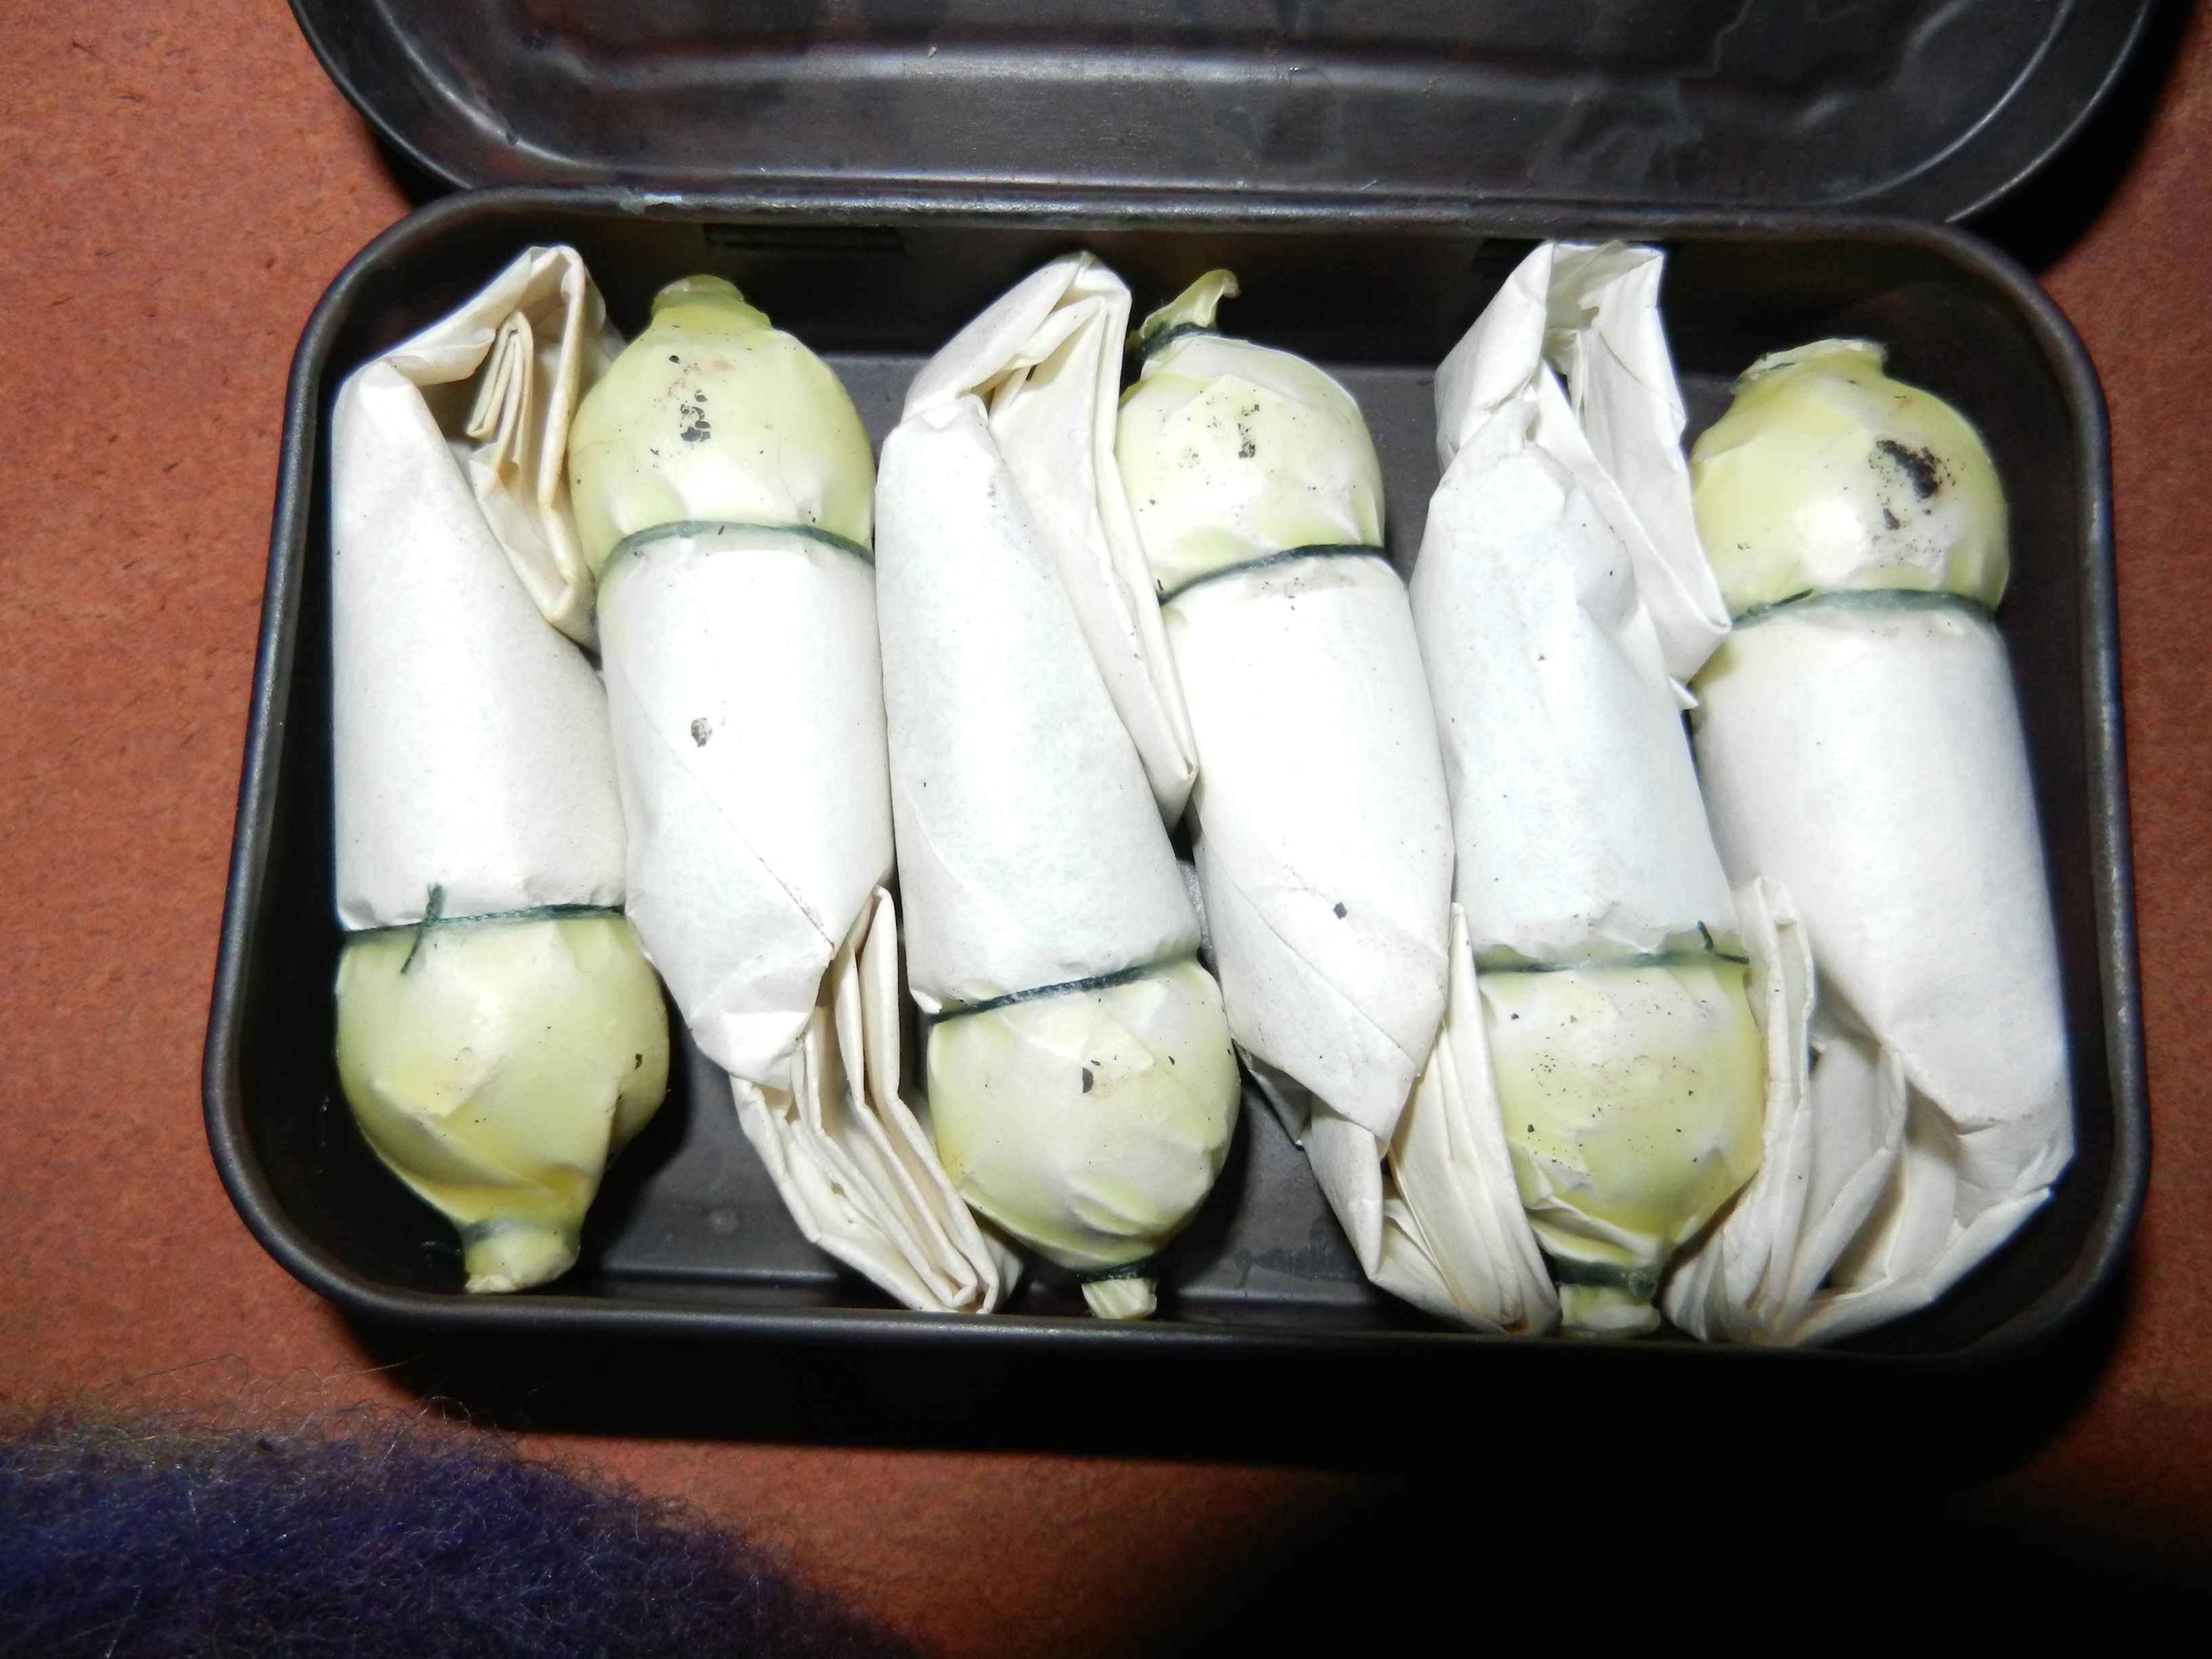
20190213_204223.jpg
A tin of squirrel medicine.

Next, use and options. No more pictures
 
For using these 1oz squirrel loads, they are placed folded end against my lubed felt wads. Which sit atop 2 thin cards, which sit over 65 grains of 3f powder. The card/wad/shotcup package is built at the muzzle, after pouring powder, I push the package into the bore just to the shoulder of the cup and the twist closure, then tear or cut off the twist, top the whole mess off with an overshot card or two, and maybe, a SkyChief lubed cushion wad.
Thusly I trim the string ends fairly short and try to keep the folded closure flat, to sit flat against the flat felt wads.
When making the 1 1/4oz cartridges for turkey hunting, I leave the strings longer and try to keep my folded closure to a minimum. Why? I load the twisted end 1st, leaving it tied closed. It nestles into a small wad of shredded and lubed sisal twine (more available than tow) the flaps of the fold are cut off at the muzzle.

This was more involved than expected, I address anything I missed tomorrow.
 
So I now see a few misspellings and unfinished thoughts. The dowels for the mandrel luckily were an odd size in that they are not a standard hardware store or home improvement store diameter but are very close to bore diameter, close enough to be brought down to size with some sandpaper and patience.
Obviously one could skip the stepped shape and just use a rectangle of the correct length. But, the double thickness (or more) of paper doesn't want to twist up as nicely and tends to want to tear when enough torque is put to it to get the twist tight and secure, harder to tie too.

If someone can figure out how to make these hold together just a little longer after leaving the muzzle, and drop away, without slugging, I'd love to hear how. One could get some amazing turkey hunting patterns then. Everything I've tried to effect this results in great patterns when/if the shot leaves the cup, but, I can't get it to leave the cup reliably enough. All too often the whole package hits the patterning board together.
I make my shot loads from brown paper rectangles (just at 2 complete wraps around the brass tubing mandrel - I can get 3-4 loads from each piece of paper), twist & tie the ends (linen thread) like a Tootsie Roll and trim the tails fairly short. Lube the entire load with deer tallow. I load my powder, heavier over-powder card (posterboard), the pre-made load (I start the load and when nearly flush with the muzzle, cut off the forward-facing tail) and a light over-shot card (mailing envelope).
20190214_192851.jpg
 
Last edited:
Thanks very much for the tutorial Brokennock. Very good info and very well done. This will be a big help to me when I start dialing in my FDC here soon.
 
So I now see a few misspellings and unfinished thoughts. The dowels for the mandrel luckily were an odd size in that they are not a standard hardware store or home improvement store diameter but are very close to bore diameter, close enough to be brought down to size with some sandpaper and patience.
Obviously one could skip the stepped shape and just use a rectangle of the correct length. But, the double thickness (or more) of paper doesn't want to twist up as nicely and tends to want to tear when enough torque is put to it to get the twist tight and secure, harder to tie too.

If someone can figure out how to make these hold together just a little longer after leaving the muzzle, and drop away, without slugging, I'd love to hear how. One could get some amazing turkey hunting patterns then. Everything I've tried to effect this results in great patterns when/if the shot leaves the cup, but, I can't get it to leave the cup reliably enough. All too often the whole package hits the patterning board together.
Nock,
Thanks for all the detailed info !!
That kind of tutorial is exactly what people who are Noobs (like myself) need to see (visuals are key in some cases) in order to completely understand, much appreciated!!

The Sicilian
 
"If someone can figure out how to make these hold together just a little longer after leaving the muzzle, and drop away, without slugging, I'd love to hear how. "

Try using a dilute paste of starch and water. Apply it evenly to the paper before you roll it. Let the tube dry and it should hold together. Flour was a common buffer before the modern plastic shot buffer, so it should be safe for your barrel.
With the method I described, I get no slugging...
 
Status
Not open for further replies.
Back
Top