• Friends, our 2nd Amendment rights are always under attack and the NRA has been a constant for decades in helping fight that fight.

    We have partnered with the NRA to offer you a discount on membership and Muzzleloading Forum gets a small percentage too of each membership, so you are supporting both the NRA and us.

    Use this link to sign up please; https://membership.nra.org/recruiters/join/XR045103

Purveyor of Sheaths, Crudely Made

Muzzleloading Forum

Help Support Muzzleloading Forum:

This site may earn a commission from merchant affiliate links, including eBay, Amazon, and others.
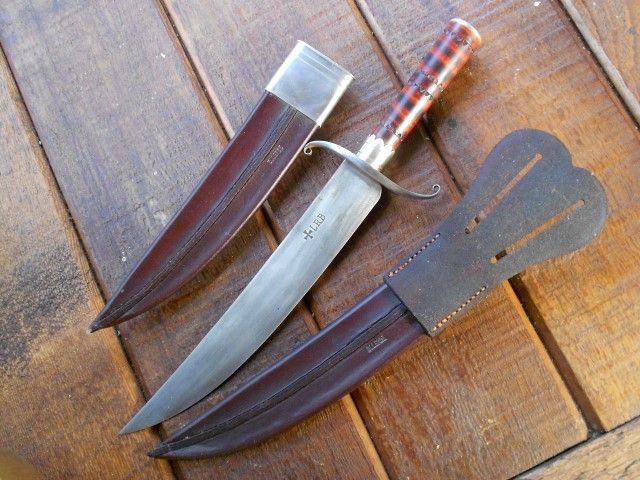
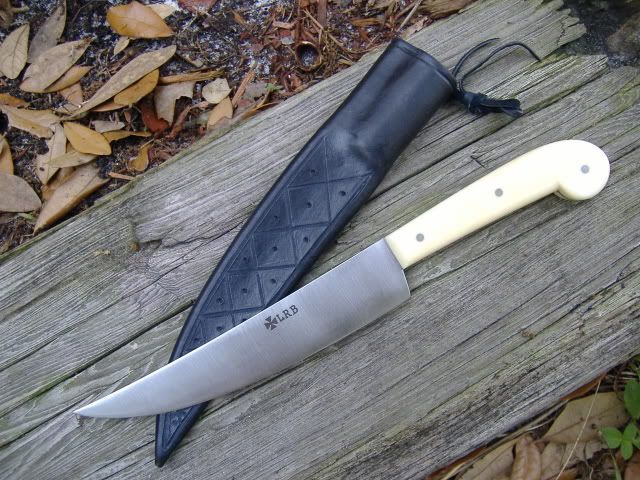
I guess you all did not carefully read my post about drilling my sheaths then sewing them. I drill mine because I glue in two sheets of 0.030" fiber spacer material along with 3 thickness of 9-10 oz veg tanned leather (counting welting). Take a closer look at the two knife sheaths on the green mat. I also don't see any crooked stiching or "fuzzy" holes in the leather. The three knife sheaths in the first picture were all done with an awl -- I like the drill press for the tough work and the awl for the other stuff :wink: .
I don't care how strong you think you are you are not going to poke a hole through all that stuff let alone get two saddle stiching needles plus two #5 cord waxed linen thread to pass through :hmm: . :v
 
Zug, Please don't take this wrong, but you are making modern style knives and sheaths, so drill bits and modern fiber materials work great for what you craft.

:thumbsup:
 
FWIW, i rather like the primitive character, but i would have gone with a welt, as per the general consensus.
 
I'll suggest a few things. First, if you do too good a job it looks like a modern sheath rather than something historical. In any event.
1. I'd go with a welt to protect the stitches. Now the thick leather will get even thicker with a welt and you might not like the appearance of a thick edge. Burnishing will blend all together but the appearance can be improved by "skiving" the leather. "Skive" is cutting the edge of leather on a slant or taper to thin it. You can slightly skive the top and bottom and also both sides of the welt and the edge will then look much like just two pieces of leather.
Tandy Leather sells special skiving tools.
2. The overall length of the edge is a little crooked. I have used files or blocks of sand paper to even out the edge. I do this after burnishing and then re-burnish. When you make the holes for the stitches- leave a little extra space to accommodate this sanding.
3. Spacing on holes- I'd use a wheel sold by Tandy's Leather. This only makes dents in the leather- then use a hand awl to make the actual holes. Once the stitching is done- run the wheel over the stitching to pack it down.
I use the shoe lace method- take a long length of thread and center the middle in the first hole and then have a needle on each end and go from hole to hole- like lacing shoes. When done- back stitch two and a half holes and just cut the threads on the back side of the sheath- they will not work loose.
You might also think about using real sinew- never use the fake stuff.
A lot of mountain man sheathes used rivets or tacks. Just a single row- the multiple rows are 1870's NDN. The PC brass tack had a square shank which is hard to find. Small harness rivets are the easiest to use and pc. Harness rivets were common, in fact saddle makers made a certain amount of belts, etc. Even in the 1870-80's west harness makers were making "bunk House specials"- gun rigs of holster and belt.
You did a good job dying the leather- I've never been very good at it. I now use a shallow pizza pan and diluted dye and just put the whole thing in it prior to stitching.
If you ever use rawhide- the dog chew toys are pretty thin. You can get a "shield" from Crazy Crow. They have white paint on one side you can easily scrap off- then you have a really thick chunk of rawhide- enough for two scalper sheaths.
 
No problem -- only trying to show different methods. I make new and some old style knives with their sheaths. I've seen some people slip a knife into a sheath and cut through the leather and cut themselves which could lead to a lawsuit - just giving a "heads-up" and how it could be prevented :hmm: . I will "lay-off" the modern style from now on -- thanks and I am not offended by your post :v . No more "soap box" preaching :bow: .
 
Please don’t take this as personal criticism and I believe I know what you meant when you wrote about something looking too good to be anything but modern, but the quality of period items had everything to do with the skill and experience of the person who did the leatherwork back in the period.

Some homemade hunting pouches from the early 19th century, that Madison Grant has illustrated in his book “The Kentucky Rifle Hunting Pouch,” are so downright crude it is amazing they held together at all, let alone for close to 200 years. I joke that they had to have been made by men because most women would have sewed a pouch better from their experience making clothes. Of course a pouch or other item did not need to be the “best quality” to work.

The other end of the spectrum of period leather work and hand sewing is as good, if not better, than most things made today. Of course, those products were made by trained saddle makers, cordwainers or other skilled leather workers.

Yet, even the mass produced scabbards for inexpensive trade knives in the 18th century were of higher quality than we might think they were. Before he passed, LaBonte showed pictures of originals on this forum where those rather inexpensive scabbards were really good quality stitching and even with some simple decoration. Chances are that since most frontiersmen used the “Butcher or Scalper” trade knives, they would have been familiar with the mass produced scabbards made for them, that were wet formed so the stitched edge went up the more or less middle of the back side of the scabbard.

The below listed link shows how a homemade version of this type of scabbard can be made. It won’t necessarily be as fancy as the less expensive mass produced 18th century ones were, of course, but it is a way they could copy the common scabbards they would have seen.
http://ofsortsforprovincials.blogspot.com/2011/03/18th-century-knife-sheath.html

This is the kind of scabbard I believe SgtErv was attempting to make, though as I think he wrote earlier, he did not leave enough room on his pattern?

Gus
 
Last edited by a moderator:
That's the one I was trying to make Gus. Yep. I think one has to allow more room when using thicker leather.

Figured instead of tossing the leather I'd make it as shown, if nothing else just for practice. ¯\_(ツ)_/¯

Re: the dye - I used cotton balls. I basically scrubbed it into the leather the wiped off the excess. Ive learned over at short time using leather dye that the less you have on the tool you're using to apply it, the less likely it is to streak. Of course, you could just dunk it, too, and that would work.
 
crockett said:
First, if you do too good a job it looks like a modern sheath rather than something historical.
Nonsense - craftsmen of the period were capable of turning out quality products that rival, and at times exceed, those made today. Why would you urge others to do mediocre work...?

When I hand-sew, my stitching looks like machine-stitching. Should I do a worse job that falls apart faster and looks crude or the best I can based upon my skills? I will ALWAYS do the latter....
 
SgtErv,

Sorry I forgot to mention it earlier, but I got a real kick out of the title of this thread and your use of 18th century terminology while poking a little fun at yourself. VERY good humour there!

Please, NEVER feel bad about making mistakes as most of us also made our share of mistakes. I joke that I managed to invent some mistakes that had never been seen before in my early years working on leather and I can still make mistakes I would be embarrassed to admit. Some of the biggest mistakes I’ve made taught me things I otherwise would not have learned.

Yes, not only the thickness of the leather can make even wet forming/bending leather difficult, but also what part of the hide the leather came from and the “Temper” of the leather, or how easily it bends due to the way it was tanned and finished. With leather as thick as you used and for this much bending, it would probably be better to use the belly leather because it naturally will bend easier. It doesn’t mean the back or shoulder leather that does not bend as easily can’t be used, you just have to allow for a little more leather for the kind of bending to make this kind of scabbard.

The important thing is you did not cut the leather out too small to not make a sheath at all. IOW, you saved the project leather from going to the scrap pile. In my scraps over the years, I had pieces that I measured three times and still cut too small. However, sooner or later you can almost always find something to use those pieces.

So keep on making things and you will get better as you go. Good leather work is as much desire and some stubbornness to learn (including from your mistakes) as much as anything else.

Gus
 
:thumbsup:

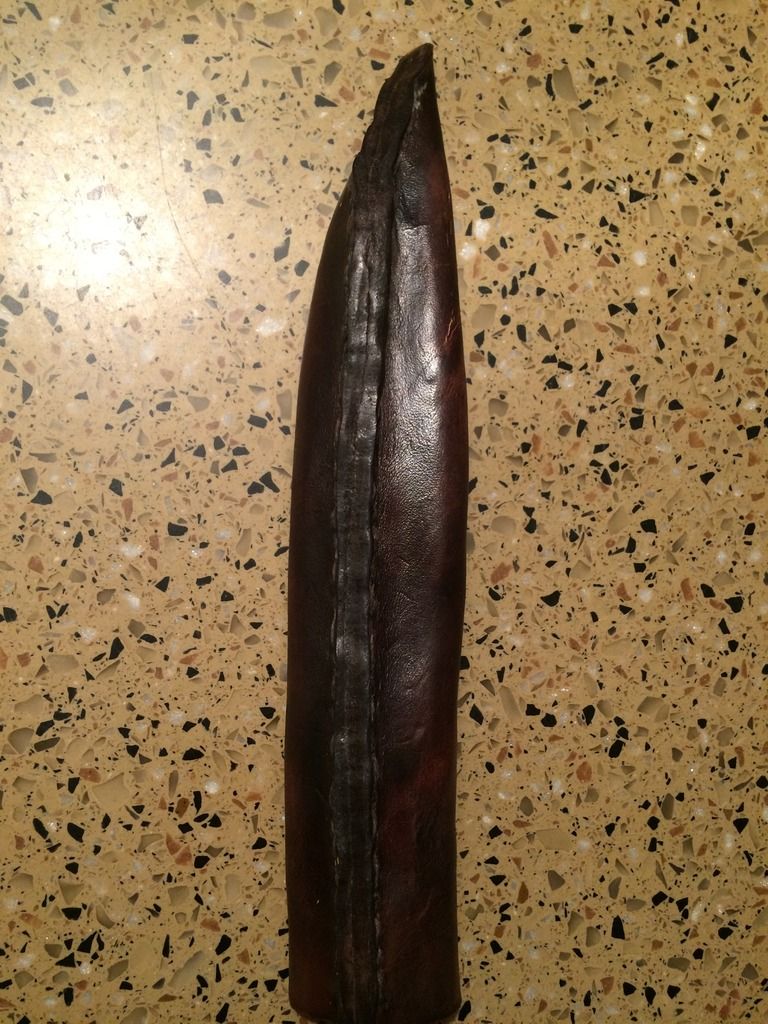
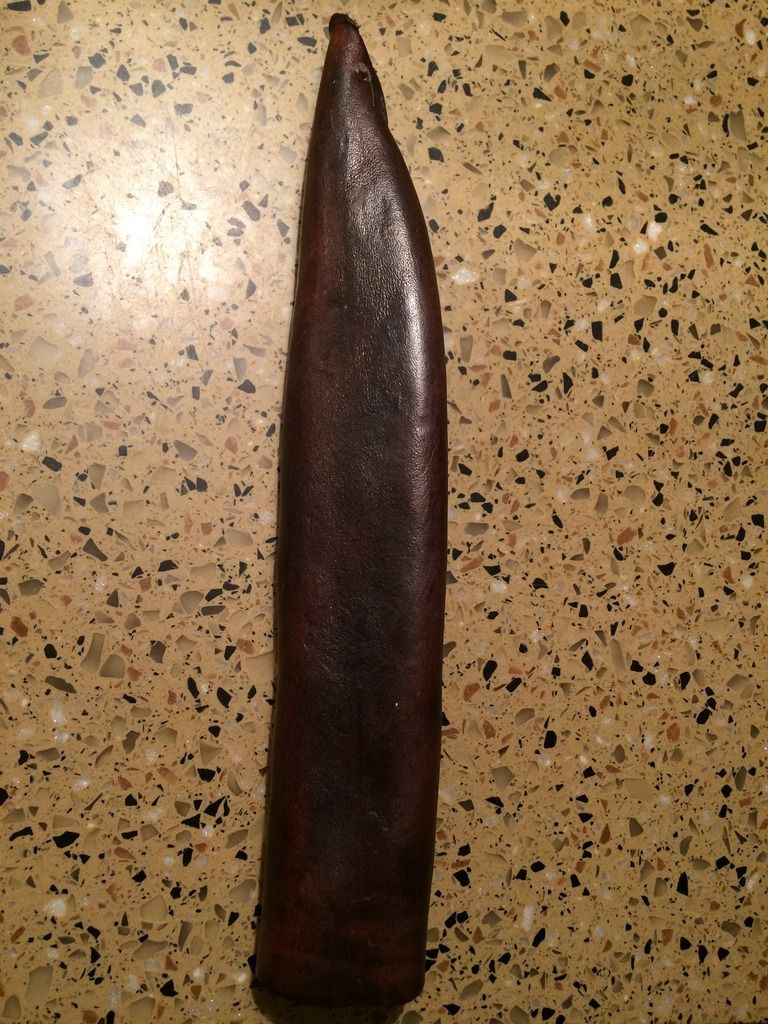
I don't reckon it'll take much to pop out those stitches and install a welt. It'll give me something to tinker on during a rainy, slow day at the fort.

I'm like most people in that I learn the best by doing and making mistakes.
 
SgtErv,

Not sure if you are used to making a welt, so may I offer some tips?

After you pop out the old stitches, then open up the sheath. Figure out which side you entered the Awl to pierce the holes. Lay that down smooth side up on another piece of leather with the smooth side up and hold the sheath firmly on the extra leather. Trace around the curved edge of the sheath with a pencil or pen. Then pick up your awl and pierce through the holes to make the holes in the welt piece. So far that is pretty straight forward.

I would take the sheath off the welt leather and go ahead and pierce the holes through the welt. Then draw another line about 1/8” to 3/16” further inside the holes in the welt piece. Hopefully this will make the width of the welt about 3/8” or a little wider. Wider is not bad as you could cut it down later if need be. Now cut the welt piece out.

Open the sheath and lay your knife in it. Lay the welt along the edge and see if the blade will stay inside the welt. If so, you can sew in the welt when you want. If not, then you are going to have to cut the welt a little less wide. Maybe the edge of the blade can be used to trace along with a pencil or pen. Then cut to that line and the welt should not cramp the blade and keep it from entering the sheath when you sew it up.

I would expect to have to have the Awl handy when you do sew the welt in place because the holes may not align perfectly. No problem, the Awl will open things up as needed.

Because your leather is thick, I don’t think I would try skiving the end near the point of the blade. This because the thick leather won’t bend over a welt with a skived end near the point. You could skive the top of the welt a little or not, as the leather will bend there better than at the point.

Remember to wet the sheath and the welt before you stitch them up.

Once the sheath is stitched back up and the knife inserted and while the leather is still moist, you can take a sharp knife held at an angle across the thickness of the welt and shave the welt and two sides of the sheath to match. Then dye the welt and sides of the sheath as needed. Then pick up a piece of antler, bone or hardwood to rub very hard along the edge to burnish the welt and edges. After it dries, apply some Atom Wax over the welt and edges.

Gus
 
SgtErv: There is another option. With a center seam there's no need for a welt. When I first tried a center seam sheath, I had questions on the pattern, etc. Then stitching was a hassle. It finally occurred to me that whether the stitching was on the blade's edge or in the center- the same amount of leather was used, so......I stitched a normal pattern of leather with the seam on the blade edge- leaving the stitching snug but not tight- the stitching being a wrap around the edge in criss-cross fashion and then I rotated the sheath on the blade the re-position the seam in the front center. I then tapped/hammered the edge to a butt to butt fit. Voila- easy.
In looking a your sheath photo, I think you might be able to do a center seam and skip the welt. Take out the stitching and when you re-stitch do the crisscrossing wrap around the edge and leave a little room- not much to tap it out to a butt to butt fit. I'd leave the tag ends uncut you -if necessary you can tighten it up if needed.
 
If a simple saddle stitch is used, and the seam is flattened afterwards, the stitches are protected both inside and out. Most of the thread is not even visible when all is finished. If I understand your cross, or X stitch method correctly, that stitch is vulnerable to abrasion wear on both sides. For a neat, relatively straight, flat and finished seam , the saddle stitches are best at no less than 7 per inch when used to do a center seam. I also use a drill press for the holes, with a 5/64" bit. The common saddle needle will go through without too much forcing, and during the wet forming any excess in the hole size closes up very well. Another thing that helps with a neat flat center seam, is to skive the under side of the two leather edges in the area of the stitching zone, and to trim the leather edge back to about 1/16" excess beyond the stitching, before the flattening is done. When doing edge seam sheaths, a stitching groove will do wonders in keeping the stitches straight. Stitching groovers are pretty cheap and easy to use. Not necessary, or even desired for center seams though.
 
Good on you for posting your work. You’re spot on in regards to reading about leather crafting techniques and actually doing them. After a while, the things which Artificer and Wick recommended will start to make sense and you would probably figure them out on your own.

Attempting to recreate professionally done cordwainer/saddle maker work takes practice and requires a high degree of craftsmanship. I think for the more “homespun” recreations, we can get by with much more “workmanlike” execution. I’ve made a bunch of center and side seam sheaths, preferring the center seam for 18th century, particularly trade knives. Since your ODF knife is aged, I think it works to have a “after market” sheath since the original one would eventually wear out with hard use. With a lot of homespun leather work creations, my opinion is that a bit of unconventional is pretty convincing. You see original artifacts, both civilian and military alike, that have been modified and the modifications are often unconventional. Meaning, they don’t necessarily use the techniques that a professional would have used. For functional frontier equipment ”“ sometimes modified after hard use or jerry rigged out of necessity ”“ unconventional makes sense. That said, I think a center seam sheath makes the most sense for a homespun, “after market” sheath for a several reasons: 1)Super simple to make 2) don’t need a welt (which aids simplicity) and 3)would have been what originally housed a scalper and one would be most likely to rough copy that construction.

When I make a center seam sheath, I like to use thinner (not super thin, but thinner that 6 oz.) HARDENED veg tanned leather. I harden by burnishing the pea waddin’ out of it with some wet wool material and/or smooth piece of antler/bone/plastic (burnishing also darkens the leather and creates a nice finish if you are making something more presentable or professional) After burnishing, wet forming the leather and using a dye further hardens ”“ I’ve used vinegaroon dye which hardens the leather or - if you’re not dying the leather ”“ alcohol. Wetting leather, by the way, also makes punching holes with an awl much easier. If you’re using thicker leather, which is totally justifiable, this may be particularly useful info. If your creating a center seam sheath with thicker leather, wetting the leather will be necessary to get a good fit. I prefer to stitch up the side just like a typical side seam sheath, then wet the leather and shift the seam to the center.
 
Thanks Wick- I didn't know it could be done that way and as you said- a lot less wear and tear on the stitches. Do you leave the stitches sort of loose or just do it in the regular manner? On some of my sheathes, in addition to the wheel to space the holes, I cut a slight groove so the stitches are half buried into the leather.
 
Crockett, you brought up an interesting point, and with all the talk of hammers I got curious...

I wetted it down from the inside (Atom Wax is good stuff so it beaded off the outside), then I took a rubber mallet to it. I now have a center deal sheath haha

:thumbsup:


SgtErv,

OK, I get it now. You just did not fully understand the directions to make a center seam sheath. Yes, there are times when the judicious use of a hammer or mallet can be beneficial ”¦”¦. :haha:

Something trained leather workers in the period would have had that frontiersmen would not have had (unless they had been trained in leather work or inherited such tools) was a “Pricking Iron.” Neil Armitage shows using a mallet to pound on the Pricking Iron into the leather, in the second of his links I posted earlier. This tool not only marks uniformly spaced points to stab with the awl, but it also partially starts the holes, making it easier to stab through the leather. It also shows even a dummy like me the angle the awl is supposed to go through the leather. I would like to make a point to thank both Capt.Jas and Labonte for informing me of Pricking Irons and how to choose and use them. Below is a link showing Pricking Irons made virtually identically to period ones. http://boothandco.com/shop/item.php?prodID=86

I don’t know if someone would have had a Pricking Iron at your 1770’s period frontier fort settlement and possibly or even probably not. However, the angle of the Awl Stab holes is still important to uniform/good looking stitches. So I will once again link this article, written by our dear departed forum member LaBonte, that shows the correct angle to stab the Awl holes and other information on hand sewing leather. (LaBonte/Chuck Burrows will not be forgotten by many of us who Chuck so graciously helped over the years.) http://www.wrtcleather.com/1-ckd/tutorials/_leatherstitch.html

It is hard for me to imagine a period sheath with center seam would have worn out. I can see how one could have been lost or damaged if dropped in a fire. IF the old sheath was somehow damaged or worn out, there is a very good likelihood that the frontiersman would have taken it apart and used the original sheath as a pattern to cut a new one from leather and possibly even to space the holes. This done by putting the old sheath over the leather and using the Awl in the old holes to align and prick points in the new leather.

Since you are new to working leather, I thought I might comment on the “Stitching or Marking Wheels” as sold by Tandy and others and I will link at the bottom of this paragraph. Technically these are “Over Stitch Tools” that are meant to sort of smooth stitches after you sew them. (Funny thing is if you are hand sewing correctly, you don’t really need to smooth over the tops of the stiches, but that is another matter.) Many of us, including me, have used these for up to decades to uniformly mark/lay out the places to Awl Stab holes for hand stitching. However, they were never intended to show the angle to Awl stab the holes. That’s why I linked LaBonte’s link to show the correct angle to stab the holes, above. https://www.tandyleather.com/en/product/craftool-spacer-set

Now there were old hand tools that combined both the Pricking Iron and the Marking Wheel, but they came out after the UnCivil War. At an old tool store, I bought one and did not realize exactly what it was when I bought it. It is actually a U.S. Cavalry Saddle Repair tool and is marked U.S. The end of the wooden handle is screwed on and in the hollow space in the handle, I found extra wheels for different numbers of holes per inch. The extra wheels were tied together by very old string. The wheels all had chisel type points as found on Pricking Irons. The funny thing is I really did not understand the chisel points until I later learned what a Pricking Iron was and how it was used. I mention this special type of wheel tool as modern ones are still being made, but they are as expensive if not more so than modern reproduction Pricking Irons. Still, if anyone runs across an original tool like this, they won’t have to wonder about them like I did for many years.

Gus
 
Last edited by a moderator:
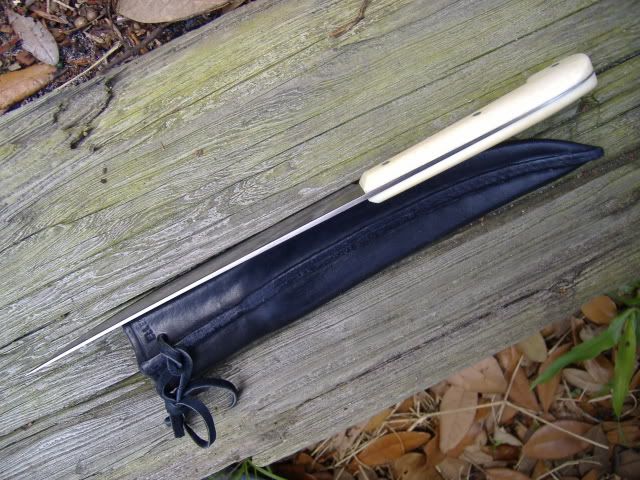
Crockett, stitches are pulled tight. No need for a groove, and if the edges are skived, then a groove might make the leather too weak. Here is what I was describing. Almost no exposed thread. Only a very few stitches showing any thread at all. This is what pressing with blocks in the vise will do.


Here is a back and front view of a scalper sheath. Note that the pressing is only done on the blade portion, and does not carry into the grip section. Also note that in the wet forming of this one, I formed a channel along the grip area to allow the blade to enter without cutting the leather. This was done with a strip of shaped wood as a form.


Wick,

"Also note that in the wet forming of this one, I formed a channel along the grip area to allow the blade to enter without cutting the leather. This was done with a strip of shaped wood as a form."

This is a GREAT tip, thank you. Also the wood blocks you use to wet form/press the leather makes a very professional grade and lovely sheath.

Do you have a groove in one of the wood blocks that the stitched seam goes into during wet forming/pressing?
Gus
 
No groove Gus, but I always, since having occasional failures early on, line the seam up by eye, then apply the plates under medium pressure just for a minute or so. Then remove the seam side plate and check for centering and uniformity of the seam before the final clamp down, which is very tight with all of it in a vise. Not often, but I sometimes have to re-adjust the seam. Usually only for centering. Oh, and the "wood" blocks are maple, faced with smooth micarta. My long sword blocks are from scrapped formica counter toppings. Those are clamped on with 8 to 10 C clamps. My first blocks were of wood, and allowed the grain pattern to show too much on the leather. The press boards need to have very smooth faces for the best results.
 
Back
Top