


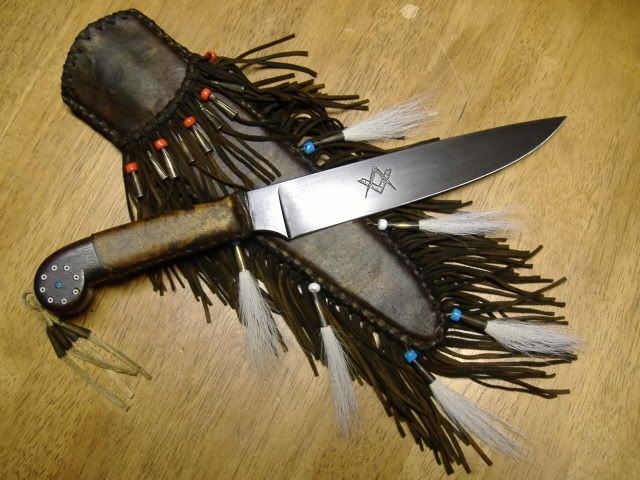
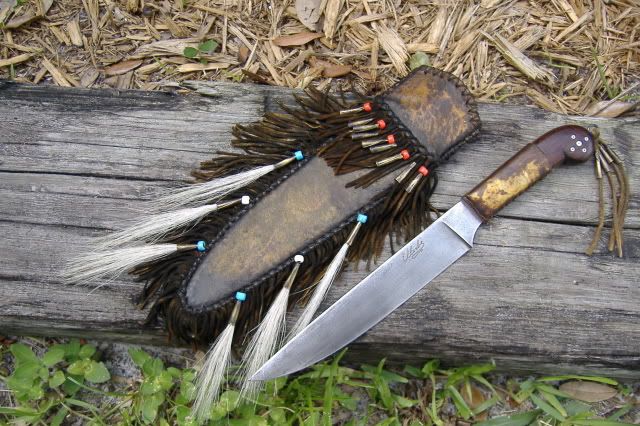
OK all you knife sheath makers, I've made plenty of regular leather sheaths(welted edge, sewn up the back, all sorts) over the years but of late have read of a lot of ya useing rawhide for the sheaths. Instead of reinventing the wheel (getten lazy in my old age)just how do you guys go about useing the rawhide?. Are you useing it as an inside liner n covering with a thinner grade leather and if so how are you connecting the two together? Can a couple of ya give me a short tutorial so to speak n get me on the right track? Thanks much guys YMHS Birdman(just got some real nice elk rawhide n have a couple knives I can practice making sheaths on)
-
Friends, our 2nd Amendment rights are always under attack and the NRA has been a constant for decades in helping fight that fight.
We have partnered with the NRA to offer you a discount on membership and Muzzleloading Forum gets a small percentage too of each membership, so you are supporting both the NRA and us.
Use this link to sign up please; https://membership.nra.org/recruiters/join/XR045103
You are using an out of date browser. It may not display this or other websites correctly.
You should upgrade or use an alternative browser.
You should upgrade or use an alternative browser.
raw hide sheath?
- Thread starter Birdman
- Start date
Help Support Muzzleloading Forum:
This site may earn a commission from merchant affiliate
links, including eBay, Amazon, and others.
- Joined
- Aug 25, 2003
- Messages
- 6,473
- Reaction score
- 1,394
You can do it either way. Most NA sheaths were rawhide inner, or often bark, then covered with brain tan, which was often quilled, or beaded. When I do a rawhide inner sheath, after wet forming, I sew it with thin brass wire. A rawhide outer sheath can be simple or very complicated. Knifemans wife, Ms Toody, is very skilled with this. I am pretty good, but don't do too many of them. Go to Knifemans website and take a look, and also Daniel Winklers site. Karen Shook does Daniels sheath work, and is probably the best in the country at it, but Ms Toody is not far behind. I will post a photo of mine, but, at least for me, these are very time consuming, and get pretty expensive. The RH has to be worked wet, and the stitching itself takes a lot of time when you are feeding in fringe and rolling the edge at the same time. I make the inner sheath of vege-tan, then cover with the rawhide.
Black Hand
Cannon
- Joined
- Mar 17, 2005
- Messages
- 9,348
- Reaction score
- 895
Rawhide liner with welt. I covered mine with braintan but the two are not attached. The braintan cover is snug enough to hold on by itself.

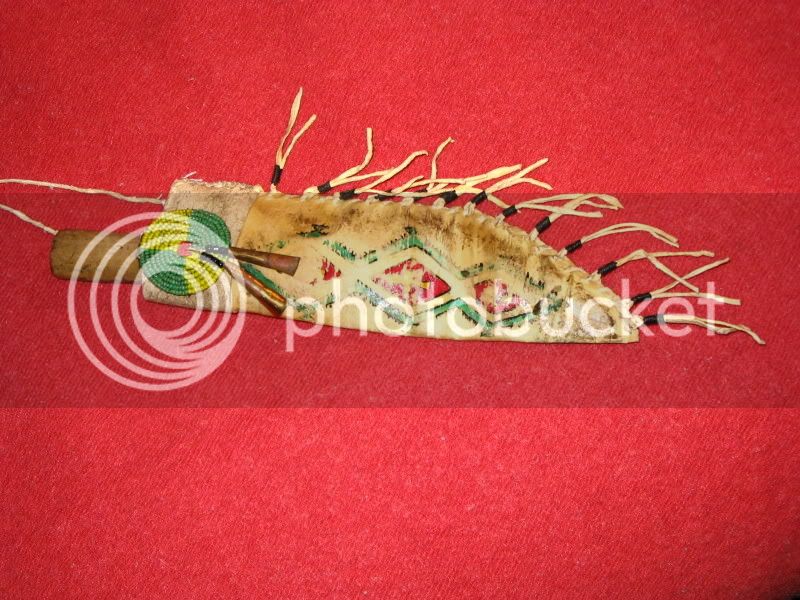
The knife is an 18th century rifleman's style with a 9" forged steel blade by Mike Mann of Idaho Knifeworks - the blade is based on an original excavated at Ft. Ticonderoga, NY. The style of the sheath and porcupine quillwork decoration is based on a couple of existing original 18th sheaths, but is not an exact copy of any existing sheath. On this sheath I did it as much as possible using only the methods and materials that would have been available at the time.
Step 1) - After doing the research (IMO an important step to get it "right") I always do a sketch to put my thoughts/ideas into some semblance of order - with quill and/or beadwork I usually work out a color scheme as well. This is only a general idea at this time - as you'll see the design wasn't "written in stone" - the whole thing will often change and/or be adapted as I go along.

Step 2) The sheath liner is double thickness elk rawhide - in this case I doubled the liner since one thickness wasn't stiff enough for the size blade. The inner liner is a standard wrap around pouch sheath with a welt sewn into place along the cutting edge using well waxed/rosined linen thread. It also has a piece of braintan buckskin sewn in at the top as liner for the handle and to which the outside braintan cover will be sewn - something I do to make it a "neater" package and to give it a bit more "grip" on the handle.
Rawhide must be worked wet, but not too wet, something only working with it will you learn - it's a bit of a hassle, but well worth the effort. Once the liner was sewn I protected the blade and ferrule from the moisture and then clamped a couple of boards over the blade until the liner was almost dry. I then took the boards off and let it dry completely. Clamping it between the boards isn't absolutely necessary - but if you don't use them you need to keep a close eye on it as it dries so that it doesn't warp - let it air dry only! Once the inner liner was dry I sealed it with varnish - I use my own home made traditional linseed oil & rosin based varnish - other period type sealers that can be used are spar varnish or a thin coat or two of hide glue. Then I sewed a second piece of rawhide over the first - I whip stitched it along the outer edge and let it air dry with the knife still in the sheath to maintain the form. Once dry I sealed this piece as well.

In the back ground are most of the materials I planned on using: at the top is a hunk of elk sinew for sewing (I also used linen and hemp thread since the sinew I had on hand wasn't teh best quality and didn't make enough good thread as I wanted), the porcupine quills and antique pound beads (about 8/0 size), and the brain tan buckskin dyed with walnut hull dye - the bottom portion almost black for the cuff and the rest a lighter color.
3) Here is the cuff (at top), cover, and sash flap (made of buffalo rawhide) all quilled and beaded. The beads on the cuff and sash flap are attached with sinew - on the far left are a couple of sinew threads. Serendipitously the sinew on the back side of the flap makes it sort of rough/sticky which will help with retention on the wool sash. With this style sheath the body of the sheath is worn under the sash with the falp on the outside. The quills and beads on the cover were sewn on using hemp thread.
For info on how-to bead and quill, a good starting place is www.nativetech.org, This along with several books available will teach you waht you need to know. There are several techniques for both beading and quillwork and my advice is to study as many sources as possible and then practice, practice, practice.....
When you compare this picture to the original sketch, you can see I changed both the overall pattern and quill colors somewhat. The pattern changed since the sheath wound up being wider than originally sketched (a not unusual circumstance) and the colors changed since I didn't get the natural dyed green/blue I wanted.
The dyes used for the quills were: walnut and charcoal for the brown/black, red ocher for the red, and rabbit brush flowers (a member of the sunflower family) for the yellow. I did try using indigo, a fairly common commercial dye of the period available either in it's raw form or from boiling trade blankets dyed with it, but the quills came out so dark that they looked like the black/brown so I decided to just use the three natural dyes. To dye the quills I steeped them in hot, but not boiling water mixed with the dyes for a couple of hours.

4 & 5) Here are front and back views of the cover and sash flap sewn onto the liner - the cover is sewn along the edge with a double whip stitch - a whip stitch was the stitch most commonly used by the Indians - I like to use a double stitch as it gives a nice look, but also makes it stronger and longer lasting since with the whip stitch the threads are exposed to wear - although in this case the beaded edge helps protect the thread from wear. Additional decoration is two hand made brass cones stuffed with buffalo hair. They are attached to the sheath with linen thread running through some larger antique pound beads and a couple of old copper beads.


6) And here it is all finished up and aged The buckskin cover is sealed with a mixture of bear oil, beeswax, and pine rosin, which also helps protect the quills.


I wrote this up for another forum a while ago so hope it helps. BTW - the so-called sash flap is something that is apparently a re-enactorism - I have yet to find ANY primary documentation for it.
As noted above their are two methods for using rawhide - use it as a liner as many NDNz did or use it as a cover over a bark/veg tan liner which can be documented as a method of repair, but not so far as I can tell as an "original" method.....
Step 1) - After doing the research (IMO an important step to get it "right") I always do a sketch to put my thoughts/ideas into some semblance of order - with quill and/or beadwork I usually work out a color scheme as well. This is only a general idea at this time - as you'll see the design wasn't "written in stone" - the whole thing will often change and/or be adapted as I go along.
Step 2) The sheath liner is double thickness elk rawhide - in this case I doubled the liner since one thickness wasn't stiff enough for the size blade. The inner liner is a standard wrap around pouch sheath with a welt sewn into place along the cutting edge using well waxed/rosined linen thread. It also has a piece of braintan buckskin sewn in at the top as liner for the handle and to which the outside braintan cover will be sewn - something I do to make it a "neater" package and to give it a bit more "grip" on the handle.
Rawhide must be worked wet, but not too wet, something only working with it will you learn - it's a bit of a hassle, but well worth the effort. Once the liner was sewn I protected the blade and ferrule from the moisture and then clamped a couple of boards over the blade until the liner was almost dry. I then took the boards off and let it dry completely. Clamping it between the boards isn't absolutely necessary - but if you don't use them you need to keep a close eye on it as it dries so that it doesn't warp - let it air dry only! Once the inner liner was dry I sealed it with varnish - I use my own home made traditional linseed oil & rosin based varnish - other period type sealers that can be used are spar varnish or a thin coat or two of hide glue. Then I sewed a second piece of rawhide over the first - I whip stitched it along the outer edge and let it air dry with the knife still in the sheath to maintain the form. Once dry I sealed this piece as well.
In the back ground are most of the materials I planned on using: at the top is a hunk of elk sinew for sewing (I also used linen and hemp thread since the sinew I had on hand wasn't teh best quality and didn't make enough good thread as I wanted), the porcupine quills and antique pound beads (about 8/0 size), and the brain tan buckskin dyed with walnut hull dye - the bottom portion almost black for the cuff and the rest a lighter color.
3) Here is the cuff (at top), cover, and sash flap (made of buffalo rawhide) all quilled and beaded. The beads on the cuff and sash flap are attached with sinew - on the far left are a couple of sinew threads. Serendipitously the sinew on the back side of the flap makes it sort of rough/sticky which will help with retention on the wool sash. With this style sheath the body of the sheath is worn under the sash with the falp on the outside. The quills and beads on the cover were sewn on using hemp thread.
For info on how-to bead and quill, a good starting place is www.nativetech.org, This along with several books available will teach you waht you need to know. There are several techniques for both beading and quillwork and my advice is to study as many sources as possible and then practice, practice, practice.....
When you compare this picture to the original sketch, you can see I changed both the overall pattern and quill colors somewhat. The pattern changed since the sheath wound up being wider than originally sketched (a not unusual circumstance) and the colors changed since I didn't get the natural dyed green/blue I wanted.
The dyes used for the quills were: walnut and charcoal for the brown/black, red ocher for the red, and rabbit brush flowers (a member of the sunflower family) for the yellow. I did try using indigo, a fairly common commercial dye of the period available either in it's raw form or from boiling trade blankets dyed with it, but the quills came out so dark that they looked like the black/brown so I decided to just use the three natural dyes. To dye the quills I steeped them in hot, but not boiling water mixed with the dyes for a couple of hours.
4 & 5) Here are front and back views of the cover and sash flap sewn onto the liner - the cover is sewn along the edge with a double whip stitch - a whip stitch was the stitch most commonly used by the Indians - I like to use a double stitch as it gives a nice look, but also makes it stronger and longer lasting since with the whip stitch the threads are exposed to wear - although in this case the beaded edge helps protect the thread from wear. Additional decoration is two hand made brass cones stuffed with buffalo hair. They are attached to the sheath with linen thread running through some larger antique pound beads and a couple of old copper beads.
6) And here it is all finished up and aged The buckskin cover is sealed with a mixture of bear oil, beeswax, and pine rosin, which also helps protect the quills.
I wrote this up for another forum a while ago so hope it helps. BTW - the so-called sash flap is something that is apparently a re-enactorism - I have yet to find ANY primary documentation for it.
As noted above their are two methods for using rawhide - use it as a liner as many NDNz did or use it as a cover over a bark/veg tan liner which can be documented as a method of repair, but not so far as I can tell as an "original" method.....
Last edited by a moderator:
Gents thanks much for the info, sorry about the delay getting back to ya but life gets crazy sometimes as ya all know. This ought to help me figure out what I want to do. This is one great board with folks so easy to work with, it just makes ya smile!!! :thumbsup:
NJStricker
36 Cal.
- Joined
- Jan 7, 2009
- Messages
- 91
- Reaction score
- 0
I hope there's not a problem with me linking to another forum, but here is a tutorial put together by John Cohea.
http://paleoplanet69529.yuku.com/topic/19744/t/Rawhide-sheath-tutorial.html
http://paleoplanet69529.yuku.com/topic/19744/t/Rawhide-sheath-tutorial.html
Last edited by a moderator:

- Joined
- Aug 25, 2003
- Messages
- 6,473
- Reaction score
- 1,394
Joe, the only reason to use buckskin as a liner would be to protect a knife with a high end finish. It is too soft, and too pliable for much else. Early liners were rawhide, bark, and wood. Stiffened bark tan would also work, as would modern vegetan.
It certainly does protect the finish, dats fo' sure! You can actually even store a knife in the deerskin lined sheaths I get from Paul Long without any real worries. I need to figure out how to make wooden sheaths pretty soon.Wick Ellerbe said:Joe, the only reason to use buckskin as a liner would be to protect a knife with a high end finish. It is too soft, and too pliable for much else. Early liners were rawhide, bark, and wood. Stiffened bark tan would also work, as would modern vegetan.
Joe Mandt said:You can actually even store a knife in the deerskin lined sheaths I get from Paul Long without any real worries. I need to figure out how to make wooden sheaths pretty soon.
With all due respect but NO you should not store a knife for long periods of time in leather of any type - I have not brought this up on the knife sites because it would just turn into a peeing match and I don't need that, but there are two problems with soft linings:
1) Eventually they will collect grit and grime and it's hard to remove due to the nature of the soft leather it gets imbedded into the leather
2) Buckskin is CHROME TANNED leather and I know of no other professional holster maker for instance that recommends using chrome tanned in contact with carbon or even stainless steel - it can and will cause corrosion over time which matches my own experiences and fairly extensive testing......Paul and others probably finish the leather but still????......hopefully things won't turn out bad, but IMO why thake the chance.
As Wick noted mostly no buckskin linings except the short ones I pictured above (and those are a type of oil tanned leather - brain or fish oil tanned - not Chrome tanned), of which I've seen a few originals. On the other hand period English Bowie sheaths at times used velvet linings....
I'm not saying that I do that,Chuck, but I have seen it done (my brother) and the blade did not have the normal hickeys that you seomtimes see when a knife is stored in the sheath. I still told him to store it in the zipper case out of the sheath. :grin:
T.C.Albert
40 Cal.
- Joined
- Apr 16, 2007
- Messages
- 220
- Reaction score
- 0
Heres one of mine from a rawhided deer skin we worked up.
TCA
TCA
TC- I've done few that look pretty close to the one you posted. I started out with leather but always wanted to get around to a rawhide sheath. After I made a couple I wasn't quite sure I liked them because they are as stiff as a board and even with a tight fit the knife isn't the same as with the more resilient leather sheath. I use rawhide because it is PC but if one had a choice, I would not necessarily rule out leather. Leather makes a good sheath. IMHO.
TC- I like the paint job. I have looked for a pattern but haven't found anything. Is there any history to the pattern? Thanks.
TC- I like the paint job. I have looked for a pattern but haven't found anything. Is there any history to the pattern? Thanks.
"2) Buckskin is CHROME TANNED leather and I know of no other professional holster maker for instance that recommends using chrome tanned in contact with carbon or even stainless steel - it can and will cause corrosion over time which matches my own experiences and fairly extensive testing......"
Makes sense most tanning methods use salt at some p[oint and there is some residual as well as the tanning chems, salting a stretched dried Beaver hide when fleshing can draw moisture and ruin a lot of other pelts in a storage area. Rawhide sheaths are about the simplest to make and are very correct for most times/areas
Makes sense most tanning methods use salt at some p[oint and there is some residual as well as the tanning chems, salting a stretched dried Beaver hide when fleshing can draw moisture and ruin a lot of other pelts in a storage area. Rawhide sheaths are about the simplest to make and are very correct for most times/areas
John Wasmuth
50 Cal.
- Joined
- Nov 8, 2005
- Messages
- 1,328
- Reaction score
- 6
SALT! Exzactly. Death to metal. NEVER STORE ANYTHING METAL IN CHROMIUM OR ALUM TANNED LEATHER!
Similar threads
- Replies
- 4
- Views
- 983
- Locked
- Replies
- 5
- Views
- 964
- Replies
- 15
- Views
- 2K
- Replies
- 2
- Views
- 913
