


I've been thinking about posting something like this for some time now. Maybe it will help somebody learn how to build their own shooting bag. Follow along as I show you how I do it.
I just started on this bag tonight. Took some pictures as I went. I'll try and describe what I'm doing and add pics and text as I get things done until the bag is finished.
Feel free to ask questions, add comments, or give advice at any time.
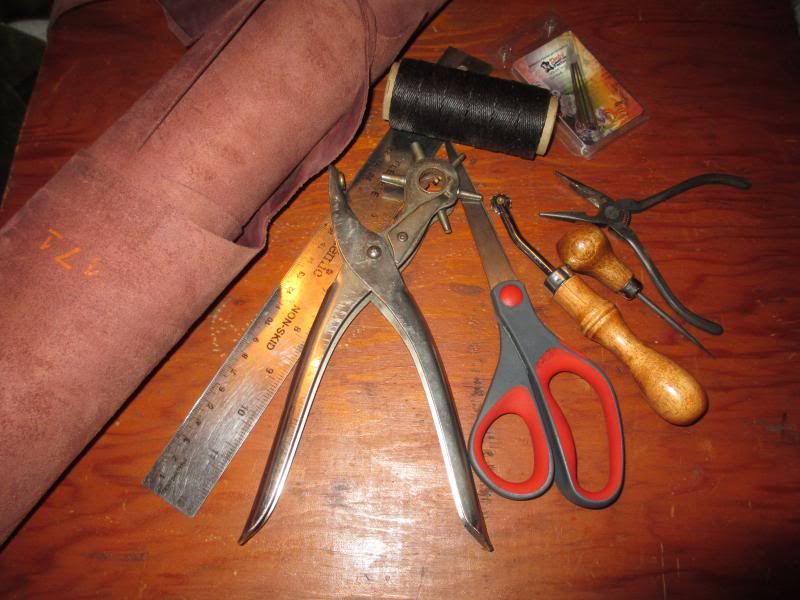
What you will need;
A pattern.
Leather. I like 4-5oz oil tanned for shooting bags.
A good sharp pair of scissors.
Awl. I like the round tipped ones. Some prefer the blade tips.
Overstitch wheel. Used for laying out evenly spaced stitching.
Small pair of pliers.
Harness needles.
Waxed linen thread.
Ruler / straight edge.
Hole punch.
Not pictured but you will want a chunk of beeswax and a soft wood board.
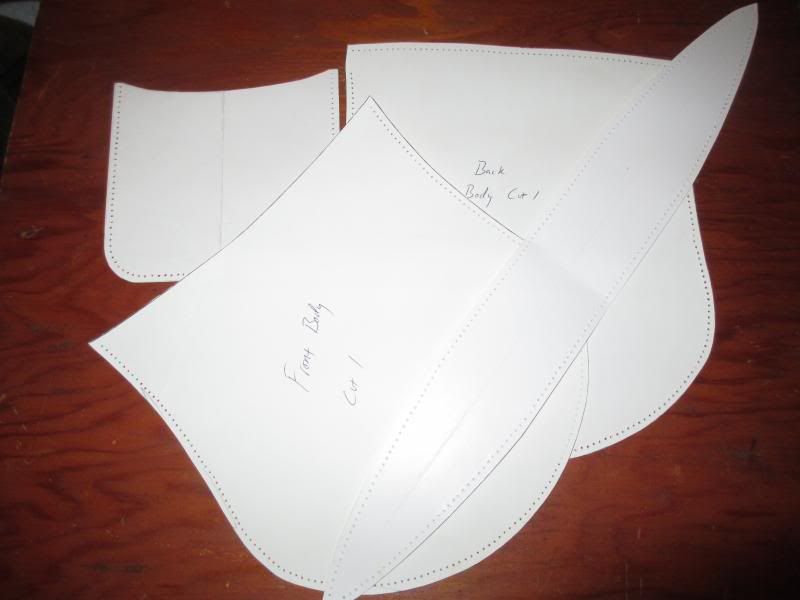
First thing you'll need is a pattern. Get a copy of an existing one or make your own. Graph paper is very useful if you decide to make your own pattern.
Once I make a pattern on paper, I like to transfer it to heavy card stock. The card stock makes it easier to handle while scribing it on to the leather. It also holds up better to be used again in the future.
I like to use my overstitch wheel to lay out the stitches on the card stock pattern rather than directly on the leather. Then I can use the pattern to mark the hole location using my awl.
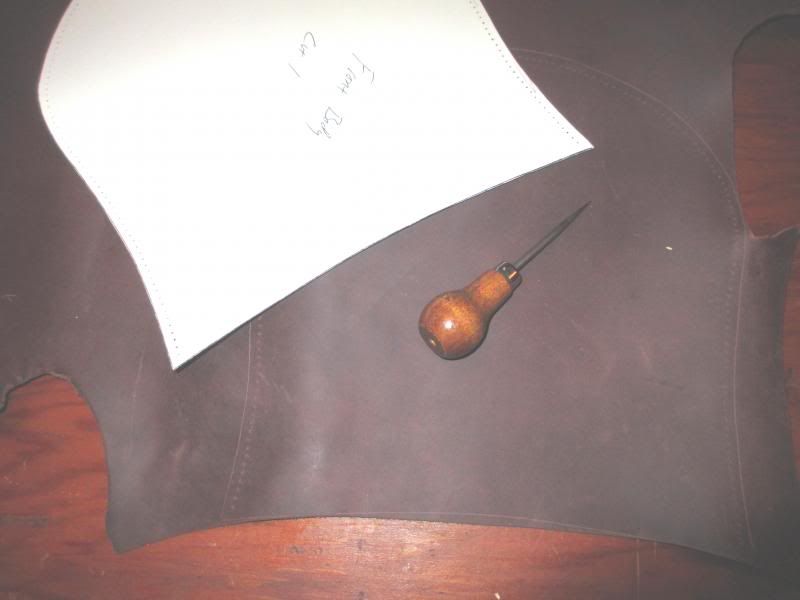
Leather is expensive, don't waste any more than you have to. Lay out your pattern as close as possible to the edge and make the best use of your whole hide. Hold the pattern still while you use your awl to scribe a line all around the edge. I also lightly poke hole marks at this time thru the locations laid out earlier on my pattern with the overstitch wheel. I use 7 holes per inch.
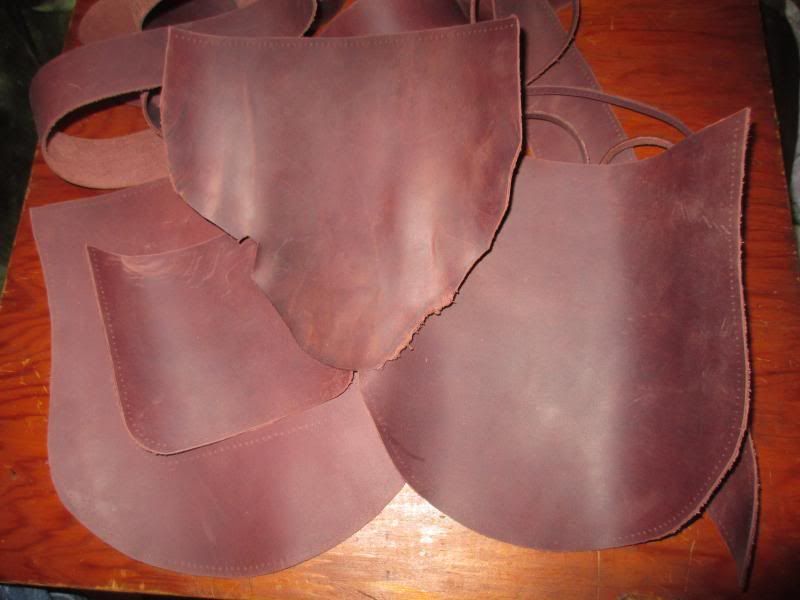
This bag will have the rough edge of the hide as a flap rather than cutting it to any certain design. I think this makes for a cool rustic look on a shooting bag. There are countless shapes you could use instead.
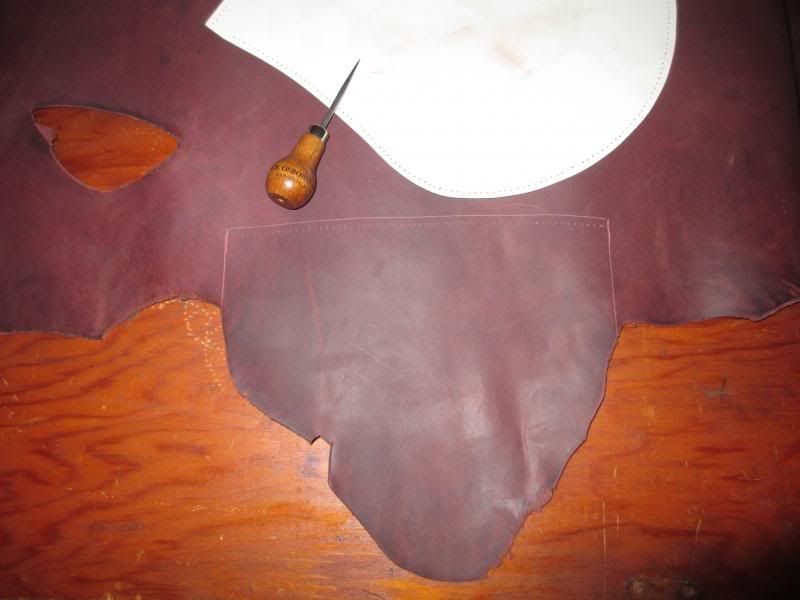
And here we have all the parts necessary to build our bag. Front and back panels, flap, tapered gusset, an inside pocket, strap, and welt.
They sell a strap cutting tool and one of these days I will buy one. I'm sure it makes a bagmakers life a lot easier, but for now I still lay them out with a long straight edge and carefully cut using my scissors. About 1.5" width seems perfect for the strap. My welts are about 1/4 inch wide.
Next thing will be to poke about a gazillion holes for the stitching and start putting this thing together. Check back for more.
I just started on this bag tonight. Took some pictures as I went. I'll try and describe what I'm doing and add pics and text as I get things done until the bag is finished.
Feel free to ask questions, add comments, or give advice at any time.
What you will need;
A pattern.
Leather. I like 4-5oz oil tanned for shooting bags.
A good sharp pair of scissors.
Awl. I like the round tipped ones. Some prefer the blade tips.
Overstitch wheel. Used for laying out evenly spaced stitching.
Small pair of pliers.
Harness needles.
Waxed linen thread.
Ruler / straight edge.
Hole punch.
Not pictured but you will want a chunk of beeswax and a soft wood board.

First thing you'll need is a pattern. Get a copy of an existing one or make your own. Graph paper is very useful if you decide to make your own pattern.
Once I make a pattern on paper, I like to transfer it to heavy card stock. The card stock makes it easier to handle while scribing it on to the leather. It also holds up better to be used again in the future.
I like to use my overstitch wheel to lay out the stitches on the card stock pattern rather than directly on the leather. Then I can use the pattern to mark the hole location using my awl.

Leather is expensive, don't waste any more than you have to. Lay out your pattern as close as possible to the edge and make the best use of your whole hide. Hold the pattern still while you use your awl to scribe a line all around the edge. I also lightly poke hole marks at this time thru the locations laid out earlier on my pattern with the overstitch wheel. I use 7 holes per inch.

This bag will have the rough edge of the hide as a flap rather than cutting it to any certain design. I think this makes for a cool rustic look on a shooting bag. There are countless shapes you could use instead.

And here we have all the parts necessary to build our bag. Front and back panels, flap, tapered gusset, an inside pocket, strap, and welt.
They sell a strap cutting tool and one of these days I will buy one. I'm sure it makes a bagmakers life a lot easier, but for now I still lay them out with a long straight edge and carefully cut using my scissors. About 1.5" width seems perfect for the strap. My welts are about 1/4 inch wide.

Next thing will be to poke about a gazillion holes for the stitching and start putting this thing together. Check back for more.


