I’m building a Chambers New England Fowler in 10ga and I wanted to share my experience with soldering the barrel lugs and front sight. I am new to building guns and had very little experience with soldering, so it took me quite a while to piece together the information from related posts and to learn the terminology related to these soldering jobs. I am by no means an expert, more like barely competent, but I learned a lot. Hopefully this will help other new builders along the way.
My first task was determining what kind of solder to use. I read a lot about “silver” solder but it was a little confusing figuring out what that meant. The consensus seems to be that this means low temp silver bearing solder as opposed to wire used for high temp silver brazing. I picked up some Harris Stay-Brite solder which is 94% tin and 6% silver which melts at 430 deg F. The set I bought on amazon came with a liquid flux that I found to be difficult to work with (will discuss later).
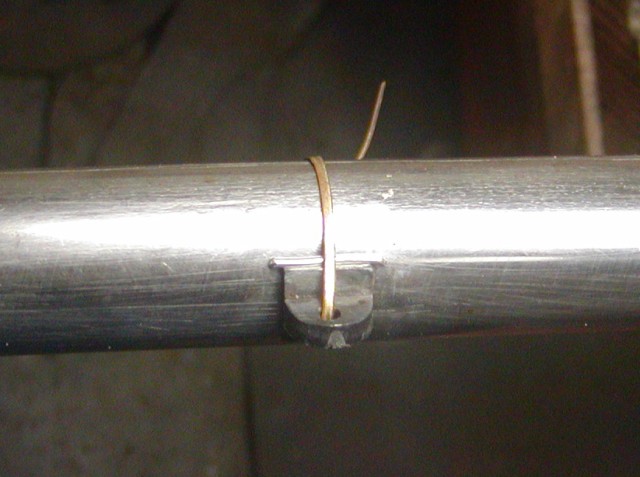
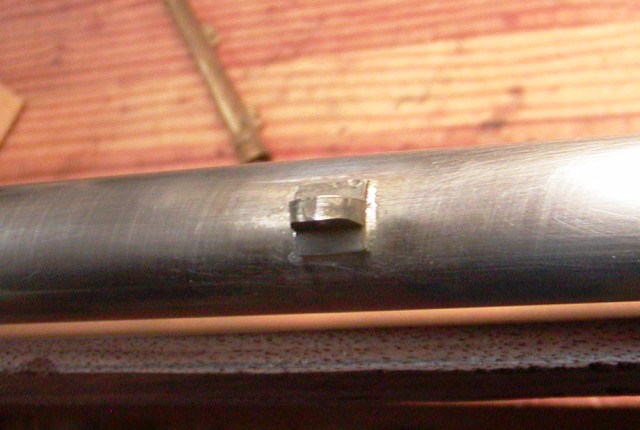
I started by preparing the round steel barrel lugs by cleaning up the casting blemishes with a file. Then I sanded the bottom of the lugs by wrapping sand paper around the barrel in the general location of the lug and sanding the bottom of the lug so that it will conform to the same radius of the barrel. I think I used 150 and 220 grit paper. Next I sanded the barrel with 220 grit where the lug was to go. There are good topics you can easily search here on how to mark center lines on a round barrel.
My next task was to “tin” the lug and barrel separately with a thin coat of solder. Being a newbie, I had no idea what “tinning” meant. It is simply applying a thin layer of solder to each surface (easier said than done!) this video helped a lot on youtube:
I found that the liquid flux I was using would turn brown and burn at nearly the exact temperature that the solder would melt, resulting in a poorly and unevenly tinned surface. I had to approach the melting temp very carefully by feathering the propane flame around the area and checking the solder for melting frequently. It is important to try and NOT heat the area you intend to solder with direct flame. I want to mention that I first held my lug to be tinned in a c-clamp and vise. It seemed like the clamp was acting as a heat sink and drawing heat from the lug, cooling it before it could be tinned. I switched to some small hemostat clips (locking forceps) for holding the lugs and had much better luck.
After parts are tinned, you want to add a bit more flux and clamp your lug to the barrel. I used a bent piece of hack saw blade that I notched on the end that holds the lug and clamped it to the barrel with spring clamps. I had to heat the hack saw blade red hot to get it to bend without breaking.
Heat the 2 parts with indirect heat until they fuse together and you see melted solder around the lug. Use a wet shop rag and clean up the flux while the part is still hot or it will be hard to remove later.
For the front sight, I used basically the same process, only this time I tried a flux paste recommended by muzzleloader builders supply website. It’s called Rectorseal C-Flux. It has some powdered solder in the mix. This seemed to have a much higher burning temp and resulted in a beautifully tinned surface. 100% easier than the liquid flux. I might also mention that I used MAP gas instead of propane, which got the parts up to temp quickly. Everything was cleaned up with the file to finish.
I’m sure this post seems very elementary for the experienced builders, but I thought it could help the new folks like me. I’m curious to hear any suggestions or different ways you all do it.
View attachment 149215View attachment 149225View attachment 149228View attachment 149229View attachment 149230View attachment 149231