• Friends, our 2nd Amendment rights are always under attack and the NRA has been a constant for decades in helping fight that fight.

    We have partnered with the NRA to offer you a discount on membership and Muzzleloading Forum gets a small percentage too of each membership, so you are supporting both the NRA and us.

    Use this link to sign up please; https://membership.nra.org/recruiters/join/XR045103

Traditions kentucky kit

Muzzleloading Forum

Help Support Muzzleloading Forum:

This site may earn a commission from merchant affiliate links, including eBay, Amazon, and others.

tractorholic

32 Cal.
Joined
Dec 8, 2008
Messages
22
Reaction score
1
Hi guys;

I need some help with a Traditions Performance Firearms Kentucky rifle kit if you would.
I've been in getting ready to start, and need some guidelines. First, I'm ready to begin sanding the stock. It has a full length stock that comes in two pieces with a brass piece between the two stock pieces with metal pins to align and hold the works together. Do I sand and stain the two pieces seperately before putting them together? And when I do put them together, am I supposed to use any glue between the two pieces to help secure them? As a beginner, I wish they would send instructions for a guys first build. It seems if the two pieces were together that sanding the top edge of the stock where it seats the barrel one would get a smoother transition between the two pieces. A little help and advice will be much appreciated.
 
bluefeather said:
Hi guys;

I need some help with a Traditions Performance Firearms Kentucky rifle kit if you would.
I've been in getting ready to start, and need some guidelines. First, I'm ready to begin sanding the stock. It has a full length stock that comes in two pieces with a brass piece between the two stock pieces with metal pins to align and hold the works together. Do I sand and stain the two pieces seperately before putting them together? And when I do put them together, am I supposed to use any glue between the two pieces to help secure them? As a beginner, I wish they would send instructions for a guys first build. It seems if the two pieces were together that sanding the top edge of the stock where it seats the barrel one would get a smoother transition between the two pieces. A little help and advice will be much appreciated.

I would make sure that all of the parts fit their specific places before sanding. Afterwards, Sand them seperatly and stain them both with even amounts of stain. You will want the Birchwood Casey walnut or rusty walnut stain. Oil stains will not penetrate the beech wood.

Do not glue anything together! There are 2 pins that you will tap into the stock and the forend part of the stock slides into them with the brass spacer in between.

You can keep the 2 pieces together while you sand, i just preferred not to when i redid my kentucky.

Very simple rifle to put together but i honest would pre-fit all of the brass trim to make sure it fits.
 
:v Thank you very much sir, I had no idea that oil stains wouldn't penetrate the wood of the stock. I want a beautiful stock as i love wood thats taken care of and looks nice. I've already put the two pieces of the stock together with both pins, and thought it should not be glued, but was unsure. You have no idea how much I appreciate the help. Thanks again sir.
 
My thoughts are that in order to get a smooth transition from one piece to the other, you need to sand them in place. Also sanding them seperate increases the possibility of rounding the edges where you want them sharp.
Just my thoughts.
 
You're welcome! They are excellent shooters thats for sure.
Mine loves 110gr 3f goex and a .015 with a .490 round ball. The rifle loves it but i dont :haha:
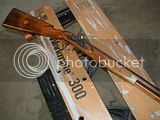
100_2235.jpg
 
You made a good choice for a first rifle kit. CVA used to sell the same kit years ago. Even with the two puiece stock it makes a pretty decent rifle. I bought my son one years ago when her was in his teens. You will need to do some filing on the stock to make the wood even at the junction will work fine. You will be doiong a lot of sanding, too. Be careful to keep the edges around the lock mortoise sharp. Also, you may have to do some inletting in the stock to make sure the lock fits nice and snug. The barrel flats may need draw fiiing and polishing with Emery cloth to make them smooth. The stock can be stained maple or walnut color. Use a seperat set of small files to smooth out the brass trigger gaurd and but plate. Files used on steel do wear a bit and brass files better with real sharp files. Bronwing solution can be purchesd to brown the barrel. Follow the directions on the bottle. My son's rifle is 45 caliber. He uses a 44 caliber patched ball and 45-50 gr. of 2F black powder. It is very accurate at 50 yds. Take your time and do not rush things. There is a long rifle in the Oakland, California history museum that has a two piece stock. It appears that it might have broken and was repaired. Take time and do not rush things. It took me 2 1/2 years to build a Rifle Shoppe wheellock pistol.
 
bluefeather: Glad to see you found us here in the Gun Builders Bench. :)

"Old Sally" a gun that was owned by Joe Meek, a Mountain Man of great fame has a two piece stock somewhat similar to the Traditions Kentucky.
It too has a metal s pacer between the two pieces of wood.

Yes, Beechwood is a very difficult wood to stain and the oil based stains will saturate the wood long before you get it anywhere close to the darkness you probably want.
As many first time gun builders have found, NEVER use a OIL based stain on a rifle or pistol stock.
A alcohol based or even a water based stain is always the best way to go unless you want to consider one of the acid stains which I cannot recommend for a Beechwood stock.

When you are sanding a flat surface like the one which the lock fits into, or the opposite side where the lock plate (if available) would go you should use a small flat board (a sanding block) to back up the paper. This will keep the edges of the panals sharp and precise.

When sanding any other area of the stock, I prefer to use just my hand to back up the paper and let the contour of the stock dictate the shape.
Using a sanding block on areas that should be smooth and flowing or rounded will create flats that don't blend into a smooth flowing surface.

If the wood where the butt plate (or a nose cap) will fit is larger than the metal piece you will need to bring the wood down in size to match the metal part.
This is one of the places where a professional builder and an amateur sometimes do things differently and it shows.
The amateur will simply sand about 1/2 to 1 1/2 inches of wood into a taper that starts at the existing stock size and then meets the metal part at the smaller size.
The professional will sand the wood at smaller metal part at least 3 inches or more away from the part so that the wood seems to flow and blend smoothly with the rest of the wood.
Put another way, except for the raised cheek piece (if present) the edge of the metal butt plate will be the largest area of the butt and the wood will taper gracefully downward in size as it approaches the wrist of the stock.

As you probably know, wood has a direction to its grain. When you want to remove wood fast, sand "across the grain", or at 90 degrees to the grain.
Although this removes wood rapidly, it also creates very deep scratches which must be removed before any finish of any kind is applied.
For this reason, if you use this "across the grain" sanding method remember, all of the finish sanding MUST be done in the direction of the woods grain.

As you probably know, start the "rough" sanding using course sandpaper like 120 grit paper.
After all of the wood is sanded with this, resand the entier stock using 160 or 180 grit paper.
Follow this with a resanding with 220 grit paper.
Some folks go to 320 grit paper but on your Beechwood stock I do not recommend this.
The finer paper will reduce the speed that the wood will soak up the stain you will want to apply.

When you think your wood is ready for staining, lightly apply the first coat.
If you see ANY areas that look black or very dark when compared to the adjacent areas, the wood is telling you that you have a rough place that needs more sanding. Resand the area (stain and all) to remove all traces of the rough surface and try again. :)
 
I used Aquafortis on a very blonde CVA stock (beech?????) and it looks 1000% better. It certainly wouldn't take a stain, but I'm very happy with the way it turned out.
 
R.M. said:
I used Aquafortis on a very blonde CVA stock (beech?????) and it looks 1000% better. It certainly wouldn't take a stain, but I'm very happy with the way it turned out.

Without pictures, it never happened...
 
Well, I've never posted a photo here, but we'll give it the ol' college try.

 
Do you have to whisker beechwood? Or is that only neccessary on maple/walnut stocks? This is probably a stupid question but what the hell.
 
I have some more questions, as there are no instructions or blow up diagrams.
1. There are two brass round pieces about a half in
diameter and counter sunk holes on one side for
screws I guess. Can't figure out where they go.

2. There are three brass machine screws, not wood
screws. I had thought maybe they were for the
trigger guard, but are not wood screws, where
are those used?

3. Three "T" shaped pieces, and two steel pins?

4. One kind of metsl flat spring kind of S shaped
that I can't figure out?

This all may sound dumb as far as questions go
but I've never built a rifle kit, and never a
muzzle loader, but I'd sure appreciate any help
as I want a beautiful gun I can be proud of.
Thank you very much
 
I feel like an idiot, I contacted the manufacturer and found out that there was supposed to be an instruction manual, so I started looking and found it. There was a white envelope covering the stuff on the bottom of the styrofoam box. I now have the thing figured out, and won't need to bother you guys for a while.......I hope. :surrender: Thanks guys for all the support, Now I can't wait to get it all finished up and shoot it. Dang work gets in the way of all my fun !! :haha:
 
give me some time and i will take pictures of my kentucky to give you some help.

never mind, just saw the post about finding the manual :rotf:
 
Thanks for all the good advice. I'm reallly excited to begin on it now that I have some good advice from you guys. It's going to be a fun project.
 
Back
Top