• Friends, our 2nd Amendment rights are always under attack and the NRA has been a constant for decades in helping fight that fight.

    We have partnered with the NRA to offer you a discount on membership and Muzzleloading Forum gets a small percentage too of each membership, so you are supporting both the NRA and us.

    Use this link to sign up please; https://membership.nra.org/recruiters/join/XR045103

Traditions Kentucky rifle kit

Muzzleloading Forum

Help Support Muzzleloading Forum:

This site may earn a commission from merchant affiliate links, including eBay, Amazon, and others.

jaybird14

36 Cal.
Joined
Apr 23, 2013
Messages
105
Reaction score
6
While visiting Colorado Springs last year I stumbled upon the Mountainman store in a Tourist area called Manituo Springs.

This years trip out there to visit my son I decided it was time to upgrade from my percussion cap to a flint. My "budget" was limited as are my building skills so I asked the nice folks in Manituo Springs to order a traditions Kentucky rifle kit in .45 cal. Flint.

They did just that. It showed up packed well and no bs.

Let me know if a beginners build along would be worth posting.

Thanks again Mountainman store!
Have a great day.
Jay
 
We were doing the tourist thing on a weekend off and I was like "SEE Ya Guys" when I saw it. LOL. Got a couple Green river knife blanks, cap box, horn and could have spent a few more dollars but suit case only carries so much.
Post the build along there seems to be several guys building them, especially if you trim it down.
 
Pictures of the build would be welcome. People here love pictures and many can give advice as you go along with your project. Everyone was a beginner at one time or another and it could help the next beginner.
 
image_zps8cxmhi5a.jpeg


Having trouble posting pics??
 
thanks for trying.

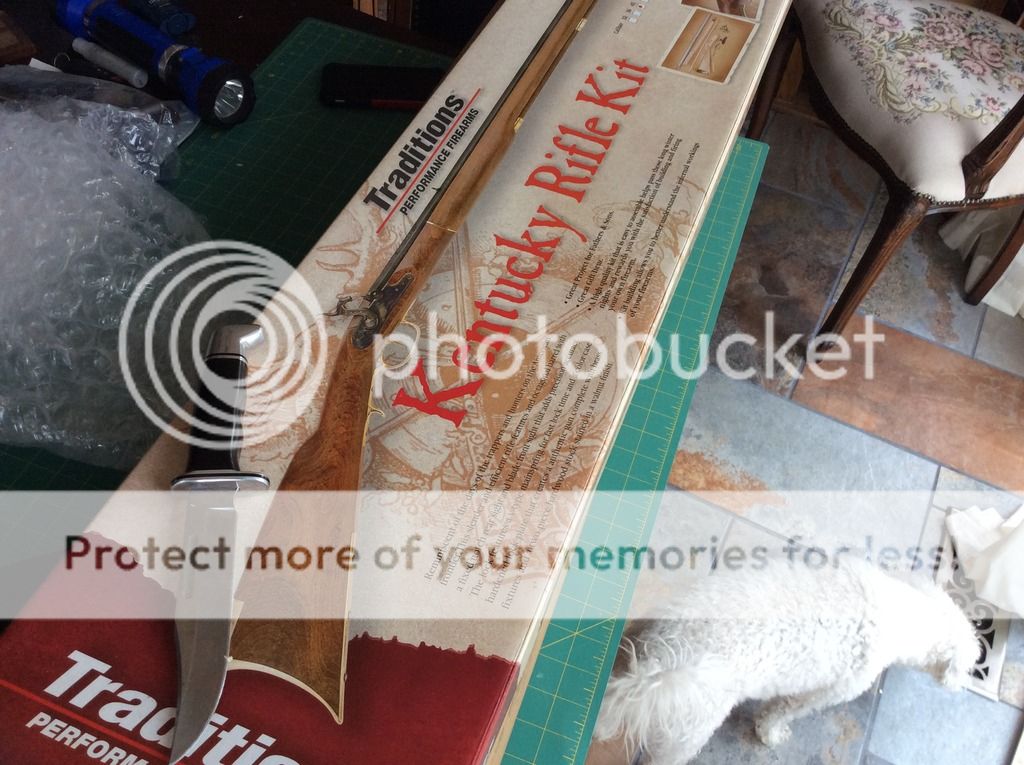
As I took inventory of my new kit i noticed that they took good care in packaging the components. The barrel was wrapped and clean of any corrosion. The two piece stock is cut clean with no splinters or cracks. The rest of the parts were tucked into nice cutouts in the foam or in a little clear plastic bag.

The instructions were typical little "book" with some supplemental sheets of info.
Traditions did a nice job with this.
 
Folks can open the link below in another tab to see the pictures.
http://i1079.photobucket.com/albums/w503/kricket141/image_zps8cxmhi5a.jpeg

Now, for the real way to post pictures on our forum, once the pictures are uploaded into Photobucket, go to your files.

Put your cursor over the three horizontal lines in the thumbnail picture representing the one you want.

Select, "Share"

Move the cursor down to the bottom where you see the "IMG".

Click on the text in that box and it should turn yellow as it copies the pictures address into your computer.

Come back to the MLF and "Paste" the address into your post.
If you have multiple pictures, have your Photobucket open in another browser tab so you can jump back and forth between Photobucket and here.

Go to the next pictures thrumbnail sketch. Choose "Share". Choose the "IMG" box. It will turn yellow.........
 
Last edited by a moderator:
The link does work and you can see my tile floor project too. lol

Question for those folks that have built the two piece stock. Do you glue/epoxy these together? I'm thinking yes but could use advice.

Thanks!

I'll keep trying to load the pics.:)


This is what i get when i try and follow your tip. I must still be messing up somewhere.
 
Thanks again zone.


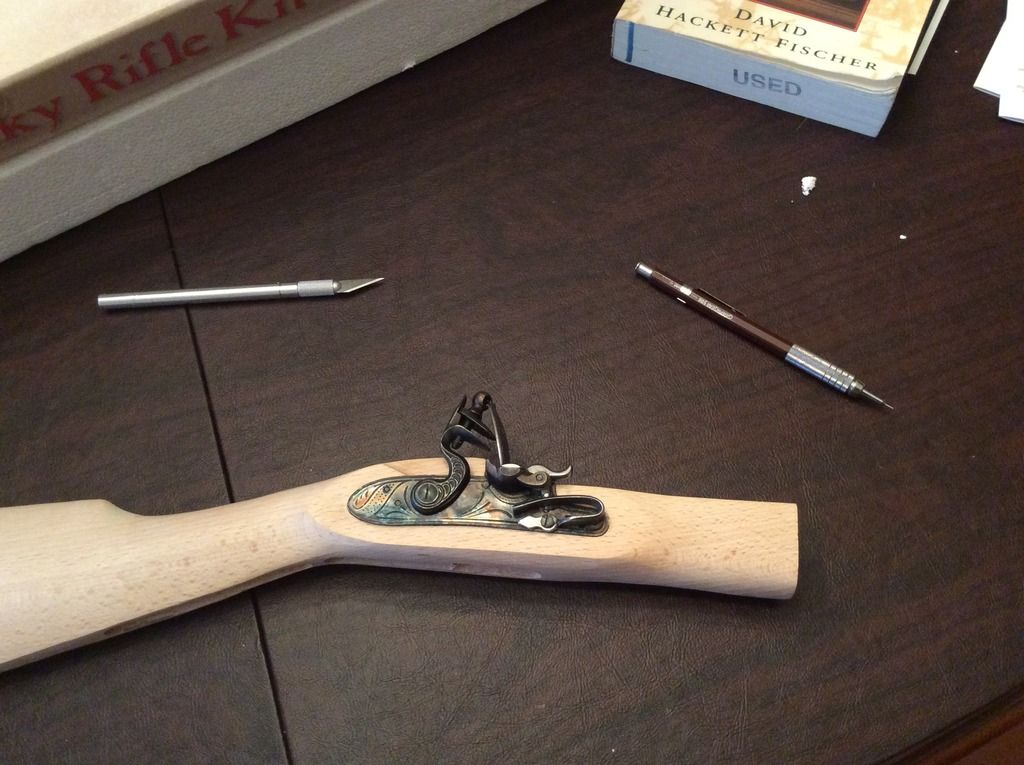
Back to the business of building. This kit required minimal "shaving" of material off the stock to get the lock and trigger guard to rest properly.

The nose piece took a bit more work with a file to seat and level.

Lastly I have brass at the butt just about fit.
Every area I've mentioned requires care not to go too fast and remove too much wood.
 
While your removing wood to match it up with the metal parts, don't forget to use a good straight edge to make sure you've blended the new contour in with the rest of the wood.
(Even a cheap plastic ruler will work fine for this task as long as its edge is straight.)

One of the big mistakes (IMO) that first time builders make is to just sand off the wood next to the metal joint.
Although the "finished" product matches up well, after the gun is finished it will be obvious there are some major tapers in the wood next to the metal part.

Hold the straight edge against the metal part with the majority of it running down the stock towards the other end of the gun.
If the edge seems to be going "out in space" you're not done yet.

In other words, sand the new shape at least 2 to 6 inches down the stock from the joint so it blends into the existing contour slowly with no rapid change.
You'll be glad you did when the gun is finished. :)
 
+1 on Zonie's recommendation.

A good sanding block can be made by fitting a belt for a sander around a section of a board. This gives a good flat surface and you can interchange belts of different grits.
 
thanks for the tips guys.

I have been taking it slow and blending a little at a time. Its going better than i thought.

I still think the T88 epoxy is going to be deployed to hold the stock halves together once the blending is done.
 
jaybird14 said:
thanks for the tips guys.

I have been taking it slow and blending a little at a time. Its going better than i thought.

I still think the T88 epoxy is going to be deployed to hold the stock halves together once the blending is done.

Epoxy is way way over used and over rated for traditional gunsmithing. A simple wood glue like the Titebond series works very well, is stronger than the original fiber(if applied correctly) and it does not show as bad.

As far as your project, I would only glue the dowels in the lower furestock (lock side). Then I would fit the brass plate and the upper forestock. I would not glue the dowels into the upper stock until I was sure the fit was good. Honestly I may not glue the upper stock to the lower at all. That just depends on what the builder wants. If you want them glued, glue them.

I would not glue the brass to the wood, it's the dowels that hold the piece together.
 
Yes, Titebond is good stuff. I use it to glue the hickory backing on my long bows.Lots of clamps and pressure.

I use t88 epoxy to clue the steel points to my wood arrow shafts. The stuff takes a pounding.

Is there any reason not to glue the halves?

One of the reasons i want them together is when i break it down for cleaning i don't want a pile of pins and plate. :)


If some one knows a problem with joining them please post it.

I have them fitting quite good and don't want anything to change.

THANKS!!!
Jay
 

Latest posts

Back
Top