Wantin' To Make and Antler-Handle Knife

Muzzleloading Forum

Help Support Muzzleloading Forum:

This site may earn a commission from merchant affiliate links, including eBay, Amazon, and others.

luieb45

54 Cal.
Joined
Jun 9, 2009
Messages
1,856
Reaction score
2
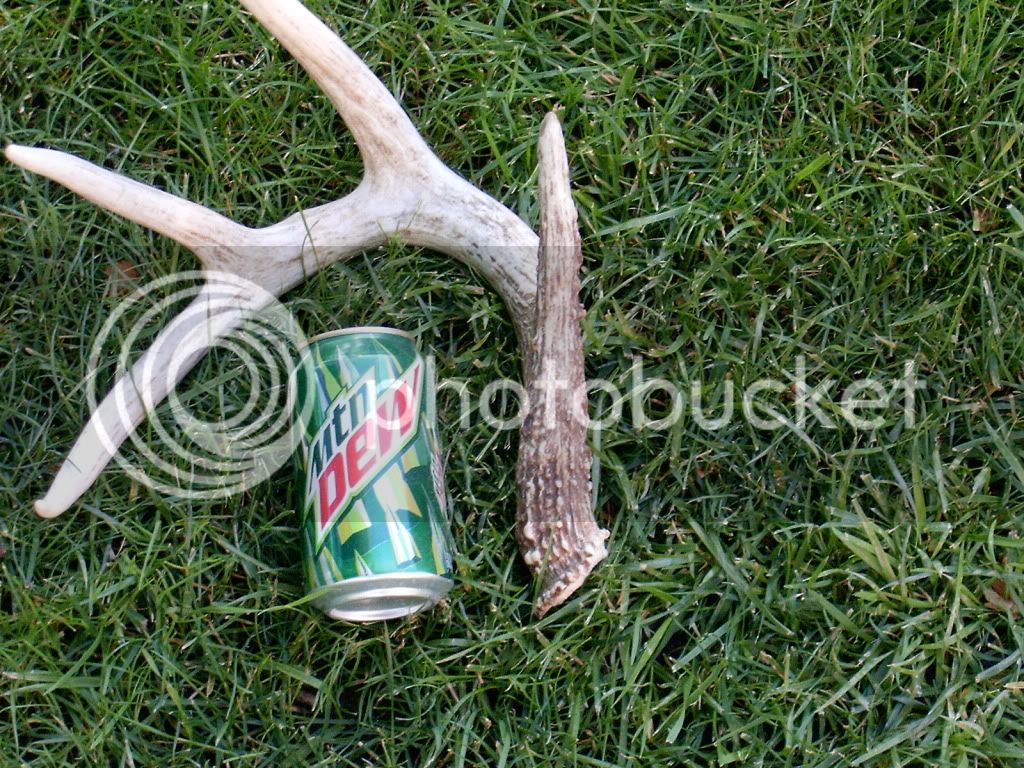
I think I have an antler that would make a good knife handle that I found this year. I'm somewhat familiar in working with antler because I've made about 6 or so powder measures and an antler short starter. I'm not sure what type of blade to put on it but I'm guessing someone will point me in the right direction for that. What do you think the best way to mount the blade into the antler would be? Thanks.
HPIM0386.jpg

here's the antler. what do you do about brow tines?
 
Luie
That antler looks nice. A good straight section for the tang,mine was a bit more curved than I might have wished for. As for the brow tine....just saw it off and sand smooth.I had one on mine too and did that and just left a bit of a 'lump' right where it had been. Lots of good pix of knives out there to get ideas from.
Macon
 
Try the interlibrary loan system and get the book....well I forgot the name...it's by Baldwin and called primitive knives if I recall. Post if you can't find it. This book has photos of original knives with antler handles. If I recall the brow tines were often left on but bobbed and were on the underside of the handle to form sort of a quillion or guard. Again- if I recall correctly, stick tangs were not that common, most blades had a half tang that fit into a slot in the front of the antler and three small nails/pins were drilled crosswise through the piece to hold the blade to the handle. Do some research, that's part of the fun, and you'll end up with a really nice knife.
Found it: Early Knives and Beaded Sheaths of the American Frontier
by Baldwin, John
 
Luie
The best way seems to be to use a saw and cut a slot in the antler to fit the tang into.You might have to reshape the tang somewhat to fit the antler. As to the other type of tang.......it seems that a tang sorta like on a file is forced into the antler which has a hole either drilled into it or burned in by using a red hot rod. Anyway.......I think a bit of research may help you.
Macon
 
I've done some reading and the way that seems the coolest to me is to use the "natural epoxy" of deer antlers(stuff on the inside). I've read to cut the antler off to what size you want, then soak it until the inside becomes soft. I'm planning on buying a knife with a skinny tang(I have no idea what the name for it is) then once the inside is soft enough you wrap the blade in duct tape and just keep pushing it into the antler. How do you make the part where the blade and antler meet sized down to where it is contained by the brass piece between the blade and antler?
 
That brass part is not necessary, and if 18th c. would not have been common. Very little brass is found on early knives. Either iron or poured pewter. The poured pewter cap would be easier, and would assure a good fit. If possible, an iron cross pin through the grip and tang would add greater strength to that type of grip. To fit an iron face plate is like fitting a guard. You have to drill and file a slot in the center of an over sized piece to fit the tang and blade shoulders, then in your case, hope everything lines up when you set the blade in the antler. Then you dress off the iron plate to the antler. The way you want to secure the antler will only give you one shot at a good fit. The alternative is to drill the antler, get everything to fit, then epoxy the tang in. To do as you have planned, I would advise to forego the plate, or use pewter. Most old knives of this type have no spacer plate. Just a blade stuck into the antler. These were not made for beauty, but for use. Take a look at what Macon Bacon did with his. That is a grand example of an early style knife, and is stronger than what you have in mind.
 
I'm more interested in mid-1800s and am looking for practicality and "beauty." Last year a guy made me a deer antler knife that had a brass guard and no bolt through the tang. I'll have to post a picture of it to show what I want my knife to sort of look like, except I'd like to use white brass.
 
Macon- on some of this the devil is in the details. Some( I'm not sure how many) of the half tangs were tapered to an edge at the rear- in other words the tang didn't have parallel sides as would be the case with a modern knife ground out of barstock. How this tapered tang fit into the slot- again I'm not sure but I would think the slot had to conform somewhat to the shape of the tang. The obvious problem is how you cut a tapered slot in the antler. Again I'm not sure unless the slot was partially cut and then the tang pounded in from the top. Hopefull someone on this forum may know- I myself always wondered how it was done.
 
For thin tanged blades I drill a hole slightly smaller than the tang thicknes to serve as a pilot then heat a piece of steel the same pattern as the tang aand slowly step by step burn out the antler until the tang can be fit in to the desired dept.(CAUTION DO THIS OUTSIDE ). Then I put a little epoxy in the hole and insert the tang. After the epoxy has set up I cross drill for a brass pin. :hmm:
 
Ok, I got confused about tangs. People tell me to use a stick tang but drill it out first then epoxy. How can you drill it out if the tang isn't round-shaped? When you say to put a bolt through the tang to secure it, how do you do that? I see some tangs have holes in them but how do you line it up to know where to drill?
 
Use a bit about the diameter of the tang thickness. Drill two holes like a figure 8. Use the drill to dig out and ream the two to form a slot. It helps to have another bit the same size, and grind the point off leaving a flat to do the reaming and digging out. The tang should be tapered, and soft. If you are going to go all the way through and peen the tang over a butt plate, you can slot the forward end as deep as you can, then drill a single round hole to meet the slot. If the tang is not going all the way, fit it as deep as you can, epoxy in place, then drill for a cross pin through grip and tang. If you have a quality strong hard epoxy, you really don't need the pin, but it is more traditional looking if you have one. Stag handled Randall knives have been made that way with no pin, for many years now. You just have to decide how you want to do it, and what will the grip allow you to do. Another trick with slotting for the tang is use a sawzall blade mounted in a handle, and cut down to get in a roughed out hole. Seems to work best mounted to cut on the pull. A major concern in any case, is to not drill out through the side.
 
Crockett, for a tapered half tang in wood, I use a metal cutting bandsaw with a .025 thick blade. Using a straight edge, I pencil a V the length of the tang, then saw one line until I am about to overlap, then saw down the middle until I stop at the length mark. I then go back and saw the other line until it blends with the first cut. It would difficult to mark that out on antler but I suppose the same basic sawing might be doable.
 
Any of those should do. The tangs are probably soft. Just file or grind a little taper in it. That will make fitting easier. If you're going to fit a plate or guard, also taper the sides of the tang a little.
 
People keep telling me I need a cross pin in it but I've seen lots of knives without them. How would you put one in the tang of the knife blade I want?
 
You don't need a pin, just file or saw some notches in the sides of the tang so the epoxy will have something to hold on to and you'd have to tear the antler apart to get the blade out.
If you want the looks of a pin, drill a small hole in both sides and put a short pin in each side. I bought a commercial knife recently that had 3 pins. When regripping it I found that none of the pins went thru, just stuck in from each side.
Deadeye
 
Well... the blade and brass guard is on its way from crazy crow. I finally decided to get the same blade design I posted in the link but went with 5" instead of 4 1/2". I just felt the antler was too big for that 4 1/2" blade. Can't wait for it to get here so I can start working :grin:.
 

Latest posts

Back
Top