• Friends, our 2nd Amendment rights are always under attack and the NRA has been a constant for decades in helping fight that fight.

    We have partnered with the NRA to offer you a discount on membership and Muzzleloading Forum gets a small percentage too of each membership, so you are supporting both the NRA and us.

    Use this link to sign up please; https://membership.nra.org/recruiters/join/XR045103

Wheellock Pistol

Muzzleloading Forum

Help Support Muzzleloading Forum:

This site may earn a commission from merchant affiliate links, including eBay, Amazon, and others.

Guest
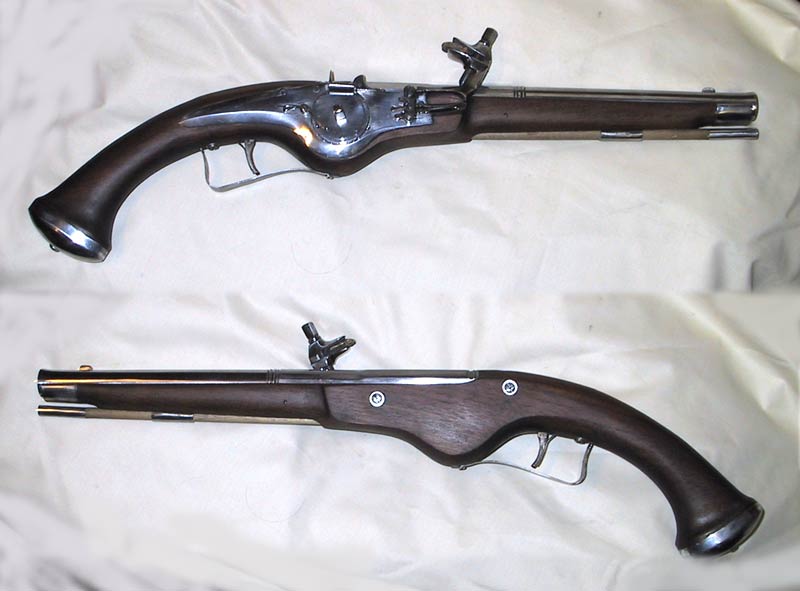
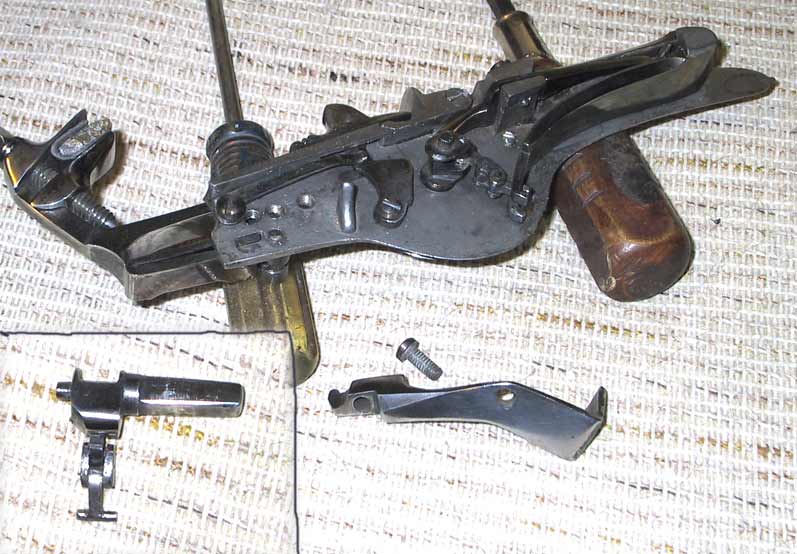
A few photos of the wheellock pistol I just finished based on a 623 lock from the Rifle Shop. The lock:

Wheellock-Lock.jpg


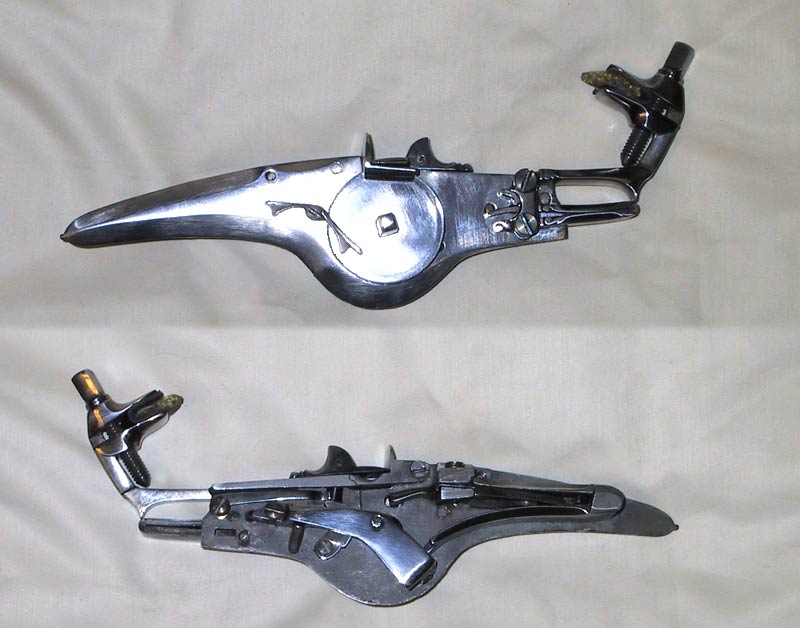
Side views:
Wheellock-Side.jpg


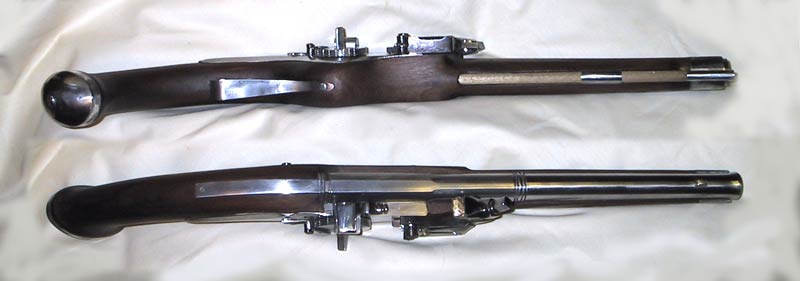
Top/bottom views:
Wheellock-Top.jpg


Comments and critiques welcome ;)
 
Your The Rifle Shoppe lock turned out perfect. I hope my lock turns out well. I sent for the entire pistol kit and have been working on it for about a year in my spare time. I have most of the work done except a slot needs to be cut in the lock plate for the trigger sear so I can asemmble, adjust, and harden the sears. Were there any problems with the sears I should be aware of? I sure had to do a lot of filing, cutting, polishing, drilling, and tapping. I had to round off all the screw heads as they were on the original pistol I saw in Germany. The screws that were sent to me were a little too large but I was careful on drilling the holes so that all were centered. I have to get the cross pin lugs welded onto the barrel. The pistol will be a well balanced, long barreled, and slender. There is not much room for the lock parts to move when it is installed on the stock. I built a German 16th century style wheellock from a Schroeder kit. After a few adjustments to flaws in the locks intrernal desighn the pistol works fine and is fun to shoot. Boy! what mess to clean after shooting it. :thumbsup: :m2c:
 
I cut the slot for the secondary sear using a carbide cutter in a flex shaft. I think I only used three of the screws from the kit, one for the dog, one for the dog spring, one with the head cut down for the bridle. All the others I made as I needed them. I annealed all the parts in the kit when I received it. After fitting and polishing, I hardened the parts using a MAPP gas torch with an oil quench, then tempered at 600 degrees for an hour. The springs were retempered at 750 degrees. I ended up making another dog spring when the first one broke. Be very careful cutting the inside of the dog spring. My original one had a web of metal about half way to the end between the arms. I didn't get it all cleaned out and it broke about half an inch from the bend. I used 1/8" spring stock from Dixie Gunworks and made a replacement. You'll need to carefully fit the wheel to the pan to prevent it binding as it rotates. Also (at least on mine) the wheel is not the same thickness all the way around. You'll need to measure and even it out. You may want to thin out the pan cover spring. Mine was very stiff as completed. I thinned it until I got a positive snap action on the pan cover without a great deal of resistance. The shape of the spring holds the pan cover open or closed. Look at some originals if you can before you cut the cross grooves in your wheel. Most of them are not very deep or close together, at least on the three I had a chance to examine. You want the minimum number to keep from chewing up the pyrites. You also may want to adjust the dog spring for a firm but not hard pressure on the dog. This will also help save the pyrites. Finally, the touchhole I drilled is at a 15 degree angle, pointed to the rear. This directs the flame jet at the pan fence and away from the pyrites. The originals measured from 12 to 15 degrees. This also helps save the pyrites as you don't "cook" it with each shot.

Let me know if you have other questions. I'll answer as best I can ;)
 
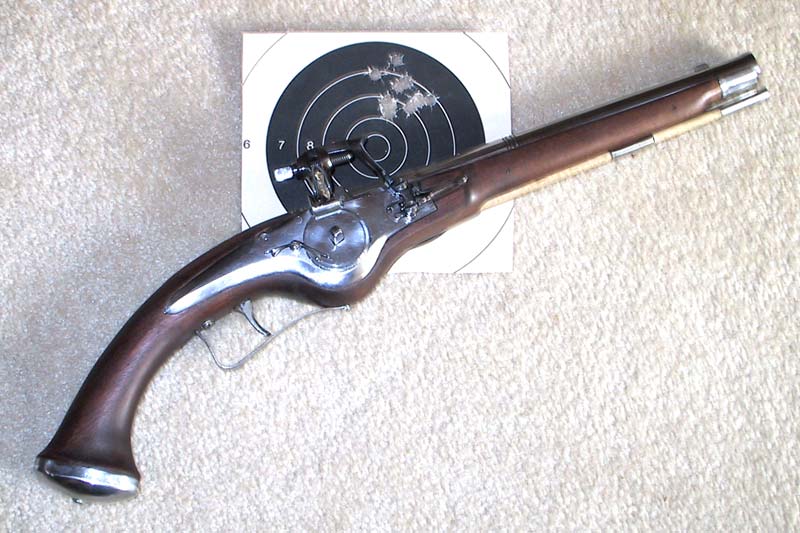
Spent some time playing on the range yesterday and after working up the charge and load, this is the best I could do. Target was on the 50' line and the gun was shot from a rest. .445 patched round ball with 40 grains of FFFg powder.

Wheellock-Target.jpg
 
Thanks for the information. I will try the wheel with flexible shaft to cut the slot in the lock plate. Sounds like a good idea. Your target group is excellent for a smooth bore with no sights. Your group is about the same as the group I shot, few times, with my Schroeter wheellock. I see where I will have to heat the dog arm and bend it a little bit. The dog on my lock drops on the rear part of the exposed wheel when the pan opens.
:RO: Rabbit Ears
 
Actually that one is rifled with a 12" barrel and has a front sight. I also adjusted the dog to move the pyrites forward so it's on the leading edge instead of the trailing edge of the wheel as it spins. That puts the sparks right in the priming.
 
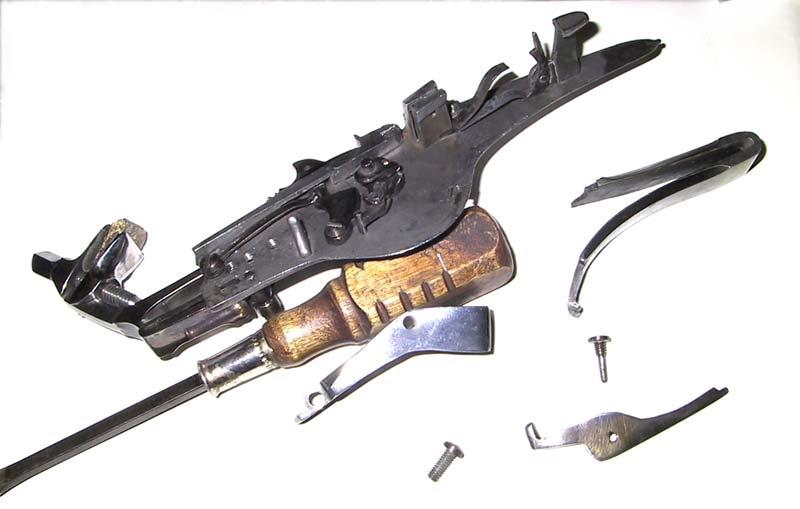
Here's a view of the inside so you can see the slot and pin for the secondary sear. The mainspring holds everything in place so a pin is good enough to retain the sear.

Wheellock-Inside.jpg
 
:thumbsup: :redthumb: :thumbsup: :redthumb:

A labor of love and it shines! Nice work!

Just :m2c:
 
Vern, after speaking with Volat', I have obtained the Dutch rifle lock by TRS. Can you provide(email me or post on this forum) a photo of your chain assembly, please? I still need to make proper screws, slot the main spring, add the pan arm, and temper the springs. I've got 20 hours on this puppy and can see light at the end of the tunnel. Cheers, Bookie
 
Here is a photo of the chain. If this isn't what you want, let me know and I'll post another shot.

WL-Chain.jpg
 
Many thanks! It appears that I have my chain backwards with the rounded sides of the links facing the opposite direction. Your photos are a God-send! Thanks, Bookie
 
Vern, When you have time, I'd really like to see some close ups with the bridle dismounted, please. Were you able to get your pan flush with the top edge of the lock plate without removing too much metal? How deep is the slot on your main spring? How does the small sear spring attach? See? I ask too many questions for my own good! Thanks, Bookie
 
I operate a traditional American gunsmithy/blacksmithy here in Corn Patch and I have a lifetime supply of spring stock. If any of you wheel lock fans need stock to make replacement springs, I just might have some for FREE...if you pay the postage. Looks as if perhaps my small sear spring that TRS supplied may be too (insert non-Christian verbage here) crudely made to used.....but it seems to fit right in with some of the other parts. Cheers, Bookie
 
I'll take a shot or two later today. I fitted the pan first, then dressed the top of the plate with the pan in place. The mainspring slot is about 1/4" long. It needs to be long enough to allow the link to rotate as the wheel is wound. That would vary depending on the spring length. I cut a small slot in the rear of the primary sear block to take the end of the sear spring to hold it in place, but it really wasn't needed. In my other wheellock, I fitted the sear spring under the primary sear between the sear block and the end of the mainspring. If you polish and re-arc the sear spring after fitting the primary and secondary sears, then harden and temper the spring, it will work correctly. Both of mine were too soft out of the kit.
 
Vern and Bookie,
You guys got sear springs with your lock kits!? :what: I did not with my German covered wheel lock. :curse: I made mine out of the thinner strapping for bundles of lumber. :eek: I had to fiddle with it for a while to get it to the right shape to let the main spring come up far enought to let the main sear pin drop into the hole in the wheel. whew, that was a mouthful, Hee Hee! :shake: Now that it is stabilized it seems to be working right well. :blah:
God bless.
volatpluvia
 
I got sear springs with both of my kits including the German covered wheel kit :blah: Now for the bad news. I was shooting my wheellock pistol today and the top chain link broke :curse: I've got to make a new link to put it back together. I did get a chance to proof my carbine today. It's going together well :thumbsup:
 
What is the secret of positioning the pan cover arm? I think I mounted it in the wrong position. Grrr. Also think I'll remake the pan cover arm spring because the one supplied seems pretty stiff. The sear spring needs reworked or remade because the main spring will not fit into the cavity because the sear spring sets up about 1/8". Grrr. Other than that, we're having a ball in Corn Patch! Cheers, Bookie
 

Latest posts

Back
Top