Woodsrunner!

Muzzleloading Forum

Help Support Muzzleloading Forum:

This site may earn a commission from merchant affiliate links, including eBay, Amazon, and others.
Joined
Nov 10, 2023
Messages
671
Reaction score
1,557
Location
Atlanta Georgia
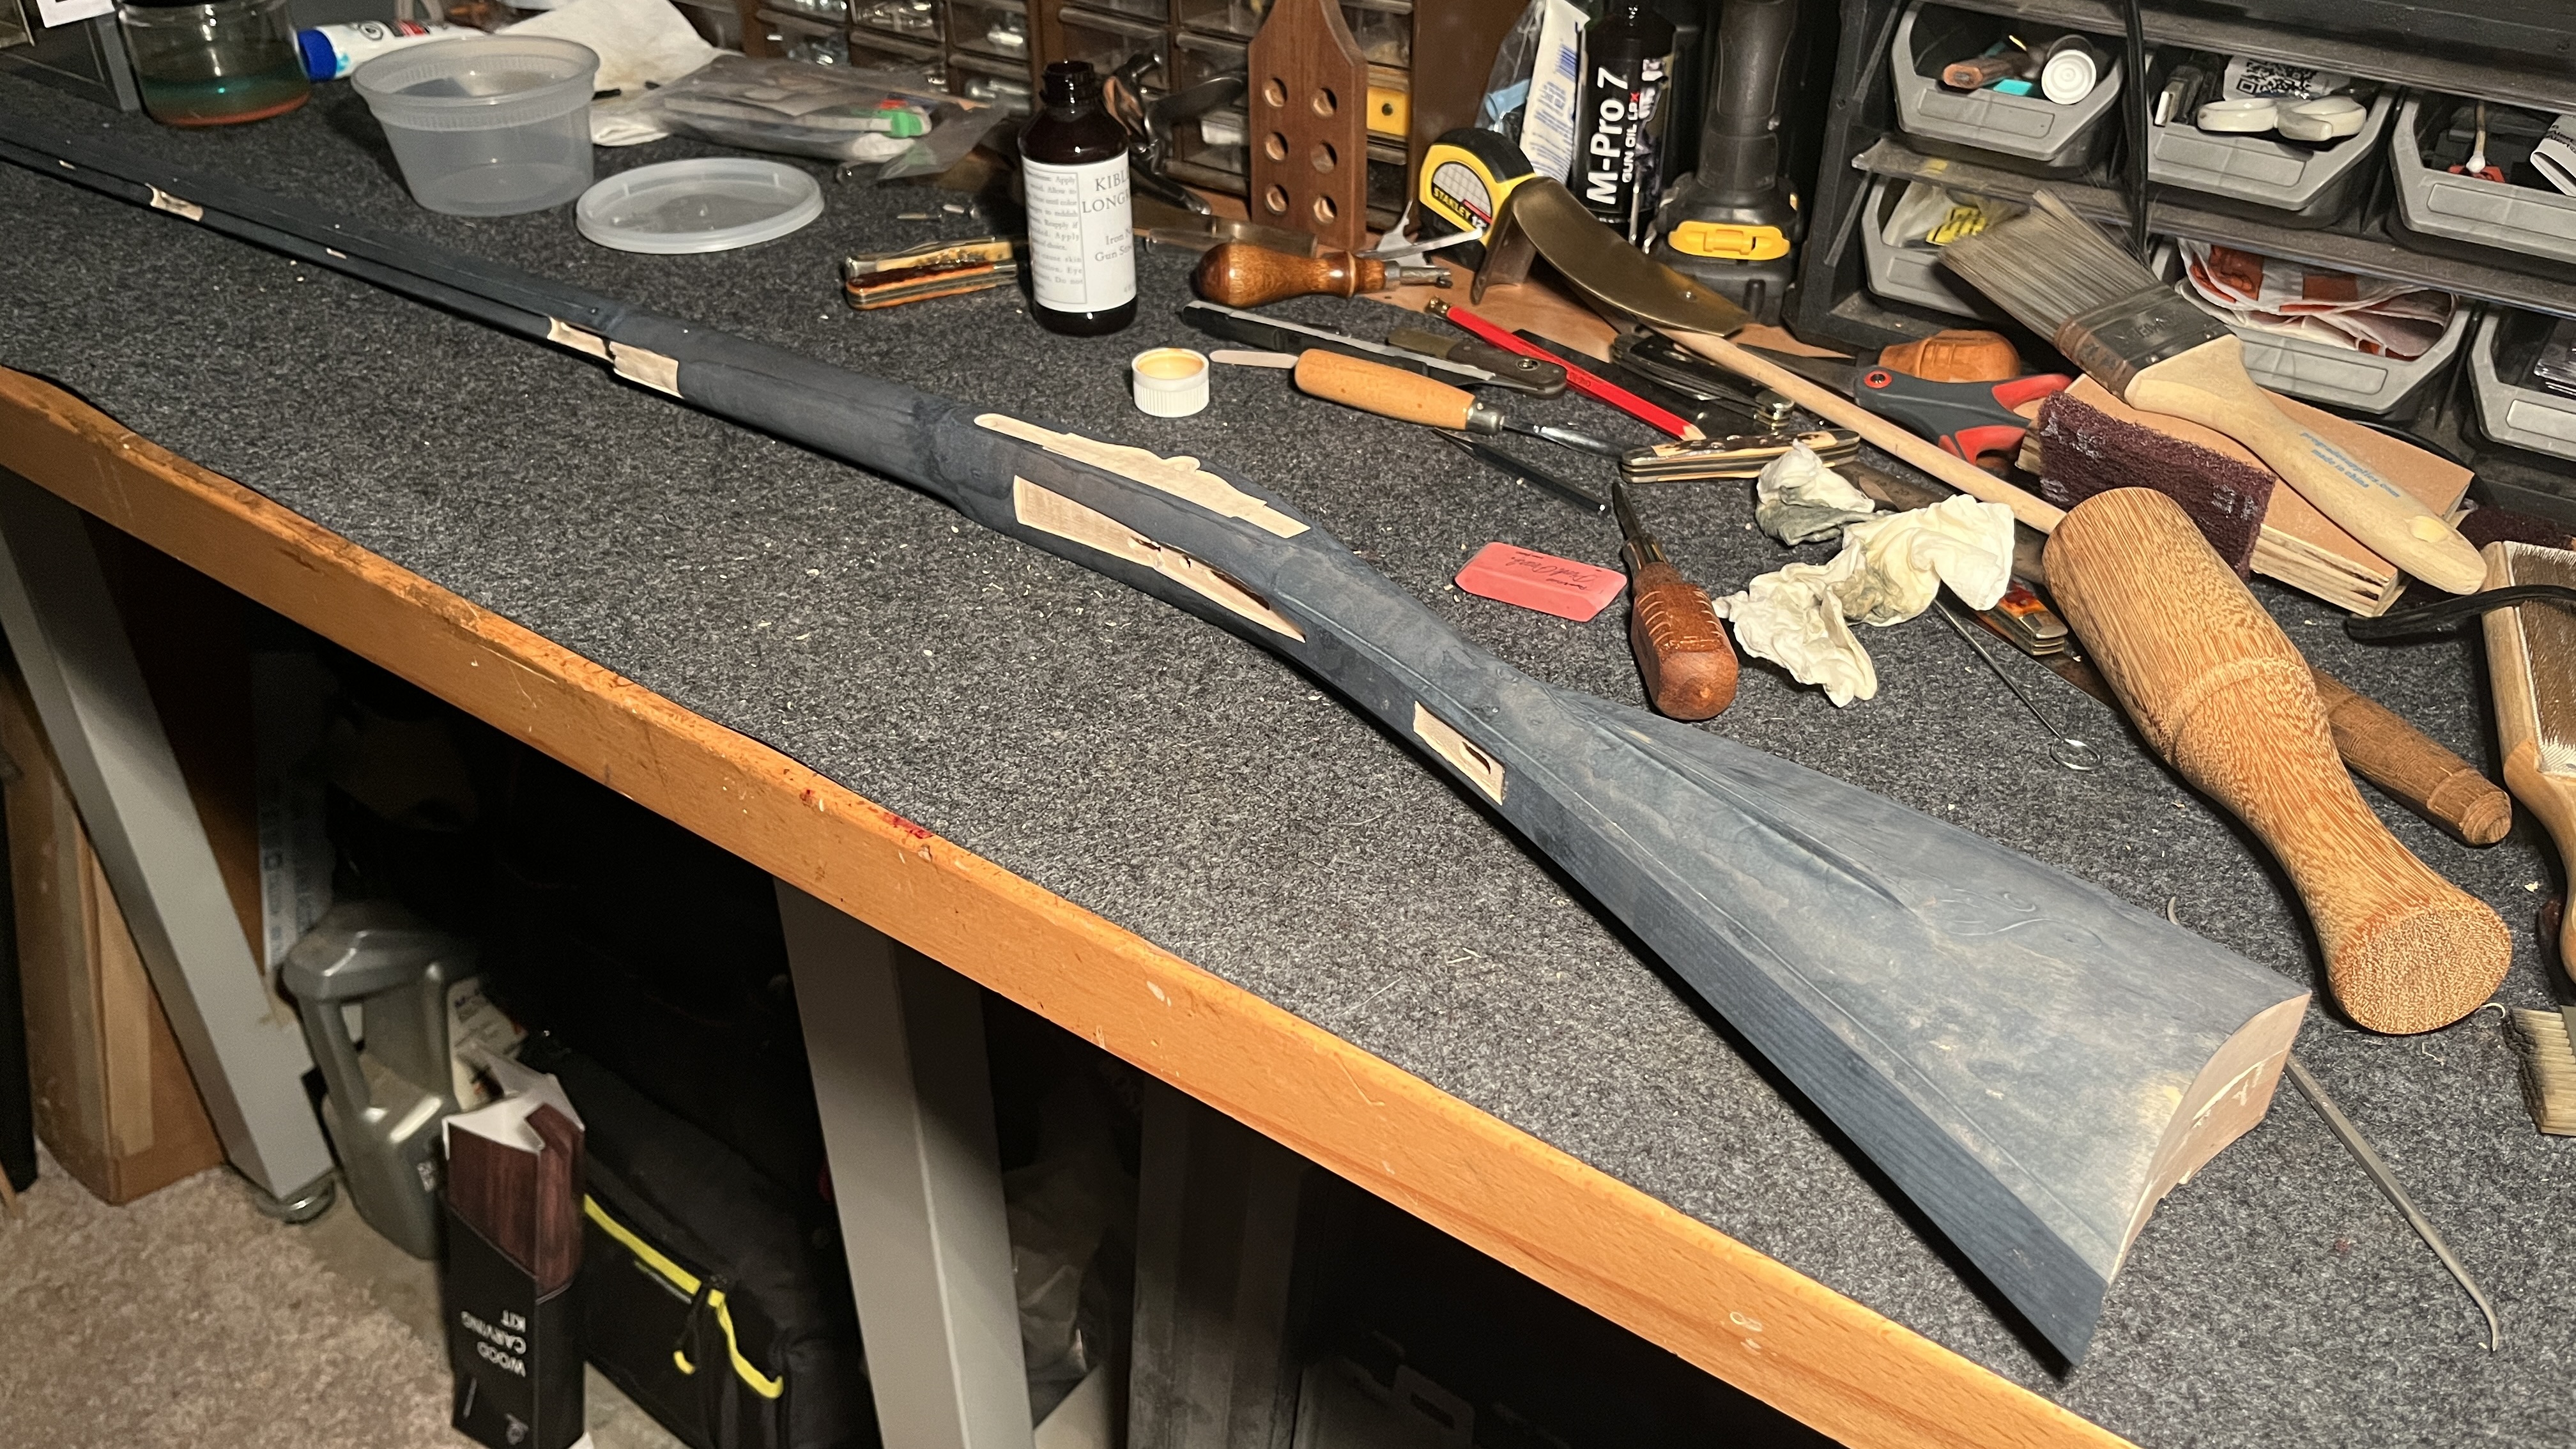
My Ring doorbell chimed in my iPhone today and saw a long box on my green mailbox. I headed home. Maintaining all applicable speed limits, barely. Took the box into my garage and took out about a hundred screws in the very well done shipping box from Kibler's Longrifles and there, it finally was home!

.50 Caliber, woodsrunner, carved and extra fancy curly maple. Naked as a baby and full of promise!

Took almost two hours to sand down the trigger guard. Yeah, I am taking my time.

Spent an hour on a phone call with a friend who lives near me and has been finishing and shooting BP for 55 years. I realized that I do not know how to "properly" finish my woodsrunner, so I am off to him, soon, for some "hands on" help!
 

Attachments

  • IMG_0975.JPG
    IMG_0975.JPG
    2.9 MB
  • IMG_0979.JPG
    IMG_0979.JPG
    3.6 MB
  • IMG_0978.JPG
    IMG_0978.JPG
    3 MB
I finally started in on mine a little over a week ago, it's been hanging on the wall since this summer waiting for me to get "in the mood". I did a plank and scratch metal build from tree to hunting field and sawed up a tree and got a profiled blank ready for another build in the meantime. Balking on finishing my new shed so I'll have room to build a rifling machine in the shop before proceeding on that one and already have another LH kit coming next year so the WR needs to get out of the way. Whatever you do, take your time and use good cross lighting to get every last machine mark out of the wood....the CNC machining is so good that it will fool you into thinking just smoothing it up is all it needs until you put some stain on it and then you go back to sanding again.

Jim's investment cast and nearly machined to final finish brass parts will sure spoil a person if they've ever filed out a rough sand casting.
A rifling machine? I still have dreams of just having a lathe.
 
That is a very good idea (range rod) along with a muzzle protector will save the accuracy of your barrel better than anything else I can think of assuming proper cleaning and lubing techniques.
From what I can see of them these are easy kits to get right as Kibler has done all the hard stuff for the customer already.
Another thing that was a good investment for me when I made my SMR from TOTW (quite a bit harder kits to build) was and instruction packet that had drawings and step by step build procedure as there is a definite sequence of steps to take in order to get things right.
No. I had them add in a few ex
 
Beginning to sand. But first Dampening the stock with water. Drying with a hair dryer and sanding down the whiskers, Getting it really smooth. Meeting with a local guy who has done many long rifles and getting his advice how to proceed. Fortunately it is cold weather and not a good time to shoot, at least for me. So I can take my time,
 
That is a very good idea (range rod) along with a muzzle protector will save the accuracy of your barrel better than anything else I can think of assuming proper cleaning and lubing techniques.
Muzzle protector, yes. I saw a tapered brass ferrule that would safely guide the range rod. Looking for one. Where can I find one? Maybe I need to open an account with TOW.
 
As @pilot said. The Kibler should have had a bore guide on it. I ordered one for my SMR as my old one from TOTW wasn't long enough. The one from Track is the nicer rod with a nicer guide but both are good.
Kibler didn't put anything in the box to protect the rod or secure the guide to it. Mine came in bent a tad and the guide fell off when I took it out of the box.
TOTW very thoroughly tapes theirs to a board for shipping.
 
OK, getting ready to stain. Nervous as a cat and as a friend said today, there are about ten ways to skin a cat!

Ok, down to what I want. Subdued colors and reddish brown. Also thinking about browning the barrel and lock. What did the early guns have? Blue or Brown? Maybe blue and a little distressing? I like old original. Maybe the Jax Black Darkener, just enough.

Here is a gun I just bought. I'd like my woodsrunner stock like it, Barrel here just looks old. How can I get this? Or just time will tell?
 

Attachments

  • 2 Swiss Jaeger.jpg
    2 Swiss Jaeger.jpg
    1.4 MB
  • 1 Swiss Jaeger.jpg
    1 Swiss Jaeger.jpg
    976.4 KB
  • 1.1 Swiss Jaeger.jpg
    1.1 Swiss Jaeger.jpg
    3.9 MB
  • 4 Swiss Jaeger.jpg
    4 Swiss Jaeger.jpg
    1.6 MB
  • 2 Swiss Jaeger.jpg
    2 Swiss Jaeger.jpg
    1.4 MB
Last edited:
My Ring doorbell chimed in my iPhone today and saw a long box on my green mailbox. I headed home. Maintaining all applicable speed limits, barely. Took the box into my garage and took out about a hundred screws in the very well done shipping box from Kibler's Longrifles and there, it finally was home!

.50 Caliber, woodsrunner, carved and extra fancy curly maple. Naked as a baby and full of promise!

Took almost two hours to sand down the trigger guard. Yeah, I am taking my time.

Spent an hour on a phone call with a friend who lives near me and has been finishing and shooting BP for 55 years. I realized that I do not know how to "properly" finish my woodsrunner, so I am off to him, soon, for some "hands on" help!
Lucky!
 
OK, just watching Jim Kibler sanding a stock. An hour and 42 minute video. Embarrassed I dozed off a few times. He goes along and I catch back up. Don't polish the metal until you sand, sand and sand.

I am nowhere near ready to stain! But more sanding!

I do have some ferric, and a scrap of maple in the shipping box.

 
Last edited:
OK, just watching Jim Kibler sanding a stock. I am nowhere near ready to stain! I do have some ferric, and a scrap of maple in the shipping box.


I cannot over-emphasize the need to cross light (use a flashlight in a dim room if that's all you have) to point out all the scratches, scuffs, and especially machining marks that you missed. Dabbing at it with water and sandpaper isn't going to do it, you need to block sand it out to 220 at least, being careful not to round any edges. Backing the sandpaper with small blocks of very flat wood is important to keeping the ripples down and to keep from making a wavy surface that will show in the finish when viewed at an angle. If you can see a defect when cross-lighting, it will be 10 times more visible when stained.

Use Ferric Nitrate and blush it with a heat gun. If you don't have a heat gun, Harbor Freight has them for less than $20 and will gladly trade you money for one. Again, watch the videos, Kibler has at least three on Ferric Nitrate and blushing, pay particular attention to how he and Bree use the heat gun so the corners don't burn. That is the look you want and will give the grain contrast you desire. I see so many people using regular pigment stain on their stocks and it's a muddy mess with little grain contrast and and usually an awful color. Also I see a lot of aniline dyes being used in ways that could be a lot better. Doing it right is very simple but folks get their own ideas and jump in without testing anything and that's how they end up with something they don't like. Trust the advice you've been given, and trust Jim Kibler.
Ian, Thank you so much. I am getting a good swivel vise and will get the cross lighting you suggested. And all the rest. Trust Jim Kibler!

I hope to have this Woodsrunner for a long time. Take my time.
 
Last edited:
I watched that sand-along video several times as I worked on my Woodsrunner. I also viewed his various finishing technique videos several times.

In one of his videos, he goes over finishing with Iron Nitrate and Tannic Acid. I followed that one fairly closely but without adding any dyes.

Tannic acid > Iron nitrate > Tannic acid > Iron nitrate. This turned my stock dark charcoal gray, almost black.

XnkYUKw.jpg


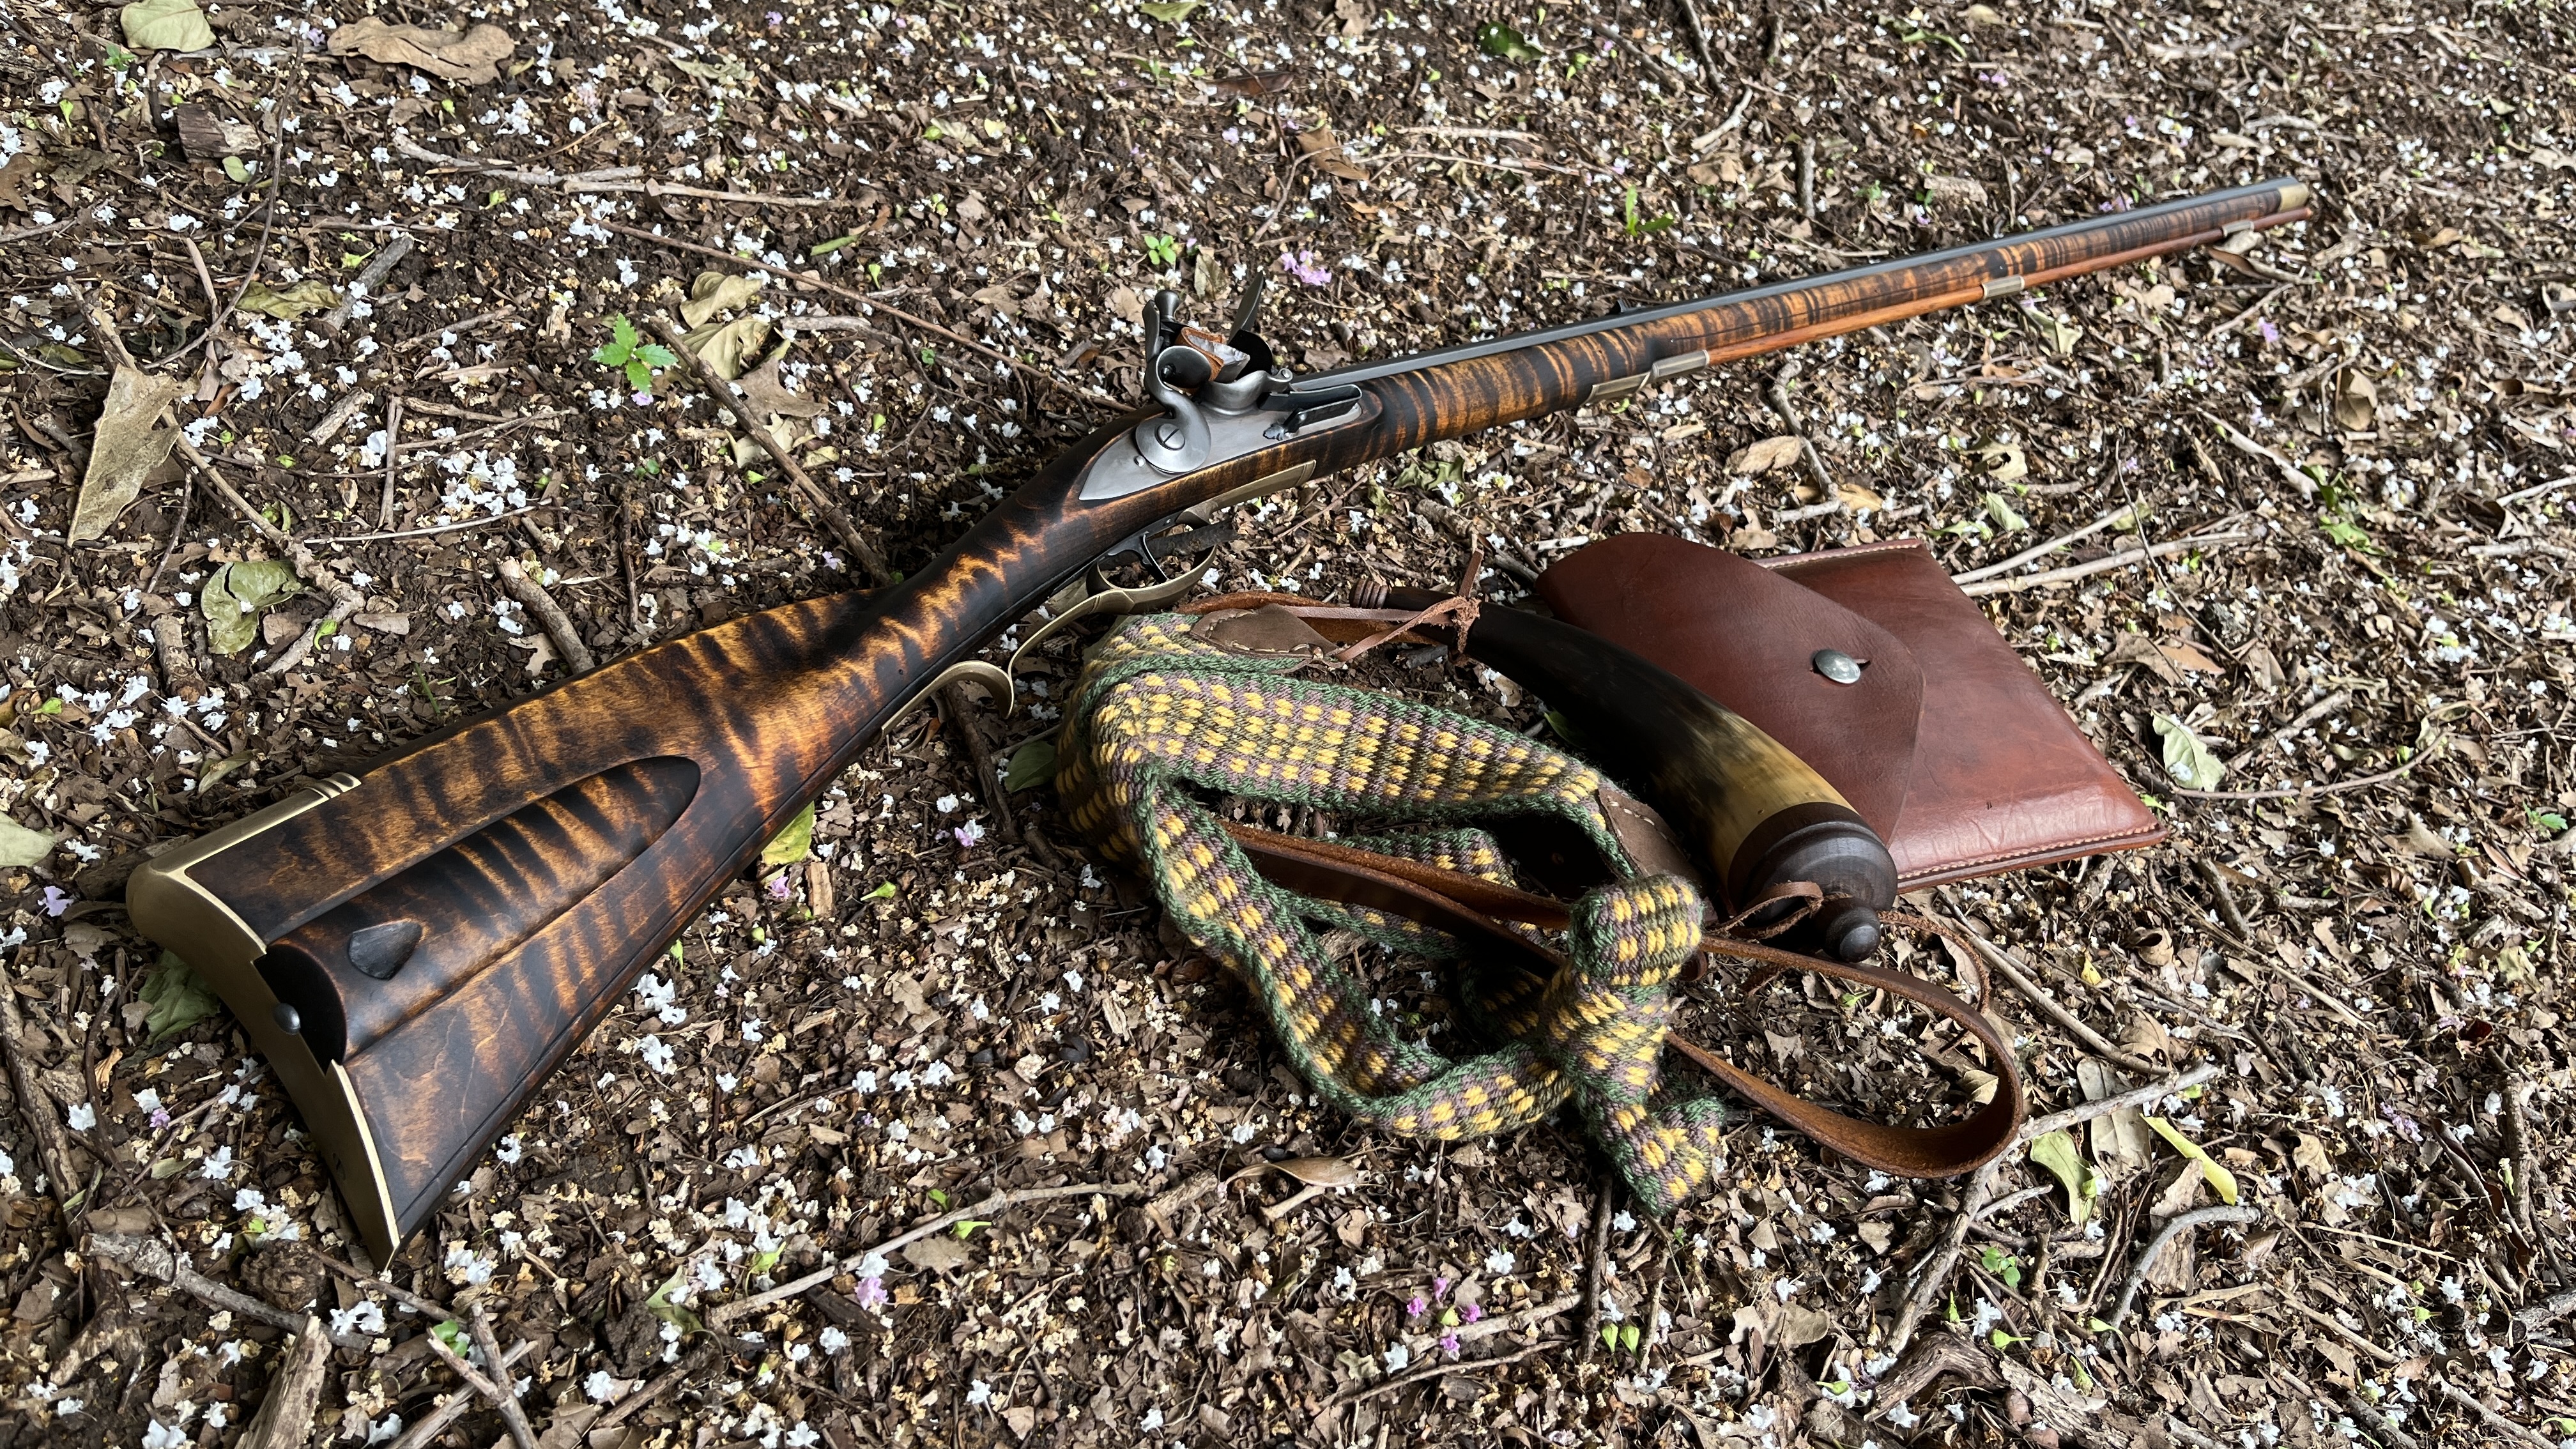
A lot of scrubbing with maroon scotchbright and Tried & True Oil Varnish cut with turpentine followed by a few coats of straight Tried & True yielded the results pictured. (The rifle actually received two more coats of oil over the next couple of days after this pic was taken.)

t88bd8a.jpg
 
Back
Top