• Friends, our 2nd Amendment rights are always under attack and the NRA has been a constant for decades in helping fight that fight.

    We have partnered with the NRA to offer you a discount on membership and Muzzleloading Forum gets a small percentage too of each membership, so you are supporting both the NRA and us.

    Use this link to sign up please; https://membership.nra.org/recruiters/join/XR045103

Building a British Pattern 1800 Rifle (Baker)

Muzzleloading Forum

Help Support Muzzleloading Forum:

This site may earn a commission from merchant affiliate links, including eBay, Amazon, and others.
Terry, you mentioned the rifles you shot were clunky. Dave

Compared to my Pritchett rifle, the Baker is clunky.

1721814756759.png
 
Hi Folks,
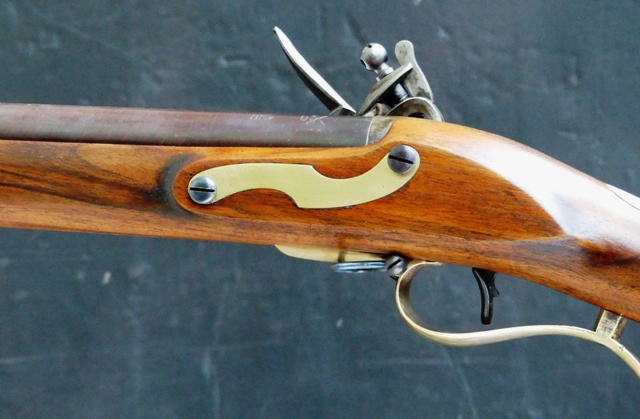
I am back from the Kempton Gunmaker's Fair. It was a great event and my brother, Nils, and my apprentice, Maria, came with me. Maria and I did seminars on the stepwise order of procedures for building muzzleloaders and making a historically correct 18th century British sporting gun. We also did two demos on beginning engraving and shaping wrist and lock panels including shaping the British "baluster" wrist. I don't have a mobile device so when I got home, my answering machine was loaded and could not accept more messages. I've just finished working through all the calls and questions. Maria will be off to the CLA show in Lexington, KY next Friday and Saturday.

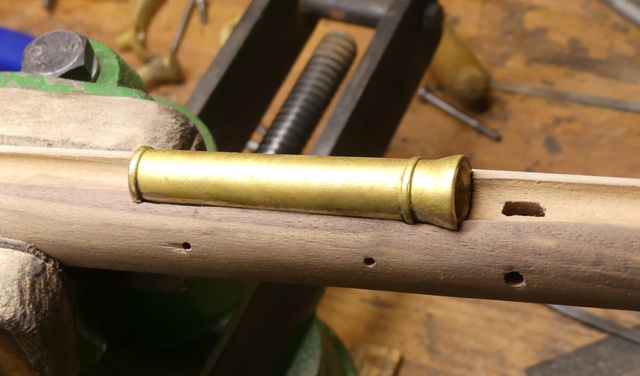
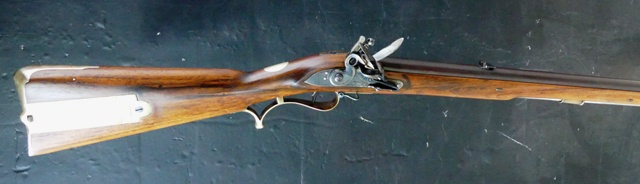
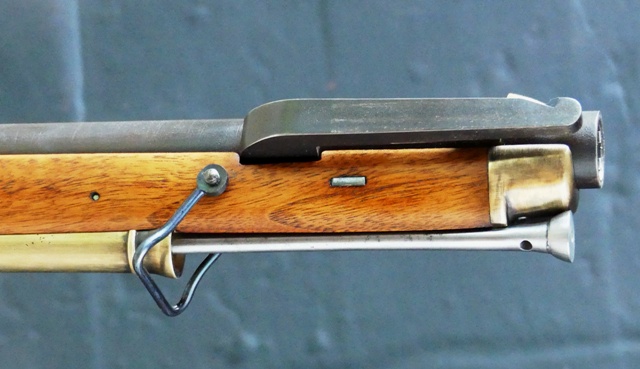
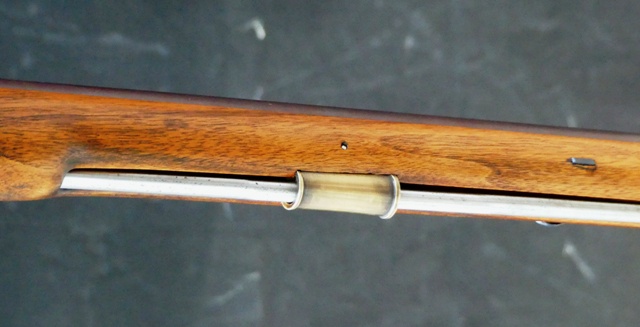
I am back at the Baker. The owner saw the incomplete rifle at the fair and was very pleased. I inlet the ramrod pipes. They both have funnel or trumpet shaped front ends, however, the ramrod holes in the castings are not funneled at all. That completely negates the advantages of the trumpet mouths, so I funneled the front ends with a tapered grinding stone in a drill. The inletting was easy and took less than 30 minutes total for both pipes.
ftY2vl0.jpg

aI0C57Z.jpg


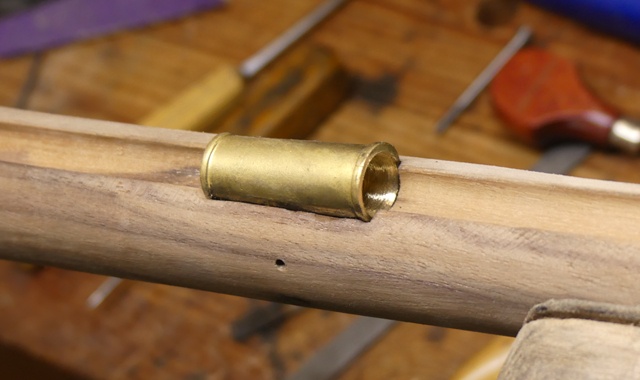
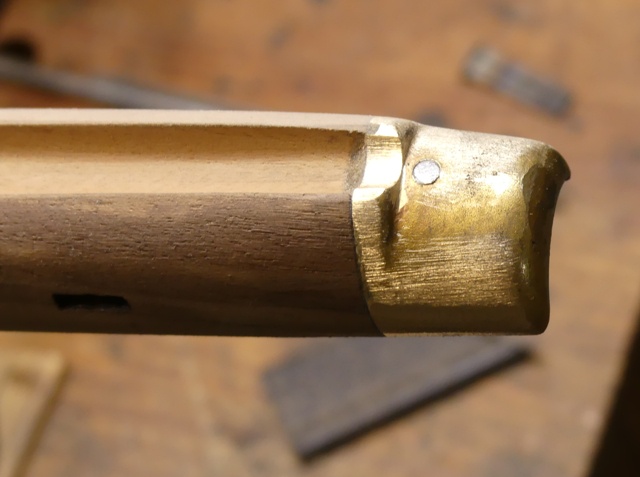
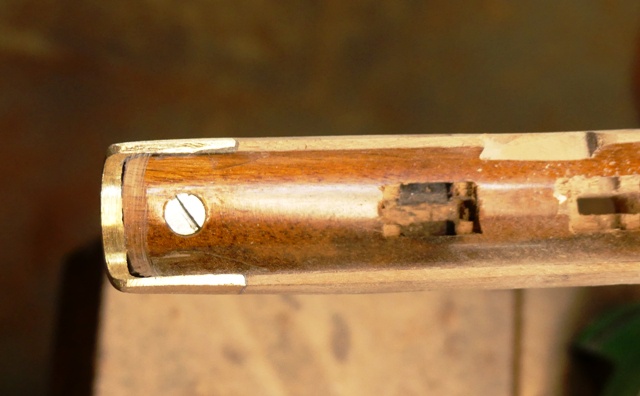
Next I mounted the nose cap. It went on very easily but I had to cut back the machine inlet almost 1/4" to position it correctly. After fitting it, I glued it in place with Acra Glas, which makes it so much easier to drill and fit the steel anchoring screw. I fit the screw and filed down the cap, which has a lot of extra thickness.
0yPUPCH.jpg

RtippnG.jpg


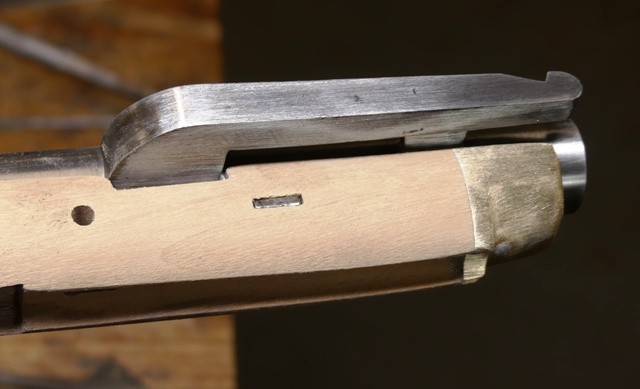
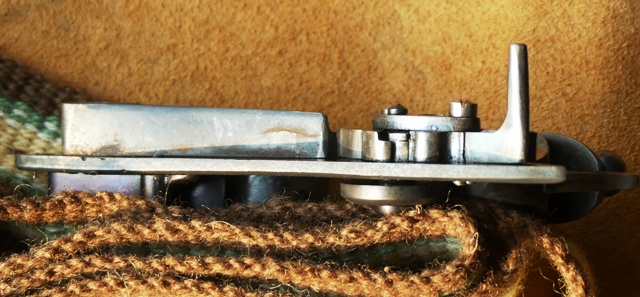
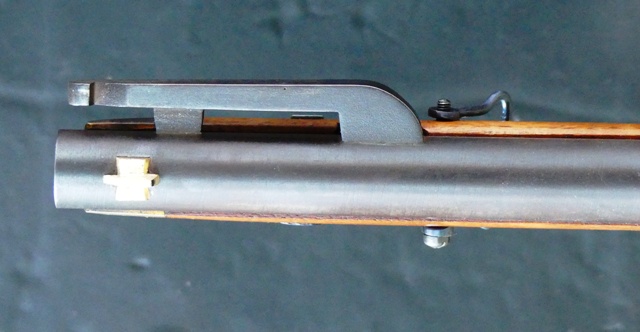
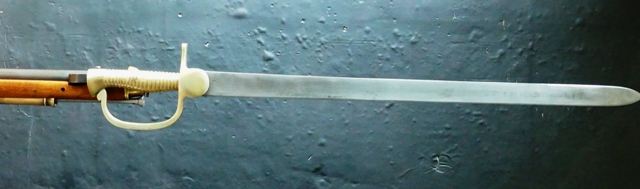
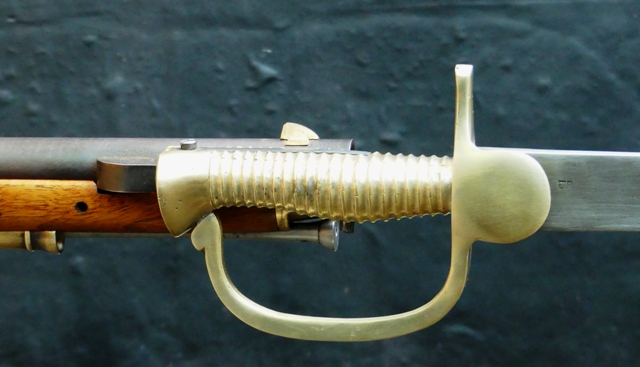
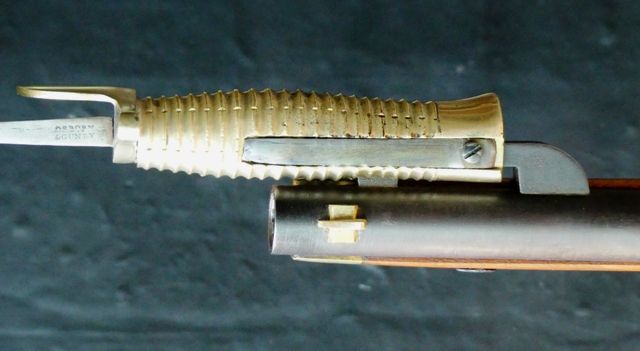
I rasped, filed, scraped, and sanded wood off the forestock in preparation for mounting the bayonet lug on the barrel. That was a task that required some nuance. I never made a Baker before and never directly handled an original. Consequently, I originally positioned the lug on the barrel incorrectly. If you are making a Baker, please pay attention because this stuff is important. When fitting the bayonet lug, it is incredibly important to have the castings for the bayonet. You really have to fit the lug to the barrel using the bayonet handle as a guide. The key issue is clearance between the stock and that handle when attached to the lug. I naturally assumed the lug was attached to the barrel perpendicular to the top of the barrel (9 o'clock position). I did that and discovered that the stock would have to be thinned greatly on the side of the bayonet to clear the brass handle of the bayonet. Then I looked at the TRS plans and photos of originals and suspected the lug was mounted not at the 9 o'clock position but the 9:30 position. When I did that, the handle cleared the wood and solved the problem.
C09d8ng.jpg

L1g7rPa.jpg

xUpjAAm.jpg


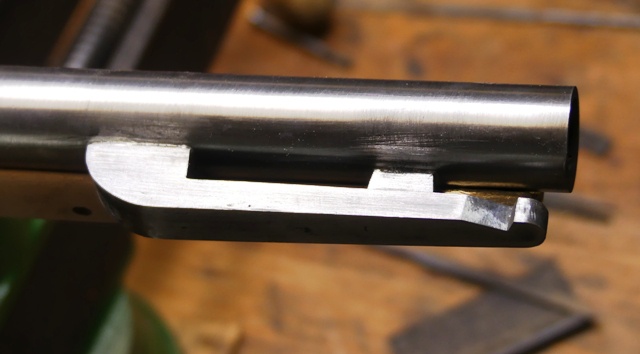
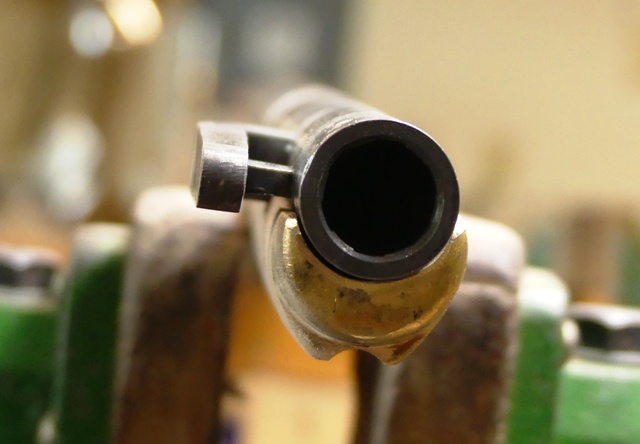
I originally mounted the lug too low on the barrel and then changed it to allow the bayonet handle to clear the stock. Consequently, I filed a little too much wood off the slot in the side of the stock intended to fit the bayonet lug. Not much but more than needed with the correct position of the lug. I used low temperature silver bearing solder for the joint. I could braze it but expect the solder to be sufficient.

jU6YxBa.jpg


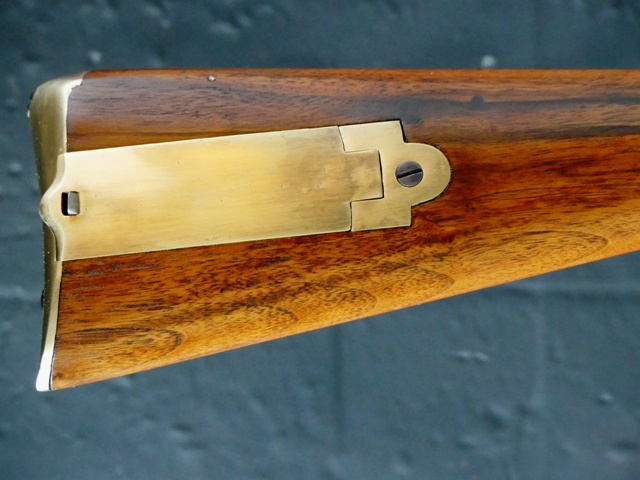
Finishing the stock and bayonet is next. In the future Maria and I will post a thread about building an Elliot Carbine and a pattern 1742 King's musket.

dave
 
Hi,
I need input from Rudyard and Terry. Guys, how was the standing breech treated? Was it case hardened and then browned? Was it left soft and browned? Were any barrel and breech components color case hardened. I ask this because there are a number of modern makers doing just that and I don't believe they are historically correct. Some are color case hardening the lock. I can do all of that but I don't believe it is correct. I would appreciate historically correct guidance from folks really familiar with the original guns not internet hacks..

dave
 
Dave, here's a couple of photos I copied about a decade ago of a Baker 1800/15. You can still see the case colors on the lock and on the standing breech and worn browning on the barrel. Hopefully these will help you.

216_1675.JPG
216_1676.JPG
216_1683.JPG

Mike
 
Hi Mike,
Thank you. Case colors are hard to document because they fade and are polished off. I think I will color case the lock plate, cock, and top jaw, and the standing breech. I can produce the reddish brown but I may also simulate the twist pattern. I'll see it goes. I have the barrel and inspection stamps.

dave
 
Hi Folks,
It has been hard to post photos on this thread. We are just too busy. Here is the finished lock. The rifle lock is a pretty good design and should perform very well. I eventually forged the main and sear springs to get the strength I wanted. Something I hate is when the lug on the mainspring does not butt against the lock plate bolster and relies solely on the screw for support. That means you always have to release tension on the spring before removing the screw or risk stripping the threads. Our shop always fits those springs so they actually do not need the screw to stay in place. That way you can remove the screw and then place a spring vise on the spring to remove it. All of the exterior screw heads were hardened and tempered blue. The lock plate, flint cock, frizzen, and top jaw were case hardened. All but the battery (frizzen) were cased to promote colors so the hardening temperature was 1450 degrees. The battery was cased at a higher temp to deepen the case. It was then tempered to 375 degrees. The plate, cock, and top jaw were tempered to 450 degrees. The action of the lock is very smooth, the components are precisely fitted and polished, and the springs balanced.

Bc8Q1Dm.jpg

SZP6pdj.jpg

uHyvdLv.jpg

0E3j26f.jpg

7jweo9a.jpg

f1Wrrpd.jpg


All of the cast in engraving was lost during cleanup and polishing so I completely engraved all the markings and border.

dave
 
Dave, looking at the inside of the lock at the lock bolt hole in the bolster- would they have been champhered? I know it’s a small detail.
I had seen it done on some antique flintlocks and just wondered because that feature makes reinstalling the lock a breeze and would imagine for a military gun it might have been useful.
Thanks!
Bob
 
Hi Bob,
I've not seen that done routinely, particularly on military guns. In the case of the Baker lock, there is no need because the lock bolts engage the plate very easily and precisely. No reason to fix something that is not broken. On many better quality British guns, the rear lock bolt hole is a blind hole. It does not go all the way through the lock plate. Consequently, you have a limited number of threads engaged and the makers would be reluctant to sacrifice any of them to create a chamfered hole.

dave
 
Hi Guys,
The Baker is done.
q5WBhLe.jpg

tIM17KU.jpg

CCPZh5t.jpg

dRtF0pA.jpg

U98hEQx.jpg

6E1UXsn.jpg

MhBnYuf.jpg

n3ANM3z.jpg

XY8agyz.jpg

1e0xvep.jpg

WXm2GDh.jpg


The wood sure looks and worked like English walnut but TRS assured the owner it was black walnut. Anyway, I stained it with alkanet root infused in turpentine. I also added a light bone black glazing. The finish is Sutherland-Welles polymerized tung oil wiping varnish. The browning of the barrel does not show well in the photos. It is a reddish plum brown, is shiny and has a pattern. Many Bakers were fitted with twist barrels and the patterning mimics that twist. As the browning wears the pattern will become more beautiful. All of the external machine and wood screws had their heads hardened, tempered and heat blued. The standing breech is case hardened as is the lock plate, cock, and battery. The rifle weighs almost 9 lbs and the trigger pull is just barely 1 pound. It has a tiny bit of rattle at full cock but once pulled up against the sear, the pull is crisp with no mushy creep. It should be a very good shooter.

dave
 
Hi,
Thanks everyone for looking. I finished the sword bayonet.


I've never made a sword before and it took me a bit to figure out how this one should be constructed with its locking catch. The attachment system needed adjustment to get to work properly but it all came out OK.

We took the rifle out to shoot and make sure everything worked before the owner comes to pick it up. Here is Maria loading and shooting the rifle at my range. As expected, it shoots very low because the front sight is too high. We will correct that once the owner gets here.


dave
 
Back
Top